For each of the following Role Playing Qualified Segment logical dimensions, create the required physical objects and define the logical mappings as listed below:
Dim - AP Account Balancing Segment
Dim - AP Account Cost Center
Dim - AP Account Natural Account Segment
Dim - AP Asset Account Balancing Segment
Dim - AP Asset Account Cost Center
Dim - AP Asset Account Natural Account Segment
Dim - AP Pay Account Balancing Segment
Dim - AP Pay Account Cost Center
Dim - AP Pay Account Natural Account Segment
Dim - Asset Balancing Segment
Dim - Asset Cost Center
Dim - Asset Natural Account Segment
Dim - Asset From Balancing Segment
Dim - Asset From Cost Center
Dim - Asset From Natural Account Segment
Dim - Asset To Balancing Segment
Dim - Asset To Cost Center
Dim - Asset To Natural Account Segment
Dim - CE Asset Balancing Segment Value
Dim - CE Asset Cost Center Value
Dim - CE Asset Natural Account Value
Dim - CE Offset Balancing Segment Value
Dim - CE Offset Cost Center Value
Dim - CE Offset Natural Account Value
Dim - Distribution Balancing Segment
Dim - Distribution Cost Center
Dim - Distribution Natural Account Segment
Dim - SLA Balancing Segment
Dim - SLA Cost Center
Dim - SLA Natural Account
 To create the required physical objects and define the logical mappings for both Tree-based and Value Set-based elements in Role playing segment dimensions:
Right-click each imported view object physical table from its corresponding GL Accounting Qualified Segment logical dimension and select New Object.
Select Alias to create the Flexfield view object alias physical table for this Role Playing Qualified Segment logical dimension.
In the General tab, enter a unique name for the new Flexfield view object alias physical table.
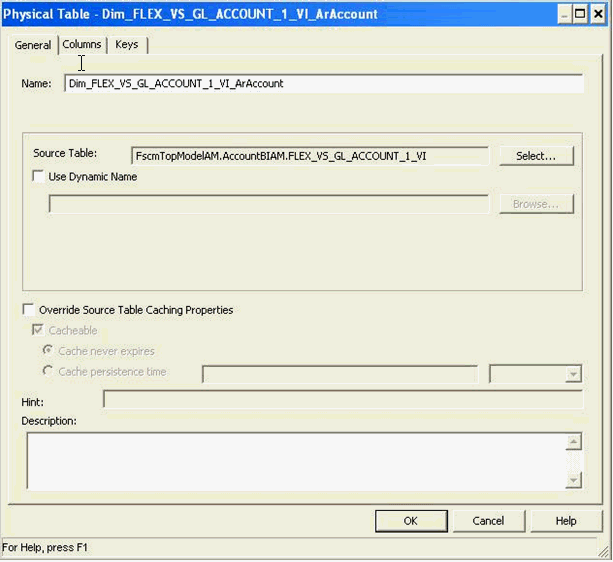
Figure 28, First Physical Table for Role Playing Tree Based AR Distribution Balancing Segment logical dimension and Figure 29, Second Physical Table for Role Playing Tree Based AR Distribution Balancing Segment logical dimension show the new alias physical tables for the Role Playing Tree Based AR Distribution Balancing Segment logical dimension.
Figure 28. First Physical Table for Role Playing Tree Based AR Distribution Balancing Segment logical dimension
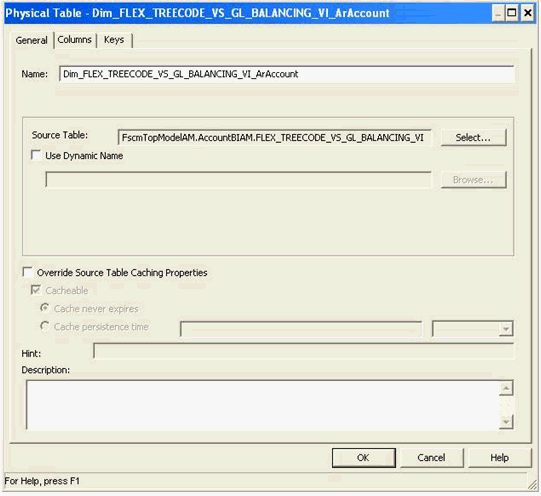
Figure 29. Second Physical Table for Role Playing Tree Based AR Distribution Balancing Segment logical dimension
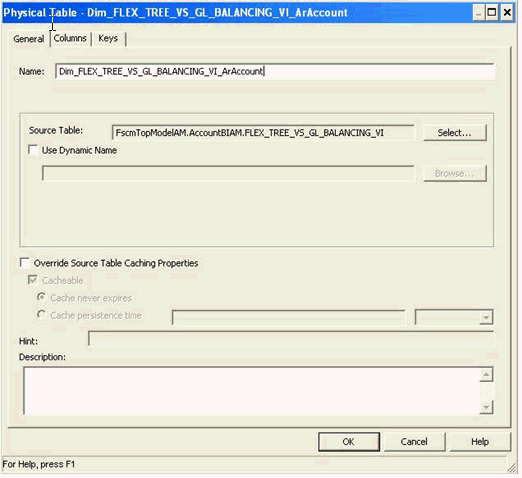
Figure 30, New Alias Physical Table for Role Playing Value Set Based AR Distribution Natural Account Segment logical dimension shows the new alias physical table for the Role Playing Value Set Based AR Distribution Natural Account Segment logical dimension.
Select the new Flexfield view object alias physical tables and the BI Account view object alias physical table for this Role Playing Qualified Segment logical dimension; for example, Dim_FLEX_BI_Account_VI_ArAccount.
In the physical diagram, create the physical joins among the alias physical tables so they are the same as the physical joins in their source tables.
Note:
The physical joins should have the same cardinality and use the same view link. If it is a Tree Based Qualified Segment logical dimension, create the physical join from the Flexfield Tree Code view object alias physical table to the Flexfield Tree view object alias physical table, and the physical join from the Flexfield Tree view object alias physical table to the BI Account view object alias physical table.
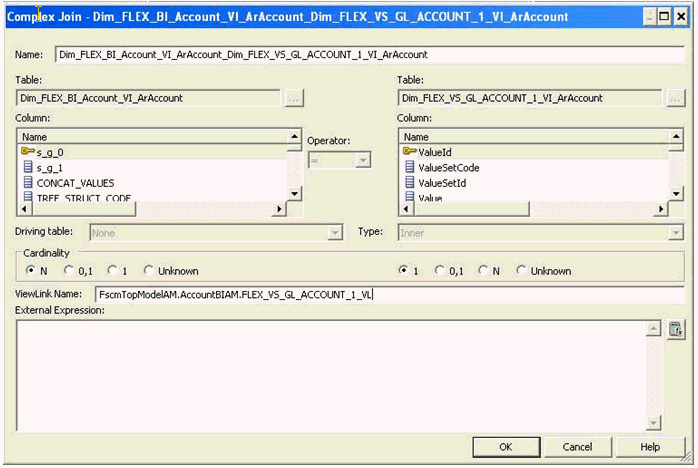
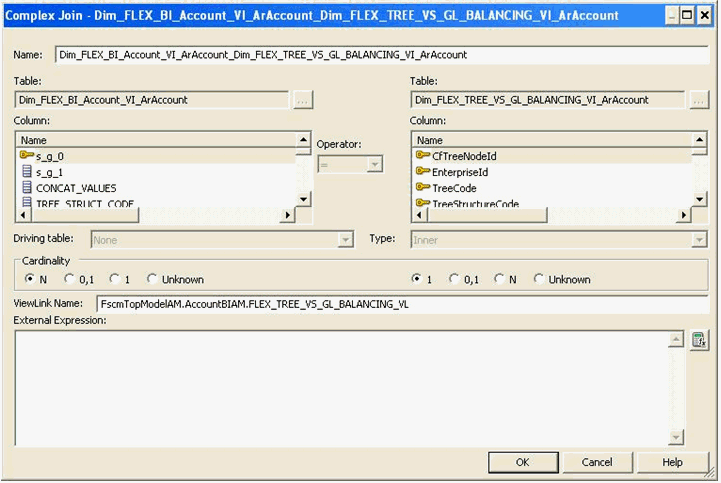
Figure 31, First Complex Physical Join for the Role Playing Tree Based AR Distribution Balancing Segment Logical Dimension and Figure 32, Second Complex Physical Join for the Role Playing Tree Based AR Distribution Balancing Segment Logical Dimension show the complex physical joins for the Role Playing Tree Based AR Distribution Balancing Segment logical dimension.
Figure 31. First Complex Physical Join for the Role Playing Tree Based AR Distribution Balancing Segment Logical Dimension
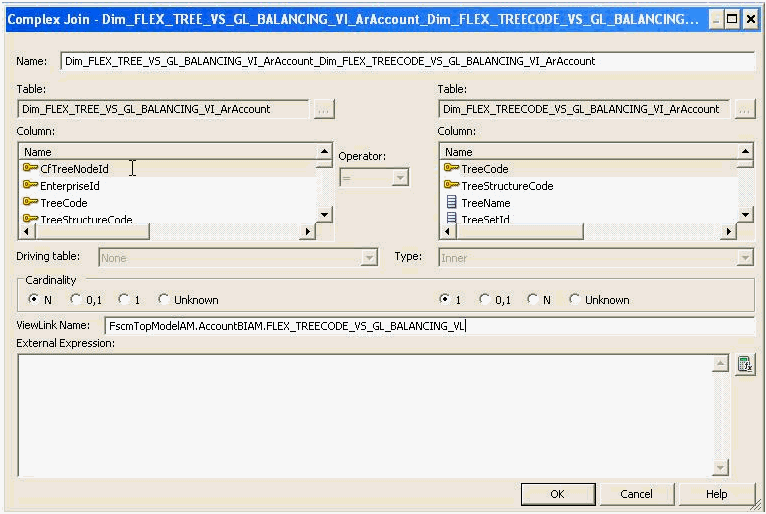
Figure 32. Second Complex Physical Join for the Role Playing Tree Based AR Distribution Balancing Segment Logical Dimension
Note:
If it is a Value Set Based Qualified Segment logical dimension, create the physical join from the Flexfield Value Set view object alias physical table to the BI Account view object alias physical table.
Figure 33, Complex Physical Join for the Role Playing Value Set Based AR Distribution Natural Account Segment Logical Dimension shows the complex physical join for the Role Playing Value Set Based AR Distribution Natural Account Segment logical dimension.
Create a logical table source to map the new Flexfield view object alias physical tables to this Role Playing Qualified Segment logical dimension.
If it is a Tree Based Qualified Segment logical dimension, drag the physical column, Dep0Value, of the new Flexfield Tree view object alias physical table to the logical column, Segment Code, of this Role Playing Qualified Segment logical dimension.
This will automatically create a new logical table source.
Double-click this logical table source to update and finish the mapping:
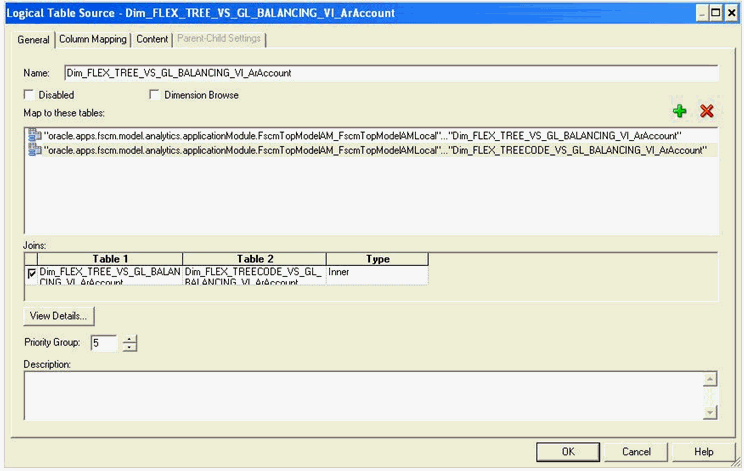
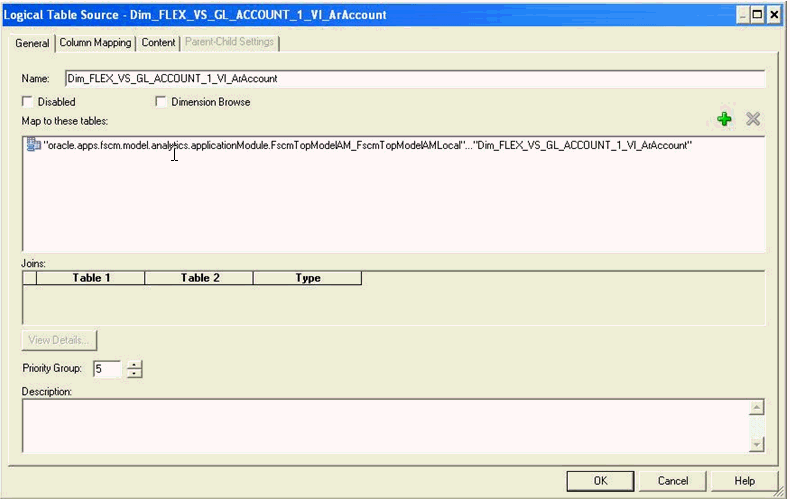
In the General tab, add the new Flexfield Tree Code view object alias physical table and set Priority Group to 5.
Figure 34, Adding New Flexfield Tree Code VO Alias physical table and Setting Priority Group for the New Tree Based Qualified Segment Logical Dimension LTS shows the addition of the New Flexfield Tree Code VO Alias physical table; the figure also shows the setting of the Priority Group for the New Tree Based Qualified Segment Logical Dimension LTS.
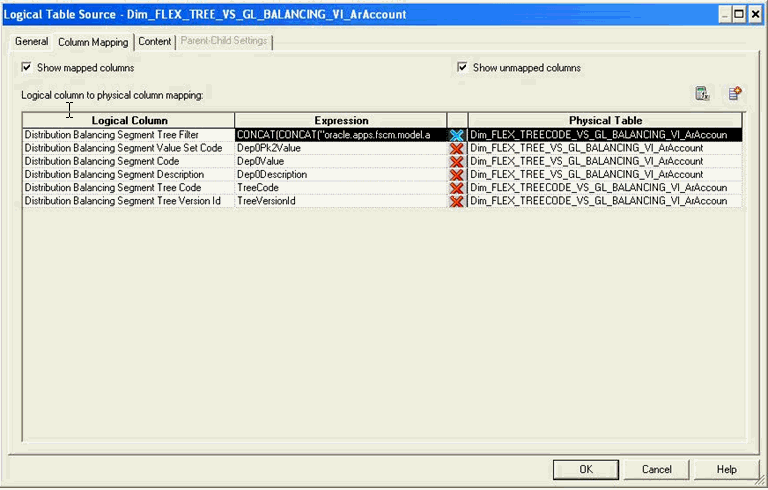
In the Column Napping tab, map these logical columns as shown in Table 7, Mapping for Tree Based Qualified Segment Logical Colums:
Table 7. Mapping for Tree Based Qualified Segment Logical Colums
Logical Columns Expression Physical Table Tree Code TreeCode Flexfield Tree Code VO Alias Physical Table Tree Version ID TreeVersionId Flexfield Tree Code VO Alias Physical Table Tree Filter CONCAT(CONCAT(TreeName of Flexfield Tree Code VO Alias Physical Table,‘-‘), VersionName of Flexfield Tree Code VO Alias Physical Table) Segment Value Set Code Dep0Pk2Value Flexfield Tree VO Alias Physical Table Segment Code Dep0Value Flexfield Tree VO Alias Physical Table Segment Description Dep0Description Flexfield Tree VO Alias Physical Table Figure 35, Mapping of Logical Columns of New Tree Based Qualified Segment Logical Dimension LTS shows the mapping of the logical columns of the new tree based Qualified Segment Logical Dimension LTS.
In the Content tab, set the Aggregation Content Logical Level to Detail.
If it is a Value Set Based Qualified Segment logical dimension, drag the physical column, Value, of the new Flexfield Value Set view object alias physical table to the logical column, Segment Code, of this Role Playing Qualified Segment logical dimension.
This will automatically create a new logical table source.
Double-click the logical table source to update and finish the mapping by completing the following steps:
In the General tab, set Priority Group to 5.
Figure 36, Setting Priority Group for New Value Set Based Qualified Segment Logical Dimension LTS shows the setting of the priority group for the new value set based Qualified Segment Logical Dimension LTS.
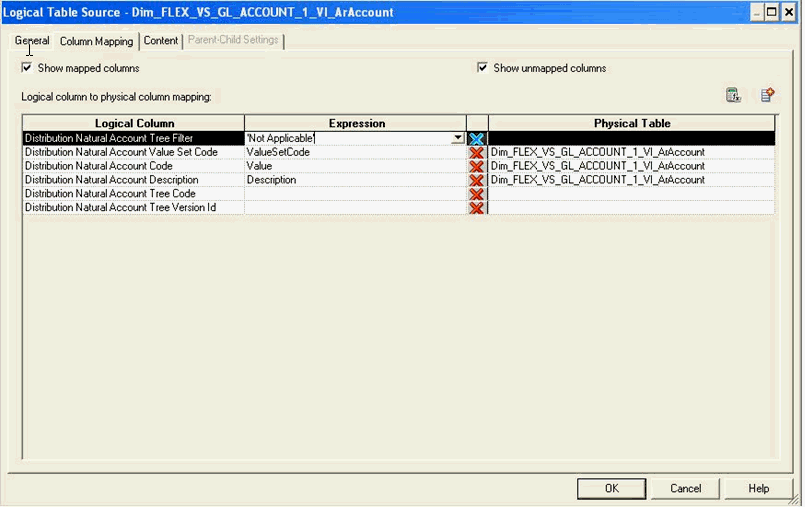
In the Column Mapping tab, map these logical columns:
Table 8. Mapping for Value Set Based Qualified Segment Logical Columns
Logical Columns Expression Physical Table Tree Filter "Not Applicable" Segment Value Set Code ValueSetCode Flexfield Value Set VO Alias Physical Table Segment Code Value Flexfield Value Set VO Alias Physical Table Segment Description Description Flexfield Value Set VO Alias Physical Table Figure 37, Mapping of Logical Columns of New Value Set Based Qualified Segment Logical Dimension LTS shows the mapping of the logical columns of the new value set based Qualified Segment Logical Dimension LTS.
In the Content tab, set the Aggregation Content Logical Level to Detail.
Delete the logical columns, Tree Code and Tree Version Id. They are not applicable for Value Set Based Segment logical dimensions.
Disable the original Transactional Business Intelligence logical table source SegmentValueHierarchyPVO.
