8 Set Up Defaults and Overrides
This chapter contains these topics:
8.1 Setting Up Defaults and Overrides
You can define default values for several parameters on more than one screen. The screens on which you can change these parameters include:
-
Column Specifications
-
Row Specifications
-
Cell Specifications
Some of the parameters that you can change include:
-
Ledger type
-
Fiscal year
-
Decimal places
-
Debit/credit signs
-
Totals
Some default values can be overridden within columns, rows, or cells. For example, you might display two decimals for the majority of the report figures in your version but choose not to show any decimals in the row of your report that shows actual units. In this instance, you override that row on the row screen. Overrides occur in the same order as the screens on which you change them, for example, cell specifications can override row specifications, and row specifications can override column specifications.
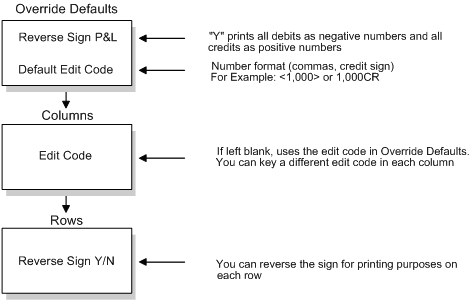
8.2 About Debit/Credit Signs
You use debit/credit signs to display the figures on your version as positive or negative. Revenue figures are generally displayed as positive. Expenses are generally displayed as negative.
The following illustrates how you set up the default values on Override Default Information. You can override the default values in columns with the edit code. In rows, you can reverse the sign through the Reverse Sign Y/N field.
8.3 About Decimal Places
You use decimal places to display the level of accuracy in your report figures.
The following illustrates no decimals assigned to the values in the first three columns. In the last column, two decimals are assigned.

The following illustrates how you set up your default values for Division Factor and Default Decimals on Override Default Information. On Column Specifications, you can override the values in each column in the Display Decimals field. On Row Specifications, you can override the values for each row. On Cell Specifications, you can use display decimals to override decimals on a cell-by-cell basis.
Figure 8-3 Setting Up Values for Division Factor and Default Decimals

Description of "Figure 8-3 Setting Up Values for Division Factor and Default Decimals"
8.4 About Ledger Types
The following illustrates how you can set up fiscal years and ledger types in both column and row specifications. If you are defining ledger type by column, you must allow all ledger types in your rows. If you are defining fiscal year by row, you must allow for all fiscal years in your columns.
| Fiscal Year | Result |
|---|---|
| 08 | Specific Year = 2008 |
| (blank) | Current Year |
| -1 | Prior Year (2007)
(can go back to -9) |
| + 1 | Next Year (2009)
(can go up to +9) |
| * | All Years (default in rows) |
| Ledger Types | Description |
|---|---|
| AA | Actual Amounts |
| AU | Actual Units |
| BA | Budget Amounts |
| * | All ledger types (default in rows) |
| *x and x* | Wildcard |
8.5 About Wildcard Ledger Types
You use wildcard ledger types when you are combining several ledger types in a complex version.
The following illustrates how you can set up wildcard ledger types.
| Row | Column 1 Actual LTA + A* | Column 2 Budget LTA + B* |
|---|---|---|
| Row 1 Amounts (LT + *A) | AA | BA |
| Row 2 Units (LT + *U) | AU | BU |
8.5.1 What You Should Know About
| Topic | Description |
|---|---|
| Entering values | If a value you have entered disappears when you re-inquire, then the processing options have not been defined completely.
Select the Processing Options Setup program (P98304) and inquire on the Form ID of the FASTR in question. Page down, and add any missing processing options (the culprit is usually the Print Sequences in Heading field). Return to the FASTR version and add the values again. If the processing options are complete, you need to run the DW Options program (P98325) to impact all Form Ids. |
8.6 How to Make the Print Sequences In Heading Value Stay In the FASTR Overrides
When the 'Y' value doesn't stay in the Print Sequences in Heading field in the FASTR Override Default Information, the Processing Option needs to be added to the system.
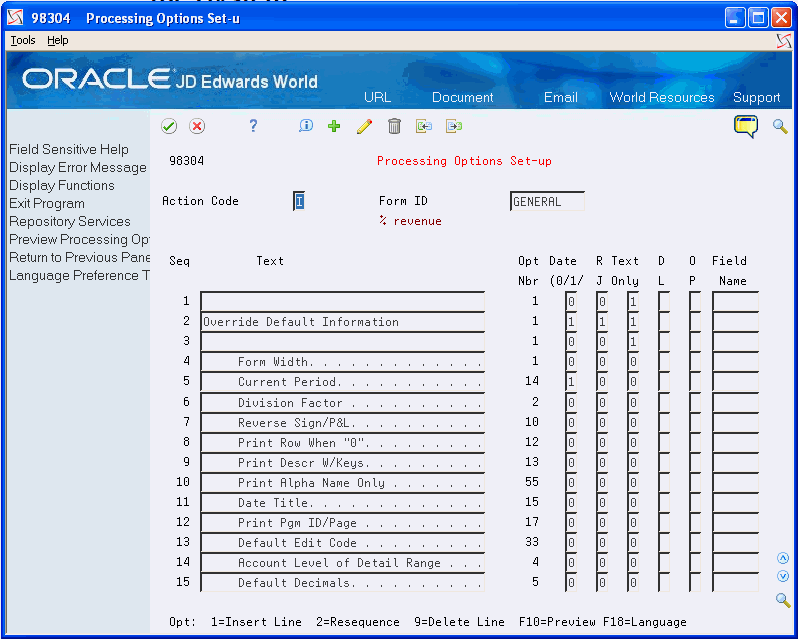
8.6.1 Adding the "Print Sequences in Heading" Processing Option to the System
-
Inquire on the FASTR screen, where the FASTR version resides, in Processing Options Set-up (P98304).
-
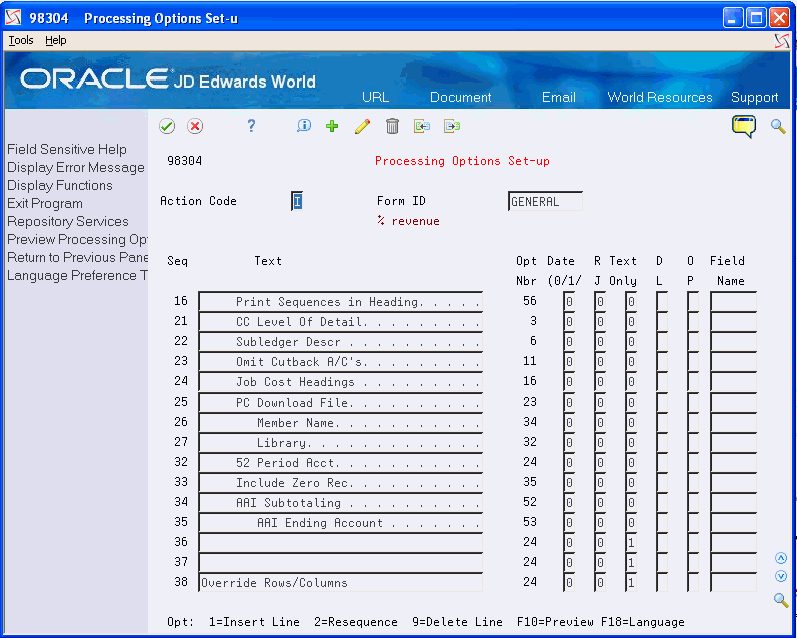
The "Print Sequences in Heading" Processing Option is usually found within the first 30 sequences. Sometimes, however, this Processing Option may not be listed at all. This is the reason the value 'Y' won't stay in the Override Default Information of the FASTR version. In such cases, it should be added on the first blank line, which is usually found in the 80's sequences.
Figure 8-4 Processing Options Set-Up screen
Description of "Figure 8-4 Processing Options Set-Up screen"
-
With a 'C' in the Action Code, add the information in the fields as shown below. The option number must be 56.
Note:
If the Date, Right Justify, or Text Only fields highlight when attempting to make the change, change the values that error, to a 1. If the Display Level column highlights, add blank as a valid value in the UDC table 00/LD (the Code field should be left blank and the description should be "Display All").Figure 8-5 Processing Options Set-Up (Action Code C) screen
Description of "Figure 8-5 Processing Options Set-Up (Action Code C) screen"
8.6.2 Globally Updating all Existing FASTR Processing Options
To make the change impact all of the FASTR versions, run DW Options (P98325).
Note:
This job should run during off peak hours.-
Add a new version
-
The production library should be entered in the Processing Option.
Figure 8-6 Processing Options Revisions screen
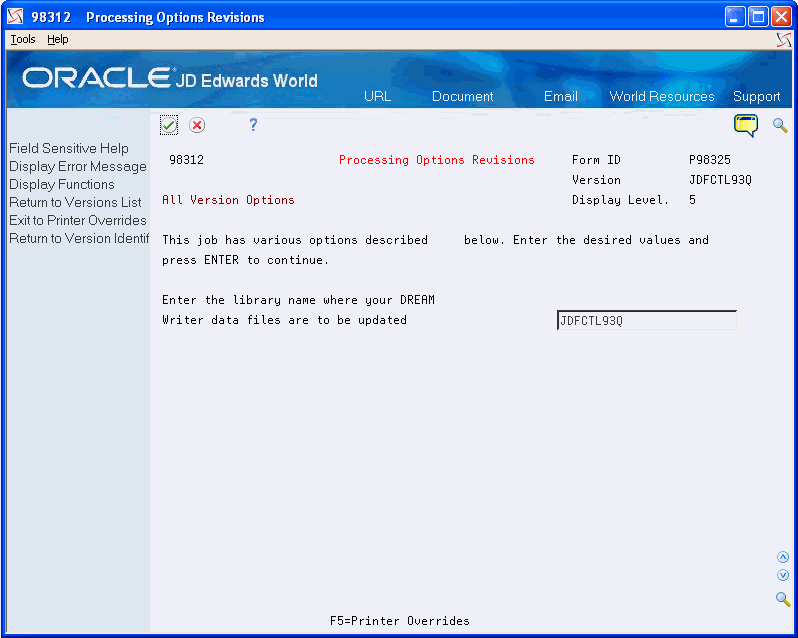
Description of "Figure 8-6 Processing Options Revisions screen"
-
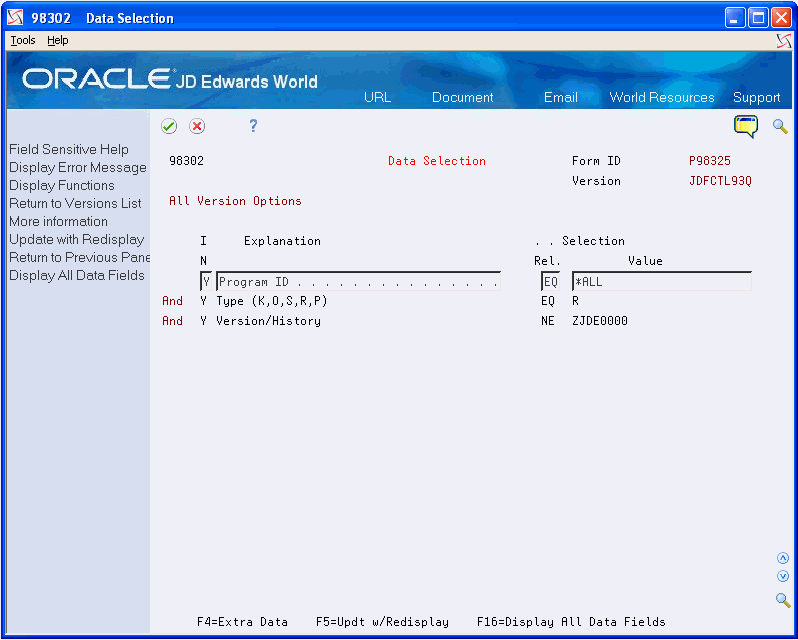
Set up the data selection as shown below.