10 Creating a Customized Project
This chapter contains these topics:
Note:
When creating customized applications, it is necessary to have a fundamental understanding of the J Walk Development Kit (JDK) provided by Seagull.10.1 Getting Started
Ensure to have SEAGULL J Walk Developer installed on a PC and the SEAGULL J Walk Collector onto your IBM i.
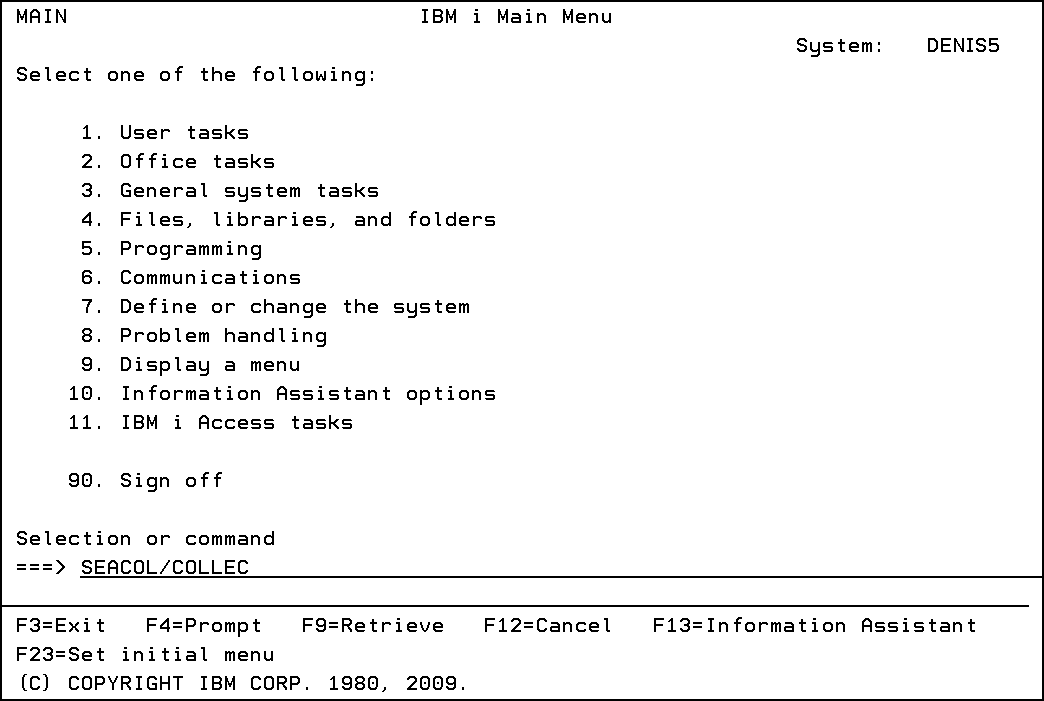
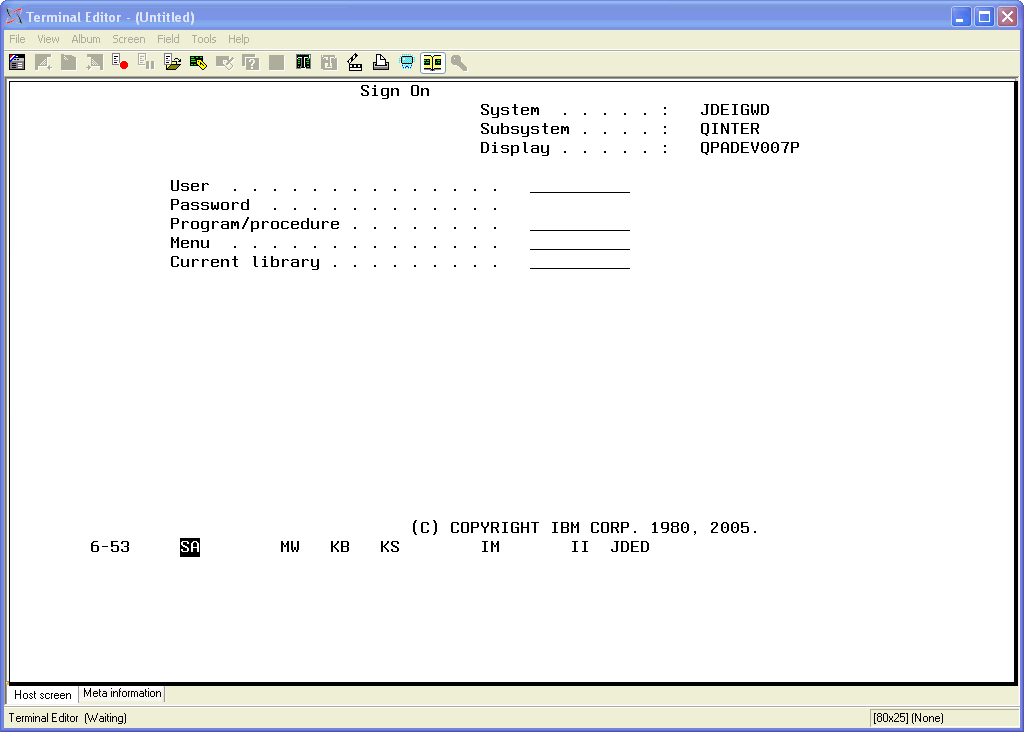
To access the SEAGULL Collector, sign on to your IBM i using QSECOFR and type the following on a command line: SEACOL/COLLEC Press Enter.
Figure 10-2 Welcome to SEAGULL Collector screen
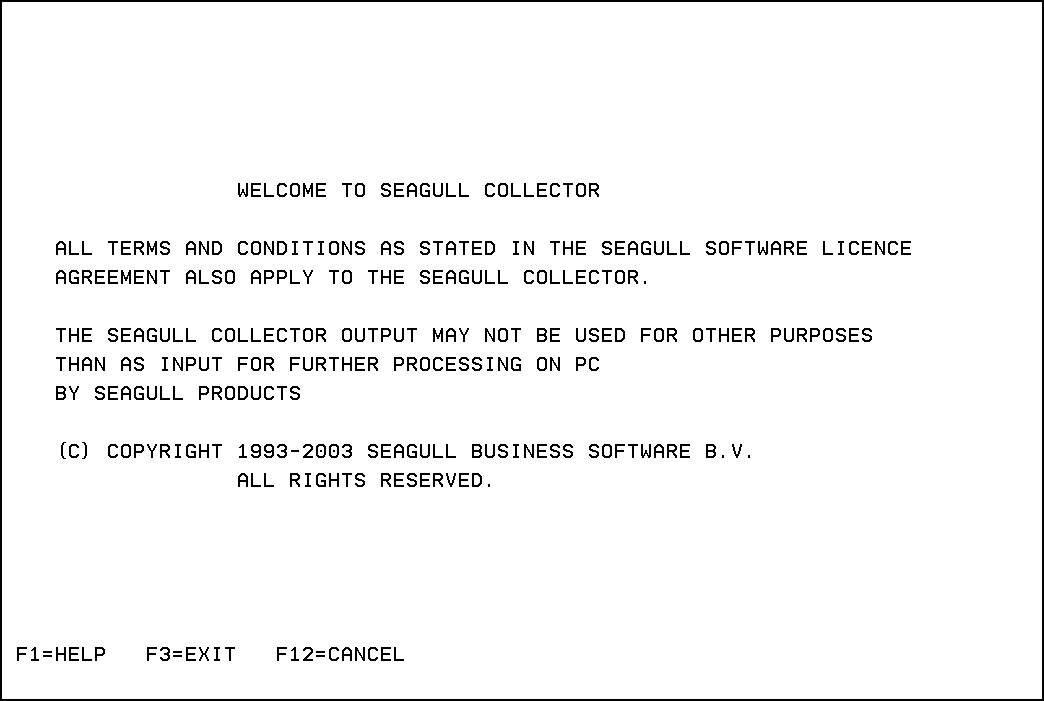
Description of "Figure 10-2 Welcome to SEAGULL Collector screen"
Press Enter to accept the message displayed above.
Figure 10-3 SEAGULL Collector Main Screen
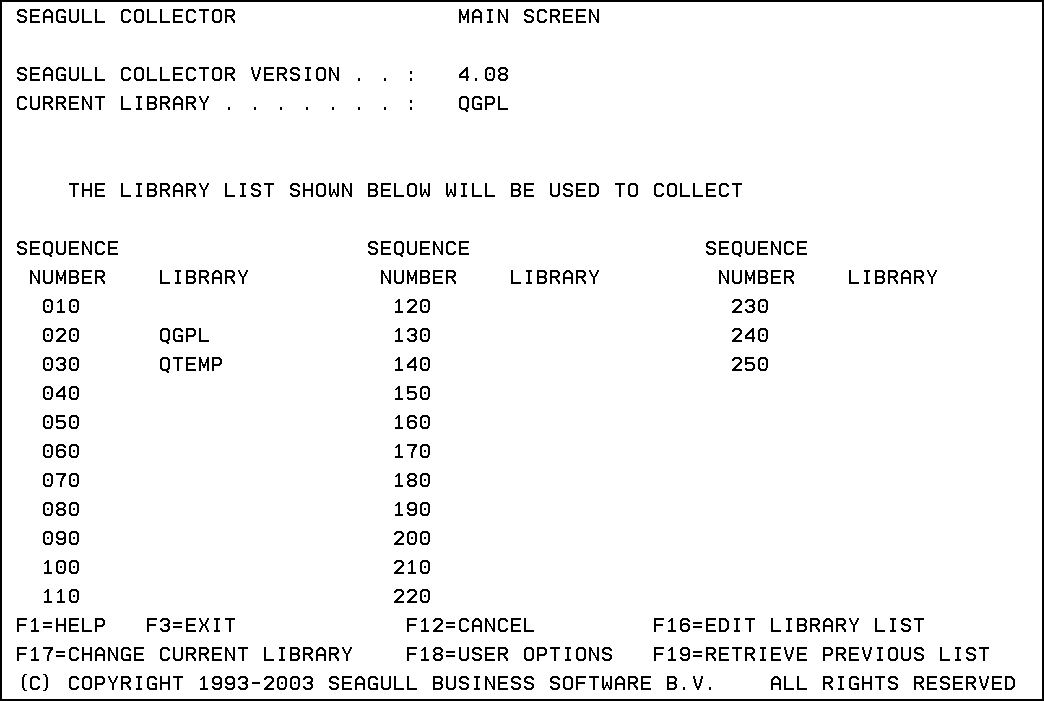
Description of "Figure 10-3 SEAGULL Collector Main Screen"
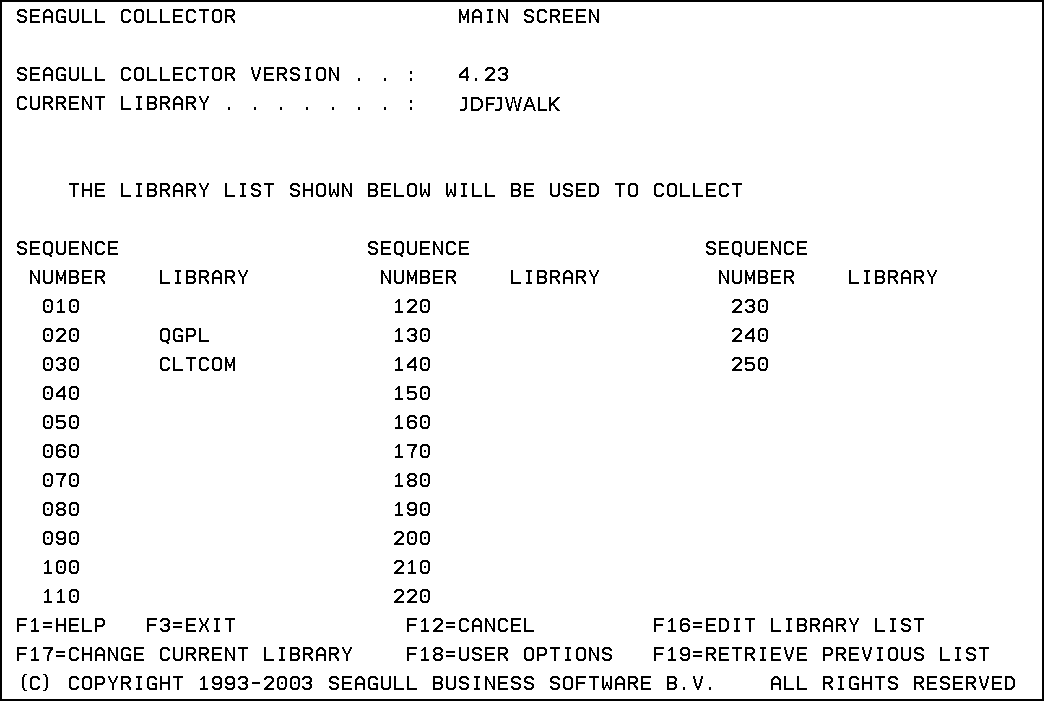
To implement the Collector, change the library list entries and User options.
Figure 10-4 Change Currency Library screen
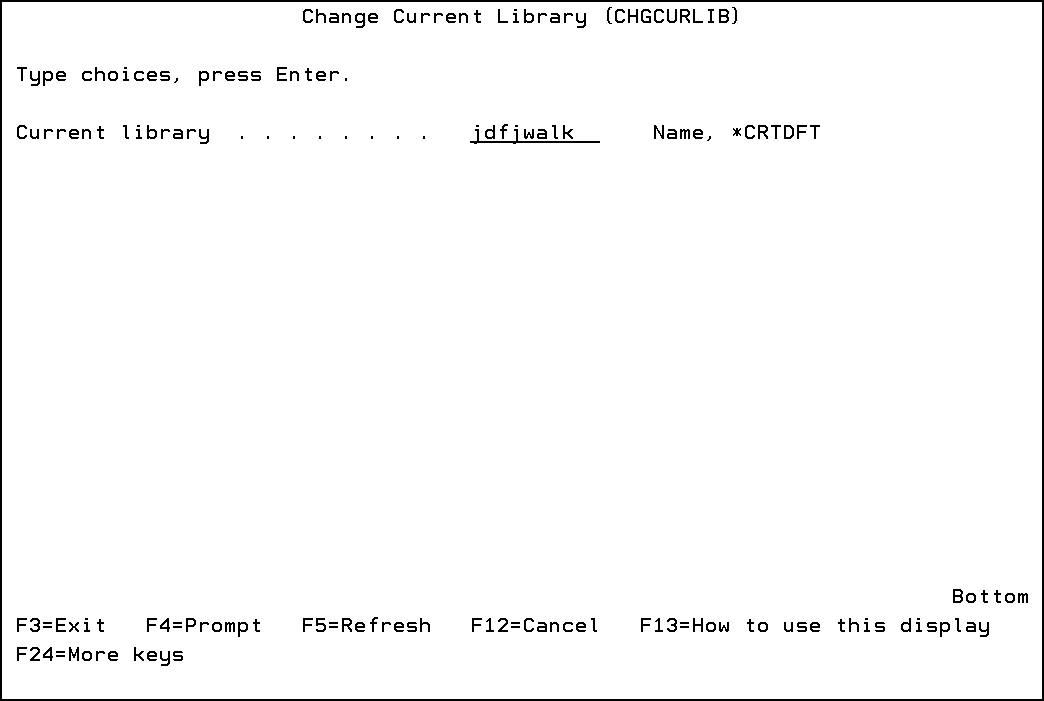
Description of "Figure 10-4 Change Currency Library screen"
Press F17. The screen above displays.
Change the current library to be the target library. The target library is where all of the display files are stored. It is a recommended to copy only the display file objects that you want to convert, to a temporary work library. This library can be deleted when you finalize the steps for creating a customized project.
Press Enter to accept your library change. The system takes you to the primary collector screen.
Figure 10-5 SEAGULL Collector Main Screen (Library Change)
Description of "Figure 10-5 SEAGULL Collector Main Screen (Library Change)"
Press F16 to edit the library list - sequence 20 is the target library. Sequence 30 must be the library that contains the control files for your version of JD Edwards World software.
Press Enter to accept the changes. The system takes you to the primary collector screen.
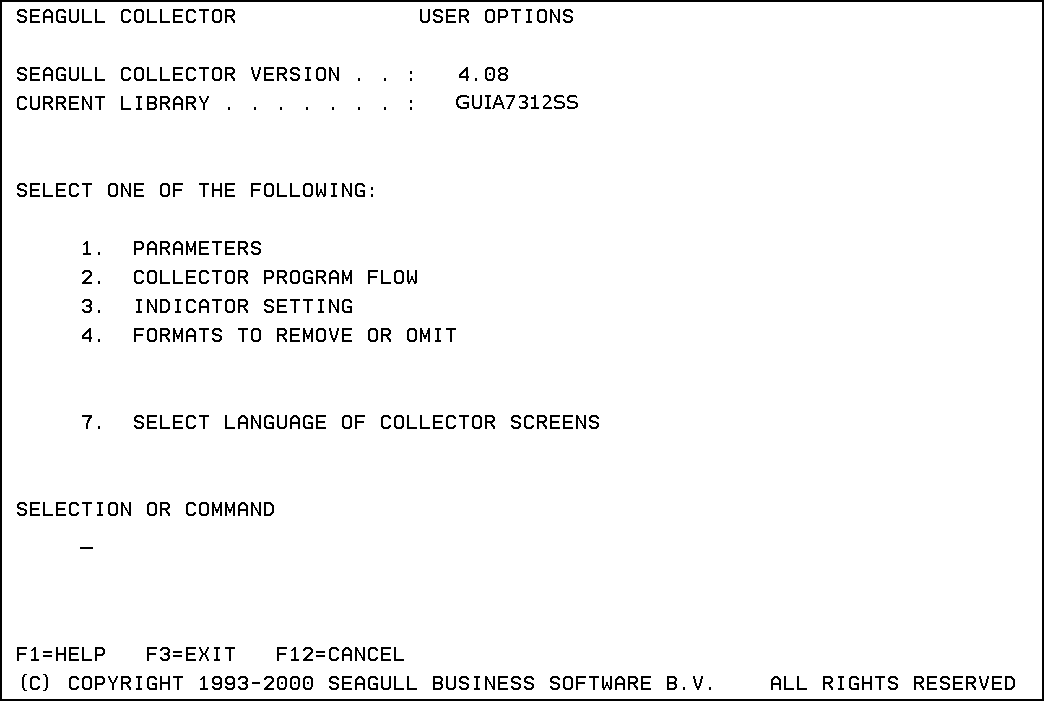
After the primary collector screen, press F18. User Options main menu displays.
10.2 Setting Collector User Options
The following procedure describes how to set the user options for the Collector run.
Figure 10-6 SEAGULL Collector User Options screen
Description of "Figure 10-6 SEAGULL Collector User Options screen"
-
Press F18 on the main menu to display the User Options menu.
-
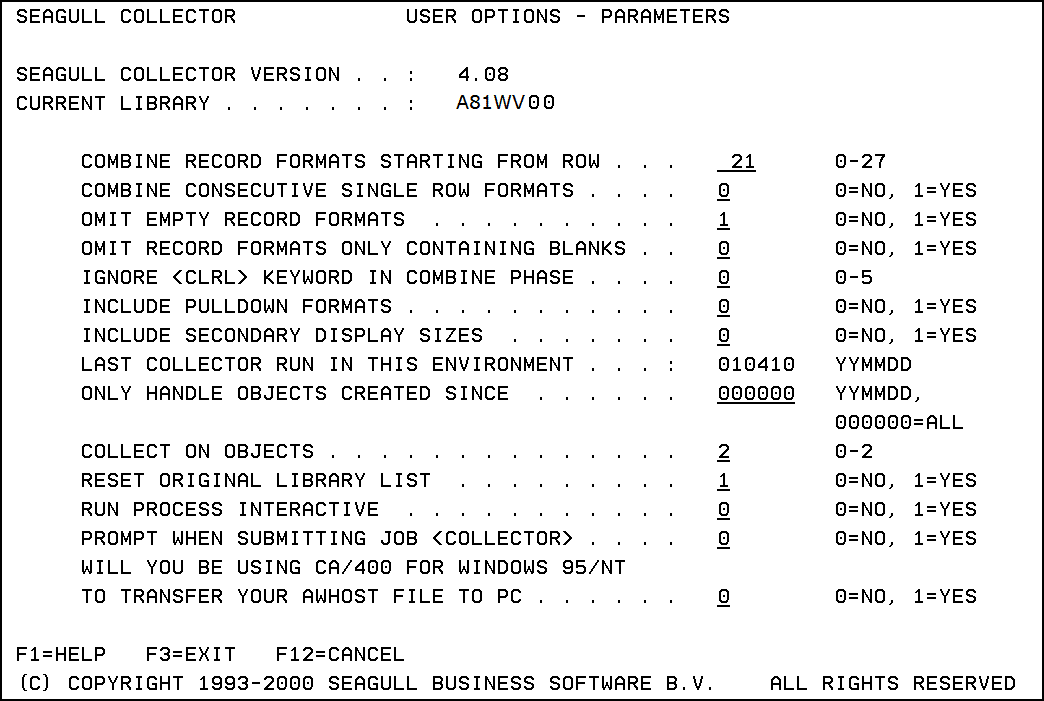
Type 1 on the User Options menu to set the Parameters.
Figure 10-7 SEAGULL Collector User Options - Parameters screen
Description of "Figure 10-7 SEAGULL Collector User Options - Parameters screen"
-
Change the 'Combine record formats starting from row' to 21.
-
Change the "Collect on objects" to 2.
-
Press Enter to return to the User Options menu.
10.3 Setting Other User Options
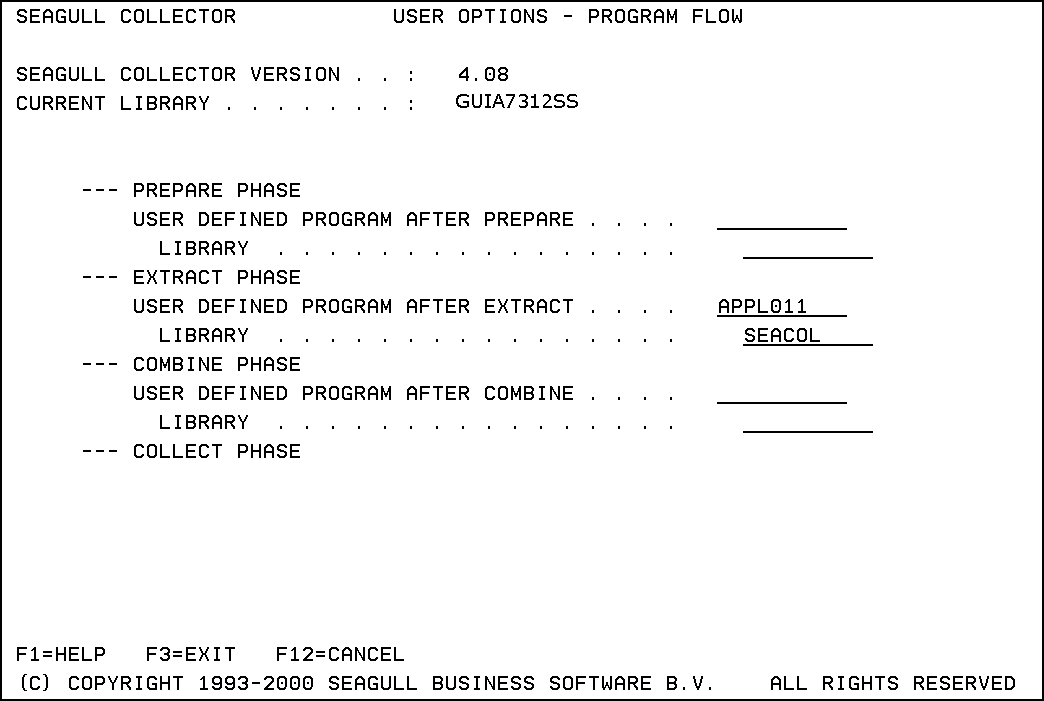
You can set other user options, including the program for the extract phase and the library that stores the program.
-
Type 2 on the User Options menu to display the User options - Collector program flow.
-
Type SEACOL on the command line to identify the library that stores the program.
Figure 10-8 SEAGULL Collector User Options - Program Flow screen
Description of "Figure 10-8 SEAGULL Collector User Options - Program Flow screen"
-
Press Enter to return to the User Options menu.
10.4 Activating or Deactivating Indicators
After you set up user options, you can activate or deactivate indicators when you run the Collector. Note that activating or deactivating indicators is not necessary for the JD Edwards application.
To activate or deactivate indicators
-
Type 3 on the User Options menu to display the User options - Indicators screen.
Figure 10-9 SEAGULL Collector User Options - Indicators screen
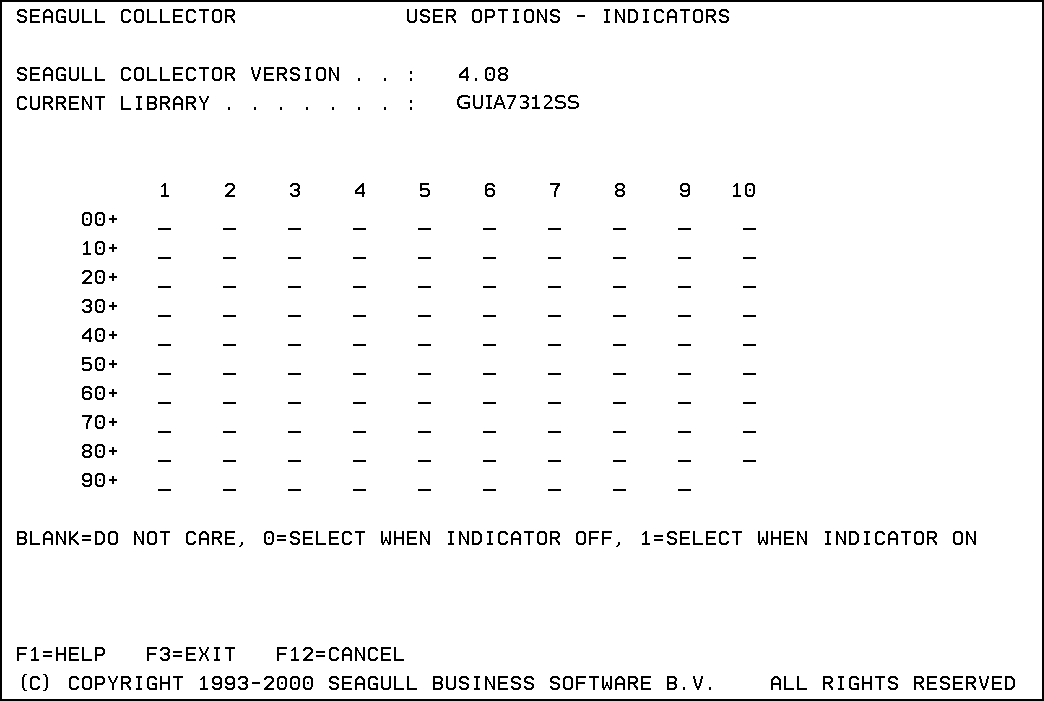
Description of "Figure 10-9 SEAGULL Collector User Options - Indicators screen"
-
Using the values (blank, 0, and 1) at the bottom of the screen, activate or deactivate the indicators.
-
Press Enter to return to the User Options menu.
10.5 Removing or Omitting Formats
You can remove or omit formats from the Collector.
-
Type 4 on the User Options menu.
Figure 10-10 SEAGULL Collector User Options - Formats to Remove or Omit screen
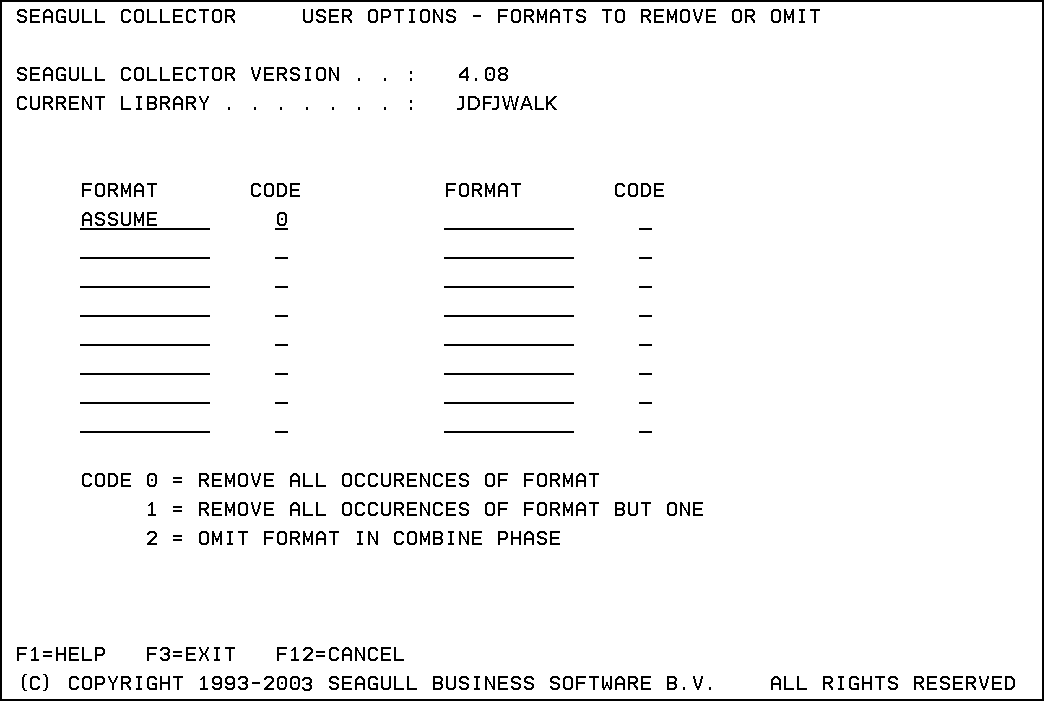
Description of "Figure 10-10 SEAGULL Collector User Options - Formats to Remove or Omit screen"
-
Type Assume in the Format field and 0 in the Code field to omit the format Assume. Note that you can also use this method to omit dummy or clear formats.
-
Press Enter to return to the User Options menu.
-
Press Enter to return to the "SEAGULL Collector - Main Screen".
-
Press Enter to submit the job to batch. You will receive a message when the job has completed.
If you view your target library, it must have a file called AWHOST. This file contains all display file data for your panels.
To move the AWHOST file and import it for use in the J Walk Developer application
-
Copy the zipped file JDECust9100.zip under folder Source from the JD Edwards Web Enablement Installation CD to your PC. Unzip this file to folder SelfServ91. It is recommended that you make a copy of the JDECust9100 folder and give it a name that has meaning to the current project.
-
Transfer the AWHOST file from the IBM i to the PC on which the J Walk Developer has been loaded. Use the "Data Transfer From AS/400" operation navigating to path Start/Programs/IBM Client Access Express. Transfer the AWHOST file from the IBM i to the PC AWHOST folder within the new project name folder created above.
Figure 10-11 SelfServ91 (AWHOST Copy) screen
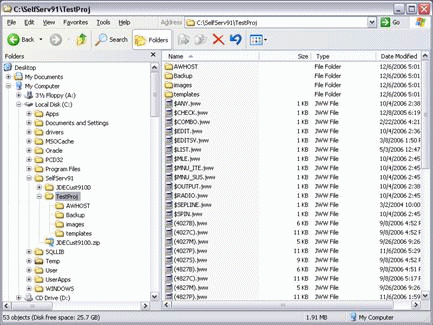
Description of "Figure 10-11 SelfServ91 (AWHOST Copy) screen"
-
Open your J Walk Developer. The following panel displays:
Note:
Do not open a project. You need to step through the process to build the picture album, screens, and panels for your new AWHOST file.-
Choose 'Album | New' from the menu bar.
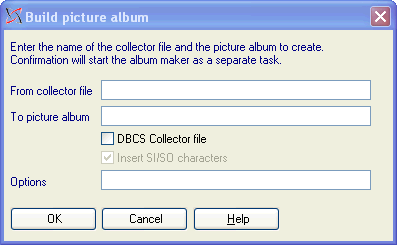
-
Right-click the 'From collector file' entry field, and choose 'List Collector Files'. Search and choose your AWHOST file.
Figure 10-14 Build Picture Album (List Collector Files) screen
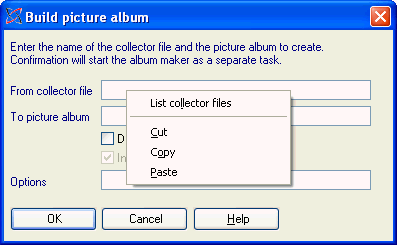
Description of "Figure 10-14 Build Picture Album (List Collector Files) screen"
-
In the 'To Picture Album' entry field, type the same directory that you used for the AWHOST file, but remove the AWHOST from the directory path. Add a file name with the extension of '.JWP'. The following graphic is an example:
Figure 10-15 Build Picture Album (AWHOST File) screen
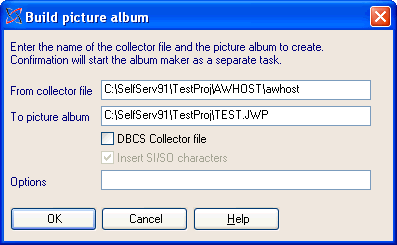
Description of "Figure 10-15 Build Picture Album (AWHOST File) screen"
-
Click OK to create the picture album. You will receive a small report on the status of the build. The file you created is now in your project directory.
-
Return to the Terminal Editor.
-
Choose Album | Identify Pictures.
Figure 10-16 Screen Identification screen
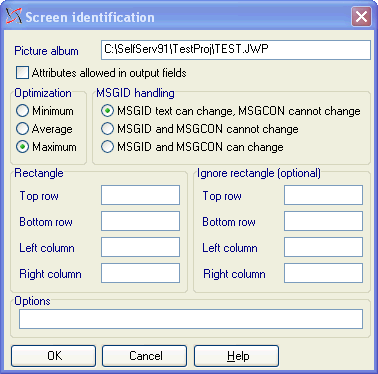
Description of "Figure 10-16 Screen Identification screen"
-
In the 'Picture Album' entry field, use the same directory that you used for the AWHOST file, but remove the AWHOST from the directory path and add the name of the .JWP file.
-
Choose 'MSGID text can change, MSGCON cannot change' under 'MSGID handling'.
-
Click OK to process the Screen Identification. You will receive a short message that the process has completed.
-
Return to the Terminal Editor.
-
Choose Album | Open.
-
Choose your new .JWP file.
-
You are now ready to start building the project.
-
On the terminal editor screen, choose File | Project | Open.
-
Navigate to the directory that contains the JD Edwards World template project, and choose JDECUST9100.JWD.
Figure 10-17 Open screen (JDECUST9100.JWD)
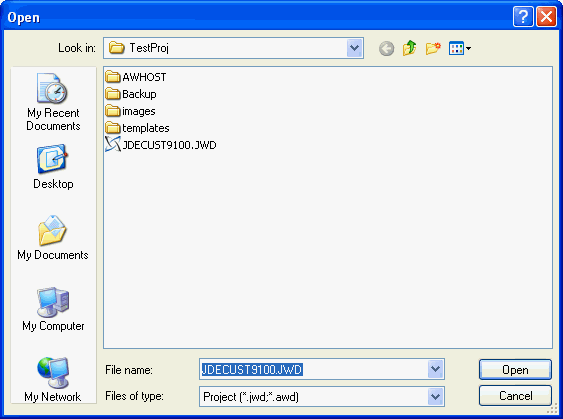
Description of "Figure 10-17 Open screen (JDECUST9100.JWD)"
-
Return to the Terminal Editor. Choose File | Project | Settings.
Figure 10-18 Project Settings (File) screen
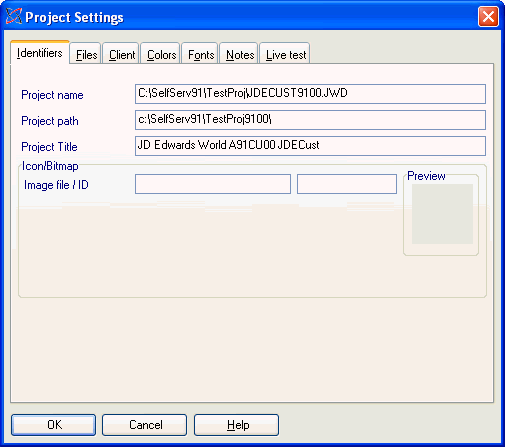
Description of "Figure 10-18 Project Settings (File) screen"
Figure 10-19 Project Settings (Project) screen
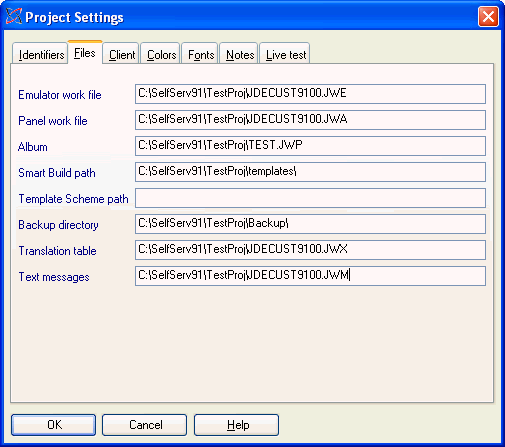
Description of "Figure 10-19 Project Settings (Project) screen"
Figure 10-20 Project Settings (Settings) screen
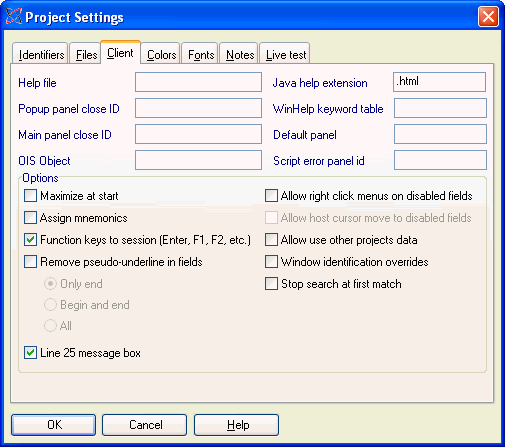
Description of "Figure 10-20 Project Settings (Settings) screen"
-
Validate the paths are correct in the 'Identifiers' and the 'Files' tabs. Verify that only the two options are checked on the Client tab. When complete, click OK.
Figure 10-21 Terminal Editor (Validate Files) screen
Description of "Figure 10-21 Terminal Editor (Validate Files) screen"
-
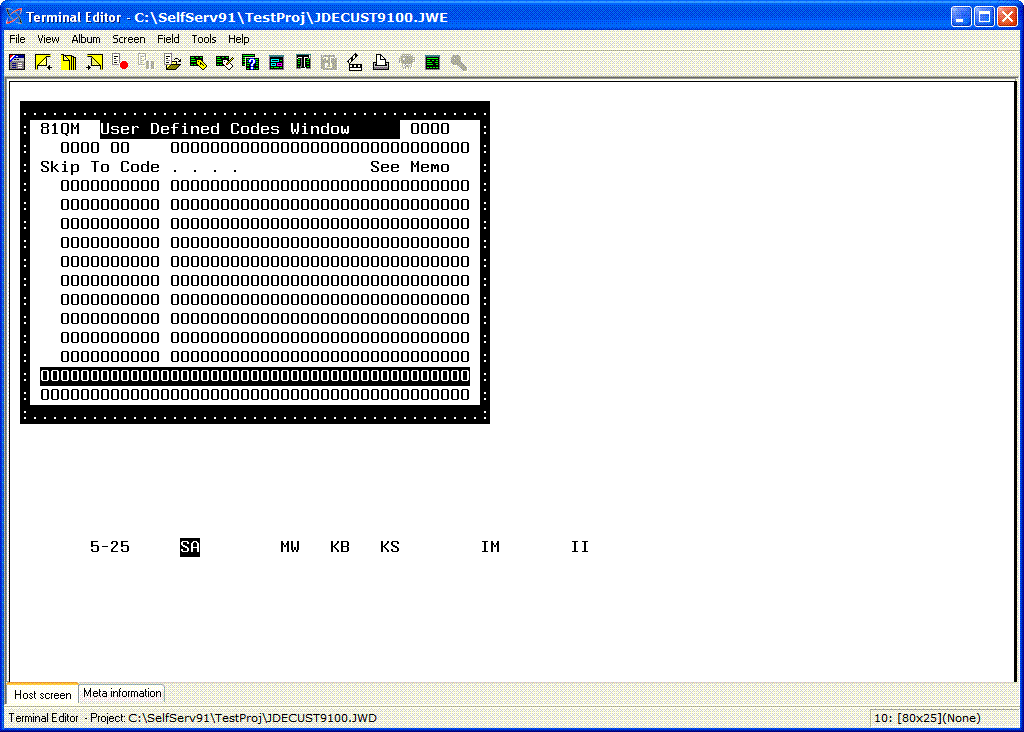
In the Terminal Editor, you will see a panel displayed from the picture album.
-
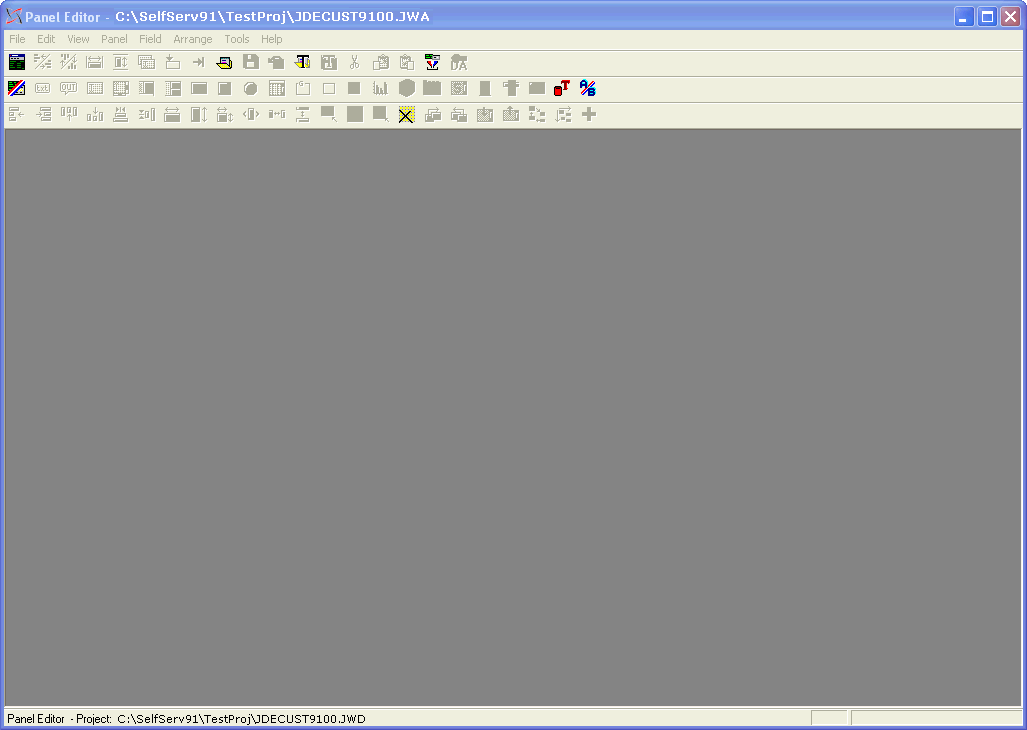
To create the Panel file (which contains all of the transformed panels) tab into the Panel Editor screen, choose Tools | Smart Build panels.
Note:
During the Smart Build process, verify that the appropriate POS template is used for the type of panel you are building. There are two extra templates within the JDECUST9100 project, POSMAIN and POSPOP. Both templates have a starting row and column where fields will be added when creating a panel. POSMAIN is used for main panel screens. POSPOP is used for popup (window) panel screens. Before the Smart Build, you need to overwrite the current POS template with the appropriate panel type position-mapping (POS) template. It is recommended to build panel type groups separately.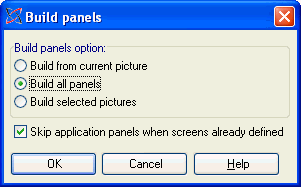
-
Depending on how many screens you are building, it is recommended that you build panel type groups separately. If you do have both main and popup panels to build, use the "Build selected pictures" option from above to choose the individual panel types. However, if you have all main panels, verify the correct version of the POS template is built (See note above). To access the list of templates, press CTRL + F4. You can then click the "Build all panels" if all your panels to build are of one specific panel type. You will receive a message when the action has completed.
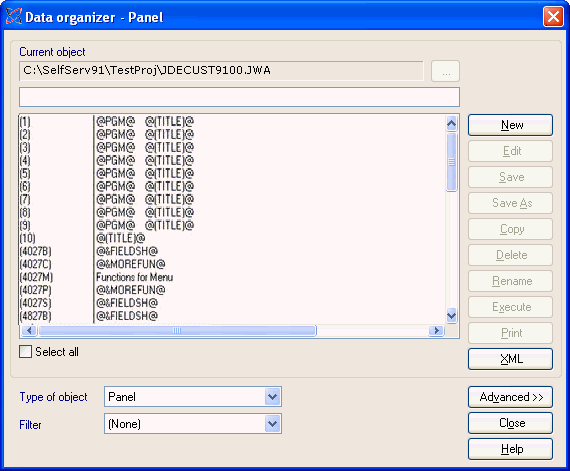
Figure 10-24 Data Organizer - Panel screen
Description of "Figure 10-24 Data Organizer - Panel screen"
-
Choose Panel | Organizer from the menu. Your new panels will be listed at the front of the list. Double click on one of the new panels to display it.
Figure 10-25 Panel Editor (Displayed Panel) screen
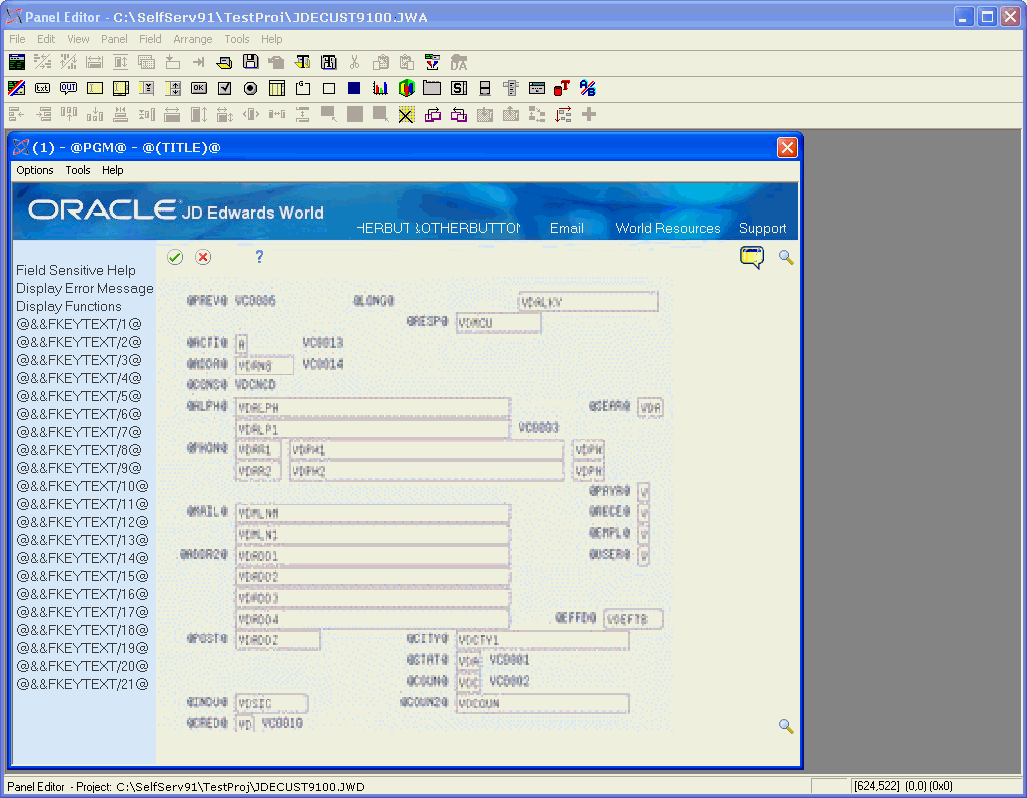
Description of "Figure 10-25 Panel Editor (Displayed Panel) screen"
-
You can now modify as needed. Upon completion, save all of your work. It must now be published.
Figure 10-26 Panel Editor (Modified) screen
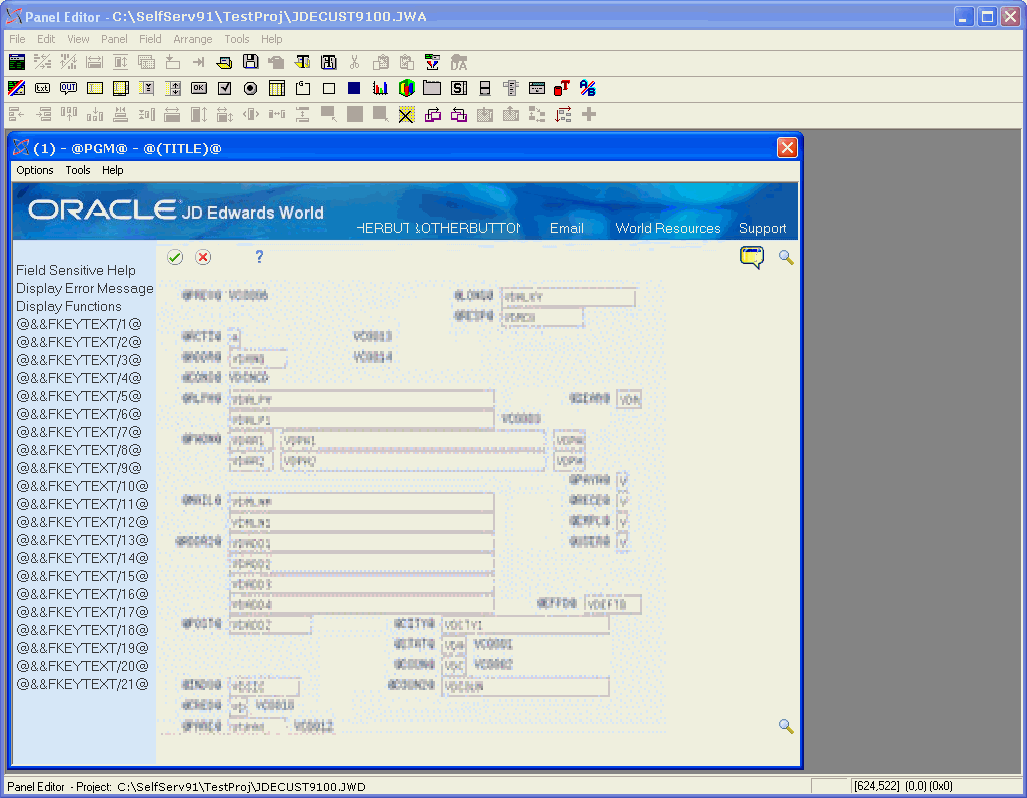
Description of "Figure 10-26 Panel Editor (Modified) screen"
-
From the Panel Editor, choose Tools | Publish.
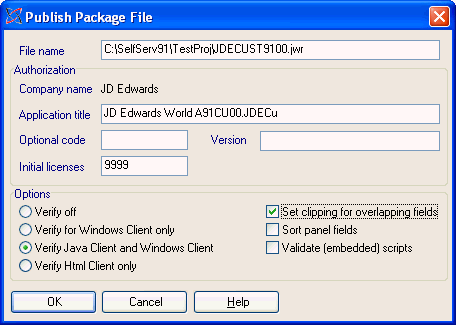
-
Verify your file name is being directed to the proper directory, and then choose Verify Java Client and Windows Client. Check the Set clipping for overlapping fields. Click OK.
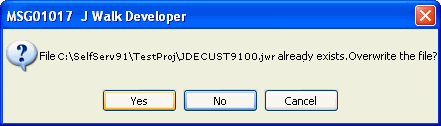
-
This message will not appear the first time you create the .JWR file. On subsequent builds, click Yes.
Figure 10-29 Data Organizer Selection - Panel screen
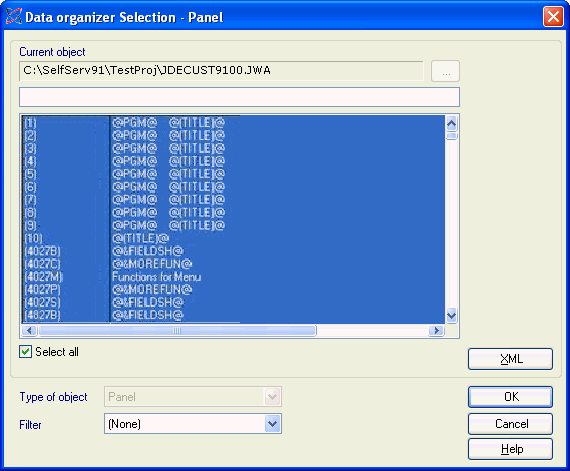
Description of "Figure 10-29 Data Organizer Selection - Panel screen"
-
All items must be selected. Click OK.
-
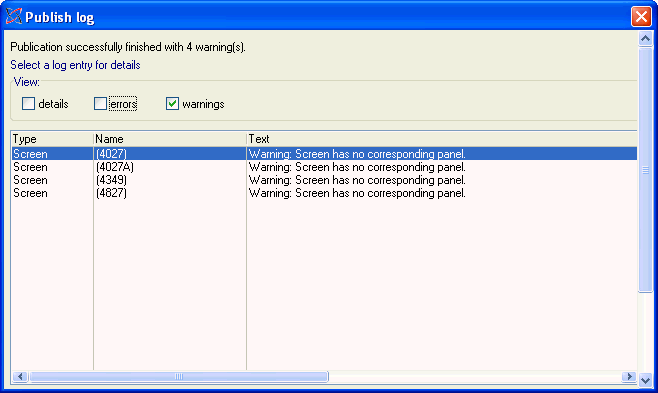
Upon completion, you may see this screen. Warnings are normal. If you have errors, correct them and republish. Otherwise, click Close to exit.
The publishing process is now complete. The files must now be moved from the development directory to the J Walk server directory.
You must move the 'xx.JWR', 'xx.JWM, and 'xx.JWX' files. After moving the files, create a file called 'WV9100.JWC' using notepad.
The following lines determine the execution order for J Walk. Copy these lines to your .JWC file.
[A93APP]
Runtime=JDECUST9100.jwr
Runtime=WV93.jwr
Runtime=DYNBLD93.jwr
-
Change JDECUST91.JWR to the name of the JWR file you created. When the J Walk server is started, this becomes the search order for the panels. Custom files should be first in line.
-
Stop and restart your J Walk server and test your new panels. Panels will appear at the expected location.
10.6 Summary
Contact JD Edwards World Technical Customer Support if you have any questions regarding this guide.
Always refer to the latest version of this guide on the Customer Connection.