4 Deployment Option 1 - Install the LegaSuite Server on IBM i
This chapter contains these topics:
-
Section 4.1, "Step 1 - Install the Seagull LegaSuite Server,"
-
Section 4.2, "Step 2 - Install the JD Edwards World Components for IBM i,"
-
Section 4.3, "Step 3 - Upload the Seagull LegaSuite Server and JDE Components to the IBM i,"
-
Section 4.4, "Step 4 - Verify the Seagull LegaSuite Server on IBM i,"
-
Section 4.5, "Step 5 - Verify Seagull License and Message Server on IBM i,"
4.1 Step 1 - Install the Seagull LegaSuite Server
-
From a PC, unzip the file A931WEB.ZIP file into a temporary folder.
-
From the temporary folder, double-click the file named SETUP.EXE. SETUP.EXE starts the Options Menu where you can launch the following installations.
-
From the Setup screen, Installations Options menu, select the LegaSuite Servers link.
-
From the Setup screen, LegaSuite Servers menu, select the Seagull IBM i (iSeries) Server link. The setup program launches.
-
From the Welcome screen, click Next.
-
From the Software License Agreement screen, if you accept the license agreement, click I Agree.
Figure 4-4 Software License Agreement screen

Description of "Figure 4-4 Software License Agreement screen"
-
On the Installation Mode screen. Choose Manual Installation and click Next.
-
From the Choose Install Location Screen, accept the default and click Next.
Figure 4-6 Choose Install Location screen

Description of "Figure 4-6 Choose Install Location screen"
-
From the Choose Start Menu Folder screen, click Next.
Figure 4-7 Choose Start Menu Folder screen

Description of "Figure 4-7 Choose Start Menu Folder screen"
-
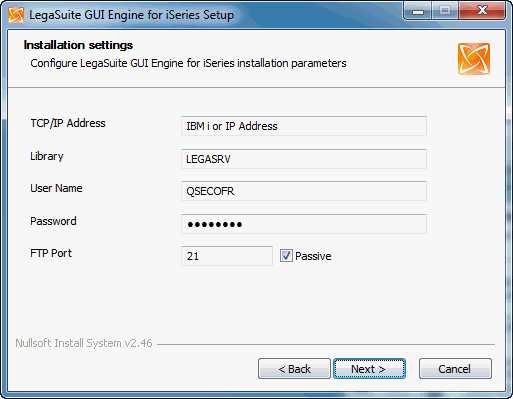
From Installation Settings screen, enter the TCP/IP Address. Enter a User Name with QSECOFR authority, but do not enter your password on this screen. Accept the other default values and click Next.
-
From the GUI Engine Settings screen, enter your IBM i host address and click Next.
-
From the Web Server Settings screen, verify your Domain and click Install.
-
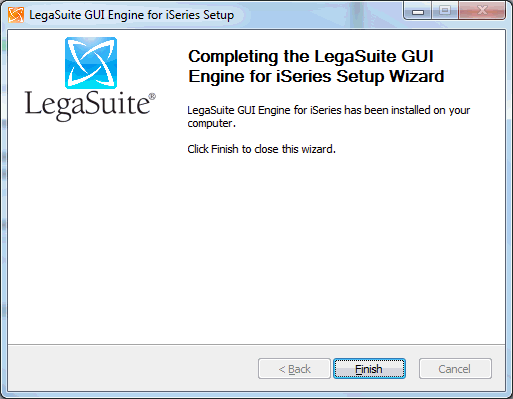
From the Completion screen, click Finish.
-
Figure 4-11 Completion Setup Wizard screen

Description of "Figure 4-11 Completion Setup Wizard screen"
-
Complete the procedures in Appendix I, "Registration Wizard," and then proceed to complete Step 2 of the Deployment Option 1, Section 4.2, "Step 2 - Install the JD Edwards World Components for IBM i".
4.2 Step 2 - Install the JD Edwards World Components for IBM i
-
From the Setup screen, LegaSuite Servers Menu that you launched in the previous section, click on the JDE World IBM i Components link.
-
From the Oracle Universal Installer (OUI) Welcome screen, click Next.
Figure 4-13 Oracle Universal Installer (OUL) Welcome screen

Description of "Figure 4-13 Oracle Universal Installer (OUL) Welcome screen"
-
Enter a folder Name for the installation, for example A93WEB and any OraHome directory and then click Next. Oracle recommends that you retain the OraHome name in some form for your path directory.
Using the OraHome name is an Oracle convention that facilitates consistent directory names among Oracle product installations.
Figure 4-14 Choose Destination Directory screen

Description of "Figure 4-14 Choose Destination Directory screen"
-
Accept the default destination directory and then click Next.
Figure 4-15 Choose Destination Directory screen

Description of "Figure 4-15 Choose Destination Directory screen"
-
From the Summary screen, click Install.
-
From the End of Installation screen, click Exit.
-
From the Exit screen, click Yes.
4.3 Step 3 - Upload the Seagull LegaSuite Server and JDE Components to the IBM i
The first part of the IBM i installation is complete. Now you need to upload the Seagull LegaSuite Server and the JDE Components to your IBM i using the Seagull FTP Wizard.
-
To start the FTP upload to the IBM i, run the following program from the Windows Start Menu:
Start Menu->Programs->LegaSuite->LegaSuite GUI Engine for IBM i ->6.xxxx.x.xx ->LegaSuite GUI Engine for IBM i
-
From the FTP Connection settings screen, ensure you have QSECOFR authority to start the IBM i install. Click OK.
Note:
Depending on your network connections, the install can take longer than 20 minutes to FTP all the objects to the IBM i. -
From the LegaSuite GUI Engine for IBM i installation screen, click OK to complete the installation.
Figure 4-20 LegaSuite GUI Engine for IBM iSeries Installation screen

Description of "Figure 4-20 LegaSuite GUI Engine for IBM iSeries Installation screen"
Note:
If you experience difficulty transferring the objects, contact My Oracle Support, JD Edwards World Technical for assistance.Note:
If you receive the following error message during installation:425 NOT ABLE TO OPEN DATA CONNECTION
Refer to Appendix A - Troubleshooting for instructions on how to resolve this issue.
4.4 Step 4 - Verify the Seagull LegaSuite Server on IBM i
-
Ensure the following server is running on your IBM i, by typing:
WRKACTJOB
| Subsystem | Server | Description |
|---|---|---|
| QSYSWRK | LEGASRVSVR | LegaSuite Server |
-
If the LegaSuite Server is not running, start it by typing the following on a command line:
LEGASRV/STRLEGASRV
4.5 Step 5 - Verify Seagull License and Message Server on IBM i
Note:
This step assumes you have previously installed the Seagull License and Message server. If you have not, follow the instructions in the section Install or Upgrade the Seagull License and Message Server.-
Ensure the following servers are running on your IBM i, type the following on the IBM i command line:
WRKACTJOB
Subsystem Server Description QSYSWRK SEALMSDMN License Message Server QSYSWRK SEALMSSVR License Message Server -
If the License Message Server is not running, start it by typing the following on the IBM i command line:
SEALMS/STRLMSTCP
4.6 Step 6 - Verify the HTTP server on IBM i
-
Ensure the following server is running on your IBM i, type the following on the IBM i command line:
WRKACTJOB
Subsystem Server Description QHTTPSVR APACHEDFT The HTTP Server -
If the default HTTP server is not running, start it by typing the following on a command line:
STRTCPSVR SERVER(*HTTP) HTTPSVR(APACHEDFT)
4.7 Step 7 - Connect the Client Browser
-
Use a web browser to launch Web Enablement.
-
Type the following URL in the web browser and press Enter.
http://your_IBM i/legasuite/LEGASUITE.HTML
Note:
Ensure you replace the text IBM i with the name used for your IBM i, as specified during the install.


