3 Installing and Configuring WebLogic Server 11gR1
This chapter describes running the Oracle Universal Installer (OUI) to install WebLogic Server 11gR1.
This chapter contains these topics:
-
Section 3.2, "Downloading WebLogic Server from the Oracle E-Delivery Website,"
-
Section 3.5, "Using QuickStart to Configure WebLogic Server."
3.1 Overview
This chapter provides instructions for installing and running the Oracle installer for the WebLogic Server 11gR1.
Additional information regarding the WebLogic Server is available at:
-
http://e-docs.bea.com/wls/docs70/install/index.html
3.2 Downloading WebLogic Server from the Oracle E-Delivery Website
This section describes how to download WebLogic Server from the Oracle E-Delivery Website:
-
http://edelivery.oracle.com
3.2.1 Before You Begin
Refer to the JD Edwards World MTRs for specific system requirements including minimum processor and memory.
Oracle recommends the following:
-
Do not exceed a maximum of 12 characters when naming your home directory. If the name of this directory has more than 12 characters and if there are spaces in the directory name, the CLASSPATH might not be resolved properly.
-
You can install only one instance of each version of a WebLogic product in a single home directory.
-
If you launch the installation from the command line or from a script, you can specify the -log option to generate a verbose installation log. The installation log stores messages (informational, warning, error, and fatal) about events that occur during the installation process.
3.3 Installing and Verifying the JDK Version
WebLogic Server 11gR1 supports Sun JDK 1.6.0_11+ or Oracle JRockit 1.6.0_05+ version. Oracle JRockit can be downloaded from the Oracle eDelivery web site:
-
http://edelivery.oracle.com
To verify you version of an installed JDK, use the following command from the command prompt:
> java -version
The system returns results. For example:
java version "1.6.0_14"
Java(TM) SE Runtime Environment (build 1.6.0_14-b08)
Java HotSpot(TM) 64-Bit Server VM (build 14.0-b16, mixed mode)
Note:
Verify the returned results indicate that a 64-bit version of the JDK is installed.3.4 Installing WebLogic Server 11gR1
To install the WebLogic Server 11gR1
-
Run the WebLogic Server installer, either from CD or from the image that you downloaded from the Oracle E-Delivery web site.
File name of the installer for the Microsoft Windows platform:
-
wls1032_win32.exe
Upon execution, the installer starts preparing the OUI install program.
-
-
On Welcome, click Next.
Figure 3-1 Choose Middleware Home Directory screen
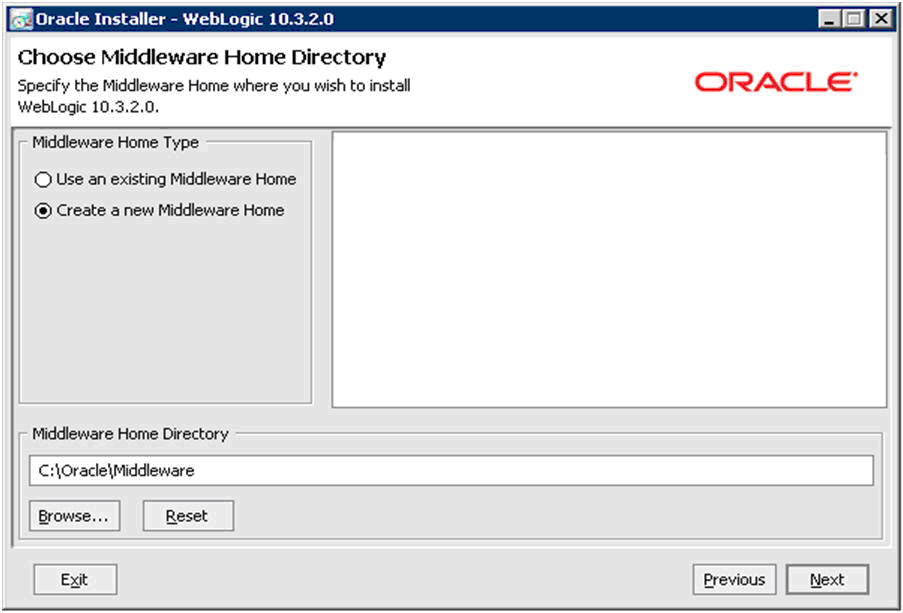
Description of "Figure 3-1 Choose Middleware Home Directory screen"
-
On Choose Middleware Home Directory screen, click the following radio button:
-
Create a new Middleware Home
For example, your Middleware Home Directory might be:
C:\Oracle\Middleware
The location you enter becomes your WM_HOME value.
-
-
Click Next.
Figure 3-2 Register for Security Updates screen
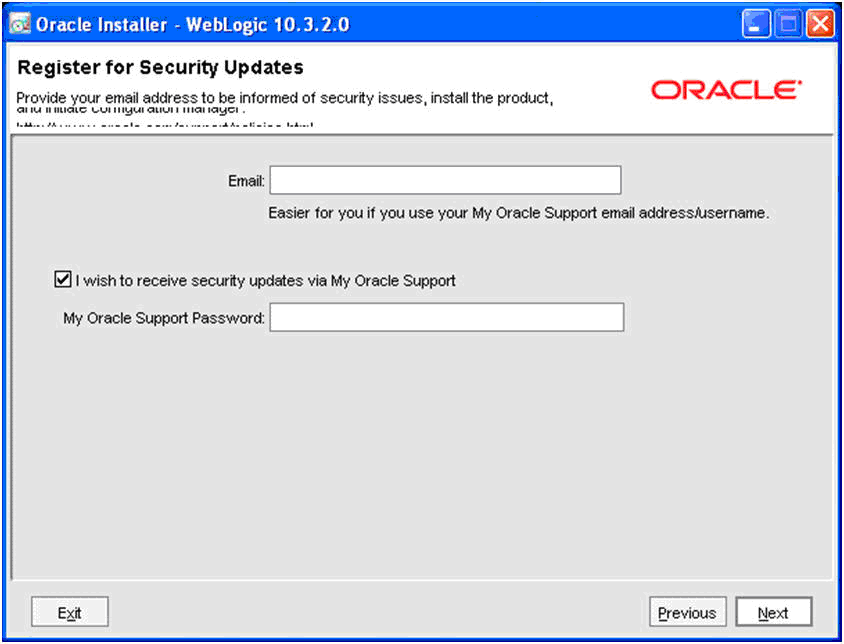
Description of "Figure 3-2 Register for Security Updates screen"
-
On Register for Security Updates screen, Oracle strongly recommends you complete the email address and/or the My Oracle Support Password fields to register your installation of Oracle WebLogic Server. This registration enables you to be informed of security issues.
-
Click Next.
-
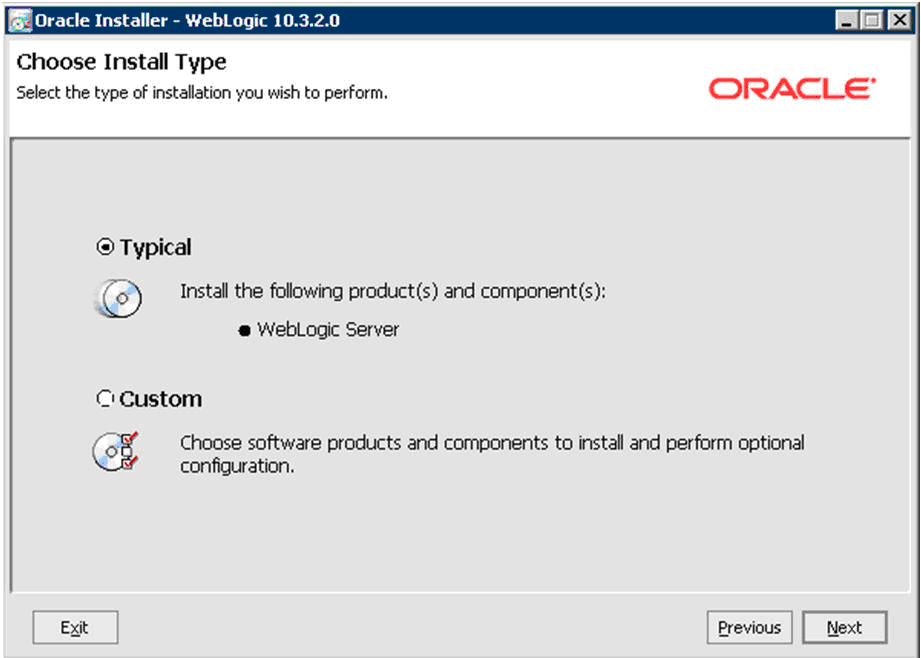
On Choose Install Type screen, select the type of installation you want to perform.
In this guide, it is assumed you select the Typical installation type, which installs the WebLogic Server. However, the following screen is for reference only, if you choose the Custom installation type.
Figure 3-4 Choose Product and Components screen
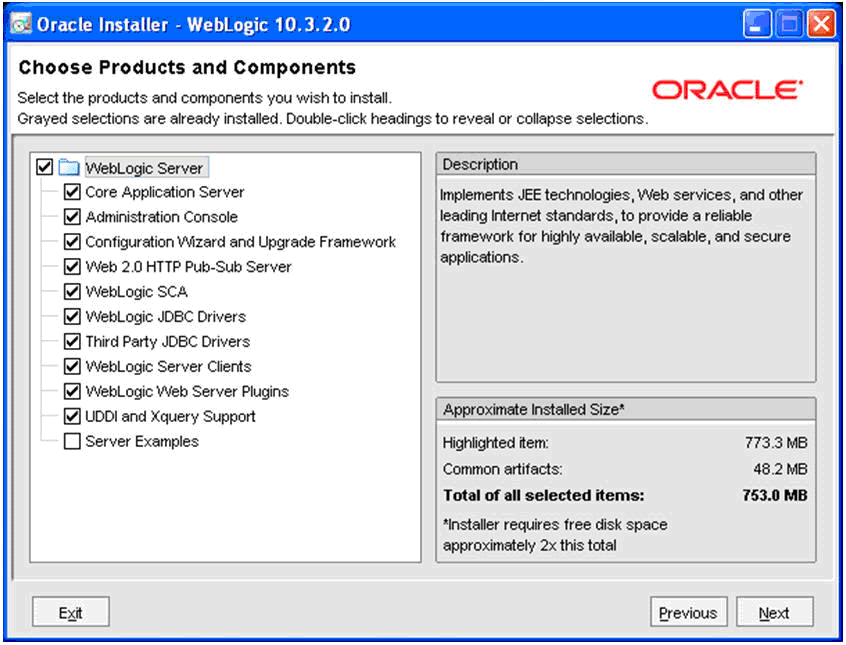
Description of "Figure 3-4 Choose Product and Components screen"
-
Click Next.
-
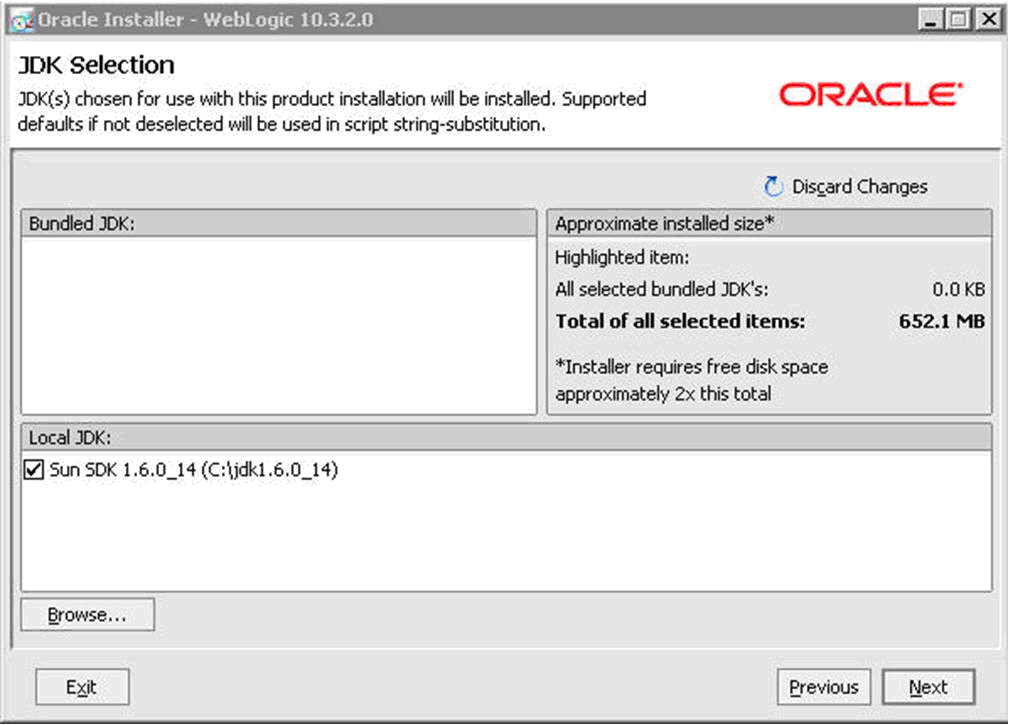
On JDK Selection screen, select the JDK checkbox you want to use and install with this product installation. If you do not deselect the default selection, the system uses it in script string substitution.
Note:
If you did not install the Sun SDK and instead installed the Oracle JRockit Mission Control JDK, the following screen displays.Figure 3-6 JDK Selection (Checkbox) screen
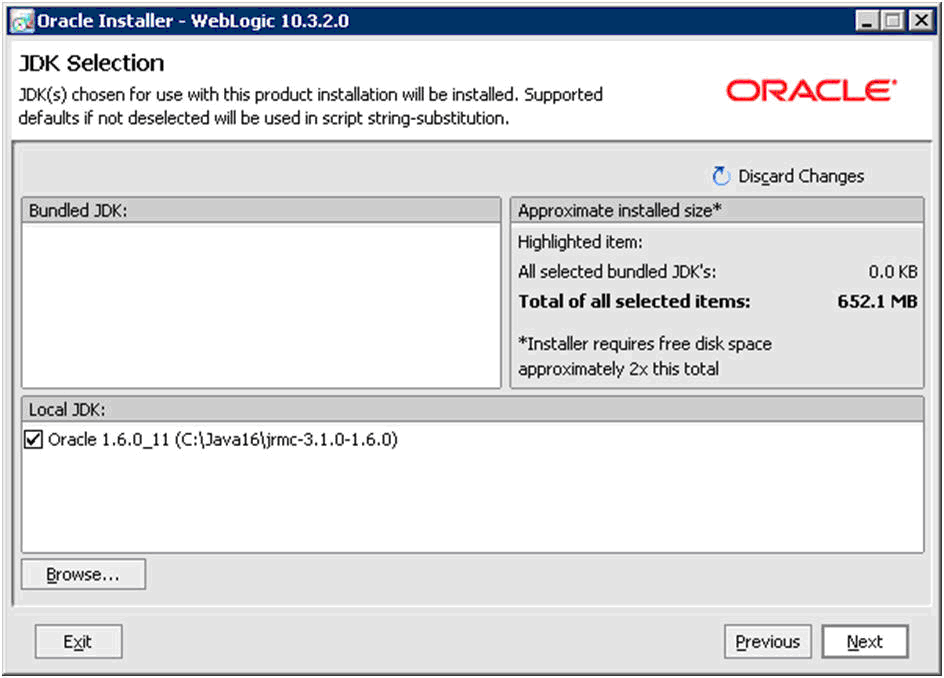
Description of "Figure 3-6 JDK Selection (Checkbox) screen"
-
Verify your JDK selection and then click Next.
Figure 3-7 Choose Product Installation Directories screen
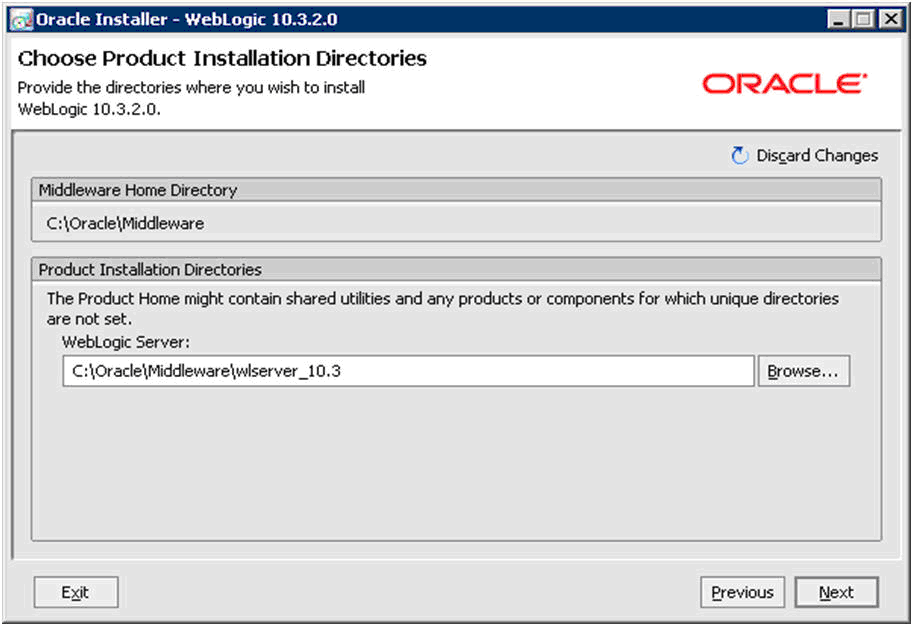
Description of "Figure 3-7 Choose Product Installation Directories screen"
-
On Choose Product Installation Directories screen, complete the following field:
-
WebLogic Server
-
-
Enter or browse to a location where you want to install WebLogic Server.
For example:
-
c:\Oracle\Middleware\wlserver_10.3
-
-
Click Next.
Note:
If you are not running the installer as an Administrator, the following two screens do not display.Figure 3-8 Install Windows Service screen
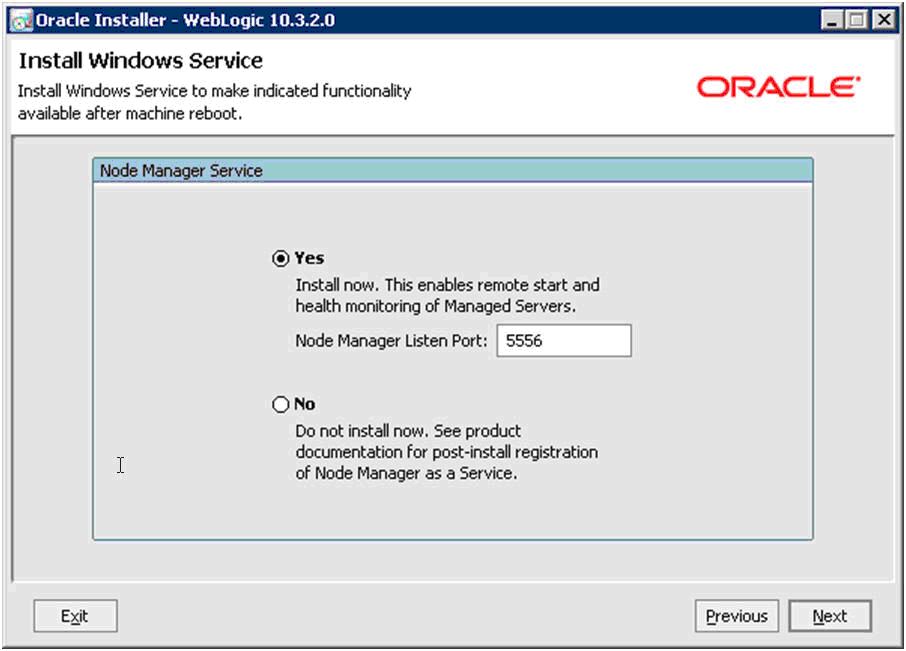
Description of "Figure 3-8 Install Windows Service screen"
-
On Install Windows Service screen, click the Yes radio button to install Node Manager as a Windows Service.
Figure 3-9 Choose Shortcut Location screen
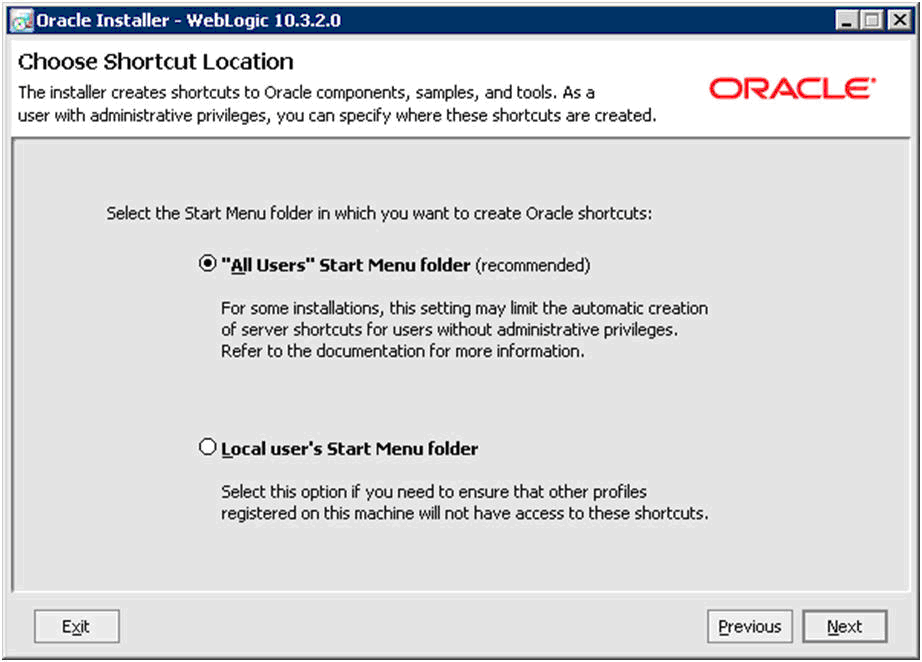
Description of "Figure 3-9 Choose Shortcut Location screen"
-
On Choose Shortcut Location, click the radio button for All Users Start Menu folder.
-
Click Next.
-
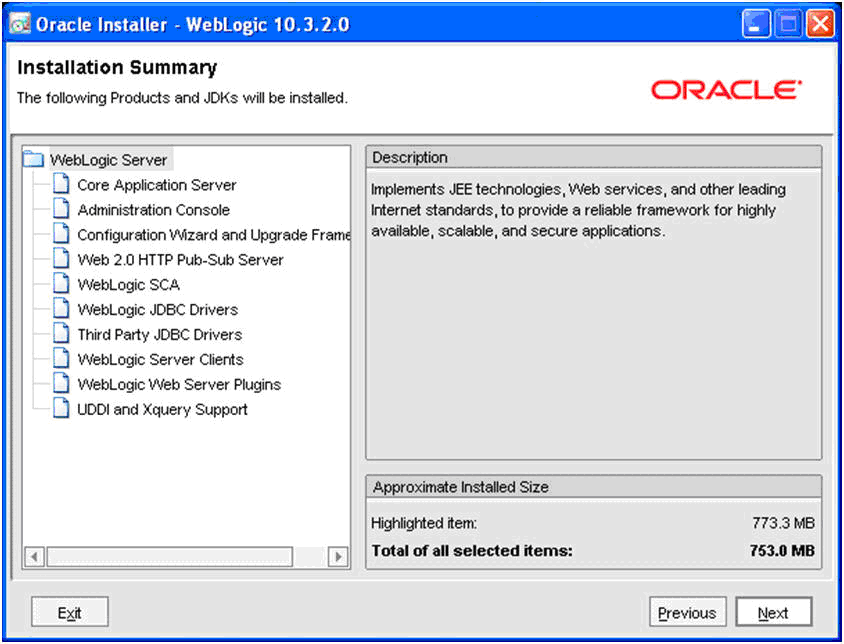
On Installation Summary screen, review the products that will be installed.
-
Click Next.
The installer starts by copying files.
A progress bar is displayed in the lower right-hand portion of the screen.
As the installer progresses, it displays the new features of the WebLogic Server product.
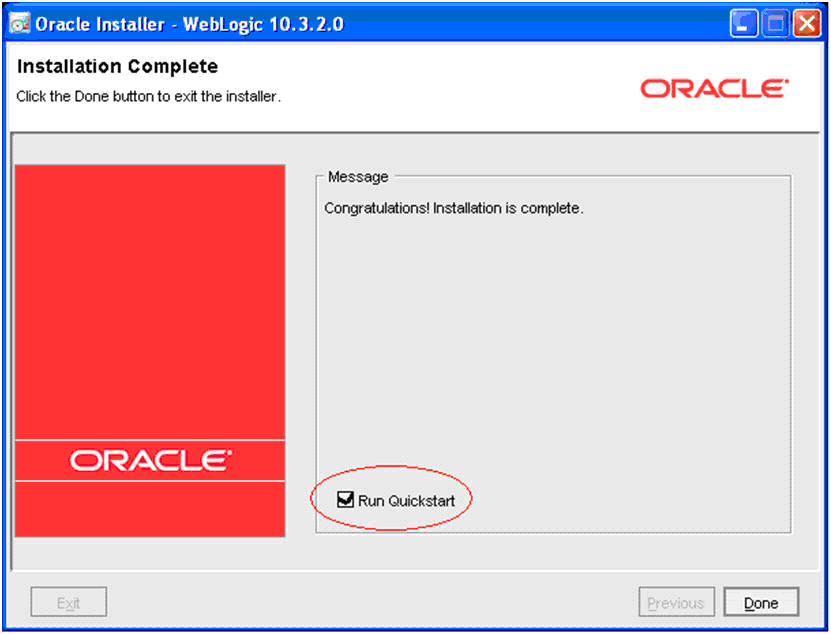
-
On Installation Complete screen, ensure the following checkbox is selected to launch to the QuickStart menu so that you can create your Domain:
-
Run QuickStart
-
-
Click Done.
The QuickStart menu displays. For instructions on using QuickStart to configure WebLogic Server, see Section 3.5, "Using QuickStart to Configure WebLogic Server" in this guide.
3.5 Using QuickStart to Configure WebLogic Server
You can use QuickStart to create a starter domain using the Configuration Wizard. This procedure guides you in the creation of a domain for the World Transaction Server.
If you selected the Run QuickStart checkbox on the Installation Complete menu of the installer, QuickStart is automatically launched.
To configure WebLogic Server using QuickStart
-
To manually launch the QuickStart configuration wizard, run the following executable:
<WM_HOME>utils\quickstart\quickstart.cmd
Figure 3-12 QuickStart Configuration Wizard screen
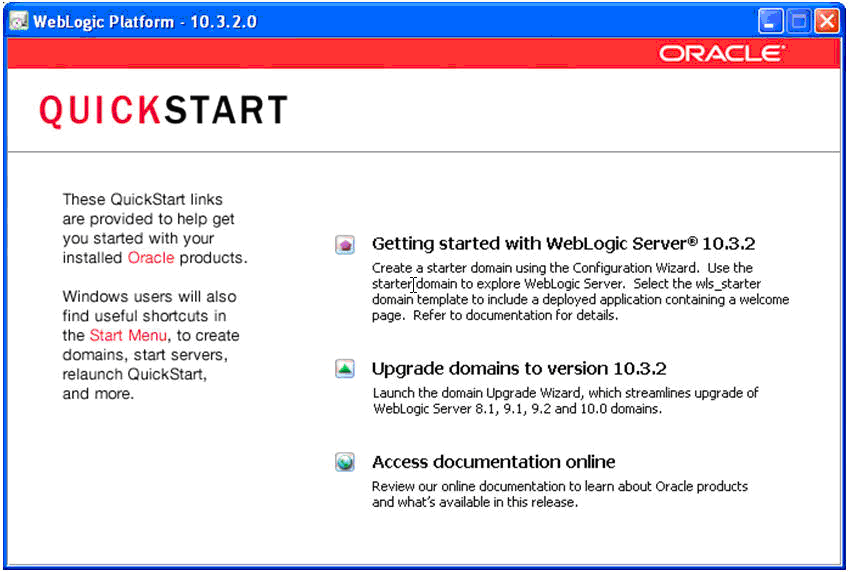
Description of "Figure 3-12 QuickStart Configuration Wizard screen"
-
On the QuickStart links panel, select the following link:
A Configuration Wizard is launched.
Figure 3-13 Configuration Wizard Welcome screen
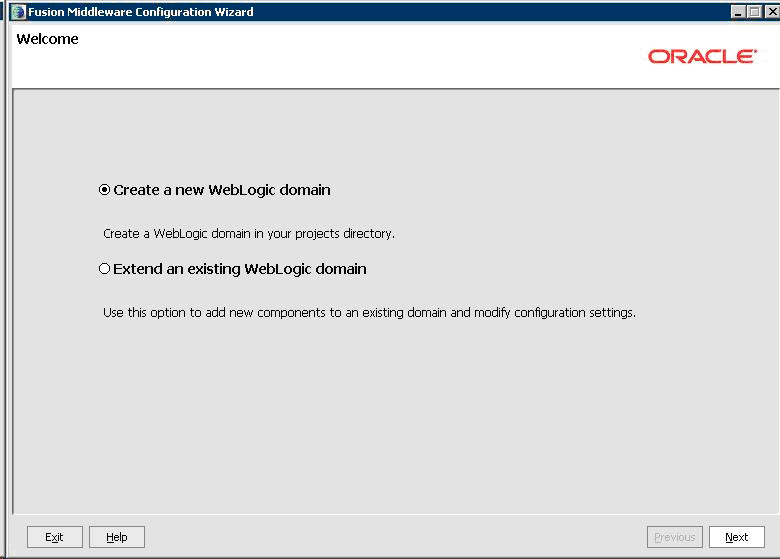
Description of "Figure 3-13 Configuration Wizard Welcome screen"
-
On Welcome screen, click the following radio button to create a WebLogic domain in your projects directory:
-
Create a new WebLogic domain
-
-
Click Next.
-
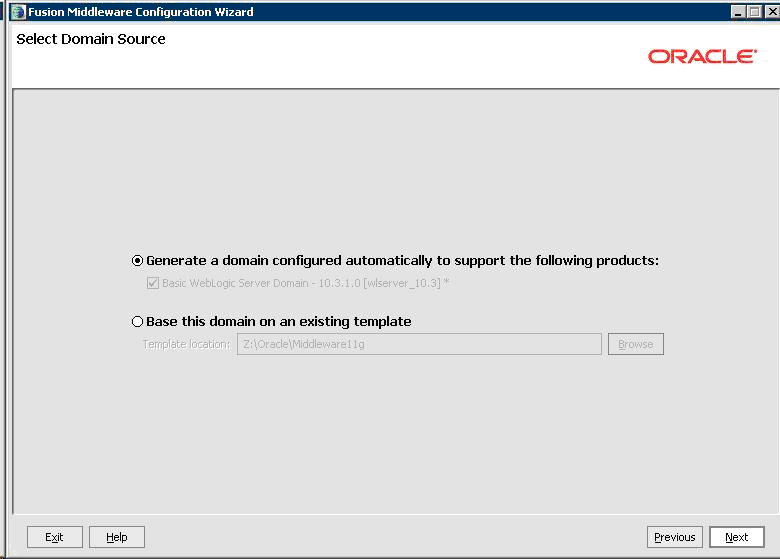
On Select Domain Source, click the following radio button:
-
Generate a domain configured automatically to support the following products
In this section, ensure to select the following default checkbox:
For operation with JD Edwards World Transaction Server, you do not need to select any other checkboxes in this section.
-
-
Click Next.
-
On Specify Domain Name and Location screen, complete the following fields:
-
Domain name:
Enter a domain name for Transaction Server use. For example:
WTSDomain
-
Domain location:
Enter or browse to your domain location. For example:
C:\Oracle\Middleware\user_projects\domains
The following is a typical default domain location:
<WM_home>\user_projects\domains
-
-
Click Next.
Figure 3-16 Configure Administrator User Name and Password screen
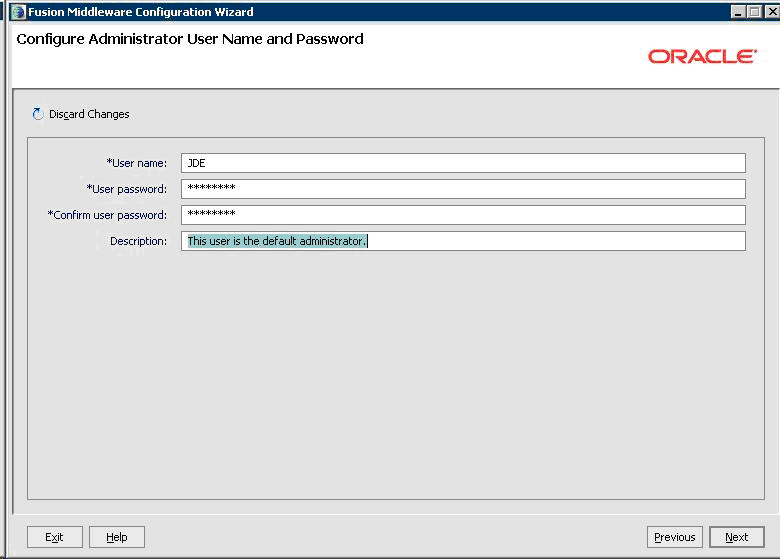
Description of "Figure 3-16 Configure Administrator User Name and Password screen"
-
On Configure Administrator User Name and Password screen, complete the fields for user name and password for the default user who is going to start the domain.
The default user is: weblogic
The default password is: welcome1
-
Click Next.
Figure 3-17 Configure Server Start Mode and JDK screen
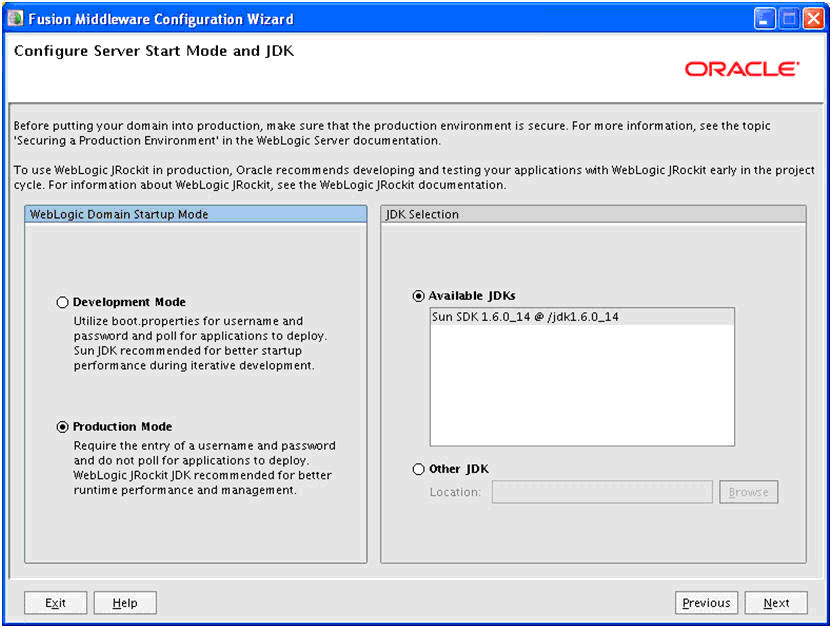
Description of "Figure 3-17 Configure Server Start Mode and JDK screen"
-
On Configure Server Start Mode and JDK screen, in the left-hand pane entitled: WebLogic Domain Startup Mode, for use with Transaction Server use, you must select the following radio button:
-
Production Mode
In the right-hand pane, ensure to select the radio button for Available JDKs button and your installed JDK is highlighted.
-
-
Click Next.
Figure 3-18 Select Optional Configuration screen
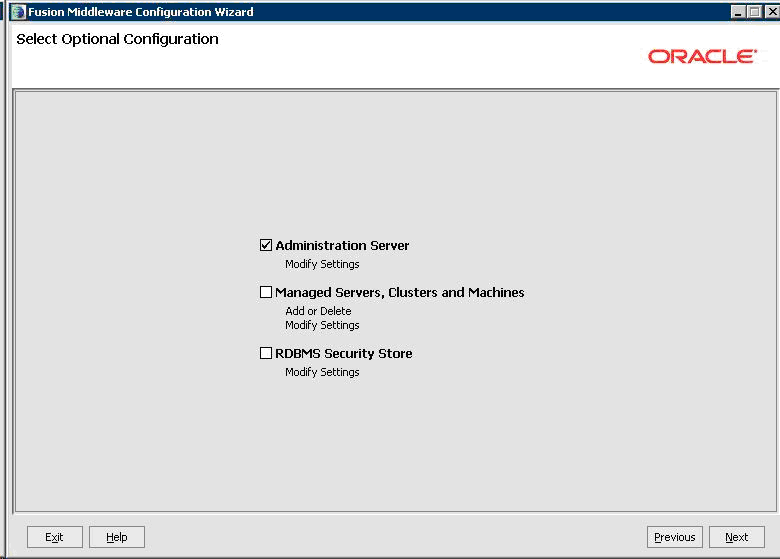
Description of "Figure 3-18 Select Optional Configuration screen"
-
On Select Optional Configuration screen, select the following checkbox to modify the server settings:
-
Click Next.
-
On Configure the Administration Server screen, complete these fields:
-
Name
Enter a name for the Administration Server. For example:
-
AdminServer
Listen address
You can accept the default selection:
All Local Addresses
-
Listen Port
Enter a port value. For example:
8000
The default port value is 7001.
You must specify this same port number in the URL that starts the Admin Console.
-
-
Click Next.
-
Click Create.
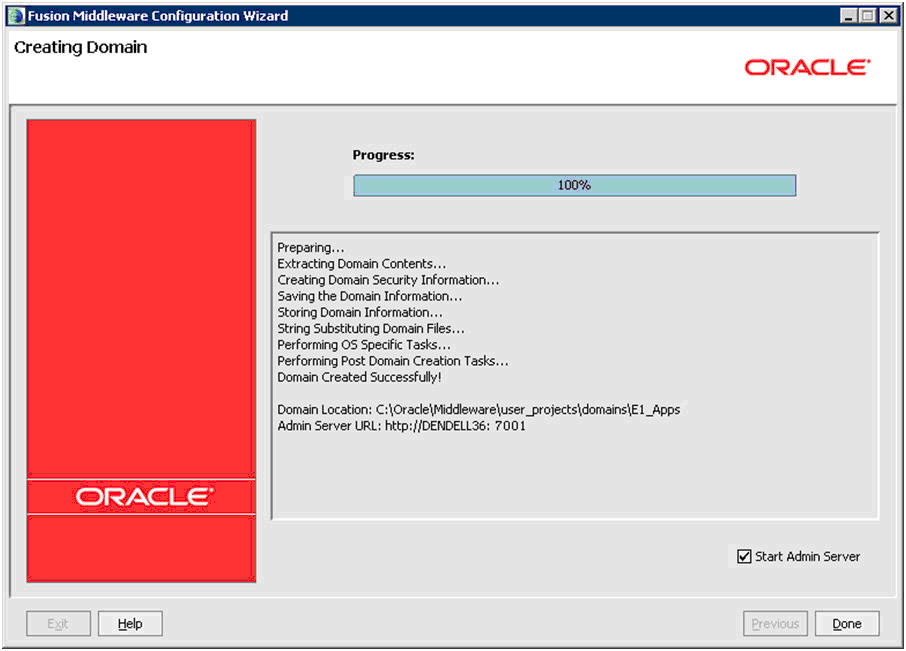
-
On Creating Domain screen, when the Progress bar indicates the process is 100% complete, click Done to exit the wizard.