Enabling Oracle E-Business Suite Audit Trail
Overview
Note: The content in this chapter is maintained for historical purposes. We recommend you use Oracle Database Unified Auditing. For more information, see Database Auditing.
You can choose to store and retrieve a history of all changes users make on a given table. Auditing is accomplished using audit groups, which functionally registered Oracle IDs or group tables to be audited. For a table to be audited, it must be included in an enabled audit group.
Audit Trail Groups are groups of tables and columns. You do not necessarily need to include all the columns in a given table. You enable auditing for audit groups rather than for individual tables. You would typically group together those tables that belong to the same business process (for example, purchase order tables).
A given table can belong to more than one audit group. If so, the table is audited according to the highest level of enabling for any of its groups, where Enabled is the highest, followed by Disable Dump Data, Disable No Growth, and Disable Purge Table, in that order.
You can enable auditing for a maximum of 240 columns for a given table, and you can enable auditing for all types of table columns except LONG, RAW, or LONG RAW. Your audit group must include all columns that make up the primary key for a table; these columns are added to your audit group automatically. Once you have added a column to an audit group, you cannot remove it.
Note: Do not include too many columns for a table. Audit Trail constructs a view creation SQL statement using the columns, and this statement is subject to a size limitation. The limitation on the maximum length for a SQL statement depends on many factors, including database configuration, disk space, and memory. For more information, see the Oracle Database documentation.
Steps to Enable Audit Trail
To enable Oracle E-Business Suite Audit Trail, review and perform the following steps as required:
-
Granted required privileges.
Have your database administrator grant SELECT privileges on SYS.DBA_TABLES to the APPLSYS account. Normally, this step will already have been done as part of the installation or upgrade.
-
Register custom tables and primary keys.
Your tables and their primary key information must already be registered and defined for successful auditing. If the table you want to audit is a custom table (not shipped as part of Oracle E-Business Suite), you should also perform the following two steps:
-
Register your table and its primary key columns using Oracle Application Object Library's Tables window (Application Developer Responsibility).
-
Run the Register Tables concurrent program from the Submit Requests window.
-
-
Turn on Audit Trail.
Turn on Oracle E-Business Suite Applications Audit Trail by setting the system profile Audit Trail: Activate to True
-
Define Audit Installations (optional).
You may optionally choose to audit by a registered Oracle ID. This allows you to audit across multiple application installations. When a table is added to an audit group, auditing will automatically be enabled for all installations of the table for which audit is enabled.
Before you proceed, ensure that the desired Oracle user name is registered. The installation process automatically registers Oracle E-Business Suite Oracle user names, but if you create a custom application, you should follow instructions in My Oracle Support article KB858105, Creating a Custom Application in Oracle E-Business Suite Release 12.2, for Oracle user names for custom applications.
To audit by a registered Oracle ID, do the following:
Navigate through Security > Audit Trail > Install and select the registered Oracle user names at your site that you wish to audit. Select the Audit Enabled checkbox to enable Audit Trail for an Oracle user name.
Audit Installations Window
For auditing to take effect, you must perform the next steps in this section.
-
Define Audit Groups.
You can audit a table or Oracle ID by defining an audit group, which can consist of one or more tables. To create an Audit Group and assign specific tables and columns, perform the following:
-
Navigate to Security > Audit Trail > Groups to create audit groups and set tables to be audited. Set audit group to Enabled Requested.
-
Identify the tables you want to audit or tables owned by an Oracle ID selected for auditing in the previous step, Define Audit Installations. See Tables to Audit with Audit Trail for a list of recommended tables to consider auditing.
Audit Groups Window
-
Audit Groups block - Identify your audit group and enable or disable auditing for this group.
-
Application Name - Select the name of an application to associate with your audit group. The combination of application name and group name uniquely identifies your audit group. An audit group may be used to audit tables in additional applications.
-
Audit Group - Enter the name of the audit group.
-
Group State - Choose Enable Requested if you are defining a new audit group. When you run the Audit Trail Update Tables report, the concurrent program creates database triggers for the tables in your audit group. Once you have run the program, this field displays Enabled for audit groups where Audit Trail is active.
-
Important: All primary key columns in each table in an audit group are automatically selected for auditing, whether or not you use the Audit Tables window to select which columns you wish to audit.
-
-
Activate Audit Trail.
Your Audit Trail definitions (and auditing) do not go into effect until you run the Audit Trail Update Tables Report. If you change any of your definitions later, you must rerun this program. Submit the Audit Trail Update Tables concurrent request from the standard submission (Submit Reports) form.
Audit Trail Shadow Tables, Triggers, and View
Upon execution, the Audit Trail Update Table concurrent request performs the following tasks:
-
Creates shadow tables, one for each audited table, to contain the audit information.
-
Creates database triggers on the tables in your audit groups for your installations.
-
Creates two views for each column with the names _AC# and _AV# where # is a sequential number.
Each of these tasks is described in detail in the following sections.
Shadow Tables
The shadow table is automatically created in the same Oracle ID as the audited table. The shadow table name contains the first 24 characters of the audited table name plus "_A" (Audit). For example, the Audit Trail shadow table is named as follows: Audit Trail shadow table name = <table_name>_A
The shadow table contains only the columns to be audited, and all columns in the shadow table are unconstrained, regardless of their status in the table to be audited. For example, NULLs are always permitted in the shadow table. All columns in the shadow table have the same data types and sizes as their counterparts in the audited table.
All Audit Trail shadow tables contain certain special auditing columns. These columns include:
-
AUDIT_USER_NAME (the Application User ID, except when changes are applied using SQL*Plus, in which case it is the Oracle ID).
-
AUDIT_TIMESTAMP (the date/time when the insertion occurred).
-
AUDIT_TRANSACTION_TYPE (I for Insert, U for Update, D for Delete, L for Last, and C for Current).
-
AUDIT_TRUE_NULLS (VARCHAR2(250) column containing a delimited list of column names that have changed from NULL).
-
The primary key for the table. This is not a special column, but rather all the columns comprising the primary key of the audited table. Note that, by convention, all audited columns are stored when a row is deleted. Likewise, an insert results in a row of NULL values in the shadow table. Changes to the primary key are marked as deletes, but new primary key values are inserted also.
For example, suppose you have the following table:
SQL> DESCRIBE AUDIT_DEMO

 NAME            NULL?    TYPE
 --------------- -------- ----
 PRIMARY_KEY              NUMBER(5)
 VALUE_ONE                VARCHAR2(5)
 VALUE_TWO                VARCHAR2(5)
 VALUE_THRE               VARCHAR2(5)
Its shadow table is as the following (assuming you audit all your table columns):
SQL> DESCRIBE AUDIT_DEMO_A

NAME                      NULL?       TYPE
----------------------    --------    ----
AUDIT_TIMESTAMP           NOT NULL    DATE
AUDIT_TRANSACTION_TYPE    NOT NULL    VARCHAR2(1)
AUDIT_USER_NAME           NOT NULL    VARCHAR2(100)
AUDIT_TRUE_NULLS                      VARCHAR2(250)
AUDIT_SESSION_ID          NOT NULL    NUMBER
AUDIT_SEQUENCE_ID         NOT NULL    NUMBER
AUDIT_COMMIT_ID           NOT NULL    NUMBER
PRIMARY_KEY                           NUMBER
VALUE_ONE                             VARCHAR2(5)
VALUE_TWO                             VARCHAR2(5)
VALUE_THREE                           VARCHAR2(5)
Database Triggers
When auditing is enabled, the automatically-generated database trigger in the "After" event on the audited table performs the auditing. The trigger calls a stored procedure to compare each column being audited to see if its value is changing. If so, the procedure saves the previous (old) value to the shadow table.
Auditing creates one row in the shadow table for each audited transaction against the table; thus, a single row in the shadow table represents all old values for all changed columns on that transaction.
The data is not compressed, since a table uses only one byte for a NULL, and Audit Trail represents all unchanged values as NULLs in the shadow table ("sparse" format).
The audit trigger names contain the first 24 characters of the audited table name plus "_AI," "_AU," or "_AD," where one of I, U or D indicates Insert, Update or Delete, respectively. Likewise, the audit procedure names use the first 24 characters of the table name plus "_AIP," "_AUP," or "_ADP." Your table names must be unique within the first 24 characters.
For example, the Audit Trail triggers are named as follows:
Audit Trail Update Trigger name = <table_name>_AU
Audit Trail Insert Trigger= <table_name>_AI
Audit Trail Insert Trigger= <table_name>_AD
Two Views for Each Column
After a shadow table is created, views onto the shadow table are created to allow easier access to the data in the "sparse" rows. These views simplify tasks such as querying a row/column's value on a given date and tracking changes to a row/column over time.
The view name contains the first 24 characters of the audited table name plus "_AC#" or "_AV#" where C or V indicates the type of view and # indicates a number. Due to limitations in creation size, the shadow table columns may need to be broken into multiple views, which are numbered sequentially.
For example, the Audit Trail views are named as follows:
Changes View = <table name>_AV#
Complete View = <table name>_AC#
Each view allows slightly different access to the data. One allows the user to reconstruct the value for a row at a given time (_AC), while the other provides simple access to when a value was changed (_AV).
For our example table, the _AV1 and _AC1 views are created as follows:
SQL> DESCRIBE AUDIT_DEMO_AV1

NAME                         NULL? TYPE
---------------------------  ----- ----
PRIMARY_KEY                        NUMBER
AUDIT_TIMESTAMP                    DATE
AUDIT_SEQUENCE_ID                  NUMBER
AUDIT_SESSION_ID                   NUMBER
AUDIT_TRANSACTION_TYPE             VARCHAR2(1)
AUDIT_USER_NAME                    VARCHAR2(100)
VALUE_ONE                          VARCHAR2(5)
VALUE_TWO                          VARCHAR2(5)
VALUE_THREE                        VARCHAR2(5)

SQL> DESCRIBE AUDIT_DEMO_AC1

NAME                         NULL? TYPE
---------------------------  ----- ----
PRIMARY_KEY                        NUMBER
AUDIT_TIMESTAMP                    DATE
AUDIT_SEQUENCE_ID                  NUMBER
AUDIT_SESSION_ID                   NUMBER
AUDIT_TRANSACTION_TYPE             VARCHAR2(1)
AUDIT_USER_NAME                    VARCHAR2(100)
AUDIT_COMMIT_ID                    NUMBER
VALUE_ONE                          VARCHAR2(5)
VALUE_TWO                          VARCHAR2(5)
VALUE_THREE                        VARCHAR2(5)
Purging Audit Trail Records
Purge the audit trail information on a regular basis. Prior to purging, disable the Audit Trail. Use the following procedure to purge audit data:
-
As System Administrator, select Security > Audit Trail > Groups.
-
Select the Security Audit group and set the group state to Disable - Purge Table.
-
Run the Audit Trail Update Tables Report.
-
Purge the data from the shadow table.
-
Select Security > Audit Trail > Groups.
-
Select the Security Audit group and set the group state to Enable.
-
Run the Audit Trail Update Tables Report.
Disabling an Enabled Audit Trail
You may disable auditing at any time. When you disable auditing, you should do the following procedure:
-
Stop auditing new transactions.
Disable auditing using either "Disable - Prepare for Archive" or "Disable - Interrupt Audit" and running the Audit Trail Update Tables report.
Variable Descriptions Variable Description Disable - Prepare for Archive Copies the current values of all rows in the audited table into the shadow table, and then disables the auditing triggers. This option requires the most space, since there is at least one row in the shadow table for every row in the audited table (and another row in the shadow table for each transaction on the original row in the audited table). You should then archive the table before you empty the shadow table. Disable - Interrupt Audit Modifies the triggers to store one final row in the shadow table as the audited row is modified in the audit table (remember that a given row in the shadow table represents the data in the audited row before an update). Inserts or further changes are no longer audited. The shadow table then grows slowly, and the data may be accessed by the existing audit views. Disable - Purge Table Drops the auditing triggers and views and deletes all data from the shadow table. -
Archive your audit data.
You should archive the information in the shadow tables according to your business needs.
-
Clean out the shadow table.
Before you restart auditing, you should clean out the shadow table. If there were transactions during the time auditing was disabled, and you did not clean out the shadow table, the data in the shadow table would be invalid because it would have a gap where transactions were not recorded. You purge the shadow table(s) by setting the audit group to Disable - Purge Table and running the Audit Trail Update Tables report.
Variable Descriptions Variable Description Disable - Purge Table Drops the auditing triggers and views and deletes all data from the shadow table.
Restarting an Audit
If desired, you can restart auditing by setting the audit group to Enable Requested and running the Audit Trail Update Tables report again.
Important: If you disable using Disable Purge Table and then re-enable auditing for a table, Audit Trail flushes the contents of the shadow table when auditing is re-enabled. You should archive any shadow table data that you want to keep before you re-enable auditing.
Tables
Tables to Audit with Audit Trail
When enabling Audit Trail, you should consider auditing tables that control Oracle E-Business Suite system security. The following is a list of tables you should consider auditing:
-
ALR_ALERTS
-
FND_AUDIT_COLUMNS
-
FND_AUDIT_GROUPS
-
FND_AUDIT_SCHEMAS
-
FND_AUDIT_TABLES
-
FND_CONCURRENT_PROGRAMS
-
FND_DATA_GROUPS
-
FND_DATA_GROUP_UNITS
-
FND_ENABLED_PLSQL
-
FND_FLEX_VALIDATION
-
FND_FORM
-
FND_FORM_FUNCTIONS
-
FND_GRANTS
-
FND_MENUS
-
FND_MENU_ENTIRES
-
FND_ORACLE_USERID
-
FND_PROFILE_OPTIONS
-
FND_PROFILE_OPTION_VALUES
-
FND_REQUEST_GROUPS
-
FND_REQUEST_GROUP_UNITS
-
FND_RESP_FUNCTIONS
-
FND_USER_RESP_GROUPS
How Data Appears in Tables and View
Here is an example of how data appears in your original table, your shadow table, and your audit views after a series of changes (starting with an empty AUDIT_DEMO table).
SQL> INSERT INTO AUDIT_DEMO VALUES (1,'A','A','A');
SQL> INSERT INTO AUDIT_DEMO VALUES (2,'X','X','X');
SQL> SELECT PRIMARY_KEY KEY, VALUE_ONE VAL_1,
     VALUE_TWO VAL_2, VALUE_THREE VAL_3 FROM AUDIT_DEMO;

 KEY VAL_1 VAL_2 VAL_3
---- ----- ----- -----
   1 A     A     A
   2 X     X     X

SQL> UPDATE AUDIT_DEMO SET VALUE_ONE ='B'
     WHERE PRIMARY_KEY = 1;

 KEY VAL_1 VAL_2 VAL_3
---- ----- ----- -----
   1 B     A     A
   2 X     X     X

SQL> UPDATE AUDIT_DEMO SET VALUE_TWO ='B'
     WHERE PRIMARY_KEY = 1;

 KEY VAL_1 VAL_2 VAL_3
---- ----- ----- -----
   1 B     B     A
   2 X     X     X

SQL> UPDATE AUDIT_DEMO SET VALUE_THREE ='B'
     WHERE PRIMARY_KEY = 1;
SQL> UPDATE AUDIT_DEMO SET VALUE_ONE ='Y'
     WHERE PRIMARY_KEY = 2;
SQL> UPDATE AUDIT_DEMO SET VALUE_ONE = NULL
     WHERE PRIMARY_KEY = 1;
SQL> UPDATE AUDIT_DEMO SET VALUE_ONE ='C'
     WHERE PRIMARY_KEY = 1;
After our two inserts and six updates, the final values in the audited table are:
 KEY VAL_1 VAL_2 VAL_3
---- ----- ----- -----
   1 C     B     B
   2 Y     X     X
The final values in the corresponding shadow table are as follows. A row in the shadow table represents the state of the audited row before the audited row was changed. Note that if a value in a row doesn't change during the transaction, the shadow table records a null for that value in that transaction.
In our example, the first two rows in the shadow table represent the state where there was no data for our two audited rows before they were inserted. The "prior values" are null values for the two insert transaction (type I) rows. Similarly, when we update the first value of row 1 to be the value B instead of A, the shadow table records the value A in its third row:
SQL> SELECT TO_CHAR(AUDIT_TIMESTAMP, 'HH24:MI:SS') TIME,
     AUDIT_TRANSACTION_TYPE TYPE, AUDIT_USER_NAME NAME,
     PRIMARY_KEY KEY, VALUE_ONE VAL_1, VALUE_TWO VAL_2,
     VALUE_THREE VAL_3, AUDIT_TRUE_NULLS FROM AUDIT_DEMO_A;

TIME     TYPE NAME    KEY VAL_1 VAL_2 VAL_3 AUDIT_TRUE_NULLS
-------- ---- ------ ---- ----- ----- ----- ----------------
11:08:16 I    FND60     1
11:08:40 I    FND60     2
11:18:40 U    FND60     1 A
11:20:12 U    FND60     1       A
11:21:54 U    FND60     1             A
11:22:15 U    FND60     2 X
14:20:50 U    FND60     1 B
14:21:15 U    FND60     1                   NYNN

8 rows selected.
Given the current values of the row in the audited table, you can trace the changes made to the row by backing up through the corresponding rows in the shadow table.
In our example table, we made two insert and six update transactions, so we see those eight transactions in our shadow table. In the last row, the NYNN indicates that the value in the second table column (VALUE_ONE) has changed from an actual null value (the Y) rather than being an unchanged value (represented by null in the shadow table).
The following two views provide further ways of examining your audited data.
The rows with a transaction type of C in the view indicate the current value of the row when the data was selected (the view is a join between the shadow table and the audited table, so the current value row reflects the current state of the audited table).
The _AC view provides a "filled-in" version of the data, where unchanged values appear instead of being represented by null values. You can order this view by the primary key (rather than by timestamp), so all rows in the shadow table that correspond to a single audited row appear together, with a secondary ordering by timestamp.
SQL> SELECT TO_CHAR(AUDIT_TIMESTAMP, 'HH24:MI:SS') TIME,
     AUDIT_TRANSACTION_TYPE TYPE, AUDIT_USER_NAME NAME,
     PRIMARY_KEY KEY, VALUE_ONE VAL_1, VALUE_TWO VAL_2,
     VALUE_THREE VAL_3 FROM AUDIT_DEMO_AC1
     ORDER BY PRIMARY_KEY, AUDIT_TIMESTAMP;

TIME     TYPE NAME        KEY VAL_1 VAL_2 VAL_3
-------- ---- ---------- ---- ----- ----- -----
11:08:16 I    FND60         1 A     A     A
11:18:40 U    FND60         1 B     A     A
11:20:12 U    FND60         1 B     B     A
11:21:54 U    FND60         1 B     B     B
14:20:50 U    FND60         1       B     B
14:21:15 U    FND60         1 C     B     B
17:53:34 C                  1 C     B     B
11:08:40 I    FND60         2 X     X     X
11:22:15 U    FND60         2 Y     X     X
17:53:34 C                  2 Y     X     X

10 rows selected.
Important: If the changes to your audited table occur faster than one change per second (that is, more frequently than the one-second granularity provided by SYSDATE), you may see "blurring" of records (i.e. more than one record per transaction) in the _AC view, because of joins used in this view. However, the shadow table itself remains correct, and you can resolve the relevant transactions by referring to the shadow table directly.
The _AV1 view provides a more sparse view of the audit data, ordered by timestamp:
SQL> SELECT TO_CHAR(AUDIT_TIMESTAMP, 'HH24:MI:SS') TIME,
     AUDIT_TRANSACTION_TYPE TYPE, AUDIT_USER_NAME NAME,
     PRIMARY_KEY KEY, VALUE_ONE VAL_1, VALUE_TWO VAL_2,
     VALUE_THREE VAL_3, AUDIT_TRUE_NULLS
     FROM AUDIT_DEMO_AV1;

TIME     TYPE NAME    KEY VAL_1 VAL_2 VAL_3 AUDIT_TRUE_NULLS
-------- ---- ------ ---- ----- ----- ----- ----------------
11:08:16 I    FND60     1
11:08:40 I    FND60     2
11:18:40 U    FND60     1 A
11:20:12 U    FND60     1       A
11:21:54 U    FND60     1             A
11:22:15 U    FND60     2 X
14:20:50 U    FND60     1 B
14:21:15 U    FND60     1                   NYNN
17:58:31 C              1 C     B     B
17:58:31 C              2 Y     X     X

10 rows selected.
Here is an example of how you might use a view to determine who changed a particular value and when:
SQL> SELECT TO_CHAR(AUDIT_TIMESTAMP, 'HH24:MI:SS') TIME,
     AUDIT_TRANSACTION_TYPE TYPE, AUDIT_USER_NAME NAME
     FROM AUDIT_DEMO_AV1
     WHERE PRIMARY_KEY = 1
     AND VALUE_ONE = 'B';

TIME     TYPE NAME
-------- ---- ------
14:20:50 U    FND60
Similarly, you might want to determine who changed a value to null and when:
SQL> SELECT TO_CHAR(AUDIT_TIMESTAMP, 'HH24:MI:SS') TIME,
     AUDIT_TRANSACTION_TYPE TYPE, AUDIT_USER_NAME NAME
     FROM AUDIT_DEMO_AV1
     WHERE PRIMARY_KEY = 1
     AND VALUE_ONE  IS NULL
     AND SUBSTR(AUDIT_TRUE_NULLS,2,1) = 'Y';

TIME     TYPE NAME
-------- ---- ------
14:21:15 U    FND60
Reporting on Audit Data
Audit Trail reports are not provided with Oracle E-Business Suite. You may write audit reports as needed using SQL. Audit Trail provides the views of your shadow tables to make audit reporting easier; you can write your reports to use these views.
You may want to create one or more indexes to your shadow table to speed up your reporting. However, such indexes decrease performance during actual auditing of transactions, so you should drop your indexes from the shadow table when you have finished reporting. Another alternative is to move audit data to an operational data store for reporting purposes.
Implications of Upgrading an Audit Trail
Important: Because the structure of the audited table may change between product versions, Audit Trail does not support upgrading existing shadow tables or audited data. Before an upgrade, you should archive the shadow tables and perform all necessary reporting on the audited data.
Auditing database row changes is performance intensive. Limit auditing to non-transactional data. Auditing transactional data may cause significant performance degradation. Tables with more than a few changes an hour should not be considered for row level auditing. Plan and consult with a DBA before enabling Audit Trails.
Disabling Audit Trail
To disable auditing for a group, choose one of the following options and then run the Audit Trail Update Tables report to have your changes take effect.
| Variable | Description |
|---|---|
| Disable - Prepare for Archive | Copies the current values of all rows in the audited table into the shadow table, and then disables the auditing triggers. This option requires the most space, since there is at least one row in the shadow table for every row in the audited table (and another row in the shadow table for each transaction on the original row in the audited table). You should then archive the table before you empty the shadow table. |
| Disable - Interrupt Audit | Modifies the triggers to store one final row in the shadow table as the audited row is modified in the audit table (remember that a given row in the shadow table represents the data in the audited row before an update). Inserts or further changes are no longer audited. The shadow table then grows slowly, and the data may be accessed by the existing audit views. |
| Disable - Purge Table | Drops the auditing triggers and views and deletes all data from the shadow table. |
Audit Tables Window
Additional Audit Trail Reporting
This section describes how to set up and manage Audit Trail Reporting functions that are used within OPM.
The following topics are covered:
-
Audit Industry Template
-
Audit Hierarchy Navigator
-
Audit Query Navigator
-
Running the Audit Report
Audit Industry Template
This window defines the Audit Industry templates. These templates facilitate binding of the required Audit groups together for easy querying and inquiries.
Before using this window, perform the following:
-
Define Audit Tables and Audit columns using Oracle Application Audit under the System Administrator responsibility
-
Define Audit Groups using Oracle Application Audit under the System Administrator responsibility
Audit Industry Template Procedure
Use this procedure in completing the Industry Template.
-
Navigate to the Industry Template window.
-
Complete the fields as described.
-
Save your changes.
Audit Industry Template Fields
The following are the fields found in the Audit Industry templates.
| Field | Description |
|---|---|
| Template Name | The name of the desired Audit Template |
| Functional Areas | Functional Group - Enter the functional group associated with this template. This is the same as the Audit Group field on the Audit Group window in System Administration. |
Audit Hierarchy Navigator
Auditing Navigation
In addition to the standard menu and tool bar, a navigator tree provides a hierarchical display of the objects in a treelike framework.
Nodes and Leaves
The higher level nodes in the navigator tree include windows and database objects. All other nodes, and the objects they contain, are indented to indicate that they belong to these higher level nodes. The terminal node is a leaf.
On the Hierarchy Navigator, the highest level is the Audit Template. The next level is the Audit Group (Functional Group), then the audit table, and finally, the columns being audited.
On the Query Navigator, the highest level is the Audit Group (Functional Group). The next level is the audit table, and below the audit table are the actual data being audited.
Using the Audit Hierarchy Editor
You can navigate to find what has been set up for auditing. This functionality is accomplished by a tree navigator that starts with the Industry template and drill down to groups, tables, and columns. The navigator lets you see a drill-down view of what columns are being audited. A search facility on the tree is provided to search a table or column.
The navigator fetches the data from the audit table to construct the tree, and relies on the Oracle E-Business Suite Object Library table, column registration and uses USER_TABLE_NAME and USER_COLUMN_NAME fields from the FND_TABLES and FND_COLUMNS, respectively.
Before using this window, perform the following:
-
Define Audit Tables and Audit columns using the Oracle Application Audit under the System Administrator responsibility
-
Define Audit Groups using Oracle Application Audit under the System Administrator responsibility
-
Define Industry Audit Templates under the OPM System Administrator responsibility
-
Enable Audit Trail, a concurrent process under the System Administrator responsibility
Audit Hierarchy Navigation Procedures
Navigate to the Audit Hierarchy window.
To view table information:
-
Use the tree navigator to view the table names.
-
Select the table name and right-click to display the pop-up menu.
-
Select Display Columns. The Define Query Navigator Display for the Table window appears.
To use the Find Audit Hierarchy function:
-
Use the tree navigator to view the column names.
-
Select the column name and right-click to display the pop-up menu.
-
Select Find. The Find Audit Hierarchy window displays.
-
Select criteria and click Find. A list of templates displays. You can save these as a new audit.
Audit Query Navigator
This interactive query window lets you investigate the changes to any functional group interactively, using a visual approach that is similar to Windows Explorer. When a particular node in the left frame is selected, audit trail details are displayed in the right frame. The right frame shows all columns set for auditing. This information is retrieved from the FND_AUDIT_COLUMNS table. The left tree is linked to the right frame with the primary key combination of the table.
Auditing Navigation
In addition to the standard menu and tool bar, a navigator tree provides a hierarchical display of the objects in a treelike framework.
Nodes and Leaves
The higher level nodes in the navigator tree include windows and database objects. All other nodes, and the objects they contain, are indented to indicate that they belong to these higher level nodes. The terminal node is a leaf.
On the Hierarchy Navigator, the highest level is the Audit Template. The next level is the Audit Group (Functional Group), then the audit table, and finally the columns being audited.
On the Query Navigator, the highest level is the Audit Group (Functional Group). The next level is the audit table, and below the audit table are the actual data being audited.
Before using this window, perform the following:
-
Define Audit Tables and Audit columns using the Oracle Application Audit under the System Administrator responsibility.
-
Define Audit Groups using Oracle Application Audit under the System Administrator responsibility.
-
Define Industry Audit Templates under the OPM System Administrator responsibility.
-
Define the display look up using the Audit Hierarchy Navigator (Admin Mode). This setup step is not mandatory.
-
Enable Audit Trail, a concurrent process under the System Administrator responsibility.
Audit Query Navigation Procedures
Navigate to the Audit Query window.
To use the Find Functional Groups function:
-
Use the tree navigator to view the tables names.
-
Select the table name and right-click to display the pop-up menu.
-
Select Find. The Find Function Groups window displays.
-
Select criteria and click Find. A list of templates displays. You can save these as a new audit.
To view the Audit Results window:
-
Use the tree navigator to view the column names.
-
Select a column name. The Audit Results window automatically displays.
-
Use the Horizontal View and Vertical View buttons to toggle between the two views.
In the horizontal view, you see the first ten auditing columns. In the vertical view, the column number is unlimited and can be viewed using the scroll bar.
Audit Report
In situations where comprehensive documentation is needed (such as to support legal or regulatory requirements), a single report request resulting in a single comprehensive report is desirable. This report can then be printed, sent by email, or archived.
Since this report could involve a considerable amount of data, a detailed parameter screen is available, allowing you to select only the items of interest.
Submitting the Report
-
Navigate to the Audit Report window. The Enter Report Parameters window is displayed.
-
Select the functional group, or a functional group and audit table name.
-
Complete the optional fields as necessary.
-
Click Select Columns. The Select Reporting Columns window is displayed.
-
Enter at least one column to run the report. The columns displayed are based on the functional group, or a functional group and audit table name criteria selected on the Enter Report Parameters window.
-
Select Print Options. The Select Printing Options window is displayed.
-
Enter the necessary print information.
-
Click OK.
-
Run the report by selecting Run Report.
Enter Report Parameters Field Reference
| Field | Description |
|---|---|
| Functional Group | Specify the name of the functional group for the report. This is the same as the Audit Group field on the Audit Group window in System Administration. |
| Audit Table Name | Optional. Specify the table name from the functional group for the report. |
| Transacted By | Optional. Specify the user who is requesting the report. |
| Transaction Type | Optional. Specify the type of transaction. |
| From Date | Optional. Specify the beginning date for the date range the report will run. |
| To Date | Optional. Specify the end date for the date range the report will run. |
Monitor Users Window
Use this window to monitor what your application users are currently doing.
Monitor Users Window
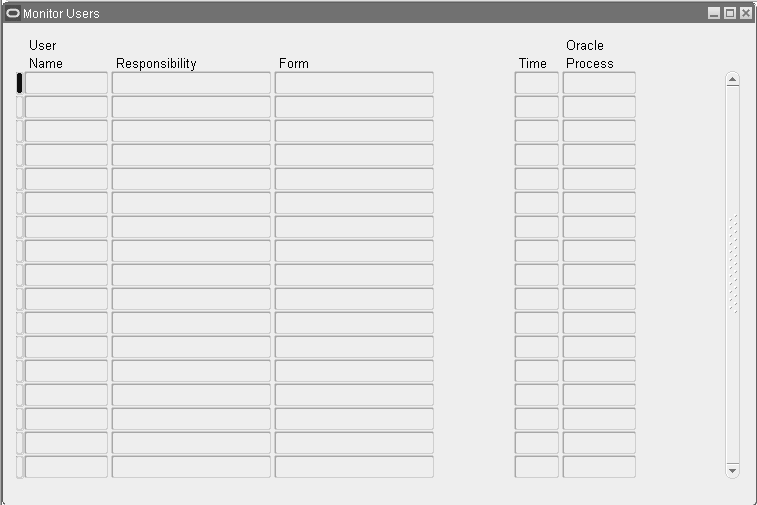
As well as seeing which users are signed on, you can see:
-
Which responsibilities and forms (windows) they are using.
-
How long they have been logged in.
-
What Oracle database processes they are using.
-
The client server's IP address.
In addition, you can monitor all users at a site, all users accessing a specific application, or a specific responsibility, or individual users.
Note: You can only monitor those users for whom you have activated Sign-On Audit. See: Enabling Sign-On Audit.
Before using this form, select a value for the Sign-On:Audit Level profile option, using the Update System Profile Options Window.
To access, navigate to System Administration, and then User Monitor.
| Field | Description |
|---|---|
| User Name | The user's login name. |
| Responsibility | The user's responsibility only appears if you have enabled Sign-On Audit at either the Responsibility or Form audit level. |
| Form | The user's form only appears if you have enabled Sign-On Audit at the Form audit level. |
| Time | The length of time the user has been logged on to this application. |
| Process | The ORACLE process of the user. |
| Client IP Address | The IP address of the client server. |
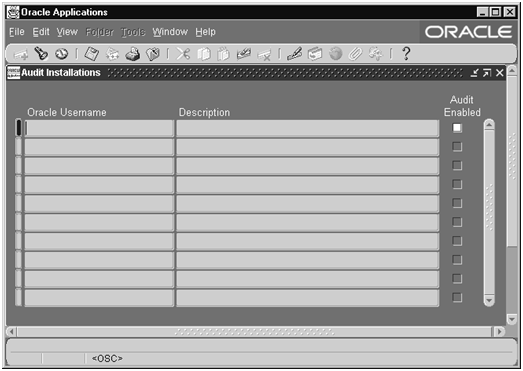
Audit Installations Window
Use this window to enable Audit Trail for an Oracle database user name at your installation. Such a user name grants access privileges to an application's tables and database objects.
Audit Installations Window
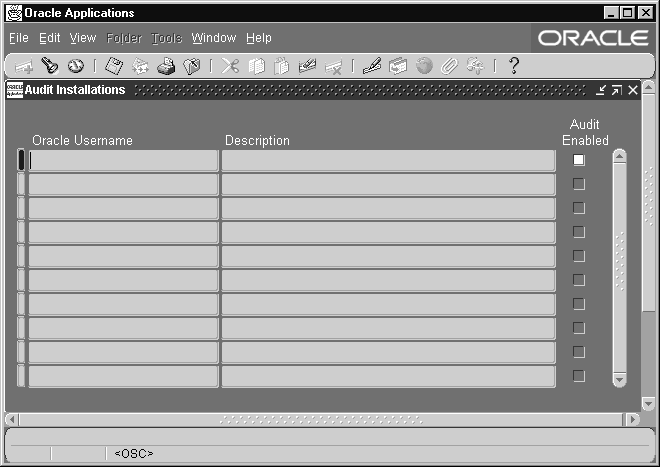
For auditing to take effect, you must also define one or more audit groups and run the Audit Trail Update Tables report. See: Reporting on Audit Trail Data.
Before using this form, ensure that the desired Oracle user name is registered. The installation process automatically registers Oracle E-Business Suite Oracle user names, but if you create a custom application, you should follow the instructions in My Oracle Support article KB858105, Creating a Custom Application in Oracle E-Business Suite Release 12.2, for Oracle user names for custom applications.
| Element | Description |
|---|---|
| Oracle Username | Select the Oracle user name that owns the tables you wish to audit. |
| Audit Enabled | Select the Audit Enabled checkbox to enable Audit Trail for an Oracle user name. Before auditing takes effect, you must define one or more audit groups and run the Audit Trail Update Tables report. |
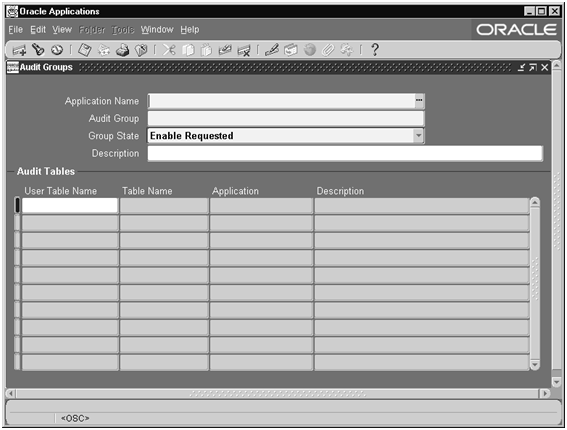
Audit Groups Window
Use this window to select the tables that you wish to audit. You audit a table by defining an audit group, which can consist of one or more tables.
Audit Groups Window
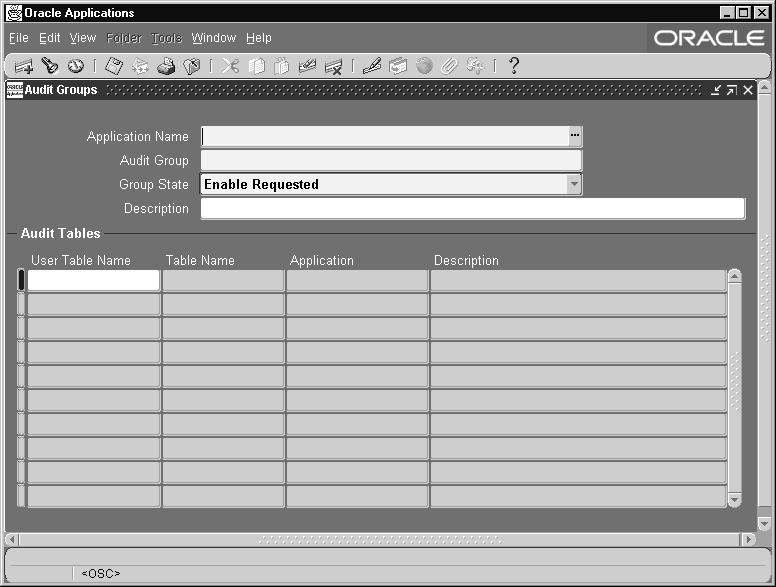
First, identify the tables you want to audit. Then, using the Audit Tables window, select which columns in each table you wish to audit. Or, select which columns in a particular table you wish to audit (using the Audit Tables window), then define your audit group (using this window).
To enable or disable auditing for the tables in your audit group, run the Audit Trail Update Tables program using the Submit Requests window. If you change the definition or audit state of your group later, you must rerun this program.
Before defining your audit groups, make sure you have defined an audit installation using the Audit Installations window.
Note: Your tables and their primary key information must already be registered and defined for successful auditing. If the table you want to audit is a custom table (not shipped as part of Oracle E-Business Suite), you should also perform the following two steps:
-
Register your table and its primary key columns using Oracle Application Object Library's Tables window (Application Developer Responsibility).
-
Run the Register Tables concurrent program from the Submit Requests window.
Audit Groups Block
Identify your audit group and enable or disable auditing for this group.
Application Name
Select the name of an application to associate with your audit group. The combination of application name and group name uniquely identifies your audit group. An audit group may be used to audit tables in additional applications.
Audit Group
Enter the name of the audit group.
Group State
Choose Enable Requested if you are defining a new audit group. When you run the Audit Trail Update Tables report, the concurrent program creates database triggers for the tables in your audit group. Once you have run the program, this field displays Enabled for audit groups where AuditTrail is active.
Important: All primary key columns in each table in an audit group are automatically selected for auditing, whether or not you use the Audit Tables window to select which columns you wish to audit.
To disable auditing for a group, choose one of the following options and then run the Audit Trail Update Tables report to have your changes take effect.
| Variable | Description |
|---|---|
| Disable - Prepare for Archive | Copies the current values of all rows in the audited table into the shadow table, and then disables the auditing triggers. This option requires the most space, since there is at least one row in the shadow table for every row in the audited table (and another row in the shadow table for each transaction on the original row in the audited table). You should then archive the table before you empty the shadow table. |
| Disable - Interrupt Audit | Modifies the triggers to store one final row in the shadow table as the audited row is modified in the audit table (remember that a given row in the shadow table represents the data in the audited row before an update). Inserts or further changes are no longer audited. The shadow table then grows slowly, and the data may be accessed by the existing audit views. |
| Disable - Purge Table | Drops the auditing triggers and views and deletes all data from the shadow table. |
Audit Tables Block
Identify the application tables you want to audit in your audit group.
User Table Name
Select the end user table name (frequently the same name as the table name) for your database table. Once you choose a table, you see its table name and associated application.
Table Name
This field displays the actual name for the table you have selected to include in your audit group.
Application
This field displays the application name for the table you have selected to include in your audit group.
Description
This field displays the description for the table you have selected to include in your audit group.
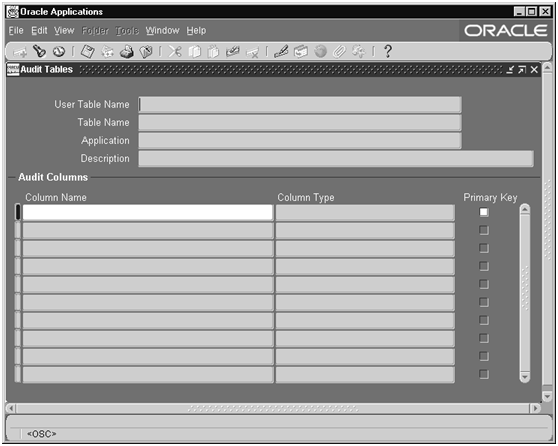
Audit Tables Window
Use this window to select which columns in a table you wish to audit.
Audit Tables Window
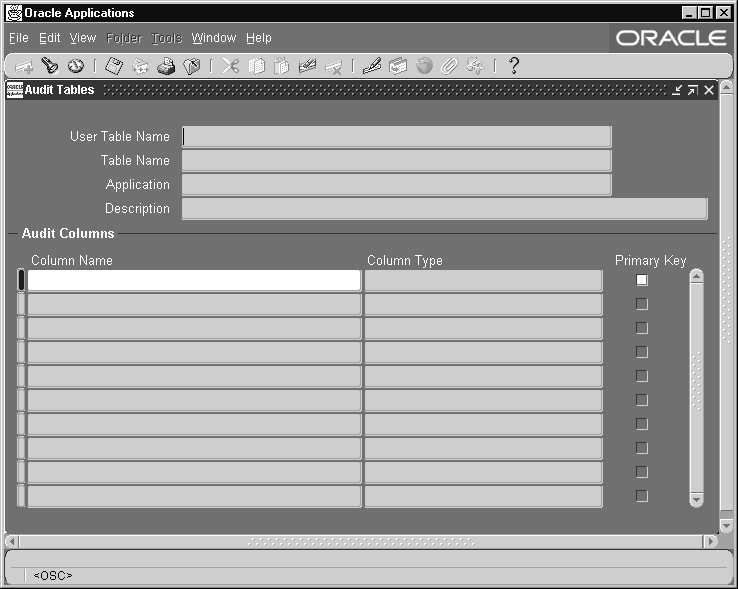
First, identify the columns in a table you want to audit. Then, using the Audit Groups window, include the table as part of an audit group. Or, you may define your audit group first (using the Audit Groups window), and then select which columns in the table you want to audit (using this window).
To enable or disable auditing for the tables in your audit group (i.e., the columns you have selected here), you must run the Audit Trail Update Tables program using the Submit Requests window. If you select additional columns to audit, or change the definition or audit state of your group later, you must rerun this program.
Before defining your audit tables, make sure that you have defined an audit installation using the Audit Installations window.
Important: Your tables and their primary key information must already be registered and defined for successful auditing. If the table you want to audit is a custom table (not shipped as part of Oracle E-Business Suite), you should also perform the following two steps:
-
Register your table and its primary key columns using Oracle Application Object Library's Table window (Application Developer Responsibility).
-
Run the Register Tables concurrent program from the Submit Requests window.
Define Audit Tables Block
Identify the application table you want to audit. Successively selecting Go - Next Record from the menu or toolbar displays, in alphabetical order, the name of each application table registered at your installation site.
User Table Name
Select the end user table name (frequently the same name as the table name) for your database table. Once you choose a table, you see its table name and associated application.
Table Name
This field displays the actual name for the table you have selected to include in your audit group.
Application
This field displays the application name for the table you have selected to include in your audit group.
Audit Columns Block
Select the columns you want to audit. Successively selecting Go - Next Record from the menu or toolbar displays, in alphabetical order, the name of each application table registered at your installation site.
-
You cannot delete a column from auditing once it has been selected.
-
You may add additional columns to be audited.
-
Each time you select a column to be audited, that change affects every audit group that includes the table which owns the column.
Column Name
Enter the name of the database column you want to audit. You should not explicitly enter the names of your table's primary key columns, since they are entered automatically, and you will get an error message if you try to save a duplicate column name. You can query to see which columns appear automatically.
Note that once you have chosen a column, you cannot delete it from the audit set, though you may add other columns to the set later.
Once you choose a column, you see its column type and whether it is part of the primary key for this table.
Column Type
This field describes the type of data the column stores, for example, varchar2.
Primary Key
This field displays Yes or No indicating whether the column you are auditing is a primary key column.
Any primary key columns you do not select to audit are automatically included when you save your column selections. For example, if the table you are auditing has two primary key columns, and you choose to audit one of them, the second primary key column is automatically selected when you save your column selections.
Audit Trail Search Pages
The Audit Trail Search pages allow you to query audit trail setup tables without launching the Forms-based Audit Trail windows.
You can navigate to these pages from the Auditing Manager responsibility. Choose Audit Trail Search from the menu.
Audit Trail Search Page
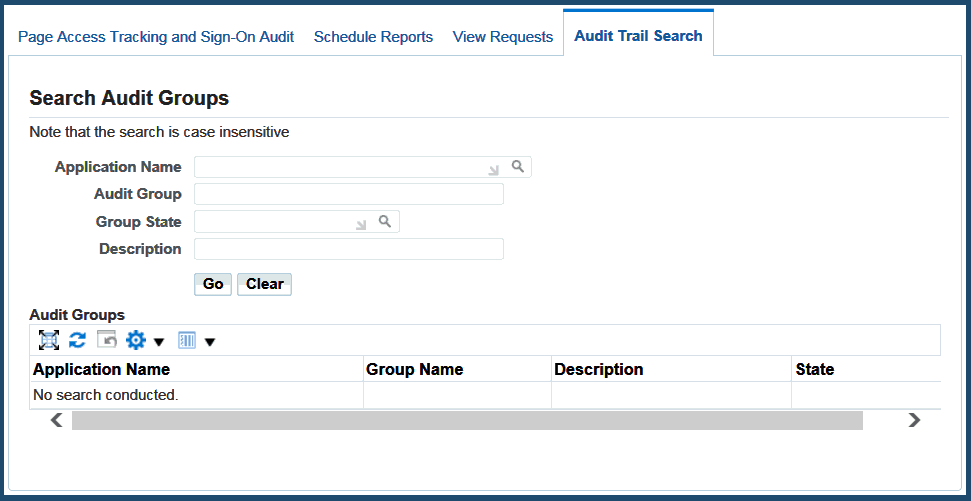
Search Audit Groups
You can search on any of the following criteria:
-
Application Name
-
Audit Group
-
Group State
-
Description
The search will retrieve the Master Record from the FND_AUDIT_GROUPS table; all audit groups that satisfy your search criteria will be returned.
In the Audit Groups search results table, the Group Name for each record is a link. This link allows you to get the rest of the details for the particular audit group.
Audit Group
This page lists the audit tables that are defined for the audit group. For each table, the following is shown:
-
User Table Name
-
Table Name (link)
-
Application Name
-
Description
Clicking on the Table Name link allows you to drill down for more information on that table.
Audit Table
This page lists the columns that are being audited for a particular table.
For each column, the Column Name and Column Type is listed.