Payroll Processing and Analysis
Post Processing for a Payroll
Post-Processing for a Payroll
PrePayments Process
Within Oracle Payroll the PrePayments process enables you to select a payment method to pay your employees. You can distribute employee pay over more than one method using either a percentage or monetary split.
You can override the PrePayments process. For example, suppose you have run the normal payroll run and made payments via one payment method. You then have to run supplementary payments for some employees and pay them by a different payment method. The PrePayments process, having distributed the regular payments over the payment methods entered, allocates the supplementary payments to the override method.
Payroll Submission Archive and Payroll Submission Report
Ireland Users Only: Use the Payroll Submission Archive and Payroll Submission reports to submit payroll information to Revenue. You can generate these reports based on prepayments. This is a two-step process and includes archiving and reporting. Archiving enables you to archive the payroll details and the payroll submission report process enables you to generate the report based on the archived details.
Cheque/Check Writer Process
Run the Cheque/Check Writer process to determine the generation of cheques/checks for a specified payroll and consolidation set over a specified time period.
You can generate contiguous serial numbers for cheque/check printing, and you can use this feature to account for cheque/check stationery used during the cheque/check printing process. If you do this, you also need to take into account the cheques/checks you use to carry out the alignment of your printer.
A sample cheque/check report is supplied with the Cheque/Check Writer process. You can customize this report, or add your own cheque/check style to meet your enterprise requirements.
Oracle Payroll provides automatic cheque/check numbering for the Check Writer process. You can keep track of cheque/check numbers when you process multiple cheques/checks per day.
Note: Your System Administrator can enable the HR: Default Check/Cheque Number Method profile which enables you to use the automatic check/cheque numbering process.
See User Profiles, Oracle HRMS Configuring, Reporting, and System Administration Guide
Void Cheque/Check Payments Process
Run the Void Cheque/Check Payments process when you want to void cheques/checks you have issued using Oracle Cheque/Check Writer. You may want to do this if there is a printing error or if the cheques/checks you print are afterwards lost. The process cancels the cheques/checks issued, records details of the cancellation, and enables you to give a reason for cancelling.
Check Writer - Override Payment Date Process
When you reissue a check after voiding it using the Void Check Payments process, the Check Writer process prints the check with the original Payment Date by default. Using the Override Check Date feature, you can replace the original check date with a check date of your choice. For reporting purposes, the Payment Register Report captures the replacement date from the reprinted check.
External/Manual Payments Process
Use the External/Manual Payments window to record cash or cheque/check payments to employees from external sources or petty cash. The window enables you to record details of each payment.
Overview of RetroPay Processing
Purpose of the RetroPay Process
Run the RetroPay process to ensure that your payroll run for the current period reflects any backdated payments or deductions. Backdated adjustments can occur when:
-
An employee receives a pay award that is backdated to a previous pay period.
-
The payroll department makes a retrospective correction for an error that occurred in a previous pay period
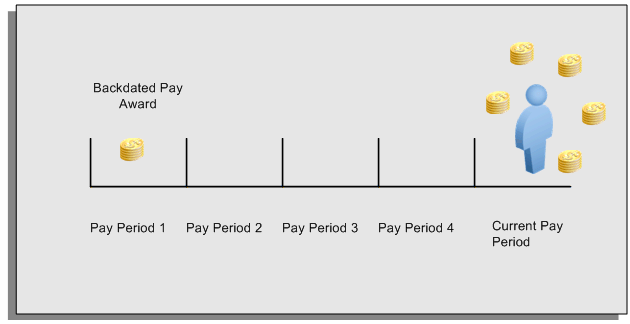
For example, at the start of the current pay period, this employee has a pay award backdated to pay period 1. The employee has not yet received any payments for this award. In the current pay period the employee is entitled to payments that represent the backdated amounts for:
-
Each of the preceding payroll periods (pay periods 1 to 4)
-
The current pay period
You run your RetroPay process to ensure that the employee receives correct payment when you next run the payroll.
Period Earned is Distinct from Period Paid
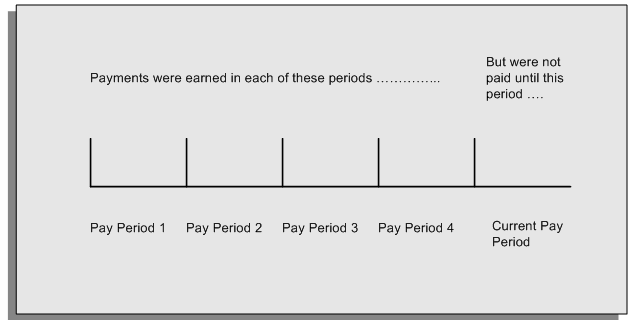
When backdated payments occur, the accuracy of your subsequent payroll processing depends on distinguishing between:
-
The period in which the payment was earned
-
The period in which the payment was made
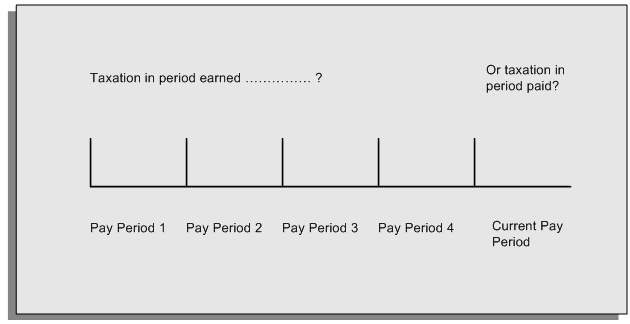
For example, the taxation implications are different for:
-
A pay award backdated to period 1 and not paid until the current period. You may want to tax this award in the current period.
-
A correction to an underpayment in period 3 which is paid to the employee in the current period. You may want to tax this correction in period 3 rather than in the current period.
The RetroPay Process Does Not Overwrite Your Historical Payment Records
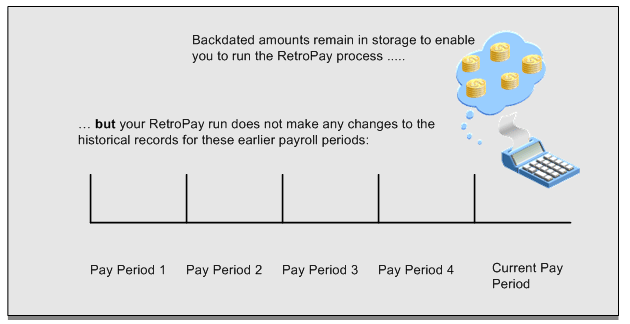
You never overwrite historical payroll data when you run RetroPay. Although you recalculate all periods that have retroactive changes whenever you run a RetroPay, you never modify the stored results for these periods. Instead, you create one or more RetroPay entries to receive the process results.
Think of the RetroPay process as a calculator holding results in memory so that it can process a final set of results. The RetroPay process uses your historical results to calculate the changes for the current period. The results for your current period change, but your historical records remain unchanged.
Process RetroPay with Overlapping Periods
The RetroPay process recalculates payroll runs, balance adjustments and reversals from a particular date onwards, the start date of the recalculations. When you have retroactive changes overlapping another retroactive change, the application resets the start date to the earliest start date of the RetroPay processes and recalculates.
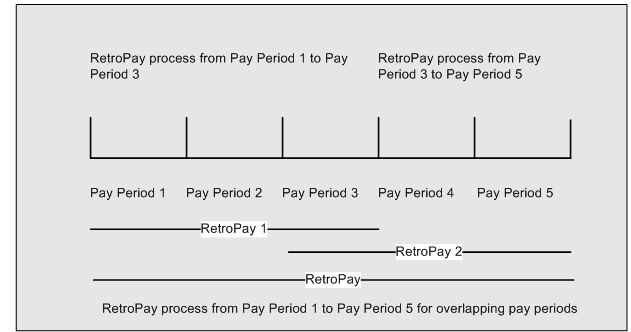
For example, you perform a RetroPay (RetroPay 1)for an assignment in period 3, with Payroll Runs being recalculated from a start date of period 1. In period 5, you perform another RetroPay (RetroPay 2) for the assignment with a start date of Period 3. The second RetroPay detects an overlap of RetroPays and sets the start date to the earliest start date.
In this case, the application sets the start date as Period 1. An overlapping override occurs to ensure that the balances are correct for the RetroPay process.
The processing of overlapping RetroPay results in an overall increase in time to process the RetroPay. If there are multiple overlaps, the increase in time is excessive.
Additional Information: RetroPay Overlap is not available by default for all localizations. To use this feature, localizations must need to enabled it.
For more information on RetroPay Overlap , refer to RetroPay Overlap - A Technical Brief, Note ID 842307.1 on My Oracle Support.
Process Retropay for Assignments with Negative Net or Insufficient Earnings (US and Canada)
To ensure that the Retropay process does not end with errors when there are assignments with Negative Net or Insufficient Earnings, Oracle US Payroll and Oracle Canada Payroll users can set the HR: Skip Negative Wage Check in Retropay profile option. See User Profiles, Oracle HRMS Configuring, Reporting, and System Administration Guide for more information.
RetroPay Standard and Replacement Methods
In the Netherlands there are two methods of RetroPay, the Standard method and the Replacement method. The Standard method is the default. However, some customers require an additional method of RetroPay calculation, referred to as the Replacement Method.
Please note that the retrospective components are Correction and Adjustment for the Standard method and Replacement for the Replacement method. The Correction component enables you calculate SI and tax deductions in the original, retrospective pay period and bring in all computed results to the current period. The Adjustment component enables you to bring in the difference in earnings due to retrospective processing to the current period and calculate the deductions in the current period.
Standard RetroPay
The standard RetroPay process depends on whether a retrospective change was made in the current or previous year.
When you make a retrospective change in the current year, the application reprocesses the payroll for the period the change occurred, calculating the tax deductions and SI contributions based on the tax and SI tables of the retrospective period. The changes to any earnings, deductions and other relevant values are carried forward to the current period.
When you make a retrospective change in the previous year, the application reprocesses the period the change occurred. The application only carries forward earnings changes to the current period, and calculates deductions in the current payroll run based on the current tax tables.
Replacement RetroPay
The alternative method, Replacement RetroPay, handles retrospective changes to earnings or tax/social insurance related information made in the current year, differently. Earnings changes in the previous year can be processed, but are treated the same as earnings changes in the current year.
Note: The input values Wage Limit and Basis Salary, for the Wage Tax Subsidy Education, must have the unit of measure set to Character to avoid their values being reversed during the running of the Replacement Method of Retropay.
There are two main differences when processing retrospective changes in the current period using the Replacement method. Those differences are as follows:
Key difference between Replacement and Standard RetroPay
When Oracle Payroll reprocesses the retro period, instead of bringing forward the changes to the current period, the run results are negated and brought forward to the current period as RetroPay entries. The new run results are brought forward as entries also.
| Original Run Results | New Run Results | RetroPay Entries |
| Salary: 1000 | Salary: 1200 | Salary 200 |
| Tax: 100 | Tax: 120 | Tax: 120 |
The above example shows a payroll period processed with a salary of 1000 Euros and a tax rate of 10%. If you then run RetroPay using the standard method, changing the salary to 1200 Euros, only the changes are posted as RetroPay entries.
| Original Run Results | New Run Results | RetroPay Entries |
| Salary: 1000 | Salary: 1200 | Salary: -1000 |
| Tax: 100 | Tax: 120 | Salary: 1200 |
| Tax: -100 | ||
| Tax: 120 |
If you run the RetroPay using the Replacement method, then the system negates the original run results and posts them as RetroPay entries. The system brings forward the new run results as entries.
Key difference between Replacement and Standard RetroPay
When reprocessing the retro period, Oracle Payroll uses the tax and SI values for the current payroll period, instead of the values for the retro period.
| January | February | March | April RetroPay Entries |
| Salary: 1000 (1200) | Salary: 1000 (1200) | Salary: 1000 (1200) | Retro Salary Jan: 200 |
| Tax: 100 | Tax: 100 | Tax: 100 | Retro Tax Jan: 20 |
| Rate: 10% | Rate: 10% | Rate: 10% | Retro Salary Feb: 200 |
| Retro Tax Feb: 20 | |||
| Retro Salary Mar: 200 | |||
| Retro Tax Mar: 20 |
The above example shows a payroll run for the periods January-March, with a salary of 1000 Euros. The tax rate for this period is 10%, but changes to 20% in April. If the current period is April, and you run a RetroPay from January using the Standard method, then Oracle Payroll uses the 10% tax rate when reprocessing the January-March period. If the retrospective change increased the salary to 1200 Euros, then the additional 200 Euros would result in an additional retrospective tax deduction of 20 Euros for each month, using the 10% rate.
| January | February | March | April Retropay Entries |
| Salary: 1000 (1200) | Salary: 1000 (1200) | Salary: 1000 (1200) | Retro Salary Jan: -1000 |
| Tax: 100 | Tax: 100 | Tax: 100 | Retro Salary Jan: 1200 |
| Rate: 10% | Rate: 10% | Rate: 10% | Retro Tax Jan: -10 |
| Retro Tax Jan: 240 | |||
| Retro Salary Feb: -1000 | |||
| Retro Salary Feb: 1200 | |||
| Retro Tax Feb: -100 | |||
| Retro Tax Feb: 240 | |||
| Retro Salary Mar: -1000 | |||
| Retro Salary Mar: 1200 | |||
| Retro Tax Mar: -100 | |||
| Retro Tax Mar: 240 |
If, however, the current period is still April, and you run a RetroPay from January using the Replacement method, Oracle Payroll uses the 20% tax rate, when reprocessing the January-March period. If the retrospective change increased the salary to 1200 Euros, then the additional 200 Euros would result in an additional retrospective tax deduction of 40 Euros for each month, using the 20% rate. The system negates the original run results using this method, which results in a new retrospective tax deduction of 140 Euros posted for each retro period to the current period.
Note: The Standard method of RetroPay suits most customers, however, you may have a requirement for the Replacement method. If so, it is up to you to select the appropriate method you require.
To select the method of RetroPay you require, see: Enabling the Method of RetroPay
For further information on how to override the Replacement RetroPay method, see: Business Groups: Entering Dutch Business Group Information
For further information on setting up RetroPay, see: To Set Up Enhanced RetroPay with Component Usages and Element Span Usages
The following information, when changed in the current year, affects Tax deductions or SI contributions:
-
Tax Code
-
Tax Reduction
-
Senior Tax Reduction
-
Additional Senior Tax Reduction
-
Beneficial Rule
-
30% Foreigner Rule and related dates
-
Last Years Salary
-
Special Rate Individual Percentage and related dates
-
Social Insurance (SI) Days
-
SI Information at SI Provider level: Basis Calculation Rule, Employee Contribution (%), Employer Contribution (%), Senior Employee Contribution (%), Senior Employer Contribution (%), Employee Threshold, Employer Threshold, Maximum Salary, Calculation Code, Day Method, Employer Contribution Taxable Income, Employee Contribution Gross or Net, Day Adjustment and Contribution Adjustment
-
Change of SI Provider for an employer
-
Assignment level SI Information: SI Classification, Insurance Provider, Status, SI Day Method, Day Adjustment, Contribution Adjustment, Overriding Day Method and Overriding Day Value
-
Assignment level private health insurance information: Employee Contribution, Employer Contribution, Unit of Contribution and Transfer Indicator.
-
Changes to information on another assignment where Oracle Payroll has a number of multiple assignments to aggregate.
-
Labour Tax Reduction
-
SI Information at employer level: Insurance Provider, Primary Provider and Transfer Indicator.
-
Override input values for SI days on the element Social Insurance
Important: Only earnings changes are recognized in the previous year.
RetroPay Windows
Setting Up Enhanced RetroPay with Component Usages and Element Time Spans
You can decide whether each retrospective payment requires:
A full reprocessing in which you recalculate all amounts for the current payroll. This option is typical when you are processing backdated payments, or when you want to deduct tax for backdated amounts in the period when it was earned, rather than in the current payroll period.
A limited reprocessing in which you recalculate only some of the amounts for the current payroll. This option is typical when you are processing corrections, or when you want to deduct tax for retrospective changes in the current payroll period rather than in the period when it was earned.
Components for RetroPay
Oracle Payroll describes each different type of RetroPay run as a component. You set up RetroPay component usages to define how RetroPay will process the component. For example, you could set up a component Earnings Correction for the element Basic Salary. A component always has:
-
A name (for example, Earnings Correction)
-
A reprocess type (Static, Partial, Reprocess) to determine how to process the component
Element Time Spans for RetroPay
For each of these components, you define an element time span to specify the start and end dates of the retro processing, and which RetroPay element applies for each time span. If you are creating RetroPay elements manually, you must follow the process given below to set up retro components and element spans to process RetroPay correctly.
Tip: Check if your Localization has components and time spans predefined that you can use to process retropay.
Additional Information: Check if your localization has any upgrade processes enabled if you are upgrading your current elements.
Setting Up Retropay Component Usages
Retropay component usages assign the components to the elements you created, ensuring all the elements recalculate with the latest values.
-
Query your defined element, in the Element window.
-
Select the Recalculation tab, and check the Retro Components button.
Note: South African users: Select the predefined ZA Statutory Updates event group from the list of values in the Recalculation Events field. Alternatively, you can create and attach an event group of your choice
-
In the Retropay Components region of the Retropay Element window, choose the component field, and an appropriate component from the list of values.
Note: Do not enable the Retro Component of the elements that are themselves being used to process retropay for another element.
-
Select the Reprocess Type. If you select Static, then Retropay will not process any changes to the element when running the relevant component. Opting for the Reprocess Type ensures the element changes process.
-
Save your work.
-
You can now enter the element time spans.
Setting Up Element Span Usages for Elements
The element time span usages defines the start and end dates for retropay processing. Most elements have the standard time span of Start of Current Year to End of Time already assigned, to cover any changes made in the current year. For each earnings element, or imputed earnings element with a defined retropay component usage, you must define two element span usages. These element span usages cover the earnings for both the current and the previous year, defining not only how far back processing should cover, but also up to where a particular retropay element carries forward the retro changes. You must define your retropay elements and components before defining the element time spans.
Set up the Element Span Usages in the Retropay Elements window.
-
Query your defined element in the Element window.
-
Select the Recalculation tab, and check the Retro Components button.
-
In the Retropay Elements region, select the appropriate time spans from the From and To fields, to define the time period the retropay element is covering.
-
Select the retropay elements you created from the Retropay Element field.
-
Save your work.
Setting Up the Adjustment Component of RetroPay
The Adjustment component of the RetroPay method enables you to bring in the difference in earnings due to retrospective processing to the current period and calculate the tax and social insurances in the current period. Ensure that you meet the following requirements to set up the Adjustment component for your payroll:
For elements that you need to process as Adjustment
-
You must enable both Adjustment and Correction components. Set the reprocess type of the Adjustment component to Reprocess and the default component to Yes. Also, set the reprocess type of the Correction component to Static.
-
Ensure that the RetroPay element has the same primary and secondary classifications as that of the element it represents.
-
To process the Adjustment component element as Correction, you must attach the RetroPay element to the Correction component. Also, the RetroPay element must have the classifications as in the current method. For example, if the source element has the classification of Earnings, the RetroPay element must have the classification of Retro Earnings.
In addition, if you have run the RetroPay Notification Report, the application would have created a record for the Adjustment component. You must override this record manually with Correction value using the RetroPay Status window.
-
If you intend to use the element for Correction processing often, ensure that the Correction component, instead of Adjustment, has the reprocess Type as Reprocess with the default set to Yes.
-
If you do not use the RetroPay Notification Report and create records manually using the RetroPay Status window, you must ensure that you add ALL elements that have retrospective changes.
Note: If you enter only the Adjustment component elements, RetroPay does not process the Correction component elements.
Changes to the Setup of ABP Pension Schemes
-
Employers report pension basis (or base) to ABP at the start of employment or in the month of January every year. The application derives pension basis from various Earnings elements. Usually, you might not encounter any changes to the salary or the Earnings element. However, if you need to change the pension salary and in turn the pension basis, you must do it manually and process these changes as Correction.
-
If the Earnings element does not affect pension salary, you can process the element either as Adjustment or Correction.
Changes to the Setup of Life Savings Scheme
To process a change in earnings as Adjustment and recalculate the life savings contributions, you must add the Adjustment component to the following elements:
-
<Base Name> Employee Savings Deduction
-
<Base Name> Employer Savings Deduction
Note: Oracle HRMS for Netherlands' best practice is to use only ABP Pensions and Life Cycle Leave Discount elements in correction retropay. Use of other elements in correction retropay give unpredictable results.
Enabling the Method of RetroPay
You select the method of RetroPay by choosing either Standard or Replacement in the RetroPay Method field of the Parameters window.
You select the Enable Dutch RetroPay Method process from the Submit Request window.
For further information on setting up RetroPay, see Setting Up Enhanced RetroPay with Component Usages and Element Span Usages., Oracle HRMS Payroll Processing Management Guide
To enable the required method of RetroPay:
-
Select Enable Dutch RetroPay Method in the Name field
-
In the Parameters window, select either Standard, or Replacement as your required method of RetroPay
Note: You can override the Replacement Method in the Override Replacement Method field for your business group.
See Business Groups: Entering Dutch Business Group Information.
-
Click OK.
-
Choose the Submit button, view the Requests window, enabling you to view the request you submitted.