This section explains the second phase of storage array configuration, which is how you make the discovered storage usable by your Oracle VM Servers.
Except for generic storage arrays, it is possible to create multiple access groups in order to arrange and restrict physical disk access according to your requirements. The generic iSCSI storage arrays have a single access group available by default, where you can simply add or remove storage initiators from your Oracle VM Servers.
Note that generic fibre channel storage has no access groups and is always listed under the Unmanaged Fibre Channel Storage Array.
Select the appropriate procedure for your type of storage array.
To configure an access group for a non-generic iSCSI storage array:
In the navigation pane under the Storage tab, select your storage array and go to the Access Groups tab.
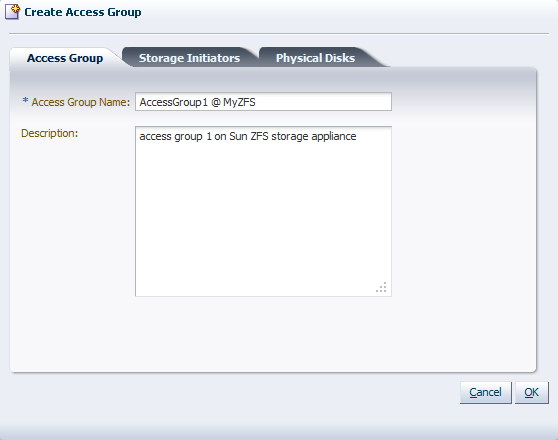
Click the Create Access Group button in the toolbar. The Create Access Group dialog box appears.
In the Access Group tab, enter a name for your new access group and optionally provide a description.
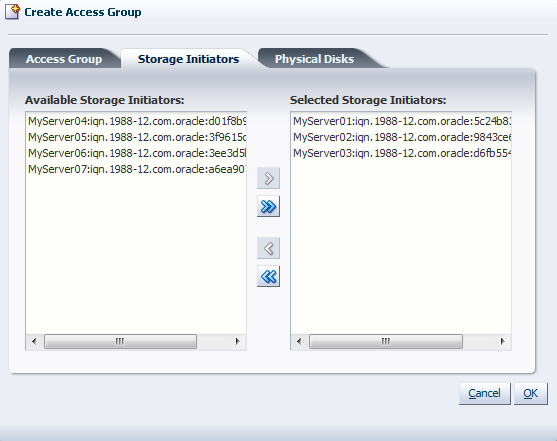
Select the Storage Initiators tab. It contains the available storage initiators for this type of storage on the Oracle VM Servers in your environment.
Use the arrow buttons to move the required initiators to the Selected Storage Initiators box.
Select the Physical Disks tab. It contains the available storage elements on the storage array you are registering.
Use the arrow buttons to move the required disks to the Selected Physical Disks box. These disks will be presented to the Oracle VM Servers of which the iSCSI initiator is part of the access group.

Click OK to create the new access group with the selected initiators and physical disks. The new access group now appears in the Access Groups tab. When you select the access group, its initiators appear in the Storage Initiators table. The presented physical disks appear in the Physical Disks table.
After configuring the access group it is advisable to refresh the storage array to make sure that the current storage layout and access rules are in effect.
The selected physical disks in your non-generic storage array are now available to the Oracle VM Servers in this access group. The access group configuration of a generic iSCSI storage array is simpler, as you can see below.
To configure the access group for a generic iSCSI storage array:
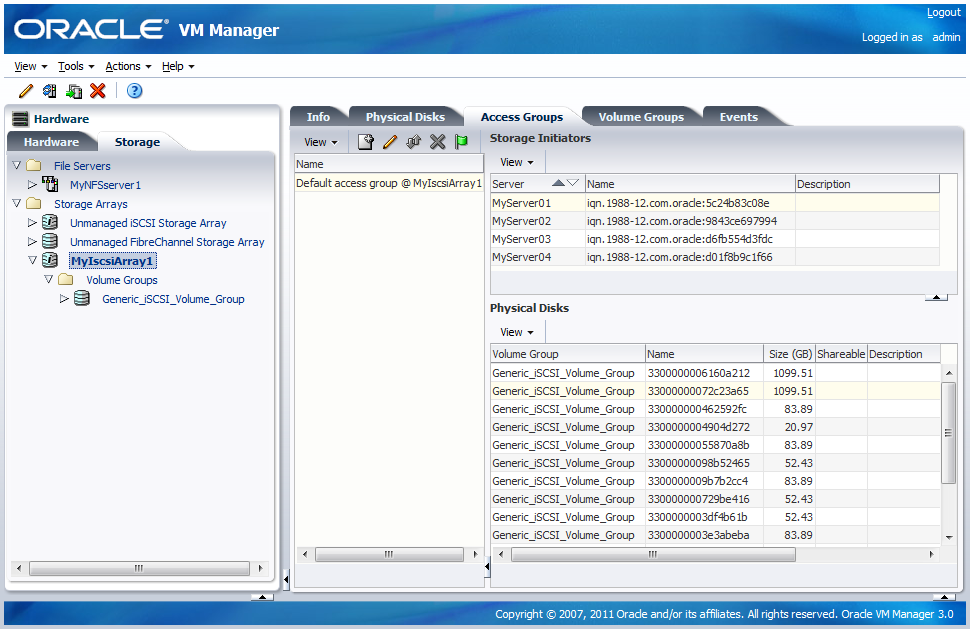
In the navigation pane under the Storage tab, select your storage array and go to the Access Groups tab.
The default access group for this storage array is already present, and all discovered physical disks in the generic storage array are listed.
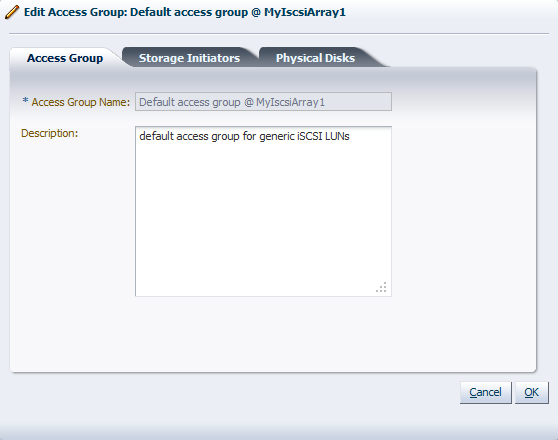
Select the default access group and click the Edit Access Group button in the toolbar. The Edit Access Group dialog box appears. It contains the available storage initiators for this type of storage on the Oracle VM Servers in your environment.
In the Access Group tab, you cannot modify the name of the default access group, but if required, you can provide a description for the access group.
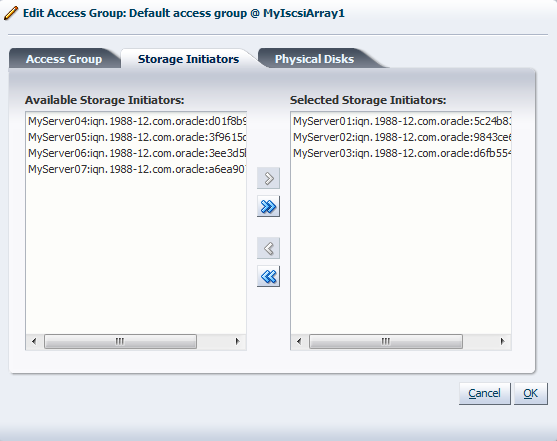
Select the Storage Initiators tab. It contains the available storage initiators for this type of storage on the Oracle VM Servers in your environment.
Use the arrow buttons to move the required initiators to the Selected Storage Initiators box.
For a generic storage array you can skip the Physical Disks tab. Click OK to save your changes to the default access group. When you select the access group in the Access Groups tab, its initiators appear in the Storage Initiators table. The disks listed in the Physical Disks table are all automatically presented to the selected Oracle VM Servers.
After configuring the access group it is advisable to refresh the storage array to make sure that the current storage layout and access rules are in effect.
The Oracle VM Servers in this access group now have the necessary permissions to use the physical disks of the storage array; they can be deployed either as disks for virtual machines (VMs) or for storage repositories. To create storage repositories on your physical disks, see Section 4.8, “Preparing and Configuring Storage Repositories”.
Of course, you can always make changes to the storage configuration you just registered. The steps and options to do so are described below.
In this section we consistently use the tree view in the navigation pane to access various storage elements at different levels. You can also reach these elements through the different tabs available to you when you select the storage array in the navigation pane.