Anti-affinity groups specify that specific virtual machines should never run on the same Oracle VM Server. An anti-affinity group applies to all the Oracle VM Servers in a server pool. You may want to set up anti-affinity groups when you want to build-in redundancy or load balancing of specific applications in your environment.
If you add a virtual machine to an anti-affinity group that already has a virtual machine in the group running on the same Oracle VM Server, the job is aborted and the virtual machine is not added to the group. To add the virtual machine to the anti-affinity group, migrate it to another Oracle VM Server, then add it to the group.
To create an anti-affinity group:
Click the Servers and VMs tab. Select a server pool in the navigation pane.
From the Perspective field in the management pane, select Anti-Affinity Group from the drop-down list. Click Create New Anti-Affinity Group...
 in the management pane toolbar.
The Create Anti-Affinity Group wizard is displayed.
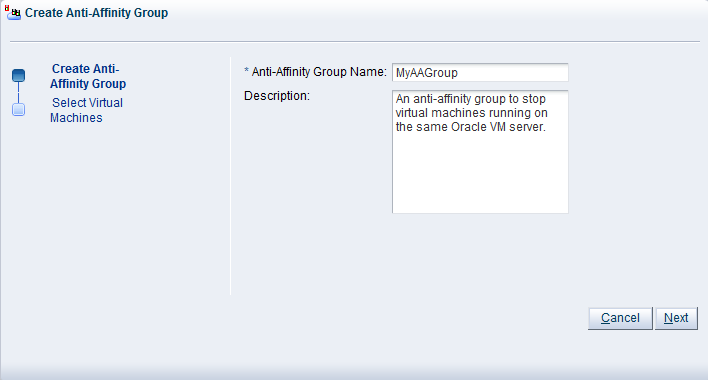
Enter the anti-affinity group information:
Anti-Affinity Group Name: Enter the name of the anti-affinity group.
Description: A description of the anti-affinity group.
Click Next.
The Select Virtual Machines step of the Create Anti-Affinity Group wizard is displayed.
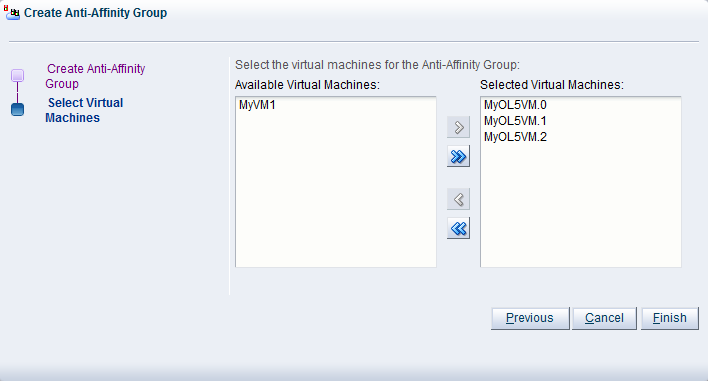
Select the virtual machines to include in the anti-affinity group and move them from the Available Virtual Machines column to the Selected Virtual Machines column.
Click Finish.
The anti-affinity group is created and listed in the Anti-Affinity Group table in the management pane.
To edit an anti-affinity group:
In the Servers and VMs tab, select the server pool to which the anti-affinity group belongs in the navigation pane.
From the Perspective field in the management pane, select Anti-Affinity Group from the drop-down list. Select the anti-affinity group in the Anti-Affinity Group table and click Edit Anti-Affinity Group...
 in the management pane toolbar.
The Modify Anti-Affinity Group:
group_namedialog box is displayed.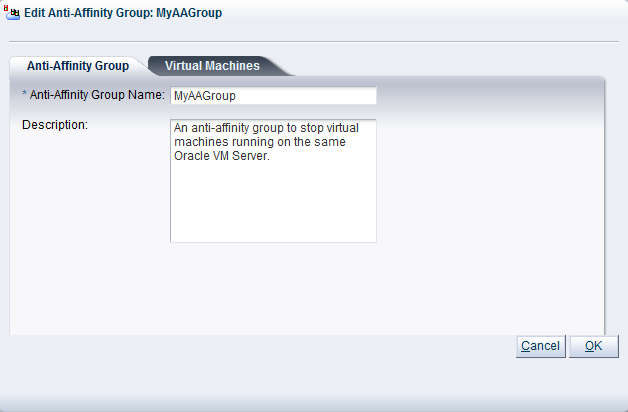
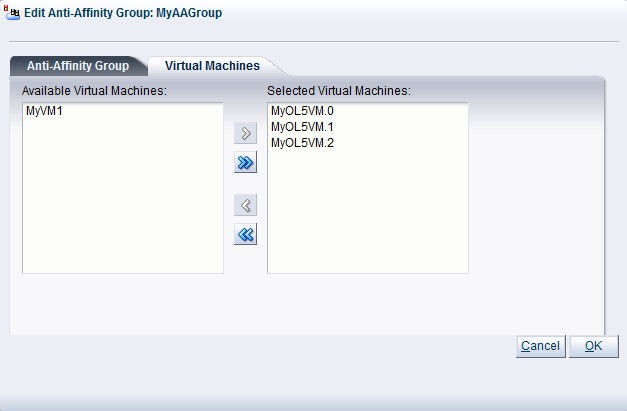
Edit the anti-affinity group as required. To edit the virtual machines in the anti-affinity group, click the Virtual Machines tab.
For more information on the tabs in this wizard, see Section 6.6.1, “Creating an Anti-Affinity Group”.
Click OK.
The anti-affinity group is edited and displayed in the Anti-Affinity Group table in the management pane.
To delete an anti-affinity group:
In the Servers and VMs tab, select the server pool to which the anti-affinity group belongs in the navigation pane.
From the Perspective field in the management pane, select Anti-Affinity Group from the drop-down list. Select the anti-affinity group in the Anti-Affinity Group table and click Delete Anti-Affinity Group...
 in the management pane toolbar.
A confirmation dialog box is displayed. Click OK to delete the anti-affinity group.
The anti-affinity group is deleted.