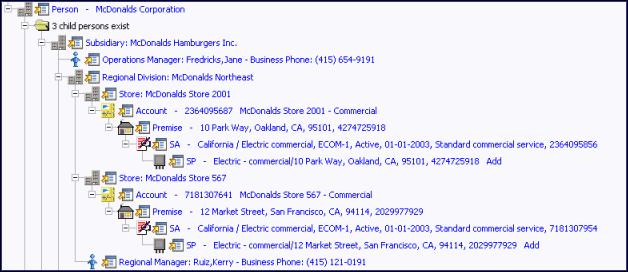
Trees are used to illustrate complex relationships between objects. The following is an example from Oracle Utilities Customer Care and Billing of a page with a tree that is expanded:
The following points describe how to use trees:
You can expand and contract the nodes in a tree by clicking on the icon that prefixes the node (you can also click the + and - button to expand and contract a node).
You can click the context menu button to cause a context menu to appear. You can navigate to any of the pages that are presented on this menu. Refer to Context Menu Button for more information.
You can click on the information that appears in an underlined node to drill into the page in which the object is maintained. For example, if you click on the account information, you will be transferred to the Account - Main page.
Nodes in trees fit into two broad categories:
- Information nodes. Information nodes highlight the existence of other data. For example, on the Control Central - Bill Payment Tree, a node exists to highlight the existence of new financial transactions that were created since the last bill was completed.
- Data nodes. Data nodes show information about objects in the system. For example, data nodes exist on the Control Central - Bill Payment Tree that show bills and payments.
- You can click on the verbiage in a data node to drill down to a page in which the respective object can be seen in detail. Information nodes to not have this type of drill down capability. We visually differentiate between these two types of nodes by using special formatting on data nodes with drill down (they are blue and underlined).
Nodes that can contain a large number of rows have special processing (referred to as "get more" functionality). We'll use an example to explain - consider the tree that contains an account's bills and payments. Over time, this tree can contain many rows (one for each payment and bill linked to the account). Rather than show every row, the system retrieves the first X rows (where X varies from node to node, and from release to release). If more than X rows exist, a Get More button is appended to the node (appearing after the last row in the node). When you click the Get More button, the system appends the next X rows to the bottom of the tree. Note, if no Get More button appears at the bottom of a node, this means you are seeing all rows.