| Oracle® Argus Insight Cognos User's Guide Release 7.0.1 E28481-01 |
|
|
PDF · Mobi · ePub |
| Oracle® Argus Insight Cognos User's Guide Release 7.0.1 E28481-01 |
|
|
PDF · Mobi · ePub |
When you execute a QBE, a filter, or an advanced condition, Argus Insight generates a list of cases that match the querying criteria. This list of cases is called a case series. Argus Insight displays the case series in a listing format on the ACTIVE CASE SERIES page.
The case series is the communication foundation between all modules of Argus Insight. All the predefined reports you generate in Argus Insight are run on the case series. This means that the report output contains information from only those cases that are part of the case series.
This chapter includes the following topics:
Note:
The case series might become obsolete each time the data mart is refreshed by running an ETL because new cases with similar attributes might get added to the data mart.This section provides information about working with the active case series and includes the following topics:
The system assigns the active status to the case series that you last generated by executing a query. Only one case series can be active at a time. The last case series you generated remains active until you:
Generate another case series.
Save modifications to an existing case series.
Manually assign the active status to a case series that has been saved to the case series library. See "Making a Case Series Active" for details.
To view the active case series, navigate to Query Results, Case Series, and select Active. The ACTIVE CASE SERIES page opens and displays the last case series that you executed, modified, or manually made active. See Figure 7-1.
On the ACTIVE CASE SERIES page, note that:
The Active Query Name label displays the name of the saved query (QBE, filter, or advanced condition) that generated the case series. If the query was not saved, the label displays the text <Not Saved>.
The Active Case Series label displays the text <Not Saved> until you save the case series by a name. Similarly, the Name label displays the text <Not Saved> until you save the case series by a name.
On the ACTIVE CASE SERIES page, use the tools in the table header (see Figure 7-2) to sort, search, and navigate through the list of cases.
To sort the list by a specific column, click the arrow icon next to a column heading.
To filter the list, enter search criteria into one or more of the fields below the column headings, and then click Search.
To move forward and backward through the pages of case series, click the Page Navigation icons. A page displays 50 cases.
When you export the data to a Microsoft Excel file, the system retains any changes you made to the sorting and filtering order. See "Exporting a Case Series to Microsoft Excel" for more information.
Before you can save a case series, you must enter a description for the case series in the Description field.
If you have not saved the active case series to the system yet, click either Save or SaveAs to assign a name to the case series and save it to the Case Series library.
If you are modifying a case series that is already saved, click Save to save your modifications or click Save As to save the case series by another name.
Use one of the following options to view the query criteria that generated the active case series:
To return to the appropriate Create Query page (QUERY BY EXAMPLE page, FILTER VALUE SET page, or ADVANCED CONDITIONS EDITOR page) and view the query criteria that generated the case series, click View Query.
The View Query button is enabled only if the active case series is not yet saved to the system.
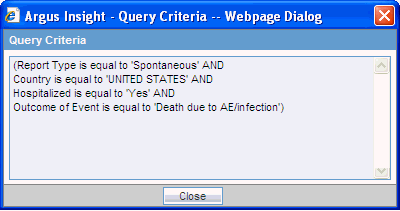
To view the query criteria in a statement format, click View Query Criteria. The Query Criteria dialog box opens and displays the query. For example:
You can assign group-level access permissions for the case series. These permissions determine which user groups will be able to view, modify, or delete a case series.
Note:
You can set permissions only on case series you saved to the system.To set case series permissions:
Navigate to Query Results, Case Series, and select Active. The ACTIVE CASE SERIES page opens.
Click Permissions to assign group-level permissions on the saved case series.
The Permissions dialog box opens and lists the names of all the groups (except the Administrator group) that the system administrator has created.
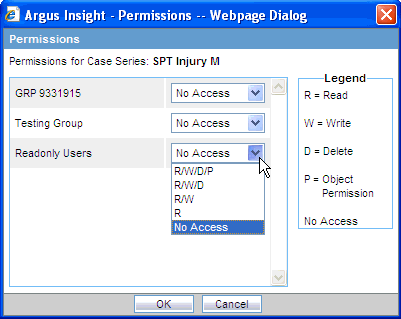
Use the drop-down list next to a group name to assign permissions to the group members on the case series you have created. You can select from these options:
| Permission | Description |
|---|---|
| R/W/D/P | Group members will be able to view, modify, delete, and assign permission on the case series. |
| R/W/D | Group members will be able to view, modify, and delete the case series. |
| R/W | Group members will be able to view and modify the case series. |
| R | Group members will be able to only view the case series. |
| No Access (Default) | No group members will be able to access the case series. |
Note:
The author of the case series always has the highest level of permission (R/W/D/P) on the case series. For example, suppose you belong to the Data Entry group and you assign the No Access permission level to the Data Entry group on a case series that you generate. In this case, you will continue to have the highest level of permission on your case series; other members in your group cannot access your case series.Click OK to save the permission settings.
A case annotation is the addition of notes to a case. For example, you may want to add explanatory notes, critical comments about the case, or updates for the reporter. Adding relevant and important information about a case makes for better understanding of that case.
A case annotation:
Supports a maximum of 200 characters.
Is saved with the case series. Once entered, an annotation is saved for the case series. You do not need to explicitly save a case series to save the annotations.
Is applicable for the case in only the same case series where it was saved. It is not applicable even for the same case if the case is in a different case series.
Is frozen along with a frozen case series. Therefore, you cannot edit, add, or delete an annotation in a frozen case series.
Is copied to a new case series if the case series where it was created is also copied.
Is exported to Microsoft Excel when you use the Export to Excel feature.
Is kept with a case if the case series is subsetted.
Is retained when the case series merges with another case series. As shown in the following graphic, the Case Series #1 section title on the CASE SERIES MERGE page includes a statement that the notes from this series will be preserved in the merged case series:

If you can access a case series, you can access its corresponding case annotations.
For any case in the active case series, you can include an annotation with the case.
To add an annotation to a specific case:
Navigate to the ACTIVE CASE SERIES page.
Select the case that you want to annotate.
Click the Annotate icon in the Notes column.
Select Annotate from the menu to open the Case Annotation dialog box.
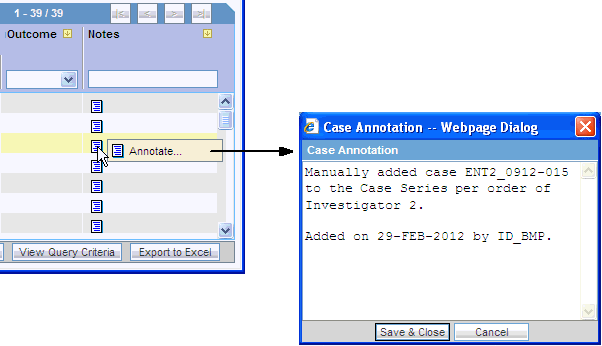
Type your notes, comments, or remarks about the case.
Click Save & Close.
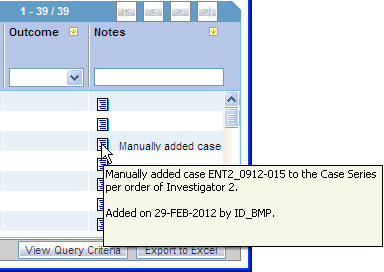
The system updates the selected case with your annotation. In addition, the Notes column displays the beginning text of the annotation.
To view the complete annotation, position the cursor over the Annotate icon.
To modify or delete an existing annotation, open the Case Annotation dialog box, edit the text, and save your changes.
To use annotations when you create an advanced condition, navigate to Case Series, Cases, and select Case Annotations. This field is a freehand text field and supports single select only.
This note is not available in Argus Safety and does not impact the case series in Argus Safety.
If required, you can modify the case series by adding cases manually.
To add a case to the case series:
Navigate to the ACTIVE CASE SERIES page.
Click the Add Case icon on the left bar. The Add Case to Case Series dialog box opens.
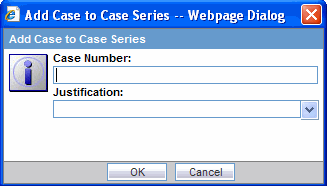
Enter the case number that you want to add to the case series manually.
Click the Justification field to select the reason you are modifying the case series.
Alternatively, you can type your own justification text to explain why you are modifying the case series.
In addition, you can define the choices that Argus Insight lists for the Justification field by using the Case Series Modification Justification option in the List Maintenance tab on the ADMINISTRATION TOOLS page.
Click OK.
If the case number you specified exists in the data mart, the system adds the case to the case series and saves the changes. A message dialog box reports that the case number was successfully inserted.
If the case number you specified does not exist in the data mart, the system displays an error message. For example:
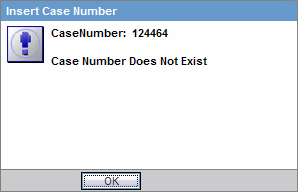
Click OK to close the message dialog box.
To delete a case from the case series:
Navigate to the ACTIVE CASE SERIES page.
Select the case you want to delete.
Click the Delete Case icon on the left bar. The Delete Case Number dialog box opens.
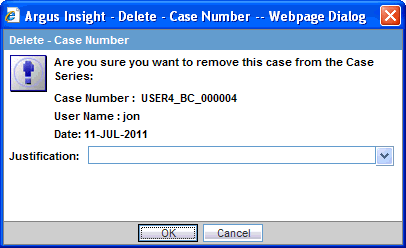
Click the Justification field to select the reason you are deleting the case.
Alternatively, you can type your own justification text to explain why you are deleting the case.
In addition, you can define the justification choices that Argus Insight lists for the Justification field by using the Case Series Modification Justification option in the List Maintenance tab on the ADMINISTRATION TOOLS page.
Click OK to delete the case from the case series and saves the changes.
When you execute a QBE, a filter, or an advanced condition, Argus Insight generates a list of cases that match your query criteria. This list of cases is called a case series.
You can choose to save a case series for future reference. You provide a brief description and a unique name for the case series; the system stores all saved case series in the Case Series library.
This section provides information about working with saved case series and includes the following topics
The CASE SERIES LIBRARY page, shown in Figure 7-3, lists all the case series saved to the system.
To open the CASE SERIES LIBRARY page, navigate to Query Results, Case Series, and select Library.
The CASE SERIES LIBRARY page displays the following information for each case series:
Name of the case series.
Brief description of the case series.
Date when the case series was last modified.
Name of the user who generated the case series.
Category assigned to the case series. For example, Compliance, General, Management, or Pharmacovigilance.
Source of the case series.
Argus Insight indicates the case series was generated using Argus Insight querying tools.
External indicates the case series was imported into Argus Insight from another source, such as a TXT or CSV file. See "Importing a Case Series from an External Source" for more information.
Number of cases in the case series. In addition, the Cases column displays a snowflake icon if the case series is frozen. Positioning the cursor over the icon displays the date and time the case series was frozen.
Report icon if reports are associated with the case series. Positioning the cursor over the icon displays the number of reports associated with the case series.
You can search a saved case series by its name, description, modified date, author, category, and source. You can enter a value for one, several, or all search fields to find a saved case series.
To search for a saved case series:
Navigate to the CASE SERIES LIBRARY page.
Enter search criteria into one or more of the fields below the column headings.

To search for a case series:
By its name, type the name of the case series in the Name field.
By its description, type part of the description in the Description field. The system searches for the specified text string in all case series descriptions.
By its date of modification, enter the modification date in the first Last Modified date field. To specify a date range, type the start and end dates in the first and second date fields, respectively.
By its author, select the author name from the User Full Name field.
By its category, select the category from the Category field.
By its source, select the source from the Source field.
Click Search. Based on your specified criteria, the system refreshes the page and displays the search results.
To sort the search results, click the sort icon next to a column header.
To clear the search results and list all the saved case series, click Clear.
To make a case series active:
Navigate to the CASE SERIES LIBRARY page.
Select the case series you want to make active.
Click Make Active.
The Active Case Series label in the upper-right corner of the CASE SERIES LIBRARY page displays the name of the case series you made active.
You may want to modify an existing case series by adding cases to it or deleting existing cases. You can also change the group-level access permissions on the case series.
To modify a case series:
Navigate to the CASE SERIES LIBRARY page.
Select the case series you want to modify.
Click Modify to display the selected case series. See "Working with the Active Case Series" for detailed information about making modifications to the case series and setting permissions.
Argus Insight lets you create a new case series by merging two case series through a set operator. The set operator you select works on the case numbers. The case numbers included in the merged case series depend on the type of set operator you use:
Union — Creates a new case series that contains all the cases in both case series; common case numbers are included, and are listed only once.
Intersect — Creates a new case series that contains only those case numbers that exist in both case series.
Minus — Creates a new case series that contains only those case numbers that are present in the first case series, but are not present in the second case series.
To generate a merged case series:
Navigate to the CASE SERIES LIBRARY page.
Click Merge. The CASE SERIES MERGE page opens.
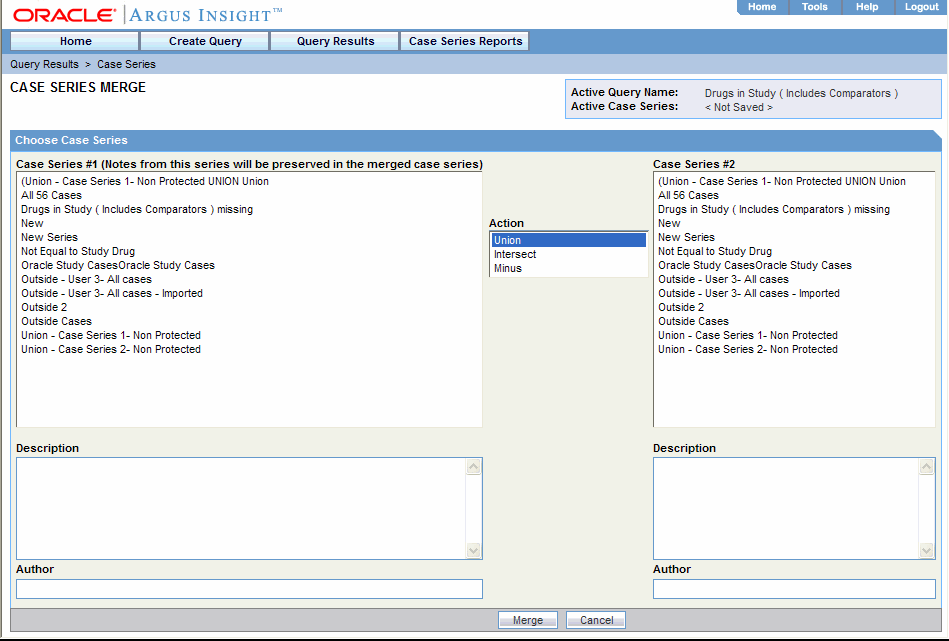
Select the two case series you want to merge:
Select the first case series from the Case Series # 1 list.
Select the second case series from the Case Series # 2 list.
Note that the system automatically populates the Description and Author fields for each case you selected. You can modify the information if necessary.
Select the Action (set operator) that you want to use to merge the two case series you selected. As described previously, you can select one of the following actions:
Union — Creates a new case series that contains all the cases in both case series; common case numbers are included, and are listed only once.
Intersect — Creates a new case series that contains only those case numbers that exist in both case series.
Minus — Creates a new case series that contains only those case numbers present in the first case series, but not present in the second case series.
Click Merge to merge the two selected case series and display the resultant case series on the ACTIVE CASE SERIES page.
You can import a case series from an external source into Argus Insight. The requirements are as follows:
The external source file can be a text (TXT) file or a comma-separated values (CSV) file.
Each case number in the file must be on a new line.
Each case number must be separated by a line return (Enter) or a semicolon (;).
To import a case series from an external source into Argus Insight:
Navigate to the CASE SERIES LIBRARY page.
Click Import to open the Select File For Import dialog box.
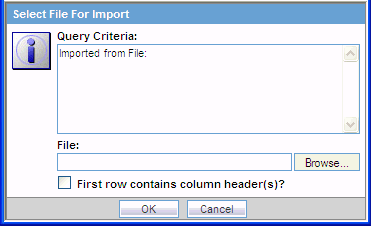
Click Browse to locate and select the external case series source file. Alternatively, type the file name with its complete system path in the File field.
Verify if the first row in your TXT or CSV file has the column headings. If so, be sure to select the First row contains column header(s) check box.
Click OK. The Import Case Series dialog box displays the status of the import operation.
Note:
To view the import operation log, click View Log.Click OK to display the imported case series on the ACTIVE CASE SERIES page.
To delete an existing case series:
Navigate to the CASE SERIES LIBRARY page.
Select the case series you want to delete.
Click Delete. The system prompts for confirmation that you want to delete the case series.
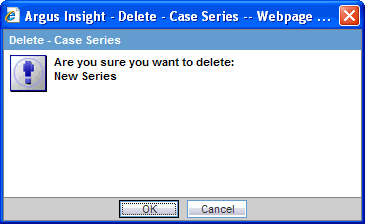
Click OK to delete the selected case series and return to the CASE SERIES LIBRARY page.
To view the details of the query that generated a case series:
Navigate to the CASE SERIES LIBRARY page.
Select a case series.
Click Query Criteria to open the Query Criteria dialog box and display the query in an SQL-statement format. For example:

Note:
For a saved case series, you can view the query details only in a SQL-statement format in the Query Criteria dialog box.However, for an active case series that is not yet saved to the system, you can view the query details within the query tool interface as well as in the SQL-statement format. See "Viewing the Criteria that Generated the Active Case Series" for more information.
Report packaging is the concept of grouping reports together. You can define multiple reports that are always or often executed at the same time into a group. A set of reports run on a weekly or periodic basis can be scheduled and run as a package.
In Argus Insight, you can associate a report group and the report scheduling to a case series or to a power query (QBE, Filter Value Set, and Advanced Conditions).
Argus Insight lets you associate the report group, schedule a time to generate the reports, and automatically send the completed reports through email to one or more users that you specify.
For detailed procedures and more information about associating report groups, see "Scheduling and Associating Reports Against a Query or Case Series".
Note:
To be able to schedule reports, you must have an enterprise login configured in the Business Intelligence tool (either Cognos or BusinessObjects) you are using with Argus Insight.You can share cases between Argus Safety Web and Argus Insight.
To enable case sharing between these two applications, you need a common user name (ID) and password for Argus Safety Web and Argus Insight. If you do not have a valid user ID in Argus Safety Web, the system displays the following error message:
Your user ID is not present in Argus.
To share cases between Argus Insight and Argus Safety Web:
Log in to Argus Insight with your user name and password.
Navigate to Query Results, Case Series, and select Make Active From Argus.
The system displays the active case series from Argus Safety Web. The active case series present in Argus are now the active case series in Argus Insight.
Note:
The system displays an error message if there are no cases present in the active series of Argus.Click Save or Save As to save the case series.
To export a case series to a Microsoft Excel file:
Create a new query using a QBE, a filter, or an advanced condition, or open a saved query from the Query library.
Click Execute to open the ACTIVE CASE SERIES page with the list of cases.
Make adjustments to the listing, if necessary. You can sort the list or enter search criteria to filter the list. The system retains the sorting and filtering order when you export the data to a Microsoft Excel file.
Click Export to Excel. The File Download dialog box opens and prompts you to open or save the Microsoft Excel file.
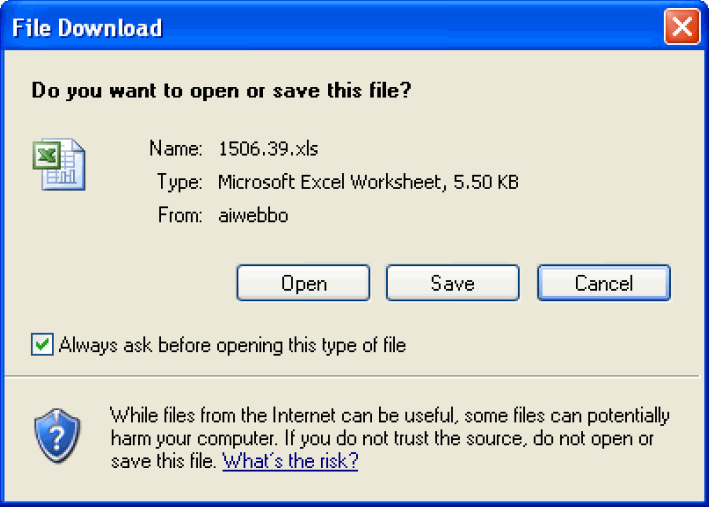
To open the Excel file and view the case series results, click Open.
To save the Excel file to your system, click Save. The system prompts for the location to save the file. Once the file is saved, you can open the file and view the case series results.
The Excel spreadsheet has two tabs:
The Case Series tab provides information about each case in the case series, including the case number, report type, primary company product, primary event, seriousness criteria, and outcome. See in Figure 7-4.
The Case Series Details tab provides information about the entire case series, including the name specified when the case series was saved, the total number of cases in the series, the description specified when the case series was saved, and the query criteria (in SQL-statement format) used to generate the case series.
This section includes the following topics:
Before you freeze the data in a case series, review the information in this section to understand the restrictions and usage for frozen case series.
System administrators define the freeze and unfreeze access rights when creating user groups.
You can freeze and unfreeze case series only if you have the proper access rights (privileges).
When you work with frozen case series, note that:
You cannot insert cases into a frozen case series.
You cannot share a frozen case series with Argus Safety.
You can delete cases from a frozen case series.
When you run a query or an advanced condition against a frozen case series, Argus Insight uses the frozen data.
The link to the Medical Review dialog box accesses the latest data for the case.
The following Argus Insight features do not require all case data to be frozen:
Copy Configuration utility
Report scheduling
Derivation rules
By default, the Report Writer displays all the versions (both frozen and current) for a case.
If the report needs to contain only the current case version, use the Display Latest Data filter.
If you select the Active Case Series filter, then the report contains only the frozen case data if the active case series is frozen. Otherwise, the report contains the current case version if the active case series is a normal case series.
The frozen case series data is available after reinitializing the ETL.
Reports run on frozen case series data show the following text next to the Case Series name:
The data in this report was frozen as of date_and_time.
The time is the database system time with the Greenwich Mean Time (GMT) offset.
Reports run on normal case series data show the following text next to the Case Series name:
The case series was last modified on date_and_time.
List Maintenance items are not frozen. Therefore, some reports will have a mismatch of List Maintenance items and the frozen case series data.
The derivation rules operate against current case data if the List Maintenance rules are modified. The frozen case series are shown if there is a change in the case data resulting from the derivation rules.
If suppress condition is checked in the derivation rule, then List Maintenance records related to the derivation rule will not be deleted in cases used in the frozen case data table.
You can freeze a custom case series when editing the case series from the CASE SERIES LIBRARY page.
To freeze the existing cases in a case series:
Navigate to the CASE SERIES LIBRARY page.
Select a case series.
Click Freeze Case Series. The Freeze Case Series dialog box opens and prompts you to provide a new name for the frozen case series.
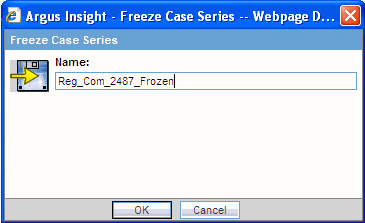
Enter a name for this frozen case series.
Click OK.
The system freezes and saves the case series with the name you specified.
To indicate that a case series is frozen, the Cases column on the CASE SERIES LIBRARY page displays a snowflake icon. Positioning the cursor over the snowflake icon displays the date and time the selected case series was frozen.
You can freeze any system-generated case series (active or inactive) (for example, using Argus Insight queries, filters, and advanced conditions) by clicking Freeze and Save.
The system freezes the case series and then displays the standard Case Series Save dialog box. You must enter a name for the saved case series.
If you have not yet saved the case series from the ACTIVE CASE SERIES page, and you click Freeze and Save, the system saves only one copy of the frozen case in the library. The frozen case series is now the active case series.
On the CASE SERIES LIBRARY page, you can position the cursor over the snowflake icon in the Cases column to view the date and time the selected case series was frozen.
On the CASE SERIES LIBRARY page, you have the option to unfreeze a currently frozen case series. Unfreezing a case series forces Argus Insight to retrieve the latest information for all the cases in the series.
When you unfreeze a case series, you must provide a justification, or reason, for this action. You can either type a new justification or select a preconfigured justification.
If you have access rights to the List Maintenance tab on the ADMINISTRATION TOOLS page, use the Case Series Un-Freezing Justification option to configure one or more justifications that can be selected when you unfreeze a case series. You can add new justifications, modify existing justifications, or delete an existing justification.
To unfreeze a case series that is currently frozen:
Navigate to the CASE SERIES LIBRARY page.
Select the frozen case series that you want to unfreeze.
If a case series is frozen, the Cases column displays a snowflake icon for that series. The Un-freeze Case Series button is enabled only if you select a case series that is frozen.
Click Un-freeze Case Series. The Un-freeze Case Series dialog box opens and prompts for confirmation and justification.
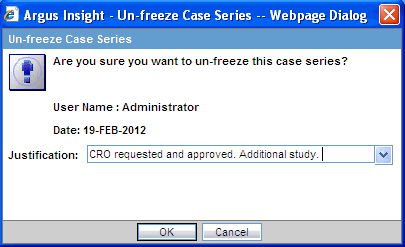
Click the Justification field to select the reason you are unfreezing the Case Series.
Alternatively, you can type your own justification text to explain why you are unfreezing the case series.
In addition, you can define the choices that Argus Insight lists for the Justification field if you have access rights to the Case Series Un-freezing Justification option in the List Maintenance tab on the ADMINISTRATION TOOLS page.
Click OK.
The system retrieves the latest information for all the cases in the series, refreshes the CASE SERIES LIBRARY page, and displays the updated case series in the list.
In addition, system removes the snowflake icon from the Cases column because the case series is no longer frozen.
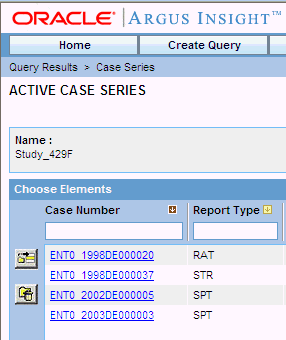
On the ACTIVE CASE SERIES page, you can click a link in the Case Number column to access Argus Safety and open the Medical Review dialog box in read-only mode.
All reports that can be executed from the Medical Review dialog box are available to you.
You may not be able to link successfully to the Medical Review dialog box for the following reasons:
If you do not have access to the case from an Argus Safety perspective, the system displays the following message:
user_name does not have access to the case in Argus Safety.
If you try to access a case that has been deleted since the last ETL, the system displays the following message:
This case has been deleted in Argus Safety since the last ETL.
If Oracle Access Manager (OAM) is not enabled in Argus Safety and Argus Insight, and you log in to Argus Insight without logging through Argus Safety, the system displays the following message:
user_name is not logged into Argus Safety.