 Understanding Personal Identification Data
This chapter provides an overview of personal identification data and discusses how to:
Enter citizenship data.
Enter driver's license data.
Enter residency data.
Enter photographs.
Enter personal identification numbers (PINs).
Understanding Personal Identification Data
You can scan photos and enter driver's license data in your database to help you identify and recognize individuals at your institution.
Your institution might require an individual's driver's license number and the state from which the license was issued. Your institution might also want to know if the driver's license is valid and how many violations and points are on driver's record. Driver's license and driver's record information might be considered when issuing parking permits, granting the use of departmental vehicles, or maintaining carpools.
You can upload photos to your database to help identify individuals. Use your institution's image importing method to place the image in a file on your computer and save it in JPEG format. Then, using the Photo page, you can upload that image to the individual's record in your database.
You can track the official and self-reported residency of individuals at your institution. You can also enter data for residency appeals.
You can also enter and track IDs from external systems and correlate them to individuals or organizations in PeopleSoft Campus Solutions. For example, if your institution uses a separate housing database, you could identify the individual's housing ID.
Use the Personal Identification Number page to assign PINs to individuals as required at your institution. For example, if your institution uses a separate housing database and individuals need a PIN to access their own housing information, you can assign that here.
Using the Citizenship pages, you can enter multiple countries of citizenship and multiple passports for individuals, and track their visa and permits data.
Note. (USA) Use PeopleSoft Patriot Act SEVIS Solutions (PASS) visa processing functionality to track foreign students and exchange visitors and their dependents as required by the U.S. Department of Homeland Security (DHS).
See (USA) Managing PeopleSoft SEVIS Solution Visa Processing for J and F/M Visas.
Entering Citizenship Data
This section provides overviews of citizenship and passport data and visa and permit data, and discusses how to:
Enter citizenship and passport data.
Enter visa and permit data.
 Understanding Citizenship and Passport Data
An important component of the data that you must track for students or employees who travel internationally to or from your institution is passport and citizenship information. Using the Citizenship/Passport Data pages, you can enter multiple countries of citizenship and multiple passports for individuals.
Using the country codes and citizen status codes in your system, you can identify an individual's country of citizenship, the current status of that citizenship, when citizenship was issued, and when citizenship expires.
Understanding Visa and Permit DataIf your institution admits foreign students or hires individuals who are not citizens of the country where your institution is located, you should set up codes that classify the types of visas and permits required by the appropriate governments.
Using the Supporting Document Table page, you can set up document codes to identify birth certificates, letters of employment, immigration application letters, and other documents required to obtain I-9 verification for individuals attending your institution.
Note. If you license and use PeopleSoft HRMS, many supporting document IDs and visa and permit types might already exist in your system.
Each country has its own regulations for permitting foreign employees to work, visit, or reside there. To track information about the visas and permits required for individuals to work at, visit, or attend your institution, use the Visa/Permit Data page.
You can also use your system to prepare visa forms. You can enter data for DS-2019 forms for international applicants, students, professors, and visitors who need a J1 Visa. You can also prepare and print I-20 forms for international students who are admitted to or currently enrolled in your institution and who need an F1 Student Visa.
PrerequisitesBefore entering citizenship data for an individual, you must define levels of citizenship status for each country and visa and permit types.
See Also
Setting Up Citizenship and Passport Data
Setting Up Visa and Permit Data
Pages Used to Enter Citizenship Data
|
Page Name |
Definition Name |
Navigation |
Usage |
|
LS_CITIZEN_PASSPRT |
Campus Community, Personal Information, Identification, Citizenship, Citizenship and Passport |
Enter citizenship and passport data for an individual. |
|
|
SCC_VISA_PERMIT |
|
Enter and track an individual's visa and permit information. |
|
|
SEV_POE_DATA |
Campus Community, Personal Information, Identification, Citizenship, Visa Permit Data, Port of Entry Data |
Enter information to identify the individual's entry point into the area. |
|
|
DS2019_FORM1 DS2019_FORM2 DS2019_FORM3 DS2019_FORM4 DS2019_FORM5 DS2019_FORM6 DS2019_FORM7 |
Campus Community, SEVIS, DS-2019 Forms, DS-2019 Form |
Enter data for preparing DS-2019 forms for an international applicant, student, professor, or visitor who needs a J1 visa. |
|
|
I20_FORM1 I20_FORM2 I20_FORM3 I20_FORM4 I20_FORM5 I20_FORM6 I20_FORM7 |
Campus Community, SEVIS, I-20 Forms, I-20 Form |
Enter data for preparing I-20 forms for an international student who is admitted to or currently enrolled in your institution and who needs an F1 visa. |
|
|
Citizenship / Country / Visa |
PRCSRUNCNTL |
Campus Community, Personal Information, Identification, Citizenship, Citizenship Country Visa Audit |
Generate the Citizenship Status and Country report (PER033) to audit citizenship status. |
|
Passport / Visa Expiration |
PRCSRUNCNTL |
Campus Community, Personal Information, Identification, Citizenship, Passport Visa Expiration Rpt, Passport / Visa Expiration |
Generate the Passport/Visa Expiration report (PER032) to audit passport and visa status. |
Entering Citizenship and Passport Data
Access the Citizenship/Passport page (Campus Community, Personal Information, Identification, Citizenship, Citizenship and Passport).
Citizenship/Passport
|
Country |
Specify the country of the individual's citizenship. |
|
Citizenship Status |
Specify the status (for example, native, naturalized, or alien permanent) of this individual's citizenship in the specified country. These status values are from the Citizen Status Table page. |
Passport Information
|
Passport Number |
Enter the number from the individual's official passport. |
|
Issue Date |
Enter the official issuance date that is stamped on the passport. |
|
Expiration Date |
Enter the official expiration date that is stamped on the passport. |
|
Country |
Specify the country where the passport was issued. Additional location fields appear based on the country that you select, so that you can provide additional location details, such as city and state or province. |
|
Authority |
Enter the name of the agency or authority that issued the passport. |
|
Comment |
Enter comments to further describe the individual's citizenship, passport, or nature of the issuance of the passport. |
Entering Visa and Permit Data
Access the Visa/Permit Data page (Campus Community, Personal Information, Identification, Citizenship, Visa Permit Data).
Note. This is the page to which you are transferred when you click Visa/Permit Data on the Biographical Details page.
Visa/Permit Data
|
Country |
Specify the issuing country for the individual's visa or permit. |
|
Type |
Select the type of visa or permit, from the Visa/Permit Table page. The available types are based on the country specified. |
|
Classification |
Displays the classification based on the type of visa or permit selected. |
|
Effective Date |
Enter the date on which the visa or permit is effective or the date on which the information should become effective in your database. |
|
Number |
Enter the issuance number from the individual's official visa or permit. |
|
Status |
The status of the official visa or permit (for example Applied, Granted, Renewal, or Renewed. Values for this field are delivered with your system as translate values. Do not modify these values in any way. Any modifications to these values could require substantial programming effort. |
|
Status Date |
Enter the date of the status. The default status date is the system's current date. You can override this date. |
|
Duration |
Specify the length of time during which the visa or permit is valid. Enter the number in the first field, and in the second field specify the period, such as days, months, terms, or years. Values for the second field are delivered with your system as translate values. You can modify these translate values. |
|
Issue Date |
Enter the date of issuance from the individual's official visa or permit. |
|
Date of Entry into Country |
Enter the official date on which the individual entered your institution's country. |
|
Expiration Date |
Enter the date on which this individual's visa or permit expires. The system calculates the expiration date based on the specified duration and the date of entry into the country. You can override the system-calculated date. |
|
Issuing Authority |
Enter the name of the agency or authority that issued the official visa or permit. |
|
Issue Place |
Enter the name of the location where the official visa or permit was issued. |
Supporting Documents Needed
|
Supporting Document ID |
Select the supporting documents that are required for this type of visa or permit. |
|
Get Supporting Documents |
Click this button to retrieve the supporting document IDs and descriptions from the Visa/Permit Table page for this visa or permit type. |
|
Request Date |
Enter the date on which your institution requests the supporting document. |
|
Date Received |
Enter the date on which your institution receives the supporting document. |
Entering Driver's License DataThis section discusses how to enter driver's license data.
Page Used to Enter Driver's License Data
|
Page Name |
Definition Name |
Navigation |
Usage |
|
DRIVERS_LIC_SA |
Campus Community, Personal Information, Identification, Driver's License Data |
Enter license numbers and driving record information. |
Entering Driver's License Data
Access the Driver's License Information page (Campus Community, Personal Information, Identification, Driver's License Data).
License Detail
|
Driver's License # (driver's license number) |
The number from the individual's driver's license. |
|
Country |
The country in which the license was issued. |
|
State |
The state in which the license was issued. |
|
Issue Location |
The location where the license was issued. For example, this can be the street address, the city, the county, or whatever your institution decides. |
|
Issuing Authority |
The authority or agency that issued the license. For example, this can be the name of the motor vehicle agency. |
|
Valid from |
The date that the license became effective, which is usually the issuing date. |
|
Expiration Date |
The date that the license expires. |
|
Valid from/to |
The dates for which the license is valid, which is usually the issuing date and the expiration date. |
|
Number of Violations |
The number of traffic violations on record for this individual. |
|
Number of Points |
The number of points on record for this individual. |
|
License Suspended |
Select this check box to indicate that this individual's driver's license is currently suspended. |
|
Comment |
Enter information to further identify or describe this individual's driver's license or driver's record. |
|
License Type |
The type of driver's license, such as car, chauffeur, class C, motorcycle, or truck, that is issued to this individual under the specified license number. Add a new license if the license number is different. Values for this field are delivered with your system as translate values. You can modify these translate values. |
Entering Residency Data
This section provides an overview of residency data and discusses how to:
Enter official residency data.
Entering official residency location details.
Enter self-reported residency data.
Enter residency appeal data.
Understanding Residency DataUsing the Resident Table page, set up codes to represent the residency rules of your institution. For example, your institution might require residency codes for residency that is in state, out of state, in district, out of district, and so on. On the Residency Exception Table page, set up exceptions to the residency rules. For example, some individuals might be exempt from nonresidency requirements because they are in the military. Exceptions are especially useful in tuition calculation.
After you set up residency codes and residency exception codes, use the Official Residency 1 and 2 pages to record residency information that your institution has verified, including the individual's state residency or out-of-state residency for a specific term. You can enter unofficial, self-reported residency information on the Residency Self-Report page.
When an individual appeals residency information, you can enter the information on the Residency Appeal page, including the date and status of the appeal and comments about the appeal.
PrerequisitesBefore entering residency data, define residency rules.
See Also
Pages Used to Enter Residency Data
|
Page Name |
Definition Name |
Navigation |
Usage |
|
RESID_OFFICIAL1 |
Campus Community, Personal Information, Identification, Residency Data, Residency Official 1 |
Enter official residency data for an individual. |
|
|
RESID_OFFICIAL2 |
Campus Community, Personal Information, Identification, Residency Data, Residency Official 2 |
Enter additional official residency data for an individual. |
|
|
RESIDENCY_APPEAL |
Campus Community, Personal Information, Identification, Residency Data, Residency Appeal |
Record residency appeal information. |
|
|
RESIDENCY_SELF |
Campus Community, Personal Information, Identification, Residency Data, Residency Self-Report |
Enter unofficial, unverified residency information that an individual reports to your institution. |
Entering Official Residency Data
Access the Residency Official 1 page (Campus Community, Personal Information, Identification, Residency Data, Residency Official 1).
Official Residency Data
|
Effective Term |
Enter the term for which the residency data is effective for the individual. |
|
Residency |
Select the rule (from the Residency Table page) that describes the individual's residency status. |
|
Residency Date |
Enter the date that the individual established or reported the residency. |
Additional Residency Data
|
Admissions |
Specify the type of residency that qualifies the individual for admission to the specified institution. |
|
Fin Aid Federal Residency (financial aid federal residency) |
Specify the type of residency that qualifies the individual to receive financial aid from the federal government. |
|
Fin Aid State Residency (financial aid state residency) |
Specify the type of residency that qualifies the individual to receive financial aid from the state. |
|
Tuition |
Specify the type of residency that qualifies the individual for tuition assistance. |
|
Admission Residency Exception |
Specify the exception from your institution's residency rule for admissions (from the Residency Exception Table page) that applies to the individual. |
|
Fin Aid Fed Residency Exception (financial aid federal residency exception) |
Specify the exception from the federal residency rule for financial aid (from the Residency Exception Table page) that applies to the individual. |
|
Fin Aid St Residency Exception (financial aid state residency exception) |
Specify the exception from the state residency rule for financial aid (from the Residency Exception Table page) that applies to the individual. |
|
Tuition Residency Exception |
Specify the exception from your institution's residency rule for tuition (from the Residency Exception Table page) that applies to the individual. |
Entering Official Residency Location Details
Access the Residency Official 2 page (Campus Community, Personal Information, Identification, Residency Data, Residency Official 2).
Enter location details of the residency data for this individual.
Entering Self-Reported Residency Data
Access the Residency Self-Report page (Campus Community, Personal Information, Identification, Residency Data, Residency Self-Report).
Self-Reported Residency Data
|
Date Reported |
Enter the date on which this residency information is reported to your institution. The default date is the system's current date. You can override the default date. |
|
Source |
Enter a description of the source of this residency information. This can be an individual's name, the method of reporting (such as letter, email, telephone conversation, and so on), or the title of a document that you have chosen to use. |
|
District, County, State, Country, and Postal |
Enter location details for this residency. |
|
Comment |
Enter comments to further describe this residency information or further identify the source of the information. |
Entering Residency Appeal Data
Access the Residency Appeal page (Campus Community, Personal Information, Identification, Residency Data, Residency Appeal).
Appeals
|
Effective Date |
Enter the effective date of the status of this appeal. The default effective date is the system's current date. You can override this date. |
|
Appeal Status |
Select the current status of this appeal (for example Accepted, Denied, In Progress, None, or Suspended). Values for this field are delivered with your system as translate values. You can modify these translate values. |
|
Comment |
Enter comments to further describe or identify the nature of this appeal. |
Entering Photographs
This section lists prerequisites and discusses how to enter a photograph into your database.
PrerequisitesBefore you can enter a photograph into your database, you must scan or digitally load the photo onto your computer and save it in JPEG format. Consult your platform manufacturer's documentation for information about imaging for the particular database platform that you are using.
Page Used to Enter Photographs
|
Page Name |
Definition Name |
Navigation |
Usage |
|
PHOTO_PERS |
Campus Community, Personal Information, Identification, Photo |
Enter a photograph of an individual into your system. |
Entering a Photograph
Access the Photograph page (Campus Community, Personal Information, Identification, Photo).
To insert an image, click the plus button to add a row on the Photo page. The following page appears.
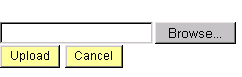
Uploading a photo to the Photo page
Browse to, or enter the path to the .JPG image of the individual on your computer and click Upload. After the system uploads the photo, save the page.
Entering PINs
This section discusses how to enter a PIN into your database.
Page Used to Enter Personal Identification Numbers
|
Page Name |
Definition Name |
Navigation |
Usage |
|
PIN |
Campus Community, Personal Information, Identification, PIN |
Maintain an individual's personal identification number in your system. |
Entering a Personal Identification Number
Access the Personal Identification Number page (Campus Community, Personal Information, Identification, PIN).
|
PIN |
Enter the PIN for this individual. PINs can be up to nine alphanumeric characters. To ensure confidentiality, the characters appear as asterisks as you enter them. |