12 Installing Microsoft Internet Information Services 7.x on Windows 2008 Server
This chapter explains how to install and test Microsoft's Internet Information Services (IIS) 7.0/7.5 on Windows 2008 Server.
This chapter contains the following sections:
12.1 Installing IIS 7.x
If IIS is not installed or is only partially installed, follow Microsoft's instruction for installing either IIS 7.0 on Windows 2008 Server or IIS 7.5 on Windows 2008 R2 Server.
Here is a summary of the instructions:
-
Select Start > Settings > Control Panel.
-
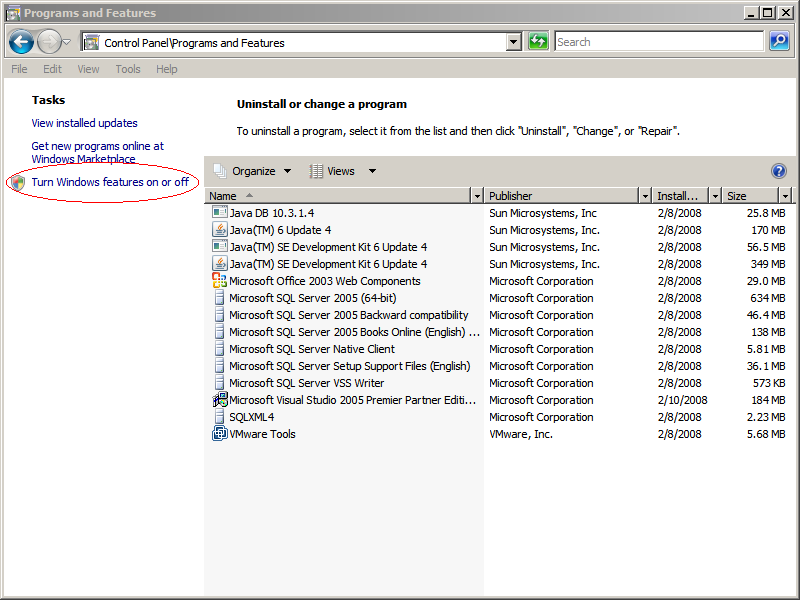
Select Programs and Features
-
Select Turn Windows features on or off (Figure 12-1).
Figure 12-1 Turn Windows Features On or Off
Description of ''Figure 12-1 Turn Windows Features On or Off''
-
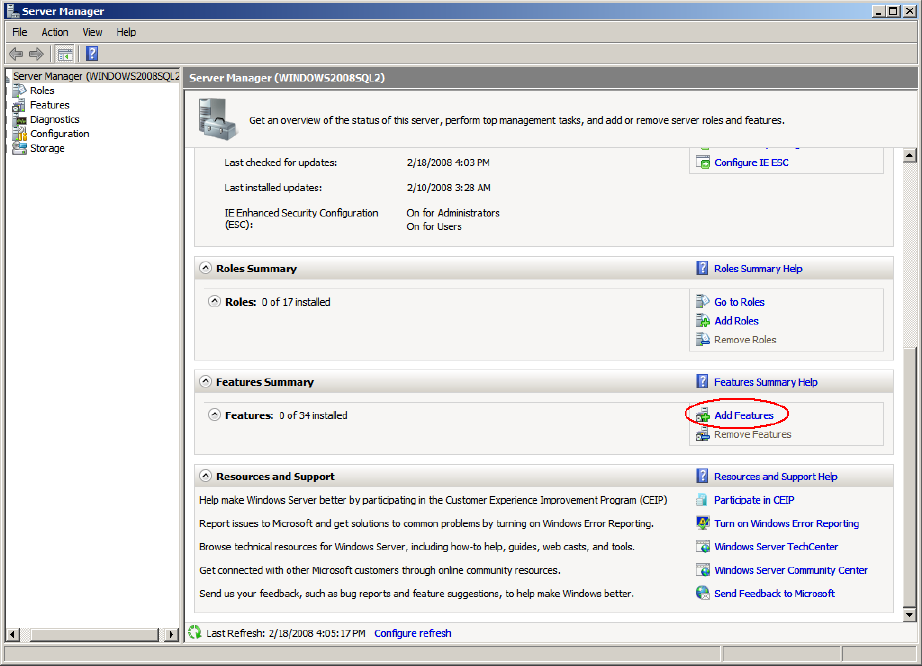
In the "Server Manager" window (Figure 12-2), scroll down to the "Features Summary" section and click Add Features.
Figure 12-2 Server Manager - Add Features
Description of ''Figure 12-2 Server Manager - Add Features''
-
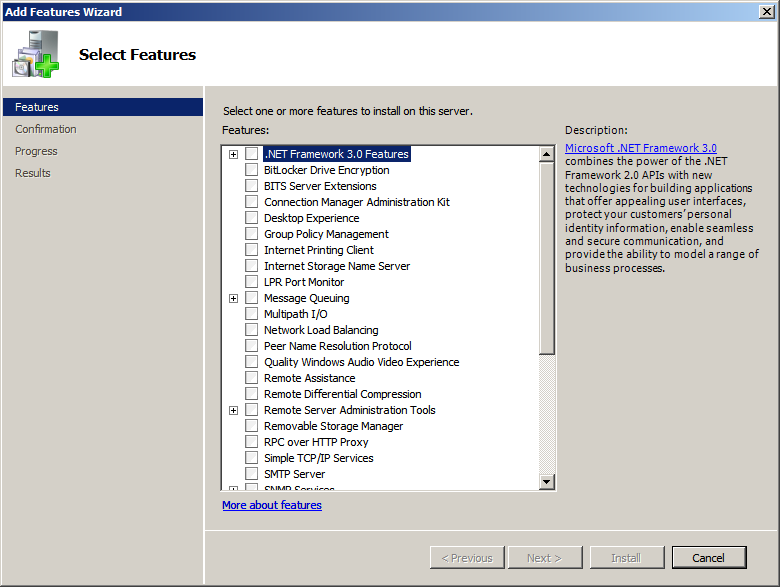
In the "Select Features" screen (Figure 12-3), select .NET Framework 3.0 Features.
-
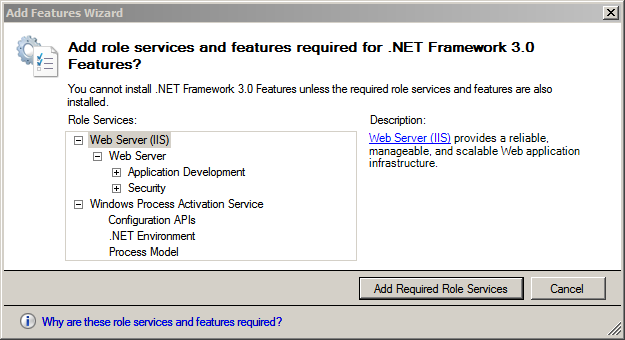
In the "Add Features Wizard" dialog box (Figure 12-4), select Add Required Role Services.
Figure 12-4 Add Required Role Services Button
Description of ''Figure 12-4 Add Required Role Services Button''
-
The Web Server (IIS) option (Figure 12-5) appears in the "Add Features Wizard." Click Next.
-
In the "Introduction to Web Server (IIS)" screen (Figure 12-6), click Next.
Figure 12-6 Introduction to Web Server (IIS)
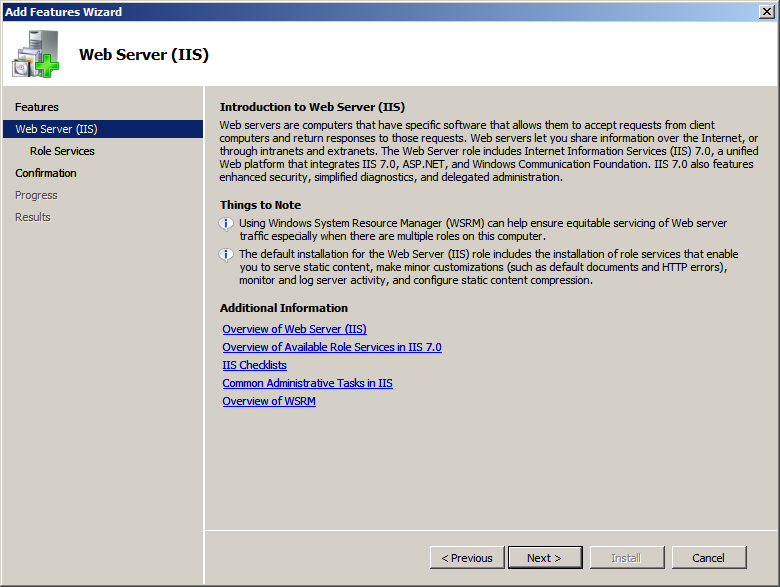
Description of ''Figure 12-6 Introduction to Web Server (IIS)''
-
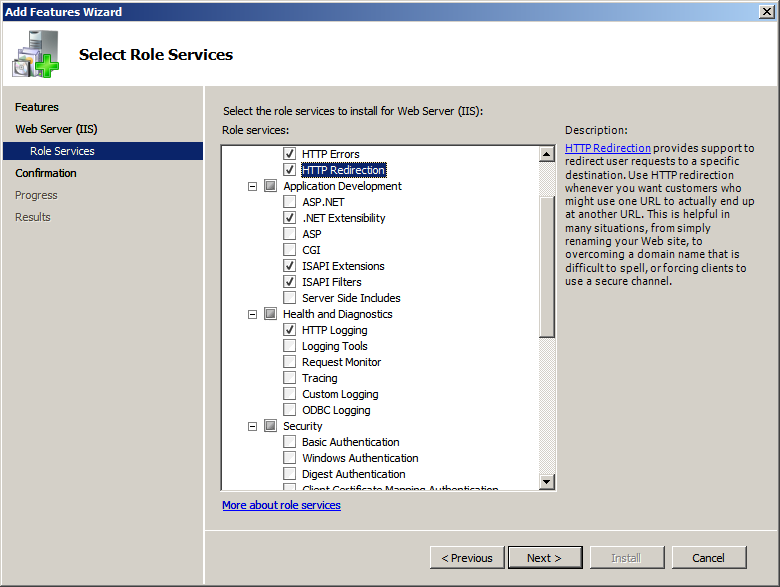
In the "Select Role Services" screen:
-
Select the following:
-
Common HTTP Features
-
ISAPI Extensions
-
ISAPI Filters
-
HTTP Logging
-
Management Tools
-
Any other roles that are required for your installation, such as HTTP Redirection
-
-
Click Next (Figure 12-7).
-
-
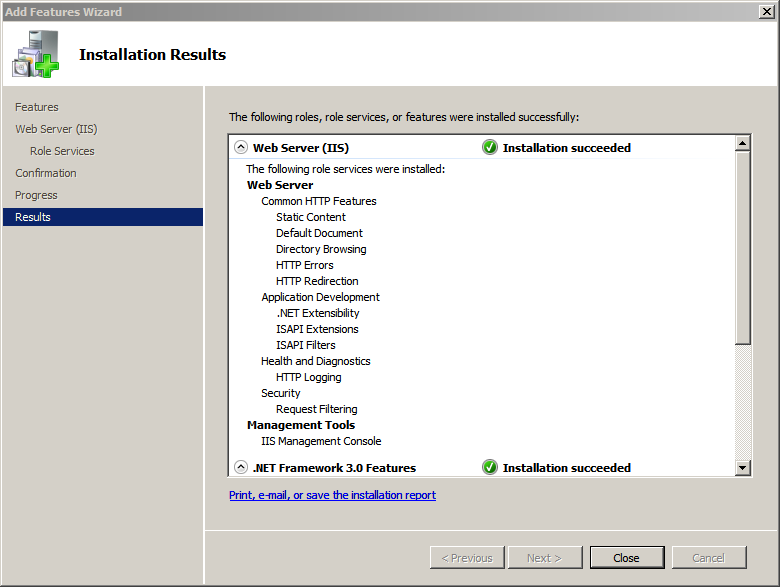
In the "Confirm Installation Selections" screen (Figure 12-8), confirm your choices and click Install.
Figure 12-8 Confirm Installation Selections
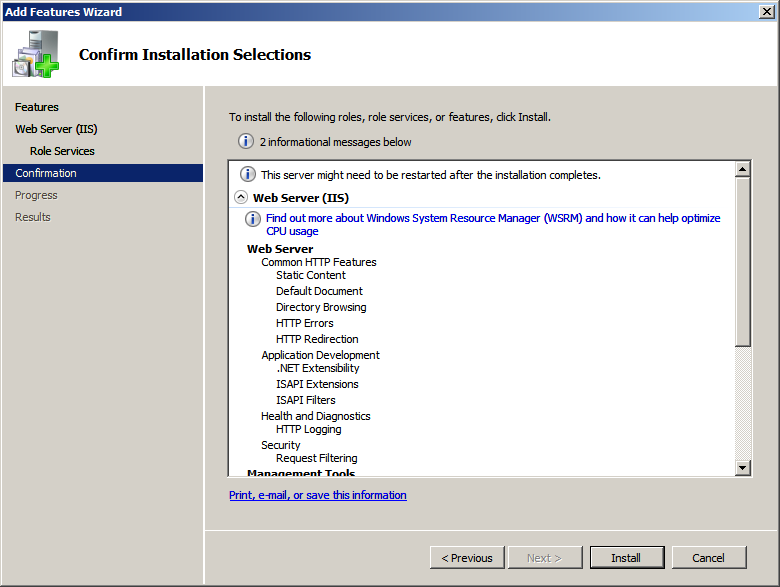
Description of ''Figure 12-8 Confirm Installation Selections''
-
Allow the installation to complete, then review the results.
-
Click Close (Figure 12-9).
-
It is suggested at this point to reboot, but it is not required.

12.2 Verifying the Installation
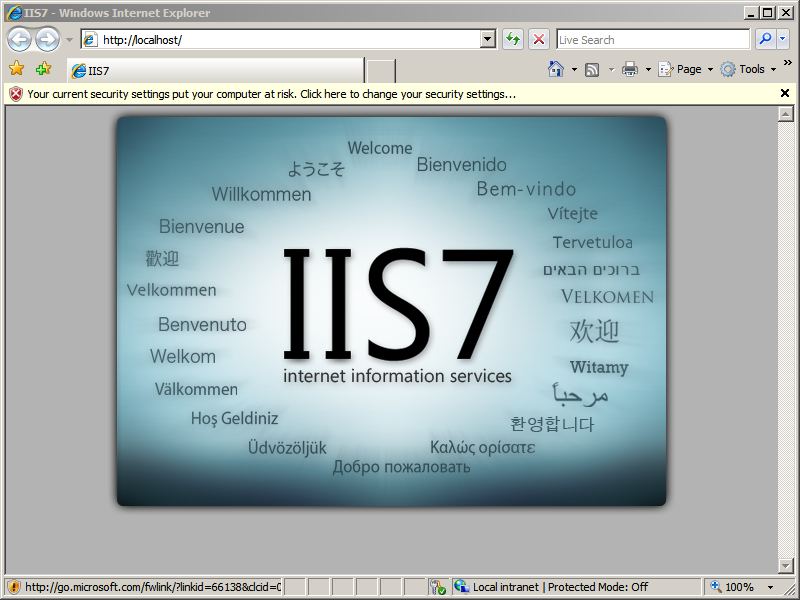
After installing IIS, you must verify the installation to determine whether it is serving pages properly. Test the installed IIS from the server that is hosting it as well as from another browser on the network.
To verify that IIS is serving pages
-
Start a browser on the host that IIS is running on.
-
From the browser, go to the following URL:
http://localhost/IIS is installed and running if the browser displays the "IIS7" page (Figure 12-10).
12.3 Starting and Configuring IIS
Section 12.3.2, "Changing the IIS Port"
Section 12.3.3, "Adding a New ISAPI Filter"
12.3.1 IIS Manager
-
Start the management console, which is required before any other actions are taken.
-
Select: Start > All Programs > Administrative Tools > Internet Information Services (IIS) Manager
-
When the "Internet Information Services (IIS) Manager" loads:
-
Expand the left-hand tree that starts with the current system's name (Figure 12-11).
Figure 12-11 Internet Information Services (IIS) Manager

Description of ''Figure 12-11 Internet Information Services (IIS) Manager''
-
In the "Sites Entry" field, select Default Web Site.
-
12.3.2 Changing the IIS Port
-
Open the management console and browser to the Default Site
-
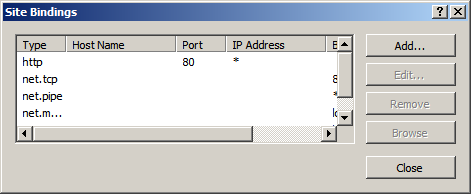
Right-click the Default Web Site entry and select Edit Bindings from the menu.
-
In the "Site Bindings" dialog box (Figure 12-12) you can add or change the ports and IP address on which the Server IIS will bind.
-
Click Close after all changes have been made.
12.3.3 Adding a New ISAPI Filter
-
Open the management console and browser to the Default Site.
-
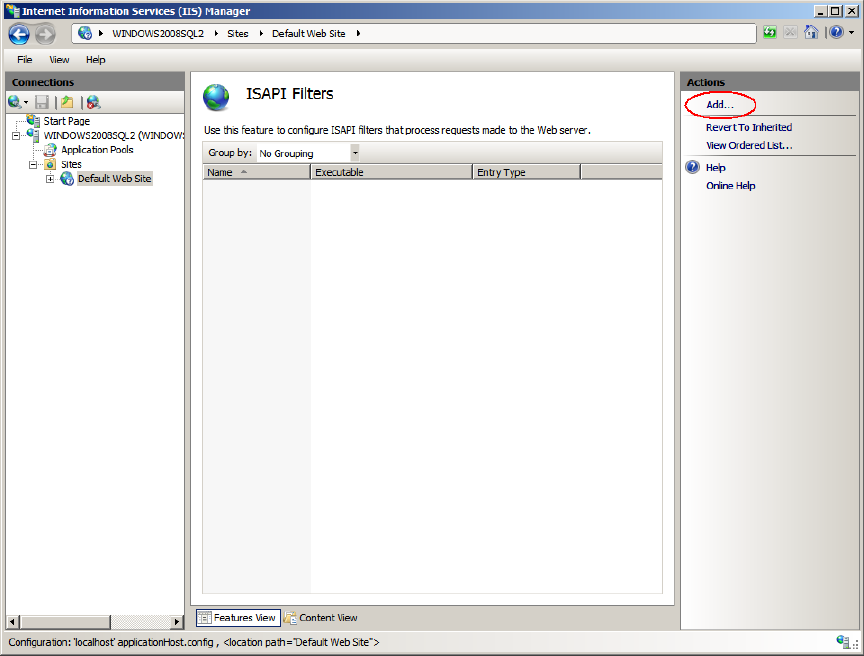
In the center list, click ISAPI Filters and click Add (Figure 12-13).
-
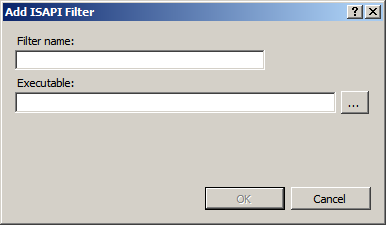
The "Add ISAPI Filter" dialog box appears.
-
Fill in the fields provided:
-
Filter name: Enter a filter name.
-
Executable: Enter the location of the Executable.
-
-
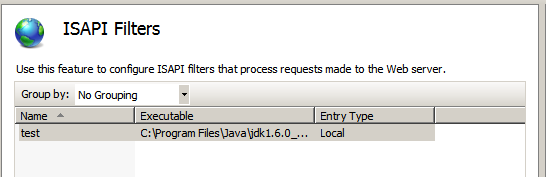
Click OK (Figure 12-14).
The new filter is added to the "ISAPI Filters" list, as shown in Figure 12-15.
-
12.3.4 Proxying Using IIS
-
Open the management console and browse to the Default Site.
-
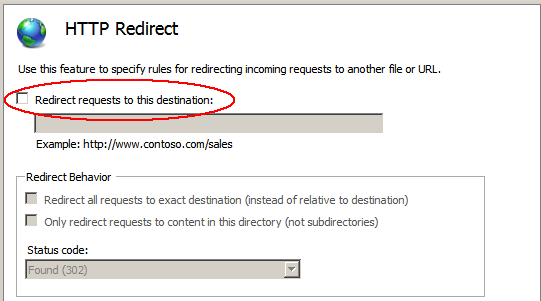
In the center list, click HTTP Redirect.
-
In the center panel of the "Internet Information Services (IIS) Manager":
-
Select the Redirect requests to this destination option (Figure 12-16).
-
Enter the location of the remote server in the text field (for WebCenter Sites or Satellite Server include the context root).
-
Click Apply.
-