| Oracle® Communications IP Service Activator OSS Integration Manager Guide Release 7.2 E36051-01 |
|
|
PDF · Mobi · ePub |
| Oracle® Communications IP Service Activator OSS Integration Manager Guide Release 7.2 E36051-01 |
|
|
PDF · Mobi · ePub |
This chapter provides examples of using the OIM commands to perform a number of functions within Oracle Communications IP Service Activator.
This chapter consists of a number of worked examples showing some of the most common uses of OIM, from discovering devices to setting up management and customer VPNs and applying policy rules to them. The examples are based on the use of the OIM CLI but as they are intended as general illustrations, they can be adapted for use in scripts.
For illustrative purposes, example screens are included showing the corresponding appearance of the user interface.
The examples are based on a simple example network, initially with a single domain called "iisp".
A set of commands are available to allow users to navigate through the system and display information.
The following commands allow you to navigate through the network topology. See "The Navigation Module" for full details.
| Command | Purpose |
|---|---|
|
getPath [object-path] |
Returns the path to the current position in the EOM |
|
setPath [object-path] |
Sets the current path within the EOM |
|
getChildren [object-path] |
Lists the children of the object |
|
getName [object-path] |
Returns the name of an object |
|
getparents [object-path] |
Lists the parents of an object |
|
getAttributes [object-path] |
Lists the attributes of an object |
|
getID [object-path] |
Returns the ID of an object |
The following diagrams illustrate the basic structure of the object hierarchy for navigation purposes.
Figure 5-1 shows the Root object hierarchy. Note the standard ID numbers for these objects.
Figure 5-2 shows the Policy object hierarchy.
Figure 5-3 shows the System object hierarchy.
Figure 5-4 shows the Topology object hierarchy. Note that whenever further objects are created or existing objects linked they appear as children of the appropriate object. For example, if a rule is created at the device level it appears as a child of the device, or if a PE interface is linked to a site, it will appear as a child of the site.
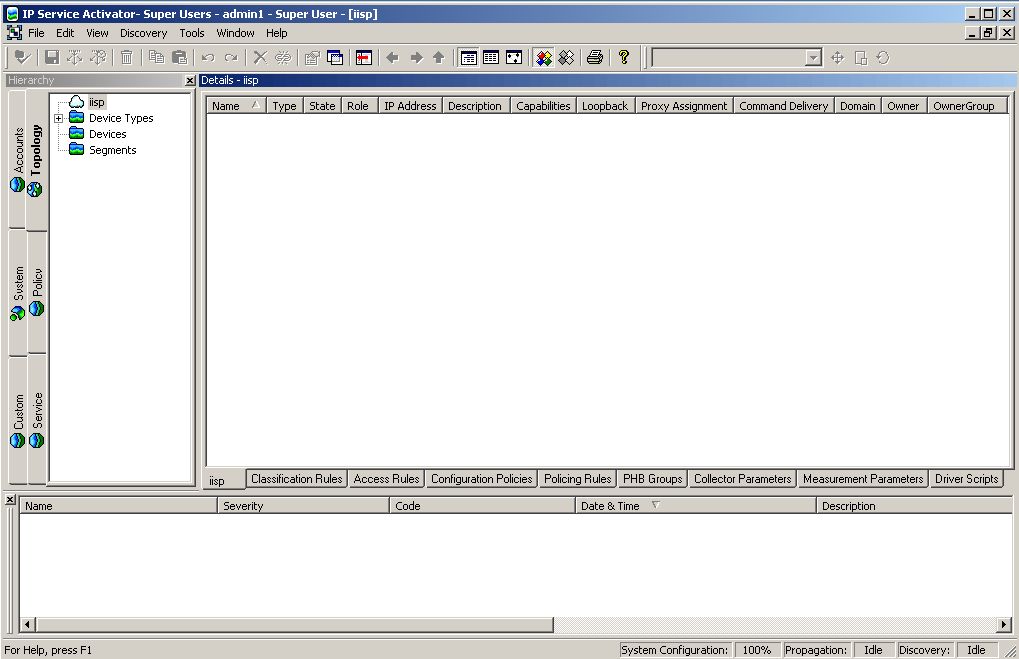
The following examples show commands to navigate through the system and list the pre-existing objects. This assumes one domain called iisp, as shown in Figure 5-5.
To browse the policy part of the EOM, set the path to "policy":
setPath policy:policy
    /Policy:"Policy"
/Policy:"Policy">getchildren
    [4] RoleDevice:"Access"
    [5] RoleDevice:"Gateway"
    [6] RoleDevice:"Core"
    [7] RoleDevice:"Any"
    [8] RoleInterface:"Core"
    [9] RoleInterface:"Customer"
    [10] RoleInterface:"Local"
    [11] RoleInterface:"Access"
    [12] RoleInterface:"Any"
    [272] Domain:"iisp"
You can then view the domain:
/Policy:"Policy">setPath domain:iisp
    /Policy:"Policy"/Domain:"iisp"
/Policy:"Policy"/Domain:"iisp">getchildren
    [273] Network:"OrchDemo"
    [285] PacketMarking:"IP Precedence 0"
    [286] PacketMarking:"IP Precedence 1"
    [287] PacketMarking:"IP Precedence 2"
    [288] PacketMarking:"IP Precedence 3"
    [289] PacketMarking:"IP Precedence 4"
    [290] PacketMarking:"IP Precedence 5"
    [291] PacketMarking:"IP Precedence 6"
    [292] PacketMarking:"IP Precedence 7"
    [293] TrafficGroup:"Standard Traffic Types"
    [297] TrafficGroup:"Standard Port Numbers"
    [647] ClassificationGroup:"Standard Traffic Types"
    [651] ClassificationGroup:"Standard Port Numbers"
    [1749] Customer:"Customer A"
    [1756] Customer:"Management"
You can then view the network and view the devices that have been set up:
/Policy:"Policy"/Domain:"iisp">setPath network:"OrchDemo"
    /Policy:"Policy"/Domain:"iisp"/Network:""

/Policy:"Policy"/Domain:"iisp"/Network:"">getChildren
    [1212] Device:"G3640-4.Orchestream.com"
    [1213] Device:"G3640-6.Orchestream.com"
    [1214] Device:"G3640-3.Orchestream.com"
    [1570] Network:"CORE NET"
    [1847] Device:"A2501-3.Orchestream.com"
The find command allows you to search for a particular character string.
The basic syntax of the find command is:
find [object-path] search-string attributes finddirection=direction [depth=depth]
object-path: The ID or path of the object from which to start the search. If this is omitted, the search will start from the current point in the path.
search-string: A string, enclosed in quotes, containing the object to look for. It may contain wild cards.
attributes: Any number of attributes may be specified. An object will only satisfy the search criteria if it matches the search string and has the same attributes as those given.
direction: Indicates the direction of the search (child or parent). By default the Find operation searches downwards through the hierarchy, from parent to child, but you can set it to search upward, from child to parent.
depth: Limits the number of levels in the object tree hierarchy that are included in a search. By default the Find operation executes a parallel search across and down all siblings.
To find all objects from the current location:
find . "*"
To search for a domain in a current directory:
find . Domain:"*"
To find a specific object from the current location:
find . Device:"DeviceName"
To search up the tree from the current location:
find . Customer:"*" finddirection=parent
To find sites that are immediate children of a particular customer:
find site:"*" Policy:"policy"/Domain:"domain"/Customer:"customer" depth=1
If you are unsure of where an object is in the object model, it is a good idea to start the search from the root. For example:
find / device:"G*"
[1152] Device:"G4500-1"
[1178] Device:"G4500-3"
[1225] Device:"G3640-3"
[1266] Device:"G7204-1"
[1817] Device:"GCAT5509"
[1837] Device:"G3640-7"
[1852] Device:"G-6509"
This example describes how to discover devices using OIM. It is possible to discover new devices, set security/authentication parameters and fetch the capabilities of interfaces using OIM in exactly the same way as from the user interface.
Note that the discovery can take some time especially if a large number of devices are discovered.
A domain must previously have been created using the UI.
The ID or name of the network object which will be the parent of the discovered devices must be known.
The basic syntax for the discover command is:
discover network-id parameters
The network-id is the ID of the network object which will be the parent of the discovered devices.
The parameters specify the type of discovery, the IP addresses (or DNS names) to discover, and the security settings that will be required to authenticate to the device. The Type parameter defaults to Discover, so for an ordinary discovery this can be omitted. The security settings are required in order to configure the device or to obtain the capabilities of specific interfaces, so if they are not set on discovery they must be set afterwards and the capabilities re-fetched.
To discover a single device, use the discover command specifying the IP address of the device to be discovered.
discover network-id ipaddress=10.0.0.22 mask=32
discover network-id DnsName=foo
This will discover the device, creating it as a child of the network object.
To discover a single device using an SNMP Profile, when the authentication option is selected:
discover network-id ipaddress=10.0.0.22 mask=32 SnmpProfileName=xxxxxxxx
To discover a whole subnet, use the discover command with the following format:
discover network-id ipaddress=subnet-address mask=24
To fetch device and interface capabilities, you need to provide security information for the devices. The exact command syntax depends on the type of security required.
Anonymous Telnet
discover network-id IpAddress=IPaddress AccessStyle=Anonymous LoginPassword=loginpassword EnablePassword=enablepassword
Named User
discover network-id IpAddress=IPaddress AccessStyle=NamedUser UserName=username LoginPassword=loginpassword EnablePassword=enablepassword
TACACS
To discover using TACACS, the UserName, ResponseStrings, and EnablePassword attributes of the Network object must be set first:
modify network-id UserName=username ResponseStrings=responsestrings EnablePassword=enablepassword
commit
The device can then be discovered using a command as follows:
discover network-id IpAddress=IPaddress AccessStyle=TACACS
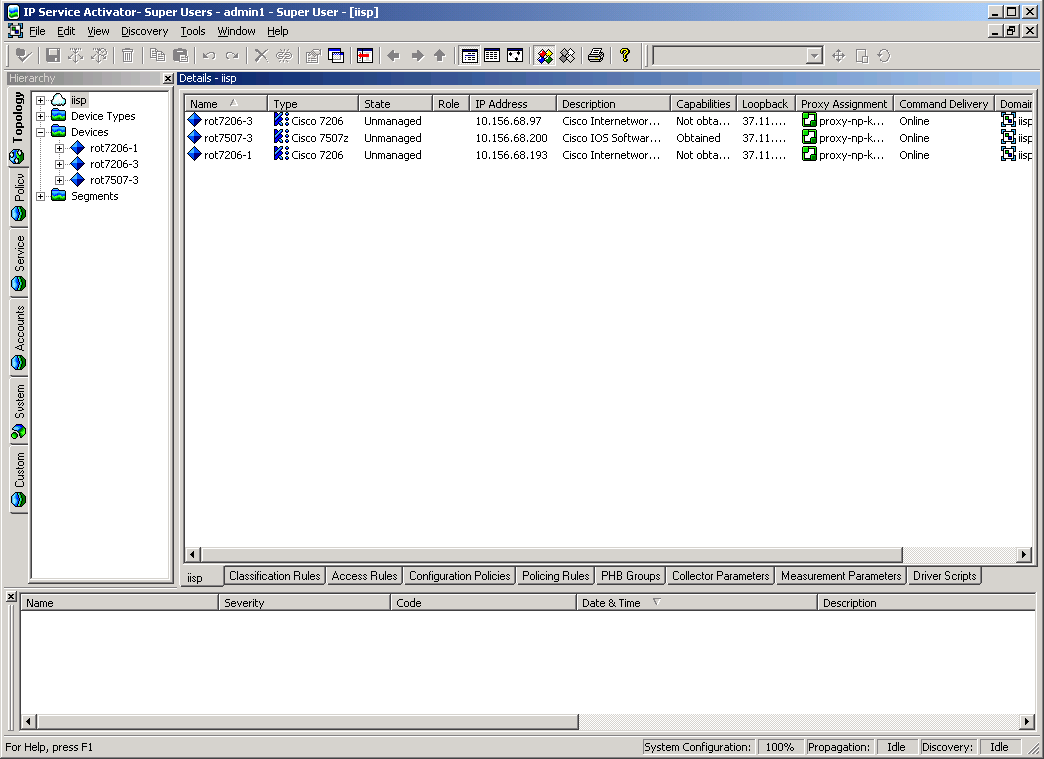
In this example, three devices are discovered within a network (ID=18)
discover [18] IpAddress=10.0.0.91 AccessStyle=anonymous LoginPassword=cisco EnablePassword=cisco
discover [18] IpAddress=10.0.0.92 AccessStyle=anonymous LoginPassword=cisco EnablePassword=cisco
discover [18] IpAddress=10.0.0.93 AccessStyle=anonymous LoginPassword=cisco EnablePassword=cisco
/>GetChildren [18]
[2707] Device:"rot7206-1"
[2731] Device:"rot7206-3"
[2799] Device:"rot7507-3"
The user interface is as in Figure 5-6.
The three devices appear as children of the network object. As part of the discovery, any role assignment rules that have been set up using the user interface will also be applied to the newly-discovered objects.
Device objects, and interfaces on those devices, can be created directly using the OIM to permit pre-provisioning.
If the required DeviceType object for the device does not exist, then it must be created as a child of the Topology object:
setPath /Topology:"Topology"
create DeviceType:"name"
modify DeviceType:"name" attributes
Devices and interfaces may be created in the same way as any other object using the create command. Note that Device and Interface objects contain a number of attributes whose values can only be set on creation. See "DeviceType Object", "Device Object", and "Interface Object".
setPath network-id
create Device:"device-name" IpAddr=IPaddress DeviceType=device-type-name IsVirtual=False ...
modify Device:"device-name" Name=new-device-name
commit
device-type-name is the name of a DeviceType object that is a child of the Topology object.
Interface objects can then be created as children of the Device object:
setPath device-id
create Interface:"interface-name" IpAddr=IPaddress SubnetMask =subnet-mask ...
modify Interface:"interface-name" Speed=new-interface-speed
commit
Once the Device and Interface objects have been created, and the correct security attributes set, the real devices can be discovered and associated with the Device object by using the discover command:
discover device-id
In this example a device and an interface are created. The device is created as a child of the network object (ID=18). This example assumes that the DeviceType object already exists as a child of the Topology object.
setPath [18]
create Device:"New Device" IpAddr=1.2.3.4 DeviceType="New Type" IsVirtual=False
commit
setPath Device:"New Device"
create Interface:"NewInterface" ipAddr=5.6.7.8 SubnetMask=255.255.255.0
commit
Before devices and interfaces can be configured, you need to assign roles to them in order to define the services and policies that can be applied to them. You can assign both system-defined roles and user-defined roles, and create new user-defined roles if required.
This section describes the command syntax.
To create a new device or interface role, set the path to the Policy object, and use the create command to create the roles:
setPath /Policy:"Policy"
create RoleDevice:"new-device-role"
create RoleInterface:"new-interface-role"
To assign a role (either a newly-created one, or an existing one) to a device, interface, or sub-interface simply link the role to the object.
link [object-id] [role-id]
Note that RoleDevice objects can only be children of Device objects, and RoleInterface objects can only be children of Interface or SubInterface objects.
In this example, roles are assigned to the three devices discovered in "Discovering Devices". The PE device is assigned a role of ”Gateway” while the two CE devices are assigned the role of ”Access”. The interfaces linking the devices are all assigned the ”Access” interface role.
Object IDs are as follows:
RoleDevice:"Gateway"=[5]
RoleDevice:"Access"=[4]
RoleInterface:"Access"=[11]
To assign appropriate roles to the devices:
link [2799] /Policy:"Policy"/RoleDevice:"Gateway"
link [2707] /Policy:"Policy"/RoleDevice:"Access"
link [2731] /Policy:"Policy"/RoleDevice:"Access"
commit
Alternatively, use the object IDs, such as:
link [2731] [4]
To assign appropriate roles to the interfaces:
link [2865] [11]
link [2867] [11]
link [2838] [11]
link [2962] [11]
commit
This section explains the steps involved in creating a site and setting up the routing parameters.
Sites are associated with PE Access interfaces. They can also be associated with CE devices if they are to be managed, and PE devices, when creating an interface-less site. These devices and interfaces must have been discovered and appropriate roles must be assigned.
This section describes the command syntax.
Sites must be created as children of Customer objects, so you need to create a customer object as a child of the Domain if it does not already exist.
setPath domain-id
create Customer:"name"
commit
The site can then be created as a child of the required customer:
setPath customer-id
create Site:"name"
commit
The appropriate interface on the PE device needs to be linked to the site:
link site-id interface-id
commit
If the site is to contain a CE router, then that must also be linked to the site:
link site-id ce-device-id
commit
If the site contains the CE router, then it should be managed.
manage ce-device-id
commit
The routing parameters between the PE and the CE can then be set. This involves modifying certain attributes on the site.
Routing Protocol
To configure the appropriate protocol, the Routing Protocol must be set to RIP, EBGP, OSPF, or NONE.
modify site-id RoutingProtocol=value
commit
For RIP and OSPF, no further parameters need to be set. If the RoutingProtocol is set to EBGP, then additional attributes should be set.
The BgpAsn attribute on the Site object should be set to the ASN of this site.
The PrivateCeIpAddress attribute on the Interface object should be set to the IP address of the access interface on the CE.
modify management-site-id BgpAsn=value
modify interface-id PrivateCeIpAddress=value
commit
Static Routing
Setting the InstallStatic attribute on the Site object to True will specify static routing. The destinations that can be reached from the PE Access interface can then be set by creating StaticRoute objects as children of the PE Access interface and setting their attributes:
setPath interface-id
create StaticRoute:""
modify static-route-id ipaddr=ce-ipaddr subnetmask=mask
nexthop=ce-access-interface-ipaddr
commit
If multiple static routes are available then a StaticRoute object should be created for each destination accessible from the PE Access interface.
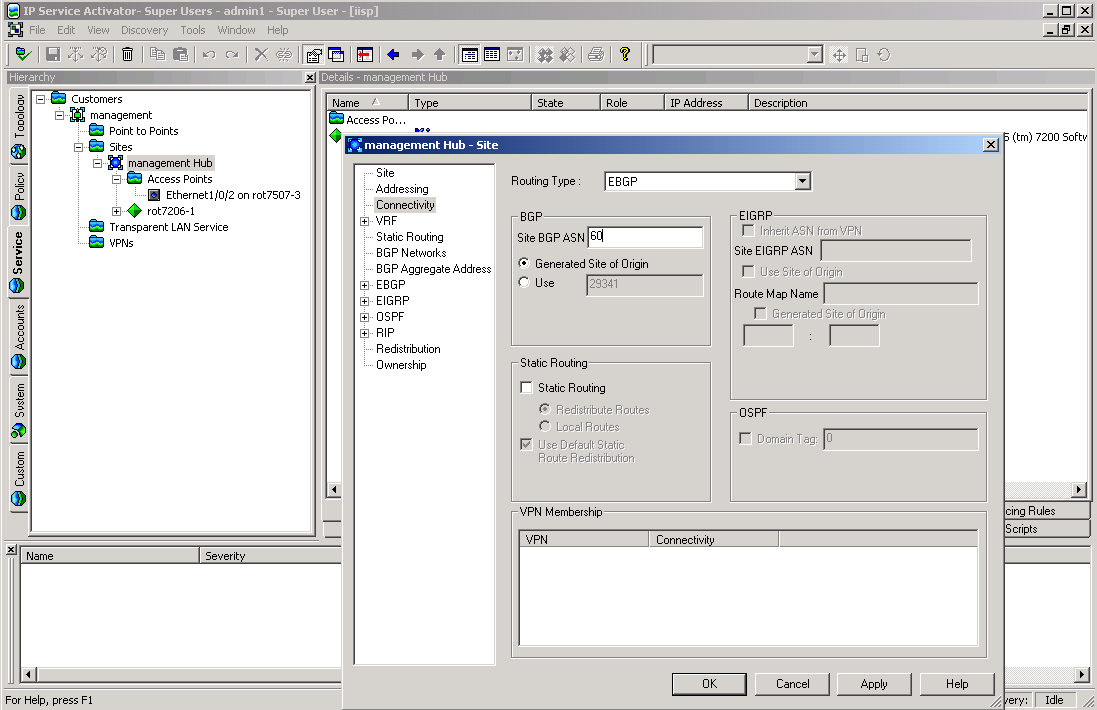
In this example a site is created that contains the PE access interface "Ethernet 0/1" and the CE device "A1720-1". This site is used as the management site of a management VPN.
The routing protocol for the site is EBGP, and the address of the access interface on the CE device is 10.136.135.2. Static routing to the CE device is also configured.
OIM Commands
First, the customer object is created as a child of the Domain object (ID=30):
setPath [30]
create Customer:"Management"
commit
Next the Site object is created as a child of the newly-created customer:
setPath Customer:"Management"
create Site:"Management Hub"
commit
Now the PE access interface (ID=2867) and the CE device (ID=2837) must be linked to the site:
link Site:"Management Hub" [2867]
link Site:"Management Hub" [2837]
commit
Now the CE and PE devices can be managed:
manage [2837]
manage [2861]
commit
Next the routing protocol for the site should be set to EBGP, and the BgpAsn attribute is set to a nominal value (in this case 60).
modify Site:"Management Hub" RoutingProtocol=EBGP BgpAsn=60
commit
The PrivateCeIpAddr attribute on the PE access interface (ID=2867) in the site should be set to the IP address of the CE's access interface.
modify [2867] PrivateCeIpAddr=10.135.135.2
commit
Now the static route is configured. A StaticRoute object is created as a child of the PE access interface (ID=2867), and the attributes of the object are set accordingly.
setPath [2867]
create StaticRoute:"0.0.0.0"
modify StaticRoute:"0.0.0.0" ipaddr=10.0.0.91 subnetmask=255.255.255.255 nexthop=10.135.136.2
commit
Figure 5-7 shows that a customer and a site have been created. The Connectivity properties page shows that the ASN has been correctly set.
Figure 5-7 The Connectivity Properties Page
This section explains the steps involved in setting up a management VPN.
The management VPN must contain a site that will be the hub of the VPN, and any customer sites that are also present in their own VPNs. These sites must have been previously set up. It is usual to create a management customer that will contain the management site and the management VPN object.
This section describes the command syntax.
The first step is to create a VPN object as a child of the management customer:
setPath customer-id
create VPN:"ManagementVPN"
commit
The VPN must be configured as a management VPN:
modify vpn-id MplsVpnType=Management
commit
The Management Site object can now be linked to the VPN. This site should be set up as a hub site of the management VPN. To do this, after linking the site to the VPN, create a SiteHub object as a child of the VPN with the same name as the management site:
link vpn-id management-site-id
setPath vpn-id
create SiteHub:"management-site-name"
commit
In this example, a management VPN is created for the Management customer. The Management site is added to the VPN, and configured to be a hub. A single customer site is then added to the management VPN as a spoke.
Firstly the management VPN object should be created as a child of the Management customer (ID=3000).
setPath [3000]
create VPN:"Management VPN"
modify VPN:"Management VPN" MplsVpntype=Management
commit
Now the management site (ID=3002) should be linked to the VPN object:
link VPN:"Management VPN" [3002]
commit
The management site is made a hub of the VPN, by creating a SiteHub object with the name ”Management Site” as a child of the VPN.
setPath VPN:"Management VPN"
create SiteHub:"Management Hub"
commit
Finally any customer sites should be linked to the VPN object. In this example a single customer site object (ID=3013) is linked to the VPN object (ID=3020).
link [3020] [3013]
commit
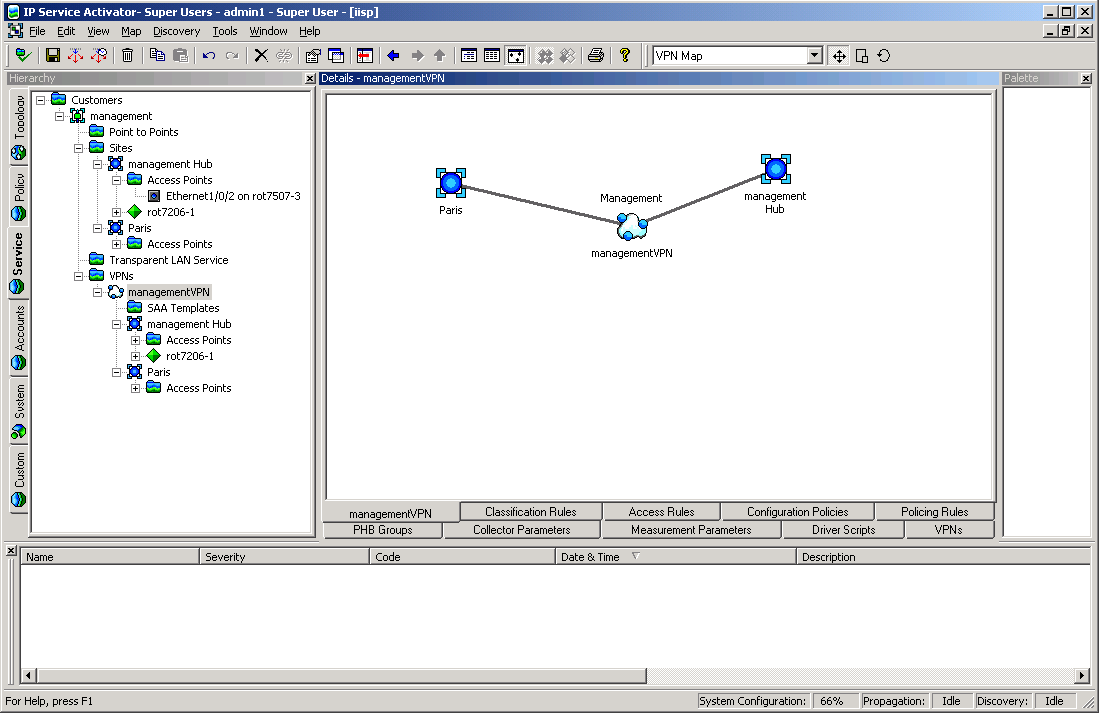
Figure 5-8 shows the management VPN containing the two sites.
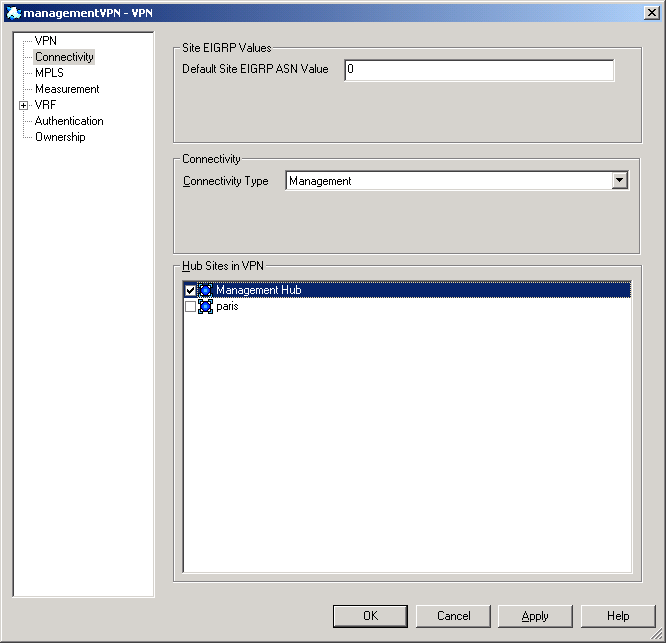
Figure 5-9 shows the properties box of the VPN, showing that ”Management Site” is a hub, and ”Paris” is a spoke.
This section explains the steps involved in creating a customer VPN.
This section describes the command syntax.
A VPN object must be created as a child of the customer:
setPath customer-id
create VPN:"vpn-name"
commit
The VPN object must be configured as a either a hub and spoke or a full mesh VPN:
modify [vpn-id] MplsVpnType=type
commit
Any sites that are to be in the VPN must be linked to the VPN object:
link customer-vpn-id customer-site-id
commit
Repeat this step for all sites to be included in the VPN.
If the customer VPN is hub and spoke, one of the linked sites must be defined as the hub site. This is achieved by creating a SiteHub object as a child of the VPN object, with the same name as the site. The hub-site-name must match the name of the site under the hub and spoke VPN.
setPath customer-vpn-id
create SiteHub:"hub-site-name"
commit
If the VPN is full mesh VPN, this step is not necessary.
To remove a SiteHub which is linked to a hub in a hub and spoke VPN:
unlink [vpn id] [sitehub id]
delete [sitehub id]
commit together
Any sites linked to any customer VPN must also be linked to the management VPN object, if this has not already been done:
link management-vpn-id customer-site-id
commit
This should be repeated so all the customer sites are linked to the management VPN object.
This example creates a full mesh VPN containing three customer sites (assumed to be already created, but not yet linked to the management VPN).
First a VPN object is created as a child of Customer 1 (ID=3012).
setPath [3012]
create VPN:"Acme Customer VPN"
commit
The VPN is defined as full mesh:
modify VPN:"Acme Customer VPN" MplsVpnType=FullMesh
commit
The three customer sites are linked to the VPN object:
link VPN:"Acme Customer VPN" Site:"London"
link VPN:"Acme Customer VPN" Site:"Paris"
link VPN:"Acme Customer VPN" Site:"Frankfurt"
commit
The three customer sites are also linked to the management VPN (ID=3084).
link [3084] Site:"London"
link [3084] Site:"Paris"
link [3084] Site:"Frankfurt"
commit
Figure 5-10 shows the Customer VPN containing three sites.
This section describes how to create and configure classification rules, access rules and policing rules.
Creating a rule involves the following steps:
Create the RuleClassification, RuleAccess, or RulePolicing object.
Link RoleDevice and RoleInterface objects to the Rule to set the role(s) that the rule will apply to.
Set the attributes of the Rule object.
Once all these steps have been performed, and the final commit executed, then ConcreteRule objects appear as children of any interfaces that match the role criteria.
The devices and interfaces on which the rules are applied must have already been discovered, and must have roles assigned to them.
This section describes the command syntax.
Consider where the rule is to be applied. If it is to apply to all devices and interfaces that match the role(s), the rule should be created as a child of the Domain object. If the rule is only to apply on the interfaces of one specific device, then the rule should be created as a child of that device:
setPath domain-id
create RuleType:"rule-name"
commit
setPath device-id
create RuleType:"rule-name"
commit
RuleType may be RuleClassification, RuleAccess, or RulePolicing.
Note:
The rule applies to global domain only when that domain contains VPN and its applying to only that device which is part of the VPN.To assign roles that the rule will apply to, simply link the appropriate RoleDevice and RoleInterface objects to the rule:
link rule-id role-id
commit
To specify whether the rule applies inbound, outbound or both, set the InBound and OutBound flags to true or false using the modify command:
modify rule-id InBound=true
modify rule-id OutBound=true
commit
You can set an applicable date and time period in one of two ways.
One method is to modify the StartTime, EndTime, and DaysOfWeek attributes using the modify command. StartTime and EndTime must be set to a string with the format ”YYYY/MM/DD HH:MM:SS”. The DaysOfWeek attribute uses an unsigned integer where each bit represents a day of the week. For example:
modify rule-id StartTime="2001/10/10 10:00:00"
modify rule-id EndTime="2001/10/10 10:00:00"
modify rule-id DaysOfWeek="127"
commit
The alternative is to modify the PeriodName attribute to match the name of an existing Period object (which must be a child of the Domain object). When this method of setting the data and time is used, any change to the Period object changes the start and end time of the Rule object.
modify rule-id PeriodName="period-object-name"
commit
The Classification of the rule can be set in one of two ways, using local classification or global classification.
To set up local classification, modify the Classification object (which must be a child of the Rule object) to ensure the appropriate source/destination IP address and account name are set. Also modify the TrafficName attribute to the name of an existing Traffic object if required. For example, to set the Rule to work on traffic from IP address 10.0.0.3, to a destination account dest-account and traffic type traffic-name use the following commands:
modify classification-id SourceIpAddr=10.0.0.3
modify classification-id SourceMask=255.255.255.255
modify classification-id DstAccountName="dest-account"
modify classification-id TrafficName="traffic-name"
commit
To set up global classification, first delete the Classification object that is a child of the Rule. Then create a ClassificationGroup object as a child of the Rule. Finally, any number of existing Classification objects or ClassificationGroup objects may be linked to the newly created ClassificationGroup object. For example:
setPath rule-id
delete classification-id
create ClassificationGroup:"name"
link classification-group-id classification-object
commit
The remaining attributes differ depending on the type of rule.
To set packet marking on a classification rule, modify the PacketMarking attribute to the name of a PacketMarking object that is a child of the Domain object:
modify rule-id PacketMarkingName="packet-marking-name"
commit
To create a packet marking and link it to a traffic type:
create TrafficPacketMarking:"TrafficTypeTT1"
create PacketMarking:”TrafficPM1”
link [traffic-type-id] [packet-marking-id]
commit
Note: the traffic type specified must match the name of the existing traffic type.
To unlink a packet marking from a traffic type:
modify [classification-id] TrafficName=""
commit
This example creates rules to apply QoS on ”Acme Customer VPN” which was set up in an earlier example.
A classification rule is created that marks real-time traffic within Acme Customer VPN is marked with a specific IP precedence value, and an access rule is created to prevent any Game traffic (Quake) from traveling on the VPN.
A RuleClassification object is created as a child of the VPN (ID= 3105):
setPath [3105]
create RuleClassification:"Real-time"
commit
The device and interface roles are set up to indicate which interfaces the rule will apply to. In this case the rule is applied to the Access interfaces on the PE. Therefore the RuleClassification object is linked to the Gateway device role (ID=5) and the Access interface role (ID=11):
link RuleClassification:"Real-time" [5]
link RuleClassification:"Real-time" [11]
commit
The rule is to apply to inbound traffic on the interfaces, so the Rule's InBound attribute is set to True, and the OutBound attribute is set to False.
modify RuleClassification:"Real-time" InBound=True OutBound=False
commit
Next the packet marking is set. The PacketMarkingName attribute is set to "IP Prec 5", which is the name of the PacketMarking object that has been assigned to the identified traffic.
modify RuleClassification:"Real-time" PacketMarkingName="IP Prec 5"
commit
Concrete rule objects will now appear as children of the three PE access interfaces in the VPN.
An access rule is set up to prevent Quake traffic from using the VPN. This rule will be configured to apply to the PE Access interfaces in the VPN.
A RuleAccess object is created as a child of the customer VPN (ID=3105):
setPath [3105]
create RuleAccess:"Quake Deny"
commit
Now the RuleAccess object is linked to the Gateway device role (ID=5) and the Access interface role (ID=11).
link RuleAccess:"Quake Deny" [5]
link RuleAccess:"Quake Deny" [11]
commit
The rule is to apply to inbound traffic on the interfaces, so the rule's InBound attribute is set to True, and the OutBound attribute is set to False.
modify RuleAccess:"Quake Deny" InBound=True OutBound=False
commit
As the access rule will deny traffic, the Permit attribute should be set to False:
modify RuleAccess:"Quake Deny" Permit=False
commit
Finally, the traffic type which identifies the traffic to be denied is set. To do this the TrafficName attribute of the Classification object that is a child of the RuleAccess object is set to the name of the traffic to be denied:
modify RuleAccess:"Quake Deny"/Classification:"" TrafficName="quake-c"
commit
Creating and apply PHB groups involves the following steps:
Create a PHBGroup object
Modify the PhbGroup object's PHB child object
The OIM automatically creates a PHB child object when you create a PHBGroup object.
Create a PHB object for each class of service to be handled by the PHBGroup object
Any Cos object to be used by an MQC PHB group must be linked to a Classification object
A PHB group must always be created either as a child of the Domain object or as a child of a PHBGroupFolder, which itself is a child of the Domain object. When a PHBGroup object is created, a PHB child object is automatically created and its ClassName attribute set to ’Default Class of Service'. The Name attribute is automatically taken from the ClassName attribute; the two are inextricably linked.
setpath /Policy:"Policy"/Domain:"USA"
create PHBGroup:"WRRPHB"
modify PHBGroup:"WRRPHB" Action=8
commit
The device and interface roles are set up to indicate which interfaces the PHB group will apply to. In this case the PHB group is applied to the Access interfaces on the PE. Therefore the PHBGroup object is linked to the Gateway device role (ID=5) and the Access interface role (ID=11):
link PHBGroup:"WRRPHB" [5]
link PHBGroup:"WRRPHB" [11]
commit
PHBAtm and PHBFrts objects are also automatically created as children of the PHBGroup object:
setpath PHBGroup:"WRRPHB"
getchildren
    [1197] PhbAtm:"PhbAtm"
    [1196] PhbFrts:"PhbFrts"
    [1190] Phb:"Default Class of Service"
When a PHBGroup object is created, a PHB child object is automatically created and its ClassName attribute set to ’Default Class of Service'. You can delete this object and link to an existing CoS.
To delete the default CoS and link to an existing CoS:
Use the following command syntax:
delete [default_cos_id]
setpath [phb_id]
create Phb:"Gold" classname="Gold"
commit
where phb_id is the ID of the PHB Group to be linked to a new CoS, default_cos_id is the ID of the default CoS, and Gold is the name of the existing CoS to be linked.
The PHBGroup automatically inherits the name of the new CoS.
If the new CoS needs a different CoS mechanism, set it before committing.
Note:
If you simply unlink the default CoS rather than deleting it, the default will become an orphan, which generates an error.You can create additional PHB objects as children of the PHBGroup object. You must set the ClassName attribute at creation:
setpath /Policy:"Policy"/Domain:"USA"/PHBGroup:"WRRPHB"
create PHB:"name" ClassName="Silver"
commit
modify PHB:"Silver" ClassName="Gold"
commit
Note that the value assigned to the PHB object's name attribute is ignored by the OIM. The OIM automatically assigns a name to the PHB object, using the value specified in the ClassName attribute; that is, the PHB object's name is taken from the CoS to which it is linked.
If no ClassName is specified at creation, the attribute is automatically assigned the string ’Default Class of Service'. Assigning the same ClassName value to two PHB objects results in an error:
CommandExecutionError.ERR_ObjectModelViolation: Object Cos is linked to more than one Phb under the same PHBGroup [PhbGroupId].
Use the getchildren command to view the children of the PHBGroup object ’WRRPHB':
/Policy:"Policy"/Domain:"USA"/PHBGroup:"WRRPHB">getchildren
    [1197] PhbAtm:"PhbAtm"
    [1196] PhbFrts:"PhbFrts"
    [1190] Phb:"Default Class of Service"
    [1205] Phb:"Gold"
An MQC PHB group must be created either as a child of the Domain object or as a child of a PHBGroupFolder, which itself is a child of the Domain object, in the same way as a standard PHB group.
When a PHBGroupMqc object is created with the attribute CreateDefaultPhbMqc set to its default value of True, the OIM automatically creates a PhbMqc child object. The child object's ClassName attribute is set to ’Default Class of Service', which associates the object with this CoS. It is essential to modify the CosName attribute and specify the QoS action:
setpath /Policy:"Policy"/Domain:"USA"
create PHBGroupMqc:"CBWFQMQC"
modify PHBGroupMqc:"CBWFQMQC"/PhbMqc:"Default Class of Service" …
CosName="Gold" Action=2
commit
Refer to Table 4-73, "PHBMqc Object Attributes" for a list of applicable Action types.
Note that if a value is not specified for the Action attribute the following error is generated:
CommandExecutionError.ERR_ObjectModelViolation: [3653], No MQC Action has been selected.
The device and interface roles are set up to indicate which interfaces the MQC PHB group will apply to. In this case the MQC PHB group is applied to the Access interfaces on the PE. Therefore the PHBGroupMqc object is linked to the Gateway device role (ID=5) and the Access interface role (ID=11):
link PHBGroupMqc:"CBWFQMQC" [5]
link PHBGroupMqc:"CBWFQMQC" [11]
commit
When a PHBGroupMqc object is created, a PHBMqc child object is automatically created and its ClassName attribute set to ’Default Class of Service'. You can delete this object and link to an existing CoS.
To delete the default CoS and link to an existing CoS:
Use the following command syntax:
delete [default_cos_id]
setpath [phbmqc_id]
create Phb:"Gold" classname="Gold"
commit
where phbmqc_id is the ID of the PHBGroupMqc to be linked to a new CoS, default_cos_id is the ID of the default CoS, and Gold is the name of the existing CoS to be linked.
The PHBGroupMqc automatically inherits the name of the new CoS.
If the new CoS needs a different CoS mechanism, set it before committing.
Note:
If you simply unlink the default CoS rather than deleting it, the default will become an orphan, which generates an error.You can create additional PHBMqc objects as children of the PHBGroupMqc object. You must set the CosName attribute at creation:
setpath /Policy:"Policy"/Domain:"Test"/PhbGroupMqc:"CBWFQMQC">
create PHBMqc:"PHBMQCSilver" CosName="Silver" Action=16
commit
If no CosName is specified at creation, the attribute is automatically assigned the string ’Default Class of Service'. Assigning the same CosName value to two PHBMqc objects results in an error.
Implementing single or two-rate policing with a PHBMqc object involves the following attributes:
Action: set to 4 for single-rate policing, 8 for two-rate policing
ConformAction: specify the name of a PHBPolicingAction object
ExceedAction: specify the name of a PHBPolicingAction object
ViolateAction: specify the name of a PHBPolicingAction object
For example, to implement two-rate policing:
modify PhbMqc:"Default Class of Service" Action=8
ConformAction="Default Conform Action"
ExceedAction="Default Exceed Action"
ViolateAction="Default Violate Action"
For a list of applicable Action values, refer to "PHBGroup Objects".
It is possible to configure WFQ using WRED as the drop strategy. Figure 5-11 illustrates the object relationships that must be created to configure WFQ+WRED.
Figure 5-11 Object Relationships for WFQ+WRED Configuration
Pre-requisites
The example assumes the following:
PacketMarking objects IP Precedence 1 and IP Precedence 2 have been created through the user interface
It is also possible to perform this step via the OIM. However, these packet markings are created automatically by loading the default.dscp.policy file into IP Service Activator.
Sample Code
*** The PhbMqc requires that any Cos it applies to is linked to a
*** Classification so we must create an appropriate Classification. In
*** this case it will be a ClassificationGroup containing
*** TrafficPacketMarkings DSCP1 and DSCP2.
create TrafficPacketMarking:"DSCP1"
create TrafficPacketMarking:"DSCP2"
link TrafficPacketMarking:"DSCP1" PacketMarking:"IP Precedence 1"
link TrafficPacketMarking:"DSCP2" PacketMarking:"IP Precedence 2"

create Classification:"Classify_DSCP1" TrafficName="DSCP1"
create Classification:"Classify_DSCP2" TrafficName="DSCP2"

create ClassificationGroup:"Classify_Gold"

link ClassificationGroup:"Classify_Gold" Classification:"Classify_DSCP1"
link ClassificationGroup:"Classify_Gold" Classification:"Classify_DSCP2"

create Cos:"Gold"
link Cos:"Gold" ClassificationGroup:"Classify_Gold"


*** Create the 2 Cos used in the WRED Phbs that will determine the WRED
*** strategy.

create Cos:"Gold_1"
create Cos:"Gold_2"

link Cos:"Gold_1" PacketMarking:"IP Precedence 1"
link Cos:"Gold_2" PacketMarking:"IP Precedence 2"

*** Create the WRED PhbGroup

create PhbGroup:"WRED Strategy" Action=8

create PhbGroup:"WRED Strategy"/Phb:"Gold_1" ClassName="Gold_1"
create PhbGroup:"WRED Strategy"/Phb:"Gold_2" ClassName="Gold_2"

*** Commit the transaction
commit

*** These are the children of the WRED PhbGroup.
*** One can modify the attributes for the Phbs as required (or could set
*** them during creation).

/Policy:"Policy"/Domain:"Domain1"/PHBGroup:"WRED Strategy">getchildren
    [1583] PhbAtm:"PhbAtm"
    [1582] PhbFrts:"PhbFrts"
    [1576] Phb:"Default Class of Service"
    [1590] Phb:"Gold_2"
    [1584] Phb:"Gold_1"

*** Create the PhbGroupMqc (Action = 66 = 2 + 64 = CBWFQ + Congestion)

setpath /Policy:"Policy"/Domain:"Domain1"
create PhbGroupMqc:"Congestion Avoidance"
modify PhbGroupMqc:"Congestion Avoidance"/PhbMqc:"Default Class of Service" CosName="Gold" Action=66
modify PhbGroupMqc:"Congestion Avoidance"/PhbMqc:"Gold" WredStrategy=WRED
link PhbGroupMqc:"Congestion Avoidance"/PhbMqc:"Gold" PHBGroup:"WRED Strategy"

commit
A PHBGroupMqc object that specifies CBWFQ, Shaping or Policing may nest a child PHBGroupMqc and so configure what Cisco refers to as a ’hierarchical service policy'. IP Service Activator now allows the user to select the Marking Action along with Nesting Action, in addition to the already existing LLQ, CBWFQ, Shaping and Policing actions. Figure 5-12 illustrates the object relationships that must be formed to nest MQC PHB groups.
Figure 5-12 Object Relationship for Nesting MQC PHB Groups
Pre-requisites
The example assumes the following:
PacketMarking objects IP Precedence 1 and IP Precedence 2 have been created through the user interface
It is also possible to perform this step via the OIM. However, these packet markings are created automatically by loading the default.dscp.policy file into IP Service Activator.
Overview of the Example
This example uses nested MQC PHB groups to apply traffic shaping to incoming Gold and Silver traffic and different queuing treatments to each class of service individually. The object relationships that are created and the policies that are applied are shown in Figure 5-13.
Figure 5-13 Object Relationships and Policies
Sample Code
*** The PhbMqc requires that the Cos is linked to a Classification so we
*** must create an appropriate classification. To apply shaping to
*** Gold and Silver traffic we need to create a ClassificationGroup
*** containing 2 types of traffic - DSCP1 and DSCP2.

create TrafficPacketMarking:"DSCP1"
create TrafficPacketMarking:"DSCP2"
link TrafficPacketMarking:"DSCP1" PacketMarking:"IP Precedence 1"
link TrafficPacketMarking:"DSCP2" PacketMarking:"IP Precedence 2"

create Classification:"Classify_DSCP1" TrafficName="DSCP1"
create Classification:"Classify_DSCP2" TrafficName="DSCP2"

create ClassificationGroup:"Gold+Silver"

link ClassificationGroup:"Gold+Silver" Classification:"Classify_DSCP1"
link ClassificationGroup:"Gold+Silver" Classification:"Classify_DSCP2"

create Cos:"Gold+Silver"
link Cos:"Gold+Silver" ClassificationGroup:"Gold+Silver"
*** We also need to create a Cos for each traffic type we
*** want to apply individual queuing parameters to.
create Cos:"Gold"
create Cos:"Silver"
link Cos:"Gold" Classification:"Classify_DSCP1"
link Cos:"Silver" Classification:"Classify_DSCP2"

*** Create a PhbGroupMqc specifying CB-WFQ as the treatment. This
*** PhbGroupMqc will be nested in a parent PhbGroupMqc that defines
*** traffic shaping parameters for the Cos's.

create PhbGroupMqc:"Nested_Queue"
modify PhbGroupMqc:"Nested_Queue" WfqBandwidthType=Percentage

*** We need to create 2 PhbMqcs that define queuing parameters for
*** each Cos - PhbMqc:"Gold" (renames the automatically created
*** "Default Class of Service" PhbMqc) and PhbMqc:"Silver"
*** Action=2 (CBWFQ) and we allocate different bandwidth for each
*** stream (35% and 20%)

modify PhbGroupMqc:"Nested_Queue"/PhbMqc:"Default Class of Service" CosName="Gold" Action=2 WFQWeight=35
create PhbGroupMqc:"Nested_Queue"/PhbMqc:"Silver" CosName="Silver" Action=2 WFQWeight=20

*** Create the top-level PhbGroupMqc to shape both Cos's
*** (Gold+Silver) and select the nested PhbGroupMqc (linked by
*** attribute). Action= 144 (Shape + Nest)
create PhbGroupMqc:"TopLevel_Shape"
modify PhbGroupMqc:"TopLevel_Shape"/PhbMqc:"Default Class of Service" CosName="Gold+Silver" Action=144 NestedPhbGroup="Nested_Queue"

commit
This section describes how to create an event subscription that will collect events of a specified type occurring on specified objects.
The objects on which events are to be collected must already exist and have been configured.
Creating a subscription requires two steps:
An EventSubscription object must be created as a child of the System object. The EventSubscription specifies the delivery target.
One or more EventCollector objects must be created as a child of the EventSubscription. The EventCollector objects determine which type of events should be captured, and on which object(s).
First the EventSubscription object is created as a child of the System object:
setPath /System:"System"
create EventSubscription:"name"
commit
Then the attributes of the EventSubscription must be set, namely the DeliveryType and the DeliveryDetails. The DeliveryType attribute indicates what sort of trap (if any) should be sent, and the DeliveryDetails attribute tells where to deliver the trap.
modify event-subscription-id DeliveryType=delivery-type DeliveryDetails=delivery-details
commit
delivery-type can take the values SnmpTrap, UpgradedSnmpTrap, NetCool, CORBA Channel, or DatabaseOnly.
delivery-details is a string containing delivery details. For SNMP traps this is a comma-separated list specifying the IP address, port to which the traps are sent, and SNMP version (for example, "192.168.1.2,162,2"). For CORBA or NetCool, the string indicates the name of the service. If DeliveryType is DatabaseOnly the string should be blank.
Multiple EventCollector objects may be created as children of the EventSubscription object. Each EventCollector object traps one particular type of event on a group of objects. Therefore if, for example, you need to trap attribute changes and fault events occurring on a single object, two EventCollector objects would be required.
setpath /System:"System"/EventSubscription:"name"
create EventCollector:"name"
commit
After creation, set the type of event to be reported:
modify event-subscription-id Type=type
commit
type takes the values CreateAndDelete, Fault, AttributeChange, or StateChange.
Then set the object(s) to trap on. There are several ways to do this.
To collect events from a single object only, link that object to the EventCollector, and set the attribute HierarchicalCollection to False:
link event-collector-id target-object-id
modify event-collector-id HierarchicalCollection=False
commit
To collect events from an object and all items below it in the hierarchy, link the top object to the EventCollector object and set the HierarchicalCollection attribute to True.
link event-collector-id target-object-id
modify event-collector-id HierarchicalCollection=True
commit
If any event from any object in the entire EOM is required, simply set the attributes RootCollection and HierarchicalCollection to True.
modify event-collector-id RootCollection=True HierarchicalCollection=True
commit
Note that you cannot set the RootCollection to be True while an object linked to the EventCollector object or CollectionPoint is non-zero.
The scope can be further narrowed down by restricting it by device role and/or interface role. To do this, simply link any DeviceRole and/or InterfaceRole object to the EventCollector.
link event-collector-id [role-id]
commit
Once the subscription is set up, any events occurring that match one of the EventCollector's criteria will be sent as specified in the EventSubscription's DeliveryDetails attribute.
EventFilter objects can be created as children of EventCollector objects, in order to filter on faults and/or object attributes. You do not need to set the name of an EventFilter object as it will be named automatically according to the attributes set.
The two types of EventFilter objects, EventFilterFaultMask and EventFilterAttributeChange, work in similar ways.
EventFilterFaultMask
The EventFilterFaultMask allows you to set up a filter to report on specific categories of faults or individual faults only. When you create the EventFaultFilterMask object you must set the Permit attribute to True or False and the FaultCategory attribute to to match the type of fault to be reported. To report a single fault only, set the FaultCategory to "SingleFaultCode", and set the FaultCode attribute to the relevant fault number (see "EventFilterFaultMask Object").
setPath event-collector-id
create EventFilterFaultMask:"" Permit={true|false}
FaultCategory=fault-category FaultCode=fault-code
commit
EventFilterAttributeChange
The EventFilterFaultMask allows you to set up a filter to report on a specific attribute change. You must set the Permit attribute to True or False, and the AttributeName attribute to the name of the attribute to be reported. the attribute can be any attribute of any object within the EOM.
setPath event-collector-id
create EventFilterAttributeChange:"" Permit={true|false} AttributeName=attribute-name
commit
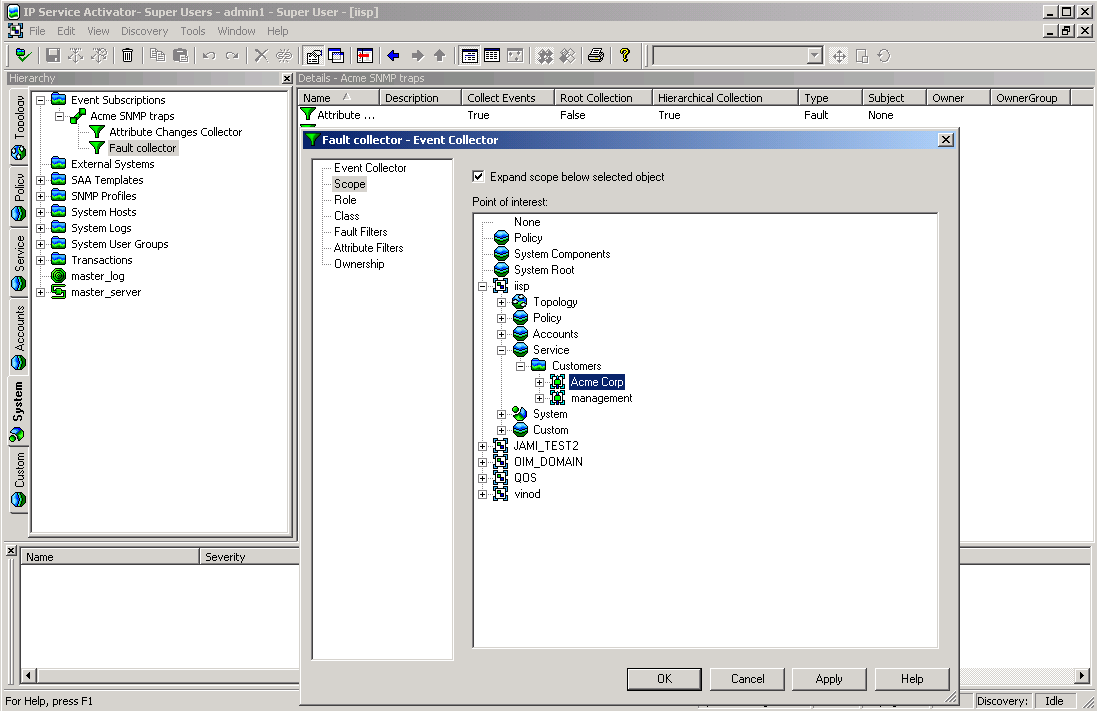
In this example, an EventSubscription object will be created and configured to send Upgraded SNMP Traps to an IP address. Two EventCollector objects will be created as children of the EventSubscription. One will catch all faults; the other will catch attribute changes of any objects in the ”Customer One” hierarchy.
It assumes that initially no EventSubscription objects exist.
The EventSubscription object is created as a child of /System:"System":
setPath /System:"System"
create EventSubscription:"Subscription 1"
commit
The DeliveryType attribute is set to UpgradedSNMPTrap, and the DeliveryDetails should be set to ”10.100.100.10, 162, 1” which signifies that the traps should be sent to 10.100.100.10, on port 162, and version 1 SNMP traps should be sent:
modify EventSubscription:"Subscription 1" DeliveryType=UpgradedSnmpTrap DeliveryDetails="10.100.100.10,162,1"
commit
The EventCollector objects are created as children of the EventSubscription object:
setPath EventSubscription:"Subscription 1"
create EventCollector:"Fault Collector"
create EventCollector:"Attribute Changes Collector"
commit
Firstly, configure the event collector that collects faults, which collects all faults in the system:
modify EventCollector:"Fault Collector" Type=Fault
modify EventCollector:"Fault Collector" RootCollection=True
modify EventCollector:"Fault Collector" HierarchicalCollection=True
commit
Then configure an event collector to collect attribute changes, which collects events for the ACME Corp customer (ID=3012) and its children:
modify EventCollector:"Attribute Changes Collector" Classname=<Class-name>
modify EventCollector:"Attribute Changes Collector" Type=AttributeChange
modify EventCollector:"Attribute Changes Collector" HierarchicalCollection=True
link EventCollector:"Attribute Changes Collector" [3012]
commit
Figure 5-14 shows that an EventSubscription object and two EventCollector objects have been created. The dialog box shows that the ”Attribute Changes” EventCollector object's scope is defined as the Acme Corp customer.
This example describes how to apply parameter sets to configuration targets.
Devices, interfaces, sub-interfaces, and VC endpoints must have already been discovered, and configured with roles assigned to them.
ParameterSets are applied using the use command. The syntax is:
use object-id parameter-set-id [attribute-list]
The above command will create a ParameterSetInstance object that is a child of both the object and the parameter set specified. The instance will also be inherited by all applicable objects, but the ParameterSetInstance object will only appear as a child of the specified object the ParameterSet object has been ”used” with.
The attributes of the ParameterSetInstance to be created can be set by supplying optional attributes, or the ParameterSetInstance object can be modified after creation.
If a CollectorParameterSet is being applied, then the relevant ExternalSystem object should be linked to the created ParameterSetInstance:
link parameter-set-instance-id external-system-id
To remove the ParameterSetInstance, delete the ParameterSetInstance object:
delete object-id parameter-set-id
commit
In this example, a Measurement ParameterSetInstance object (ID=15) will be applied to a Network object (ID=25) with one device. The example shows how the parameters are applied to all the interfaces belonging to the device:
use [25][15] Name="MeasurementInstance 1" Levels="4" OCH_MeasureCBQoS="True"
commit
The use command sets the Levels attribute of the ParameterSetInstance to 4. Levels is a bitwise attribute, and 4 means Interface, so the parameters will only be applied to interfaces.
The ParameterSetInstance object can be seen as a child of the Network object:
getchildren[25]
[701] Device:"A2504-2"
[1400] ParameterSetInstance:"Measurement Instance 1"
Device roles and interface roles can then be linked to the ParameterSetInstance object to indicate which interfaces the parameters should be applied to. For this example a device role of ”Any”, and an interface role of "Any" are linked to the ParameterSetInstance:
link [1400] /Policy:"Policy"/RoleDevice:"Any"
link [1400] /Policy:"Policy"/RoleInterface:"Any"
Using the getParameters command on one of the interfaces that is a child of the device (ID=701) will list the parameters from the ParameterSetInstance:
getchildren [701]
[702]Interface:"Ethernet0"
[705]Interface:"Serial0"
[714]Interface:"Serial1"
[715]Interface:"Null0"
[716]Interface:"Loopback0"
[740]RuleClassification:"ca1"
[5]RoleDevice:"Gateway"
getparameters [702]
r-- Boolean OCH_MeasureCBQoS = True
r-- Boolean OCH_MeasureCarQoSMIB=False
r-- Boolean OCH_MeasureMIB2Stats=False
r-- Boolean OCH_NetflowEnabled=False
r-- U32 OCH_NetflowVersion=1
r-- U32 OCH_NetflowAggregation=0
r-- U32 OCH_NetflowCacheSize=0
r-- U32 OCH_NetflowTimeoutActive=0
r-- U32 OCH_NetflowTimeoutInactive=0
Using the getTargets command on the ParameterSetInstance will display all the interface children of the device, as long as they have a role assigned.
gettargets [1400]
[702]Interface:"Ethernet0"
[705]Interface:"Serial0"
[714]Interface:"Serial1"
[715]Interface:"Null0"
[716]Interface:"Loopback0"
[740]RuleClassification:"ca1"
Applying a Collector ParameterSet is similar, except that ExternalSystem object should be linked to the ParameterSetInstance object after creation to provide the values for the parameters.
This section describes how to create an SAA template with a Jitter operation and apply it to a VPN.
Creating an SAA template involves the following steps:
Create an SAATemplate object
Create the required SAAOperation objects as children of the template
Link the SAA template object to an existing VPN
An SAATemplate must be created as a child of the Policy object:
setPath /Policy:Policy
create SAATemplate:"JitterTemplate" DeviceBits=9 TosBits=3
TypeBits=2
commit
Note:
Note that the combined values of the DeviceBits, TosBits and TypeBits attributes must be exactly 14. For more information, see "SAATemplate Object".Only one SAA operation per operation type can be created as a child of an SAATemplate object.
The name of an SAAOperation object is derived from its Type attribute value. When creating an SAAOperation object, the Name attribute must be left as an empty string ("") and the Type attribute must be specified:
setpath /Policy:Policy/SAATemplate:JitterTemplate
create SAAOperation:"" Type=TcpConnect
modify SAAOperation:"TcpConnect" Period=120 Timeout=25
modify SAAOperation:"TcpConnect" EnableErrorChecking=True
commit
An SAA template is applied by linking it as a child to a VPN:
setpath /Policy:Policy
link Domain:"Global"/Customer:"Acme"/Vpn:"Acme VPN" SAATemplate:"JitterTemplate”
commit
An SAATemplate object may be linked to multiple VPNs.
It is useful to be able to determine when a transaction has been completed and to find out if configuration has been successfully applied to a device.
You can determine that a transaction has been completed by examining its attributes. You can also examine the OPERATIONS attribute of the Transaction object. The Transactionl object displays the concretes related to the operations.
Activation state - It is related to every individual concrete involved in the transaction. It indicates whether the transaction's configuration changes, corresponding to each individual concrete, have actually been activated on the network.
Provisioning state - Once a transaction is committed, the ProvisioningStatus and ReasonForFailure attributes get updated. This reflects the status of the entire transaction. ProvisioningStatus can have the following status:
Succeeded - activation status of all concretes has been set to Succeed.
Failed - activation status of one or more concretes has been set to failed.
Timedout - activation status of one or more concretes has been updated.
/>cat [4479]
| rcw | String | Description | = ”3 actions” | |
| rcw | String | Name | = ”Login Banner” | |
| r-- | U32 | NumberOf Concretes | = 1 | |
| rc- | Operations | OPERATIONS | = |
CID: 4478 Status: Pending Operation: Create PClass: PName: PId:
CID: 4478 Status: Pending Operation: Link PClass: GenericRule PName: Login Banner PId: 4477
CID: 4478 Status: Pending Operation: Link PClass: Interface PName: 3803 PId: 3803
| rcw | Enum | ProvisioningStatus | = Pending | |
| rcw | String | ReasonForFailure | ”” | |
| rc- | Boolean | RollbackOn Failure | = False | |
| rcw | Date | Schedule | = 2009/02/17 11:30:47 | |
| rc- | Enum | State | = Committed | |
| r-- | String | Username | = ’admin' | |
| r-- | U32 | ID | = 4479 |
In the above example an attribute called ProvisioningStatus displays the provisioning status of the transaction. The ”status” field of the concretes displayed under the Operations attribute of TransactionEntry displays ’ActivationState' of every individual concrete.
Figure 5-15 shows the workflow of a transaction to update device configuration:
When a transaction is committed, the policy server propagates the new configuration and the device drivers or Network Processors attempt to apply it to the devices. A concrete object is created for each implementation of the rule, PHB group, VPN or Driver Script to the network. For example, if a rule is applied, a separate concrete rule is created on each interface where it is to be implemented.
To find out whether the configuration has been successfully installed you need to check the State attribute of all the concrete objects involved in the transaction. The State attribute is initially "Inactive" and is updated when the device is configured:
A state of "Installed" means that the transaction is complete and the configuration has been successfully propagated to the device.
A state of "Failed" means the transaction is complete and the configuration could not be applied.
Other states indicate that the transaction is still being processed. Note that states "Finished", "RunFailed", and "RunOnceFailed" only apply to DriverScripts.
In order to determine whether configuration has been applied:
Locate the relevant concrete objects.
Check for changes in status.
To find the instances where an object has been applied, you can search for all the concrete objects descended from the parent object (rule, VPN, etc), and all the concrete objects descended from the object the rule is applied to (network, customer, etc). This can be done using the command:
find objectID "ConcreteObject:*"
The intersection of the two sequences will give the set of concrete objects to examine. See "The Find Command".
An alternative method is to use the events command on the transaction that applied to the parent object. This will give a list of operations performed in the transaction, including creating, linking, or modifying concrete objects. This can be used with the subscribe command to hide operations on other objects. See "The Events Command" and "The Subscribe/Unsubscribe Commands".
There are two methods for checking concrete objects:
Poll the concrete objects, monitoring the State attributes until the value is either "Installed" or "Failed".
Set up an event subscription to collect AttributeChange events on the relevant concrete objects. See "Creating an Event Subscription" for more details.
The following pseudo-code illustrates a script for a rule being applied to a VPN. Similar processing could be used for other scenarios:
link vpnID ruleID;commit
vpnConcretes = find vpnID "ConcreteObject:*"
ruleConcretes = find ruleID "ConcreteObject:*"
activeConcrete = intersection(vpnConcretes, ruleConcretes)
done = false
While not done:
 Processing = 0
 Installed = 0
 Failed = 0
 For concreteObj in activeConcretes:
  getAttributes concreteObj
  get State attribute from the returned list
  If State == "Installed":
 Installed++
Else if State == "Failed":
 Failed++
Else:
 Processing++
If Processing != 0:
 done = true
Do something with the Installed & Failed counts...
The commands in this example illustrate how to view all users and user groups, how to add, delete, or modify a user, and how to change a user's password.
SystemUserGroups cannot be created using the OSS Integration Manager (OIM). You must use the graphical user interface to create a new SystemUserGroup.
Super User access is required to view all users and user groups.
Log in to the OSS Integration Manager (OIM) using either the OIM CLI or a python OIM script.
For example: run integration_manager_cli
To view all user groups and their IDs, enter:
>find / SystemUserGroup:"*"
[30] SystemUserGroup:"Super Users"
where 30 is the ID of the Super Users group
To view all users and their IDs, enter:
>find / SystemUser:"*"
  [33] SystemUser:"admin"
where 33 is the ID of user admin
[2249] SystemUser:"jlastname"
Super User access is required to add a user.
Log in to OIM.
Find the ID of the desired SystemUserGroup.
Create the new user in the desired SystemUserGroup:
>setpath <[ID]>
where ID is the desired SystemUserGroup ID
>create SystemUser:”<alastname>” password=”<password>”
>commit
Users can change their own password and view their own attributes. The Super User can change any user's password, and view the attributes of any user.
To change a user's password:
Log in to OIM.
Find the ID of the desired SystemUser:
>find / SystemUser:”jl*”
Modify the password:
>modify [ID] password=”password”
where ID is the desired SystemUser ID
>commit
To view user attributes:
View the desired user's attributes:
>getattributes [2249] where ID=2249 is the desired SystemUser ID
| r-- | U32 | Active | = 0 | |
| rcw | Boolean | Concurrent | = False | |
| rcw | Boolean | Enabled | = True | |
| r-- | Date | ExpireDate | = 2004/06/16 04:59:59 | |
| r-- | U32 | FailedLogins | = 0 | |
| rcw | Secure | Name | = jlastname | |
| rcw | String | Password | = "*****" | |
| rcw | U32 | PasswordExpires | = 0 | |
| rcw | String | Remarks | = "" | |
| rcw | Boolean | ResetPassword | = False | |
| r-- | U32 | Id | = 2249 |
Explanation: r-- indicates a read-only attribute, while rcw indicates a modifiable attribute. For additional explanation of attributes, refer to "DeviceType Object".
When applying Configuration Thresholding to pushing configuration commands to cartridge-driven devices, you can use this procedure to help you specify the regular expression. The provisioning of the regular expression cannot be done through the GUI, only through the OSS Integration Manager.
The Configuration Thresholding feature checks the commands to be pushed against a provisioned regular expression (MatchesPatternTransactionSize), counts the number of matches, and verifies that the count does not exceed the value of MaxTransactionSize. If the limit is exceeded, the commands are not sent and errors are raised against the concretes and the device. The regular expression and the count limit can be provisioned at a network or a device level. Configuration Thresholding is applied per device, per device transaction.
A different expression is used for different vendor devices to achieve the same purpose:
For Cisco, you can count, for example, the number of ”no” occurrences at the beginning of commands, to limit the amount of configuration removed in one transaction.
For Huawei cartridge units, you can achieve the same function by counting the number of ”undo” occurrences at the beginning of commands.
For Juniper, the whole XML text (which is one large command) is considered, and the system counts the number of times that the regular expression is found in it. On JuniperXml, the system counts occurrences of ”delete=”delete”” attributes anywhere in the XML text.
In most cases, it gives the same results as for other vendor cartridges, except if you use ”greedy” regular expressions. A ”greedy” expression on Juniper can potentially match a big part of the XML text (several or many commands). On other cartridges, it only matches to a whole command at most for each count.
A general limitation of the feature is that counting occurrences of ”no” or ”undo” or ”delete=”delete”” may not give an accurate idea of how much configuration will be removed, because if the match occurs at the top of a large code hierarchy, all code under it would be removed.
In the following sample of device code, if the command to be pushed is ”no Interface 3”, then MatchesPatternTransactionSize=”îno” counts one removal command. But because of the code hierarchy, three commands would actually be removed from the device:
Interface 3
Speed
PhysicalAddress
An inaccurate count is particularly likely on JuniperXml code.
Start a command line session and find the desired network or device objectID.
Modify the regular expression (regex) as follows:
modify [objectID] MatchesPatternTransactionSize=”<reg_expression>”
commit
Check if the regular expression is accepted:
cat
excerpt from response:
rcw String MatchesPatternTransactionSize = ”<reg_expression>”
The default global regular expression checks for ”no” at the beginning of each command line. You can change it at the device level with a specific expression.
To count removal commands on a Huawei device, search for ”undo” at the front of each command:
modify [objectID] MatchesPatternTransactionSize=”îundo”
To count removal commands on a Juniper device, search for ”delete=”delete”” on the command line:
modify [objectID] MatchesPatternTransactionSize=”delete=\”delete\””
At the network level, you can use a regular expression that counts removal commands for several device types:
modify [objectID] MatchesPatternTransactionSize=”(îno|îundo|delete=\”delete\”)”
To directly specify XML content for RuleGeneric policy types, and HTML and XSD schema for user-defined policy types, specify the location of the file with the required content. Alternatively, you can follow the steps specified in the examples below.
Note:
While creating PolicyType or RuleGeneric objects:Double quotes (") should always be preceeded by an escape sequence (\).
The OIM cannot process HTML or XML Schema languages. To insert a new line, provide an extra "\n".
HTML and XML content in the schema is given as a single continuous line in the OIM. A newline "\n" at the end of each line specifies the end of the line.
For this example, the existing configuration policy "Banner" is used.
The following objects are used:
Device with OID [4402]
RoleInterface:Access [11]
RoleDevice : Gateway [5]
PolicyType : Banner [1962]
RuleGeneric : Exexec [8902]
Start by applying appropriate roles for devices and interfaces.
/Policy:"Policy"> link [4002] [5]
/Policy:"Policy"> link [4005] [11]
/Policy:"Policy"> commit
Create a RuleGeneric object of PolicyType Banners at the Device level.
Go to the Device level. RuleGeneric must have one of Vpn, Site, Device, SAP, Domain, SubInterface, Network, Interface, VcEndPointAtm, VcEndPointFr, EthernetVlan, VlanInterface, Customer, Tls, SiteL2 as a parent.
/Policy:"Policy">  cd  [4002]
/Policy:"Policy"/Domain:"test"/Network:"test"/Device:"rot7206-5.oracle.com">
Create a RuleGeneric object.
/Policy:"Policy"/Domain:"test"/Network:"test"/Device:"rot7206-5.oracle.com"> create RuleGeneric:"Exexec" ContentType="banners"
/Policy:"Policy"/Domain:"test"/Network:"test"/Device:"rot7206-5.oracle.com"> commit
Provide values for all the attributes of the above-created RuleGeneric object by specifying XML content directly to the ContentValue attribute:
/Policy:"Policy"/Domain:"test"/Network:"test"/Device:"rot7206-5.oracle.com">  find / RuleGeneric:"Exexec"
[8902] RuleGeneric:"Exexec"
/Policy:"Policy"/Domain:"test"/Network:"test"/Device:"rot7206-5.oracle.com"> modify [8902] ContentValue="
<banners xmlns=\"http://www.metasolv.com/serviceactivator/banner\">\n
 <banner>\n
  <bannerType>motd</bannerType>\n
  <message>$MOTD banner$</message>\n
 </banner>\n
</banners>\n"
Specify the file reference (path of the file) to the ContentValue attribute.
/Policy:"Policy"/Domain:"test"/Network:"test"/Device:"rot7206-5.oracle.com"> modify [8902] ContentValue="D:\motdbanner.xml"
The XML File reference (D:\motdbanner.xml) will contain pure XML content as given below.
<banners xmlns="http://www.metasolv.com/serviceactivator/banner">
 <banner>
  <bannerType>motd</bannerType>
  <message>$MOTD Banner$</message>
 </banner>
</banners>
/Policy:"Policy"/Domain:"test"/Network:"test"/Device:"rot7206-5.oracle.com"> commit
Note:
Make sure that the XML content given in the ContentValue attribute is well defined and valid.Link the Role Interface and Role Device to the RuleGeneric object:
/Policy:"Policy"/Domain:"test"/Network:"test"/Device:"rot7206-5.oracle.com"> link [8902] [11]
/Policy:"Policy"/Domain:"test"/Network:"test"/Device:"rot7206-5.oracle.com"> link [8902] [5]
/Policy:"Policy"/Domain:"test"/Network:"test"/Device:"rot7206-5.oracle.com">commit
The Configuration Policy Exexec created is applied to the device and the concretes are created.
You can create user-defined PolicyTypes in the following ways:
by specifying HTML and XSD schema content directly to OIM as a string.
by loading the userdefinedpolicy.policy file to the Domain that has references to the HTML and XSD schema files.
In this example a user-defined policy type called staticNats for NetworkAddressTranslation is created.
Navigate to the folder where the user-defined policy can be stored. On the Policy tab, expand Service, then select General. Or, execute the following command:
/>cd [1900]
    /Policy:"Policy"/PolicyTypeFolder:"Service"/PolicyTypeFolder:"General"
Review the existing PolicyTypes that are available.
/Policy:"Policy"/PolicyTypeFolder:"Service"/PolicyTypeFolder:"General">ls
    [1901] PolicyType:"Banner"
    [1902] PolicyType:"IP Pools"
    [1903] PolicyType:"Key Chain"
    [1904] PolicyType:"Prefix List"
    [1905] PolicyType:"SNMP Community"
    [1906] PolicyType:"SNMP Host"
    [1907] PolicyType:"Static Route"
    [1908] PolicyType:"User Authentication"
    [1909] PolicyType:"User Data"
Create PolicyType "staticnats" using the OIM Create command.
/Policy:"Policy"/PolicyTypeFolder:"Service"/PolicyTypeFolder:"General">create PolicyType:"statisnats"

/Policy:"Policy"/PolicyTypeFolder:"Service"/PolicyTypeFolder:"General">commit
    [3060] TransactionEntry:"20090306101813"

/Policy:"Policy"/PolicyTypeFolder:"Service"/PolicyTypeFolder:"General">ls
    [1901] PolicyType:"Banner"
    [3059] PolicyType:"statisnats"
    [1902] PolicyType:"IP Pools"
    [1903] PolicyType:"Key Chain"
    [1904] PolicyType:"Prefix List"
    [1905] PolicyType:"SNMP Community"
    [1906] PolicyType:"SNMP Host"
    [1907] PolicyType:"Static Route"
    [1908] PolicyType:"User Authentication"
    [1909] PolicyType:"User Data"

/Policy:"Policy"/PolicyTypeFolder:"Service"/PolicyTypeFolder:"General">cat [3059]
    rcw Enum            Category             = Service
    rcw Boolean         Disabled             = False
    rcw String          HtmlPage             = ""
    rcw String          Name                 = "statisnats"
    rcw String          Remarks              = ""
    rcw String          Schema               = ""
    rcw String          Type                 = ""
    rcw Boolean         Visible              = True
    r-- U32             Id                   = 3059
Provide the HTML content of the user-defined PolicyType.
/Policy:"Policy"/PolicyTypeFolder:"Service"/PolicyTypeFolder:"General">modify PolicyType:"statisnats" HtmlPage="
<!DOCTYPE HTML PUBLIC \"-//W3C//DTD HTML 3.2//EN\">\n
<html>\n
<head><title>com.metasolv.serviceactivator.staticnat.StaticNatsDocument</title>\n
<link rel=\"stylesheet\" type=\"text/css\" href=\"style.css\"></link>\n
<style TYPE=\"text/css\">\n
<!--\n
TABLE, TD, TR, BODY\n
{\n
font-family: 'ms sans serif', sans-serif;\n
font-size:9pt;\n
background-color: threedface;\n
}\n
INPUT, SELECT, BUTTON\n
{\n
font-family: 'ms sans serif', sans-serif;\n
font-size:9pt;\n}\n
-->\n
</style>\n
<script LANGUAGE=\"JavaScript\" SRC=\"DynamicForm.js\"></script
>\n
<script LANGUAGE=\"JavaScript\" SRC=\"ValidateForm.js\"></script>\n
\n
</head>\n
<body BGCOLOR=\"#ECE9D8\" onload=\"doOnLoad()\">\n
\n
<script language=\"JavaScript\">\n
\n
displayNameByNamePut(\"staticNats.staticNat.outsideIpAddress\", \"Outside IP Address\");\n
displayNameByNamePut(\"staticNats.staticNat.insideIpAddress\", \"Inside IP Address\");\n
\n
</script>\n
\n
<form name=\"mainform\" action=\"\" method=\"POST\">\n
<input type=\"hidden\" name=\"staticNats.xmlns\" value=\"http://www.metasolv.com/serviceactivator/staticnat\"/>
\n
<table valign=\"top\" border=\"0\" width=\"100%\">\n
<tr id=\"staticNats.staticNat.add\">\n
<td>\n
\n
</td>\n
<td>\n
<button onclick=\"
addRows('staticNats.staticNat', 'null')\">Add Static Nat</button>\n
</td>\n
\n
</tr>\n
\n
</table>\n
<script language=\"JavaScript\">\n
var error_string = '';\nfunction validateFormElements(form) {\n
var success = true;\n
for(var i=0;i < form.elements.length;i++) {\n
        key = form.elements[i];\n
        var keyname = key.name;\n
        if (typeof keyname == \"undefined\"){\n
           continue;\n        }\n
        keyname = getPureCid(key
name);\n
    if (keyname == \"staticNats.staticNat.outsideIpAddress\") {\n
        if (! validate_string('Outside IP Address', key.value, 0,999999999,'','',false)) {\n
             success = false;\n
        }\n
    }\n
    if (
keyname == \"staticNats.staticNat.insideIpAddress\") {\n
if (! validate_string('Inside IP Address', key.value, 0,999999999,'','',false)) {\n
             success = false;\n
        }\n
    }\n
    }\n
    if (!success) {\n
  alert(error_string);\n
        error_string='';\n
    }\n
    return success;\n
}\n
</script>\n
</form>\n
<form name=\"templateForm\" action=\"\" method=\"POST\">\n
<table valign=\"top\" border=\"0\" width=\"100%\" class=\"HIDDEN\">\n
<tr id=\"staticNats.staticNat.t\">\n
<td colspan=\"2\">\n
<fieldset><legend>Static Nat</legend>\n
<table valign=\"top\" border=\"0\" width=\"100%\">\n
<tr>\n
<td valign=\"top\">\n
<table valign=\"top\" border=\"0\" width=\"100%\" class=\"top\">\n
<tr id=\"staticNats.staticNat.insideIpAddress.t\">\n
<td valign=\"top\">\n
Inside IP Address\n
</td>\n
<td valign=\"top\">\n<input type=\"text\" name=\"staticNats.staticNat.insideIpAddress.t\" size=\"0\"/>\n
</td>\n
\n
</tr>\n
<tr id=\"staticNats.staticNat.outsideIpAddress.t\">\n
<td valign=\"top\">\n
Outside IP Address\n
</td>\n
<td valign=\"top\">\n
<input type=\"text\" name=\"staticNats.staticNat.outsideIpAddress.t\" size=\"0\
"/>\n
</td>\n
\n
</tr>\n
\n
</table>\n
\n
</td>\n
\n
</tr>\n
\n
</table>\n
\n
</fieldset>\n
\n
</td>\n
<td valign=\"top\">\n
<button onclick=\"deleteRow('staticNats.staticNat')\">Delete</button>\n
</td>\n
\n
</tr>\n
\n
</table>\n
\n
</form>\n
<script LANGUAGE=\"JavaScript\">\nfunction doOnLoad() {\n
}\n
</script>\n
</body>\n
</html>\n"

/Policy:"Policy"/PolicyTypeFolder:"Service"/PolicyTypeFolder:"General">commit
    [3061] TransactionEntry:"20090306102049"

/Policy:"Policy"/PolicyTypeFolder:"Service"/PolicyTypeFolder:"General">modify PolicyType:"statisnats" Schema="
<?xml version=\"1.0\" encoding=\"UTF-8\"?>\n
\n
<!-- Copyright (c) 2007,2008 Oracle. All rights reserved. Oracle is a trademark of  -->\n
<!-- Oracle Corporation and/or its affiliates. Other names may be trademarks        -->\n
<!-- or their respective owners.                                                    -->\n
\n
<xs:schema targetNamespace=\"http://www.metasolv.com/serviceactivator/staticnat\" \n    xmlns:lib=\"http://www.metasolv.com/serviceactivator/devicemodel\" \n    xmlns:app=\"http://www.metasolv.com/serviceactivator/guiextensions\" \n
xmlns:ipsa=\"http://www.metasolv.com/serviceactivator/documentation\"\n    xmlns:sn=\"http://www.metasolv.com/serviceactivator/staticnat\" \n    xmlns:xs=\"http://www.w3.org/2001/XMLSchema\" elementFormDefault=\"qualified\" att
ributeFormDefault=\"unqualified\">\n
    <xs:import namespace=\"http://www.metasolv.com/serviceactivator/devicemodel\" schemaLocation=\"../networkprocessor/devicemodel/datatypes.xsd\"/>\n    <xs:complexType name=\"StaticNat\">\n
   <xs:sequence>\n
      <xs:element name=\"insideIpAddress\" type=\"lib:IPv4Address\">\n
         <xs:annotation>\n
            <xs:documentation>Inside IPaddress</xs:documentation>\n
            <xs:appinfo>\n
               <app:gui>\n
                  <app:displayName>Inside IP Address</app:displayName>\n
               </app:gui>\n
            </xs:appinfo>\n
         </xs:annotation>\n
      </xs:element>\n
      <xs:element name=\"outsideIpAddress\" type=\"lib:IPv4Address\">\n
         <xs:annotation>\n
            <xs:documentation>Outside IP address</xs:documentation>\n
            <xs:appinfo>\n
               <app:gui>\n
                  <app:displayName>Outside IP Address</app:displayName>\n
               </app:gui>\n
            </xs:appinfo>\n
         </xs:annotation>\n
      </xs:element>\n
   </xs:sequence>\n
</xs:complexType>\n
<xs:complexType name=\"StaticNats\">\n
   <xs:sequence>\n
      <xs:element name=\"staticNat\" type=\"sn:StaticNat\" minOccurs=\"0\" maxOccurs=\"unbounded\">\n
         <xs:annotation>\n
            <xs:appinfo>\n
               <app:gui>\n
                  <app:displayName>Static Nat</app:displayName>\n
               </app:gui>\n
            </xs:appinfo>\n
         </xs:annotation>\n
      </xs:element>\n
   </xs:sequence>\n
</xs:complexType>\n
<xs:element name=\"staticNats\" type=\"sn:StaticNats\">\n
   <xs:annotation>\n
      <xs:documentation>This configuration policy allows you to create
static Network Address Translation on a router to change the IP address
that is routed in or out of the router and help conserve IP
addresses.</xs:documentation>\n
      <xs:appinfo>\n
         <ipsa:documentation>\n
            <ipsa:seealso>Creating Device Level Configuration Policies
            </ipsa:seealso>\n
            <ipsa:since>5.2.0</ipsa:since>\n
            <ipsa:usagecontext>Device</ipsa:usagecontext>\n
            <ipsa:cardinality>Multiple static [no default]Ts (Network
Address Translation) can be defined in the same policy, or across
multiple policies on the same device.</ipsa:cardinality>\n
         </ipsa:documentation>\n
      </xs:appinfo>\n
   </xs:annotation>\n
</xs:element>\n
</xs:schema>\n"

/Policy:"Policy"/PolicyTypeFolder:"Service"/PolicyTypeFolder:"General">commit
    [3062] TransactionEntry:"20090306102733"
Provide a value for the Type attribute. This will be treated as content-type for RuleGeneric.
/Policy:"Policy"/PolicyTypeFolder:"Service"/PolicyTypeFolder:"General"/PolicyType:"statisnats">modify [3059] Type="statisNats"

/Policy:"Policy"/PolicyTypeFolder:"Service"/PolicyTypeFolder:"General"/PolicyType:"statisnats">commit
    [3063] TransactionEntry:"20090306105107"
Create a RuleGeneric object using the newly created PolicyType (here staticNats).
/Policy:"Policy"/PolicyTypeFolder:"Service"/PolicyTypeFolder:"General"/PolicyType:"statisnats">find / Device:"*"
    [2592] Device:"NY01.oracle.com"

/Policy:"Policy"/PolicyTypeFolder:"Service"/PolicyTypeFolder:"General"/PolicyType:"statisnats">cd [2592]
    /Policy:"Policy"/Domain:"test"/Network:"test"/Device:"NY01.oracle.com"

/Policy:"Policy"/Domain:"test"/Network:"test"/Device:"NY01.oracle.com">create RuleGeneric:"statex1" ContentType="staticNats" ContentValue="
<staticNats xmlns=\"http://www.metasolv.com/serviceactivator/staticnat\">\n
<staticNat>\n
<insideIpAddress>1.2.2.1</insideIpAddress>\n
<outsideIpAddress>2.1.1.1</outsideIpAddress>\n
</staticNat>\n
</staticNats>\n"

/Policy:"Policy"/Domain:"test"/Network:"test"/Device:"NY01.oracle.com">commit
    [3089] TransactionEntry:"20090306114456"

/Policy:"Policy"/Domain:"test"/Network:"test"/Device:"NY01.oracle.com">link [3086] [11]

/Policy:"Policy"/Domain:"test"/Network:"test"/Device:"NY01.oracle.com">commit
    [3091] TransactionEntry:"20090306114658"

/Policy:"Policy"/Domain:"test"/Network:"test"/Device:"NY01.oracle.com">link [3086] [5]

/Policy:"Policy"/Domain:"test"/Network:"test"/Device:"NY01.oracle.com">commit
    [3093] TransactionEntry:"20090306114721"
This example creates a user-defined policy type called staticNats for Network Address Translation.
Pre-requisites:
User defined configuration policy source files must be available at appropriate directories. For more information see IP Service Activator SDK Configuration Policy Extension Developer Guide.
For every Configuration Policy, three files are required.
The ConfigPolicy.policy file - to load the policy to a Domain (for example, staticnat.policy)
HTML file - to provide an input GUI (for example, staticNats.html)
XSD file - schema for the configuration policy (for example, staticNat.xsd)
Note:
Make sure that all these files are available on the server in the IPSA_HOME/SamplePolicy directory.You must create the .policy file.
See the line specified in staticnat.policy file to load the user-defined staticNat configuration policy to the domain. The line is:
Service:Custom|;Static [no default]T;staticNats;staticNats;staticNat;0;1;
The information provided in the .policy file has the following fields:
Service:Custom - Directory structure to load the policy to GUI.
Static [no default]T - Name of the user defined configuration policy to be displayed on the GUI.
staticNats - Type of the configuration policy.
staticNats - Name of the html file.
StaticNat - Name of the xsd file.
Load the .policy file to the domain.
Available domains are listed:
/>find / Domain:"*"
 [584] Domain:"test"
 [1973] Domain:"test1"
Modify the LoadPolicy attribute of the domain and specify the name of the ConfigPolicy.policy file (staticNat.policy in this example.)
/>cd [584]
    /Policy:"Policy"/Domain:"test"

/Policy:"Policy"/Domain:"test">cat
    rcw U32             AllowAsIn            = 1
    rcw Boolean         AsOverride           = True
    rcw String          BgpMd5Key            = "*****"
    rcw Boolean         DomainAsOverride     = True
    rcw String          LoadPolicy           = "unset"
    rcw String          Name                 = "test"
    rcw Boolean         PeCeSendExtendedCommunity = False
    rcw Boolean         PeCeSendStandardCommunity = False
    rcw Boolean         PePeSendStandardCommunity = True
    rcw String          Remarks              = ""
    rcw String          UseLoopback          = "0"
    rcw U32             VrfTableLimit        = 0
    rcw U32             VrfTableLimitWarning = 75
    r-- U32             Id                   = 584
/Policy:"Policy"/Domain:"test">modify LoadPolicy="staticNat.policy"

/Policy:"Policy"/Domain:"test">commit
    [3385] TransactionEntry:"20090320065237"
Create the RuleGeneric object using the newly created PolicyType (staticNats in this example.)
/Policy:"Policy"/PolicyTypeFolder:"Service"/PolicyTypeFolder:"General"/PolicyType:"statisnats">find / Device:"*"
    [2592] Device:"NY01.oracle.com"

/Policy:"Policy"/PolicyTypeFolder:"Service"/PolicyTypeFolder:"General"/PolicyType:"statisnats">cd [2592]
    /Policy:"Policy"/Domain:"test"/Network:"test"/Device:"NY01.oracle.com"

/Policy:"Policy"/Domain:"test"/Network:"test"/Device:"NY01.oracle.com">create RuleGeneric:"statex1" ContentType="staticNats" ContentValue="
<staticNats xmlns=\"http://www.metasolv.com/serviceactivator/staticnat\">\n
<staticNat>\n
<insideIpAddress>1.2.2.1</insideIpAddress>\n
<outsideIpAddress>2.1.1.1</outsideIpAddress>\n
</staticNat>\n
</staticNats>\n"
"ContentValue" can take the path of the xml file.
Create an XML file (here staticnat.xml) with all the values of the configuration policy and make sure that the file is valid against the schema (here staticNat.xsd).
Provide the path of the XML file to ContentValue attribute. OIM will parse the file and take care of escaping special characters (" to \") and new line (\n).
For example:
/Policy:"Policy"/Domain:"test"/Network:"test"/Device:"NY01.oracle.com">create RuleGeneric:"statex1" ContentType="staticNats" ContentValue="export\OracleCommunication\ServiceActivator\xmls\staticnat.xml"
See the XML content of the staticnat.xml file as shown that does not have escape sequence characters and \n:
<staticNats xmlns="http://www.metasolv.com/serviceactivator/staticnat">
<staticNat>
<insideIpAddress>1.1.1.1</insideIpAddress>
<outsideIpAddress>2.2.2.2</outsideIpAddress>
</staticNat>
</staticNats>

/Policy:"Policy"/Domain:"test"/Network:"test"/Device:"NY01.oracle.com">commit
    [3089] TransactionEntry:"20090306114456"

/Policy:"Policy"/Domain:"test"/Network:"test"/Device:"NY01.oracle.com">link [3086] [11]

/Policy:"Policy"/Domain:"test"/Network:"test"/Device:"NY01.oracle.com">commit
    [3091] TransactionEntry:"20090306114658"

/Policy:"Policy"/Domain:"test"/Network:"test"/Device:"NY01.oracle.com">link [3086] [5]

/Policy:"Policy"/Domain:"test"/Network:"test"/Device:"NY01.oracle.com">commit
    [3093] TransactionEntry:"20090306114721"
|
Copyright © 2011, 2013, Oracle and/or its affiliates. All rights reserved. Legal Notices |
|