Cloning a virtual machine or template enables you to create multiple virtual machines or templates based on the original. There are two methods of cloning; a simple clone, and an advanced clone. A simple clone sets up the clone with the same configuration information as the original. An advanced clone enables you to create and use a clone customizer with differing configuration from the original. For example, you can use a clone customizer to have the clone deploy to a different server pool or repository, with changed memory, virtual CPU number, network settings, and so on. Figure Figure 7.2, “Cloning a virtual machine or template” shows the process of creating a clone of a virtual machine or template.
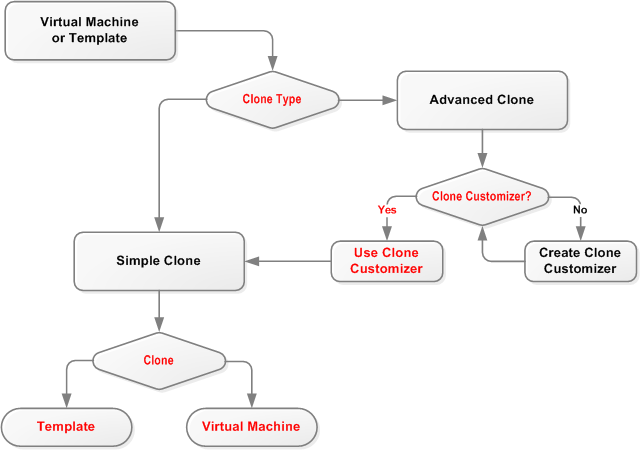
To modify the clone parameters, such as virtual disks, network, memory, and so on, you should use a clone customizer, and use that clone customizer to perform cloning. See Section 7.9.1, “Managing Clone Customizers” to create a clone customizer to use during cloning.
A cold clone is a clone created from a
stopped virtual
machine. A cold clone performs a clone of the virtual machine,
with safe and consistent virtual disk status. This is useful for
creating a virtual machine or template from the original virtual
machine. A hot clone is created from a
running virtual machine. A hot
clone is only available on OCFS2-based file systems, so you must
use either iSCSI- or fibre channel-based storage for the source
and target repositories. A hot clone creates a clone with
inconsistent disk status, and should only be used as a
snapshot or back up of a virtual machine,
perhaps on a virtual machine that requires 100% uptime and cannot
be shut down. If you want to use the hot-cloned virtual machine,
you should first repair any virtual disks, using a disk repair
utility such as fsck. Do not use hot cloning
for virtual machines running an Oracle Database. Instead, you
should use an Oracle Database backup strategy, such as the
rman utility.
A thin clone copies the virtual machine files and only takes up the amount of disk space actually used, not the full specified disk size. Thin cloning can only be used when cloning from and to the same OCFS2-based repository, and when the storage used for the storage repository is non-generic (for example, a Sun 7000 or NetApp Storage Connect plug in). Thin cloning is the fastest and most efficient cloning method.
Thin provisioning of physical disks on generic storage is not supported.
A clone can also be performed using two other file copy methods: sparse copy, and non-sparse copy. These two cloning methods can be used when cloning from and to different repositories, and when the storage used for the storage repository uses a generic Storage Connect plug in. These cloning methods are slower than thin cloning, but more versatile.
To create a clone of a virtual machine or template:
Select the virtual machine or template to clone and display the Clone or Move dialog box. You display this dialog box from different locations, depending on whether you are cloning a virtual machine or a template.
Virtual Machine: Click the Servers and VMs tab. Select the server pool on which the virtual machine resides in the navigation tree. Select Virtual Machines from the Perspective drop-down list. Select the virtual machine to clone in the management pane, and click Clone or Move
 .
.
Virtual Machine Template: Click the Repositories tab. In the navigation tree, select the repository in which the template resides, then VM Templates. Select the template in the management pane and click Clone or Move Template...
.
The Clone or Move dialog box is displayed.
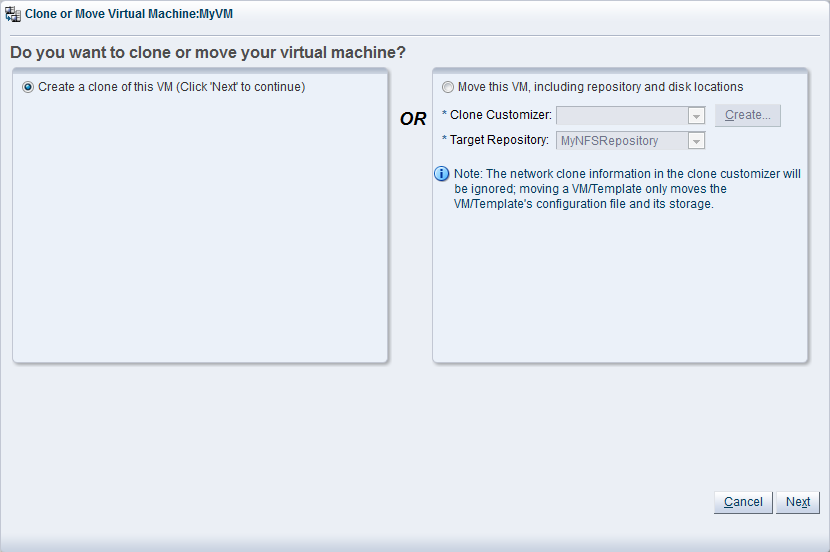
Select the Create a clone of this (VM or Template) option. Click Next.
The Clone or Move (Virtual Machine or Template) dialog box is displayed.
Select or enter the following:
Clone to a: Select the clone type, either Virtual Machine or Template, to specify the objects to create from the clone.
Clone Count: The number of clones to create.
Clone Name: A name for the virtual machines or templates.
Target Server Pool: The server pool on which the clone is to be deployed.
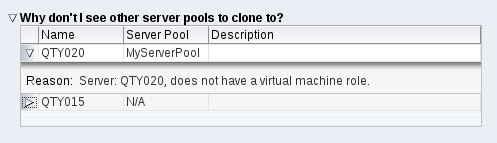
NoteThe list of server pools that are available in the dropdown is limited to valid server pools that are capable of handling the cloning process correctly. This helps you to prevent cloning to a server pool that may fail to process the request. If this list is empty, you should refer to the table presented under the Why don't I see other server pools to clone to? element on this dialog screen.
Description: A description for the virtual machines or templates.
Advanced Clone: Whether to use a clone customizer to set preferences for the clone operation.
Clone Customizer: The clone customizer to use to create the clones. Click Create... to create a new clone customizer. See Section 7.9.1, “Managing Clone Customizers” for information on creating a clone customizer. Only enabled if Advanced Clone is checked.
Target Repository: The repository to store the cloned files, such as virtual disks. Only enabled if Advanced Clone is checked.
Why don't I see other server pools to clone to? A collapsed window element, providing a table of server pools that do not meet the requirements to accept a clone request. Expanding any of the entries in this table will provide the reason that the server pool does not qualify.
TipIf you clone a virtual machine or template without using a clone customizer, the storage repository is locked for the duration of the cloning job; this may be some time in some circumstances. To quickly create clones and not lock the storage repository, use a clone customizer.
Click OK.

The virtual machines are created and deployed to the server pool. The templates are created in the storage repository.
Cloning a virtual machine or template means making a copy of it, so that you can create multiple virtual machines or templates from the original. You can create a clone customizer to set up the clone parameters, such as networking, and the virtual disk, and ISO resources. A clone customizer is also used when moving a virtual machine or template.
To create a clone customizer:
Select the virtual machine or template and display the Manage Clone Customizers for (Virtual Machine or Template) dialog box by:
Virtual Machine: Click the Servers and VMs tab. Select the server pool on which the virtual machine resides in the navigation tree. Select Virtual Machines from the Perspective drop-down list. Select the virtual machine to clone in the management pane, and click Manage Clone Customizers...
 .
.
Virtual Machine Template: Click the Repositories tab. In the navigation tree, select the repository in which the template resides, then VM Templates. Select the template in the management pane and click Manage Clone Customizers
.
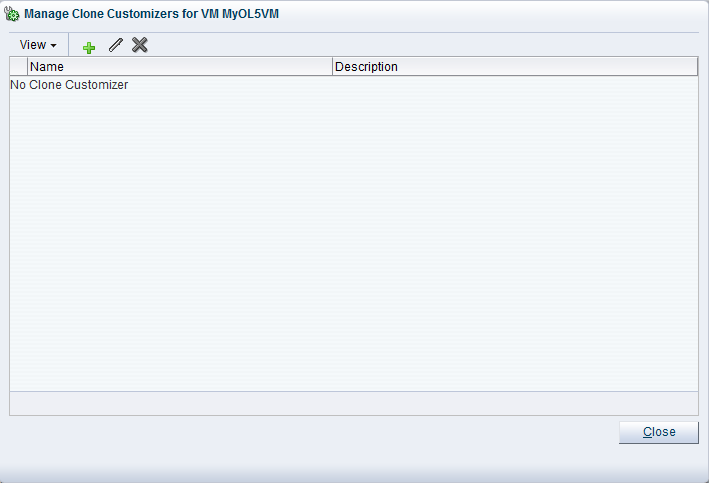
Select Create Clone Customizer...
 .
.
The Create a Clone Customizer wizard is displayed.
In the Name and Description step of the wizard, enter a Name and Description for the clone customizer, and click Next.
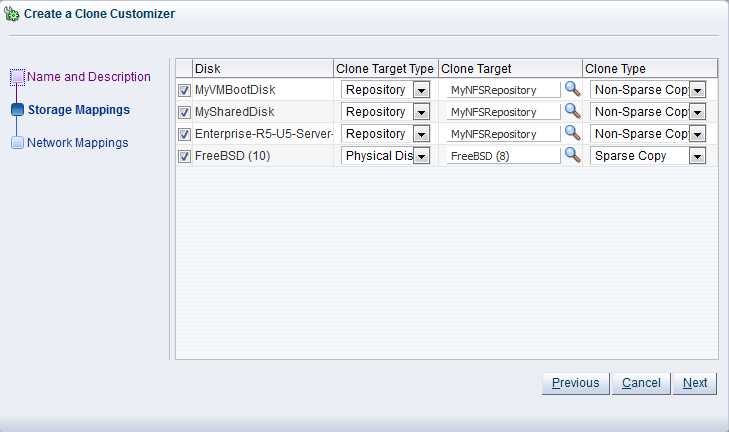
The Storage Mappings step of the wizard is displayed.
Select the following storage mappings:
Disk: The disks to include in the clone.
Clone Target Type: The type of storage location where the disk is to be created, either a Repository or a Physical Disk.
Clone Target: The location on the storage type where the disk is to be created.
Clone Type: Whether to use a sparse or non-sparse files for the disk.
Click Next.
The Network Mappings step of the wizard is displayed.
Select the Virtual NICss to include in the clone customizer, and the Ethernet Network to which they should belong.
NoteThe network configuration is not changed when moving a virtual machine or template. It is only used when cloning a virtual machine or template.
Click Finish.


The clone customizer is now available to use to create a virtual machine, or template. See Section 7.9, “Cloning a Virtual Machine or Template” for information on using the clone customizer to create a virtual machine or template.
To edit a clone customizer:
Select the object to which the clone customizer belongs, either a virtual machine, or a virtual machine template. Click Manage Clone Customizers...
.
The Manage Clone Customizers for (VM or Template) dialog box is displayed.
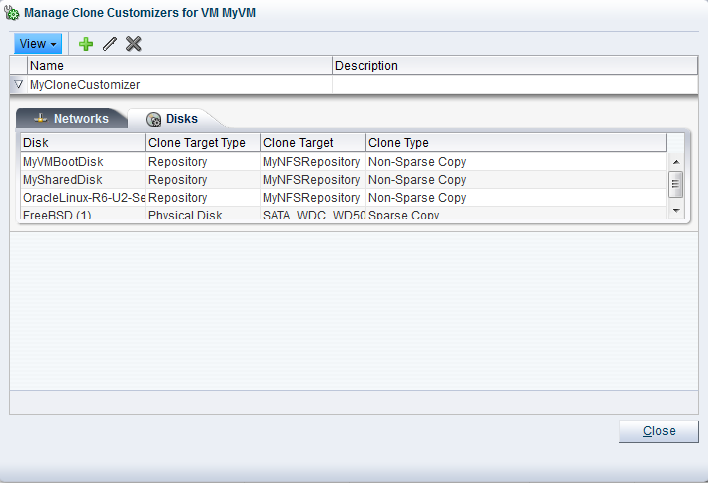
Select the clone customizer to edit and click Edit Clone Customizer...
 .
.
The Edit Clone Customizer dialog box is displayed.
Edit the clone customizer. For details on each clone customizer option, see Section 7.9.1.1, “Creating a Clone Customizer”.
Click OK. The changes to the clone customizer are saved.

To delete a clone customizer:
Select the object to which the clone customizer belongs, either a virtual machine, or a virtual machine template. Click Manage Clone Customizers...
.
The Manage Clone Customizers for (VM or Template) dialog box is displayed.
Select the clone customizer to delete and click Delete Clone Customizer
 .
.
A dialog box is displayed to confirm you want to delete the clone customizer. Confirm you want to delete the clone customizer and click OK. The clone customizer is deleted.