| Oracle® Enterprise Data Quality for Product Data Task Manager Reference Guide Release 11g R1 (11.1.1.6) Part Number E29144-02 |
|
|
PDF · Mobi · ePub |
| Oracle® Enterprise Data Quality for Product Data Task Manager Reference Guide Release 11g R1 (11.1.1.6) Part Number E29144-02 |
|
|
PDF · Mobi · ePub |
This chapter explains how to manage your tasks in Task Manager and how to process them in Knowledge Studio including the following:
For complete details about using the Knowledge Studio application, see the Oracle Enterprise Data Quality for Product Data Knowledge Studio Reference Guide.
The main feature of the Task Manager is the ability to view users and tasks, chart all available task data, and monitor task progress.
You start Task Manager from the to review all tasks, both open and completed, as shown in the following figure:
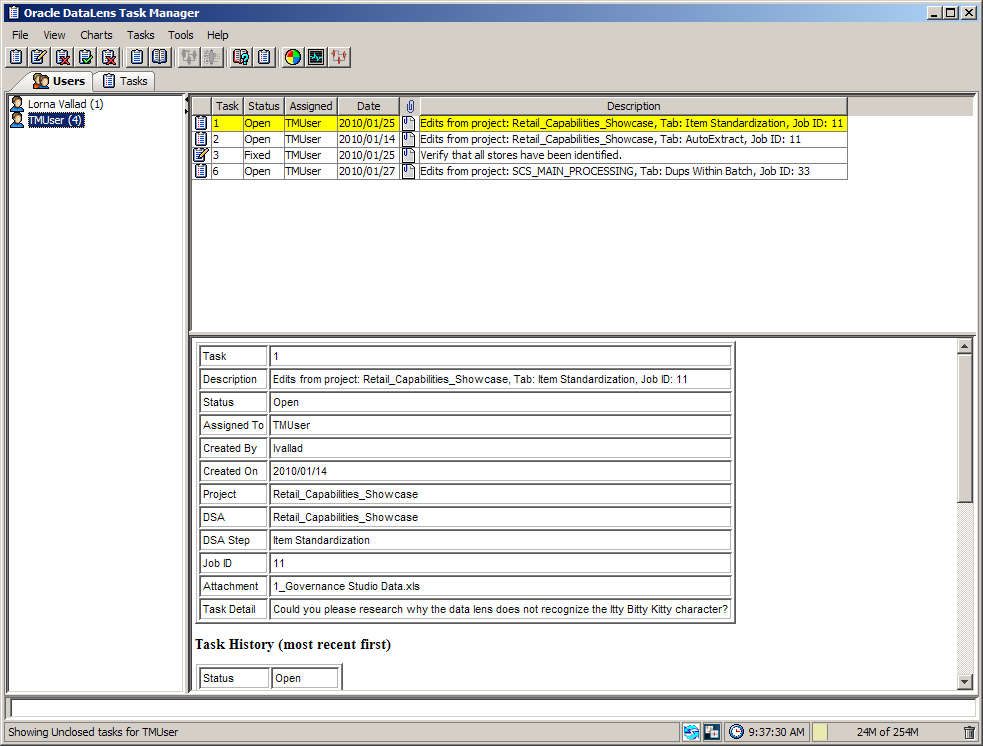
In this example, the Governance Studio task creation step created is Task 1 with Job ID 11 and requested the Task User to add the AutoSuggest variants to the data lens so that it will recognize variations of the source input.
Upon opening Task Manager, all tasks are displayed and are categorized by user on the default Users tab.
The way the tasks are viewed can be changed by using the selections on the View menu. The selections on this menu isolate the tasks by the status and displays the only the tasks that match the view selection. For example, when you select View Closed Tasks only the tasks that have been closed are displayed.
Note:
The default for a Task Manager user is that they can only change their own tasks though they view the tasks assigned to others.You can review the attachment and comments in order to take action on the task. Once you have reviewed the task and have completed the action, you can complete the task by changing the status to something other than open.
You can change the status of any task including closed and deleted. The status selections are open, fixed, rejected, closed, and deleted. It is recommended that you create criteria for all statuses other than open to ensure standardization across Task Manager Users.
To change the status of task, select the task from the Users or Tasks tab, then right-click and select Change Task Status.
Tip:
f the task you want to change is not listed, change the view to View All Tasks from the View menu.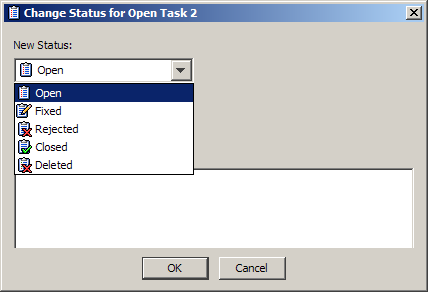
Select a new status or reassign the task. You must enter a comment regarding the status change. Click OK to immediately effect the changes to the task.
Note:
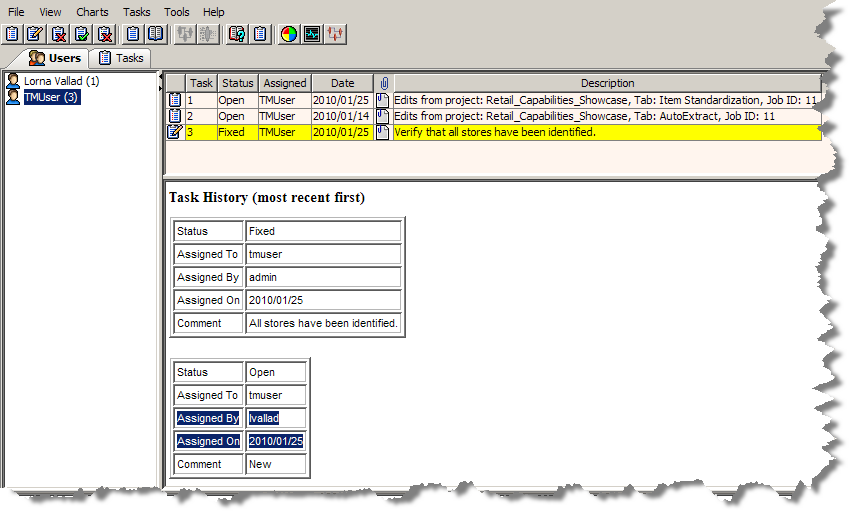
You must have permission to change the status of a task you did not create or you must be logged in as Task User.All tasks have a full status history that details all changes to the task including which user took the action. The task history is shown in the main task information pane and is chronological order with the most recent action first as in the following example:
You can now download the attachment to review the requested changes by selecting a task then right click and select Download Attachments. You are prompted to locate the directory that you want the attached files to be copied to; all attachments to the task are copied to the selected directory.
This is useful in the case of a spreadsheet that was created using the Governance Studio AutoSuggest feature. For example, if you download and open an attached Excel spreadsheet, you will see the row that was created by AutoSuggest. The following figure shows the left section of the row with the data lens name with the variants colorized (the spreadsheet is not normally colorized).
The following figure shows the right section of the row with the Suggestions colorized. The attribute name and attribute text with the full form term and the suggested word is in parenthesis "(suggested)".
At this the point, if the Task User agrees with the suggested changes, then the changes should be affected in the Knowledge Studio.
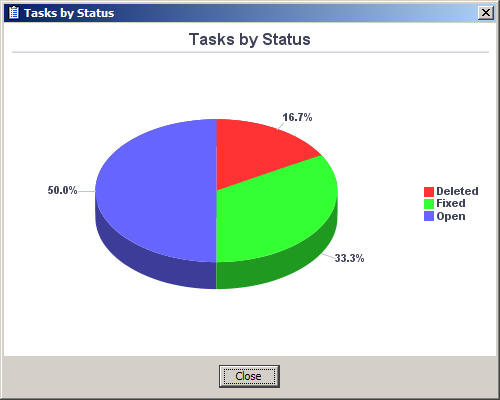
You can generate and review tasks several different ways using the Charts menu. Charting by task status, user, DSA, or data lens all produce a pie chart illustrating the number of tasks relating to the selection. For example, the following is charting all tasks by their status.
Additionally, you can chart tasks using trend analysis; this option is active only when the trend analysis option of the output step of the DSA in the Application Studio has been selected. For more information about setting this option, see the Oracle Enterprise Data Quality for Product Data Application Studio Reference Guide.
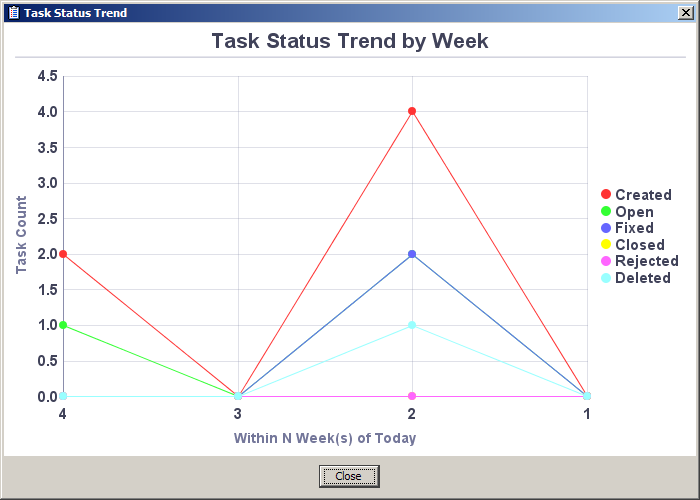
The following figure shows the trend that tasks take over the course of N number of weeks of the current day:
You can also chart using all DSA jobs that have run successfully by selecting DSA Job Trend.
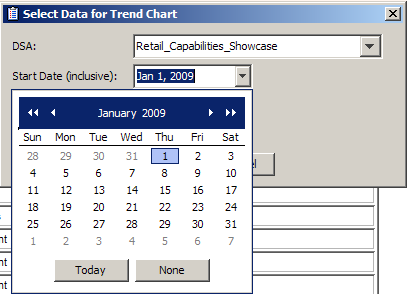
Select a DSA and the start and end date that you want to analyze and click OK. The chart that is generated will be similar to the following:
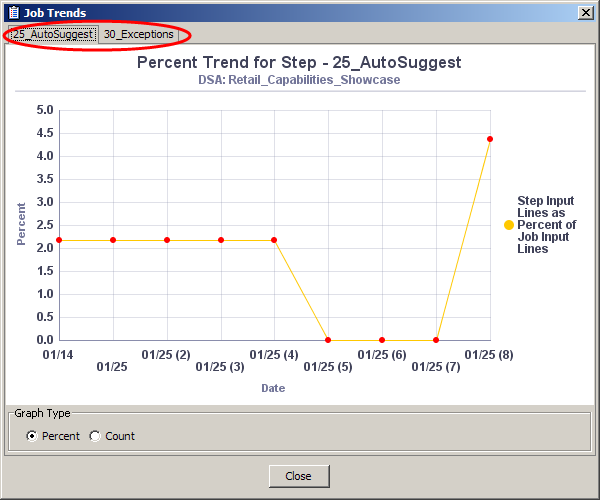
The example DSA had two output steps configured for trend analysis so a tab for each is created so that the data can be reviewed independently. The view of the data can be changed from a percentage of the input lines for a step in a job to simply a count of the step input lines.
All charts can be saved to a PNG or JPG file by right-clicking in the chart and selecting one of these file types.
After reviewing the requested changes as a result of a task and validating their correctness, the Task User updates the data lens and applies them to Enterprise DQ for Product using the Knowledge Studio.
For example, the following table summarizes the requested changes to an apparel data lens:
| Item Definition | Attribute | Phrase | Term | Text (Variant) |
|---|---|---|---|---|
Handbags_or_purses |
Color |
[a_color] |
[purple] |
PRPL |
Handbags_or_purses |
Handle_type |
[a_handle_type] |
[single_strap] |
SS |
The process to make changes identified by a task is to open the appropriate data lens in the Knowledge Studio, effect the changes, save them, and deploy the changed data lens for use in the Governance Studio.
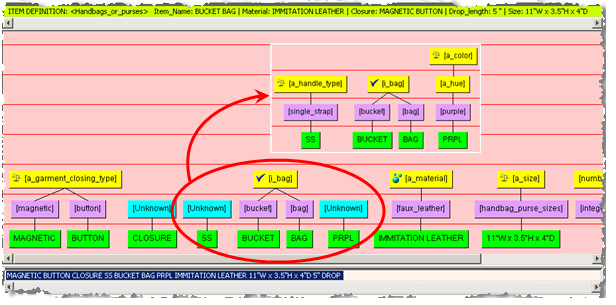
In this example, either you could enter the full description that includes the variants or the individual text for the variants would be updated in the data lens. The following figure shows the data lens with the missing data and the full description entered into the data lens:
|
Copyright © 2001, 2013, Oracle and/or its affiliates. All rights reserved. Legal Notices |
|