To work through the Batch Fit example:
In Microsoft Excel with Crystal Ball loaded, open the example workbook Magazine Sales.xls.
Start the tool; select Run, then More Tools, then Batch Fit. (In Microsoft Excel 2007 or later, select More Tools in the Tools group.)
If this is the first time you have opened the Batch Fit tool, the Welcome panel opens.
If the Welcome panel opens, click Next to display the Input Data panel.
On the Input Data panel, the Batch Fit data selector attempts to select relevant data and indicate its orientation. In this case, you need to select data on another worksheet.
On the Input Data panel, click the Select Cells icon beside the Location Of Data Series field.
On the Fitting Options panel, select All Continuous in the Distributions To Fit group.
Select Anderson-Darling in the Rank By Goodness-of-Fit Statistic group.
The Output Options panel opens, similar to Figure 58, Output Options panel, Batch Fit tool but with different settings.
For Fit Results, select Current Workbook and then select Existing Sheet.
Include a correlation analysis of the data:
Select "Define correlations between assumptions..." For now, leave 0.0 in the box to display all correlations.
The threshold must be between 0 and 1 (inclusive). The tool displays the correlation matrix at the end of the results section.
The settings should look like those in Figure 58, Output Options panel, Batch Fit tool.
Select Create Goodness-Of-Fit Report but do not select Show All Goodness-Of-Fit Statistics.
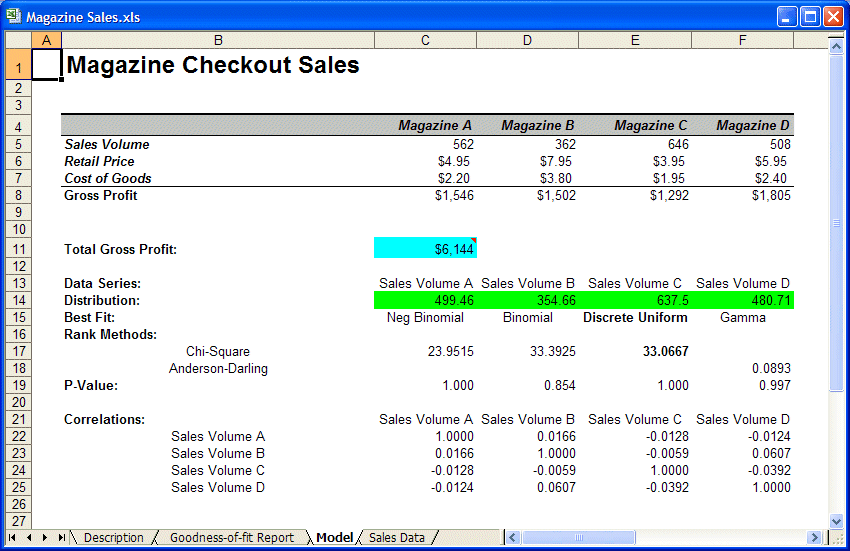
The tool fits each selected distribution to each data series. The Batch Fit results are displayed on the Batch Fit Output worksheet, similar to Figure 59, Batch Fit Results Below the Model.

 ) in the Starting Cell box.