This example describes a special feature on the Custom Distribution dialog: the Load Data button, which lets you pull in numbers from a specified cell range (grouped data) on the worksheet. This example is not a hands-on exercise, but the illustrations will guide you through the procedure. After you read this section, you can experiment with the own data by pulling in numbers from specified cell ranges on the worksheet.
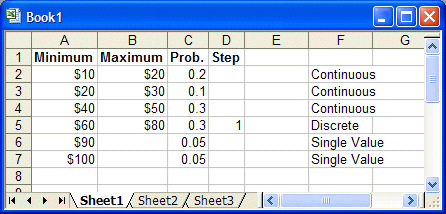
In this example, the same company decides that the unit cost of the new product can vary widely. The company feels it has a 20% chance of being any number between $10 and $20, a 10% chance of being any number between $20 and $30, a 30% chance of being any number between $40 and $50, a 30% chance of being a whole dollar amount between $60 and $80, and there is a 5% chance the value will be either $90 or $100. All the values have been entered on the worksheet in this order: range minimum value, range maximum value (for all but Single Value ranges), total probability, and step (for the Discrete Range only) as shown in Figure 118, Four-column Custom Data Range.
In this case, discrete ranges have the most parameters. So, you can create an assumption, choose Custom Distribution, and then choose Parameters, then Discrete Ranges before loading the data.
If the data also included discrete sloping ranges, you could choose Parameters, then Sloping Ranges before loading the data. The data table would then have five columns and could accommodate all data types.
 To complete the data load after the Parameters setting has been made:
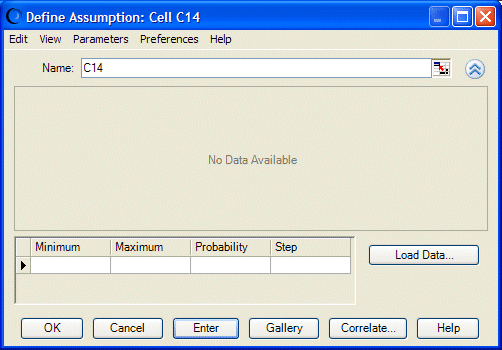
Click the More button beside the Name field.
The Custom Distribution dialog expands to include a data table, as shown in Figure 119, Custom Distribution with Data Table.
A column is displayed for each parameter in the current set (selected using the Parameters menu). Parameters, then Discrete Ranges was set before viewing the data table, so there is a column in the data table for each discrete range parameter. Because the single value and continuous ranges have subsets of the same group of parameters, their parameters will also fit into the table.
Since the values are already on the worksheet, you can click Load Data to enter them into the Custom Distribution dialog.
The Load Data dialog opens, as shown in Figure 120, Load Data Dialog, Custom Distribution.
The default settings are appropriate for most purposes, but the following other options are available:
When loading unlinked data, you can choose to replace the current distribution with the new data or append new data to the existing distribution.
If probabilities are entered cumulatively into the spreadsheet you are loading, you can check Probabilities Are Cumulative. Then, Crystal Ball determines the probabilities for each range by subtracting the previous probability from the one entered for the current range. You will need to choose View, then Cumulative Probability to display the data cumulatively in the assumption chart.
Enter a location range for the data, in this case A2:D7. If the range has a name, you can enter the name preceded by an = sign.

Crystal Ball enters the values from the specified range into the custom distribution and plots the specified ranges, as shown in Figure 121, Custom Data from Worksheet.
