This step enables you to specify the display on the side-label, drop-down list, or tab navigation of the dashboard. Navigation targets enable you to move through all predefined views of a dashboard created with Dashboard Studio.
A flat navigation structure (identical on every page) is the easiest for end users to follow. However, a hierarchy of navigation targets can be built by enabling multiple targets to be available for each frame. Use of a hierarchy enables you to accommodate more targets in a dashboard.
Note:
The navigation step includes only the frames that do not contain grouped tabs for navigation. If all frames include navigational grouped tabs, then Step 5 is blank. See Group Tabs Component.
No limit exists as to the number of sections that can be created; however, a limit exists as to the number of targets that can be added to a frame.
A dashboard that contains many sections may become cumbersome. Consider dividing such a dashboard into two or more dashboards that are linked through the Dashboard Studio Related Document feature. See Opening Related Documents.
 To configure navigation:
In Step 5: Configure Navigation from Select a Frame, select one or more frames.
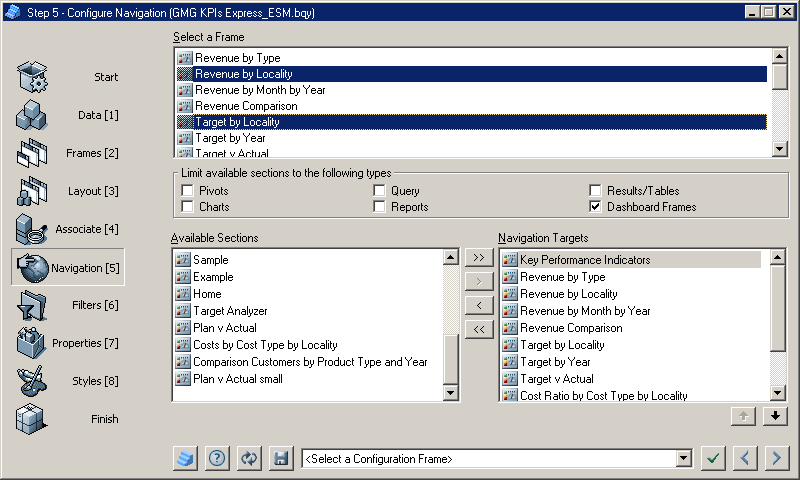
Optional: To display a report or a non-dashboard section on a dashboard, in Limit available sections to the following types, select the section type.
Move selected sections between Available Sections and Navigation Targets by clicking
 and
and  , or move all sections by clicking
  and
and  , or double-click a section.
Optional: Reorder Navigation Targets, by selecting a target and clicking
 or
or  .
.After navigation is configured, click
 to apply the selections to the document.
Click
 to move to the next step.
Step 6: Configure Filters is displayed.