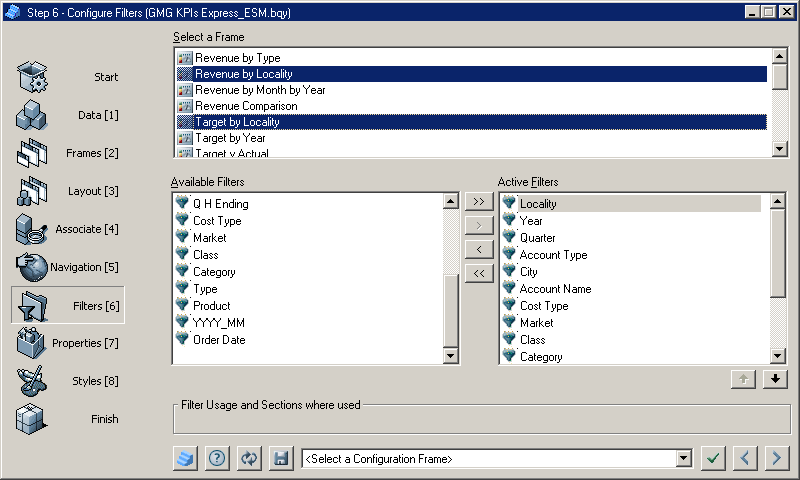
This step enables you to set filters that are available for each dashboard section. The filters are available in the Filters drop-down list on the top panel of the dashboard.
Lite frame prototypes cannot directly access the Filter dialog box, so frames created from Lite frames are excluded from the list.
 To configure filters:
In Step 6: Configure Filters from Select a Frame, select one or more frames.

Optional: To add or remove filters from the dashboard, use the Configuration drop-down list to move to QIQ Filter Properties, and click
 to refresh settings.
Select Available Filters to be available in the selected dashboard sections.
Available Filters only displays filters created before arriving at Step 6 of Dashboard Studio.
Note:
Filter names that start with _sys (or with sys for pre-3.2 Release templates) are ignored by the filters feature of Dashboard Studio and are not altered in any way.
Move selected filters between Available Filters and Active Filters by clicking
 and
and  , or move all filters by clicking
  and
and  , or double-click a filter.
Optional: Reorder Active Filters, by selecting a filter and clicking
 or
or  .
.Click
 to apply the selections to the document.
Click
 to move to the next step.
Step 7: Configure Properties is displayed.
Filter Usage and Sections where used indicates what is represented by the currently selected filter. For example, if selected filters are in Revenue Results, filters that share a name and data type are treated as one filter. A combined set of filters is presented, and the selected values are distributed to all results with filters.