 To create assignment rule definitions:
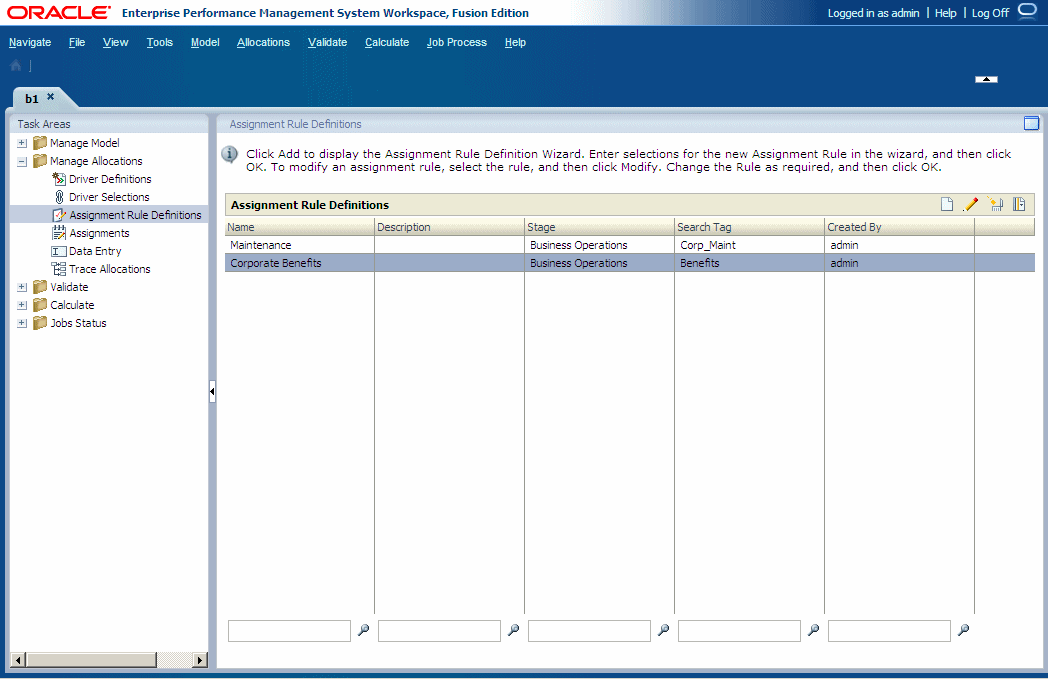
From Task Areas, select Manage Allocations, then Assignment Rule Definitions.
The Assignment Rule Definitions screen is displayed. The screen displays the Name and Description of any assignment rules, and the Destination stage. The associated Search Tag is listed, and the ID of the user who created or modified the assignment rule.

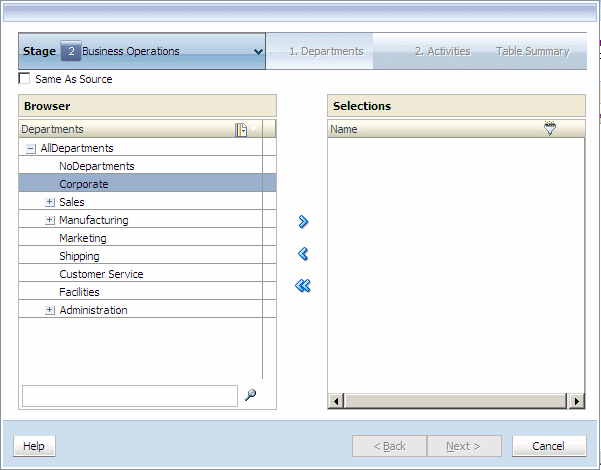
The Assignment Rules wizard is displayed.

For Step 1, under Browser, select the first member of the intersection for the assignment rule.
Click the Add arrow
 to move the selected member to Selections, and then click Next.
Under Step 2, under Browser, select the second member of the intersection for the Destination of the assignment.
Click the Add arrow
 to move the selected member to Selections, and then click Next. Repeat this step for additional dimensions, if required.
When all members have been selected for the intersection, the Destination Selection Summary is displayed.

Enter the following information for the new rule:
Rule Name— The rule name can contain a maximum of 80 characters.
Search Tag—The search tag may contain a maximum of 80 characters.
Rule Description
The Rule Name is added to the list of Available Rules on the Assignment Rules Management dialog box.
Optional: Filter the list for selected non-level 0 dimension members.
When entering a search value in a filter, enter the entire string. Wildcard symbols, such as asterisks (*) and question marks (?) are not supported in assignment rule UDA-based filters.
See Using Filters .
Note:
For Assignment Rules, the Filter with Name criterion is applied to both the member Name and Alias, regardless of which mode was selected during filter creation (Show Alias or Show Name).
In Rule Name, enter a name for the assignment rule The rule name can contain a maximum of 80 characters.
The Rule Name is added to the list of Available Rules on the Assignment Rules Management dialog box.
