Filters are available to refine long lists of members to present only those that meet the filter criteria. The Filter is available on screens that require selections from multiple options, such as Driver Selections, Assignments, Data Entry, and so on.
Using the Filter dialog box, you build the filter in this format:
<Member Name> <Operation> <Value> <Condition>
If the filter contains more than one statement, the Condition appends additional statements using an AND or OR condition. Brackets for each statement are automatically inserted, and the filters are resolved from left to right.
 To filter dimensions and members:
On the Filter drop-down list, select Show Grid.
The list is changed to a grid format, and the Filter option is activated.
On the Filter drop-down list, select Filter
 .
.The Filter dialog box is displayed.
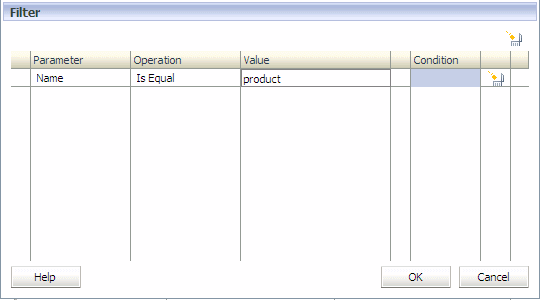
Under Parameter, click the cell to display the drop-down list of available parameters, and select the parameter to be filtered:
Name:
Displays Member Name if “Show Name” mode is selected.
Displays Alias Name if “Show Alias” mode is selected.
Attribute (Attribute, if available)
UDA (User-Defined Attribute, if available)
Under Operation, select the appropriate filter:
Is Equal
Not Equal
Under Value, click the cell and select the filter value:
For Name, enter the value or text.
For Attributes or UDA dimensions, select the member from the drop-down list of values for the selected Attribute or UDA dimension.
Optional: If more than one filter statement is to be added, under Condition, select the condition governing the filter:
AND
OR
Optional: Repeat step 4 to step 7 for each additional filter.
The filter is applied to display only those members that meet the filter criteria.
 .
.