 To select a driver for a single intersection:
From Task Areas, select Manage Allocations, and then Driver Selections.
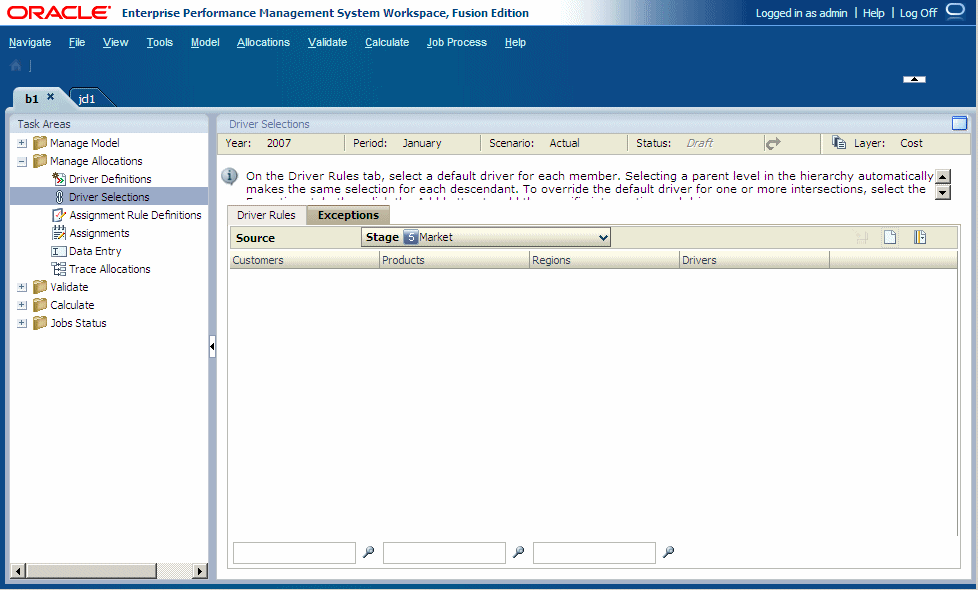
Under Stage, select the model stage that contains the intersection.
Optional: On the Exceptions tab, click the Member Selector
 to filter the list of available dimensions:
From the drop-down list, select Show Alias or Show Name, as required.
Enter the filter criteria for one or more dimensions.
Enter the exact name or alias of the required members, or use an asterisk (*) as a wildcard to select a range of members. For example, to find all members of a dimension that begins with the letter “M”, enter “M*”.

Only the items that meet the filter criteria are displayed on the Exceptions tab.
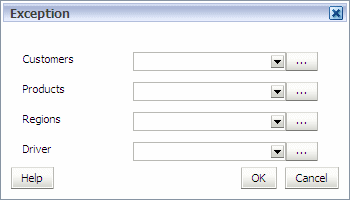
For each dimension listed on the Exception dialog box, click the selector button
 and select the members required for the specific intersection to which you need to apply the exception driver.
 Click OK when all members for the intersection have been selected.
Under Drivers, select the exception driver for the intersection.
The driver selection is automatically saved and is displayed in the table.
 .
.
 .
.