User and group information from the system tables of Oracle, SQL Server, and IBM DB2 relational databases can be used to support provisioning. If group information cannot be derived from the database's system schema, Shared Services does not support the provisioning of groups from that database provider. For example, Shared Services cannot extract group information from older versions of IBM DB2, because the database uses groups defined on the operating system. You can, however, add these users to groups in Native Directory and provision those groups. See Oracle Enterprise Performance Management Products—Supported Platforms Matrices for supported platform information.
Note: | If you are using a DB2 database, the user name must contain at least eight characters. User names should not exceed 256 characters (Oracle and SQL Server databases), and 1000 characters (DB2). |
You must configure Shared Services to connect to the database as the database administrator; for example, Oracle SYSTEM user, to retrieve the list of users and groups.
Note: | Shared Services can retrieve only active database users for provisioning. Inactive and locked database user accounts are ignored. |
 To configure database providers:
Launch Shared Services Console. See Launching Shared Services Console.
In the Directory Type screen, select Relational Database (Oracle, DB2, SQL Server).
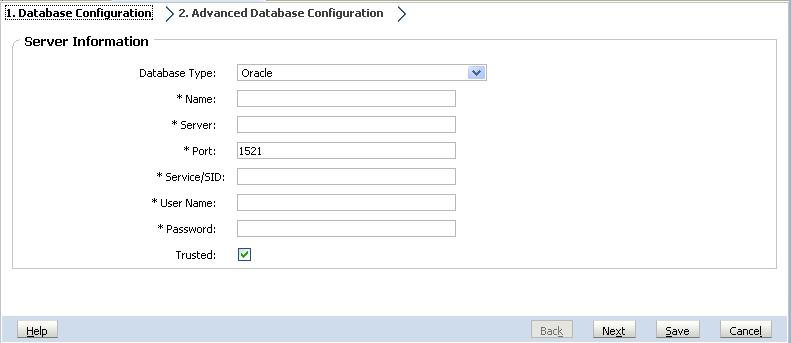
On the Database Configuration tab, enter configuration parameters.
Table 5. Database Configuration Tab
Label Description Database Type The relational database provider. Shared Services supports only Oracle, IBM DB2, and SQL Server databases as database providers. Example: Oracle
Name A unique configuration name for the database provider. Example: Oracle_DB_FINANCE
Server The DNS name of the computer on which the database server is running. Example: myserver
Port The database server port number Example: 1521
Service/SID (Oracle only) The system identifier (default is orcl) Example: orcl
Database (SQL Server and DB2 only) The database to which Shared Services should connect Example: master
User Name The user name that Shared Services should use to access the database. This database user must have access privileges to database system tables. Oracle recommends that you use the system account for Oracle databases and the database administrator's user name for SQL Server and IBM DB2 databases. Example: SYSTEM
Password The password of the user identified in the User Name. Example: system_password
Trusted Check box that specifies that this provider is a trusted SSO source. SSO tokens from trusted sources do not contain the user's password. Optional: Click Next to configure the connection pool.
The Advanced Database Configuration tab opens.
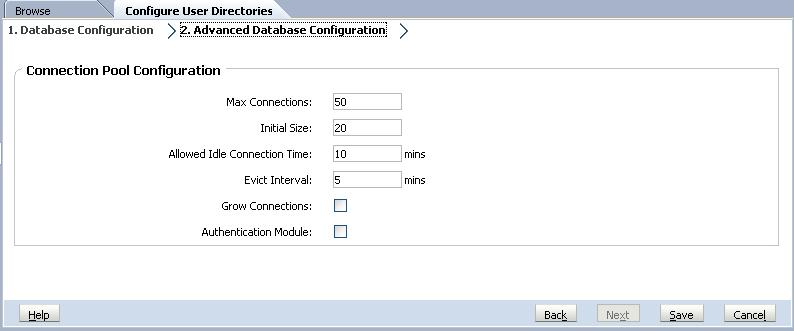
On Advanced Database Configuration, enter connection pool parameters.
Table 6. Advanced Database Configuration Tab
Label Description Max Connections Maximum connections in the pool. Default is 50. Initial Size Available connections when the pool is initialized. Default is 20. Allowed Idle Connection Time Optional: The time after which the eviction process removes the idle connections in the pool. Default is 10 minutes. Evict Interval Optional: The interval for running the eviction process to clean up the pool. Eviction removes idle connections that have exceeded the Allowed Idle Connection Time. Default is five minutes. Grow Connections Indicates whether the connection pool can grow beyond Max Connections. By default, this option is cleared, indicating that the pool cannot grow. If you do not allow the connection pool to grow, the system returns an error if a connection is not available within the time set for Time Out. Authentication Module Enable a custom authentication module to authenticate users defined in this relational database. You must also enter the fully qualified Java class name of the authentication module in the Security Options screen. See Setting Security Options. See “Using a Custom Authentication Module” in the Oracle Hyperion Enterprise Performance Management System Security Administration Guide.
Test the database provider configuration. See Testing User Directory Connections.
Change the search order assignment, if needed. See Managing the User Directory Search Order for details.
Specify security settings, if needed. See Setting Security Options.