Caution! | Manually importing descriptive flexfield changes into Transactional Business Intelligence RPD should only be done in special circumstances, and the procedure requires a sophisticated understanding of your Transactional Business Intelligence environment. We strongly recommend that you use the automatic procedure described in Importing Key Flexfield Changes into Transactional Business Intelligence. |
Note: | Perform a full backup the OBIEE RPD prior to manually importing descriptive flexfield changes. |
Note: | We strongly recommend that you backup the OBIEE RPD every time prior to importing descriptive flexfield changes. |
Note: | If you manually import Descriptive Flexfield Changes into Transactional Business Intelligence RPD, the RPD must deployed in the BI Server. |
 To import descriptive flexfield changes into the Transactional Business Intelligence RPD:
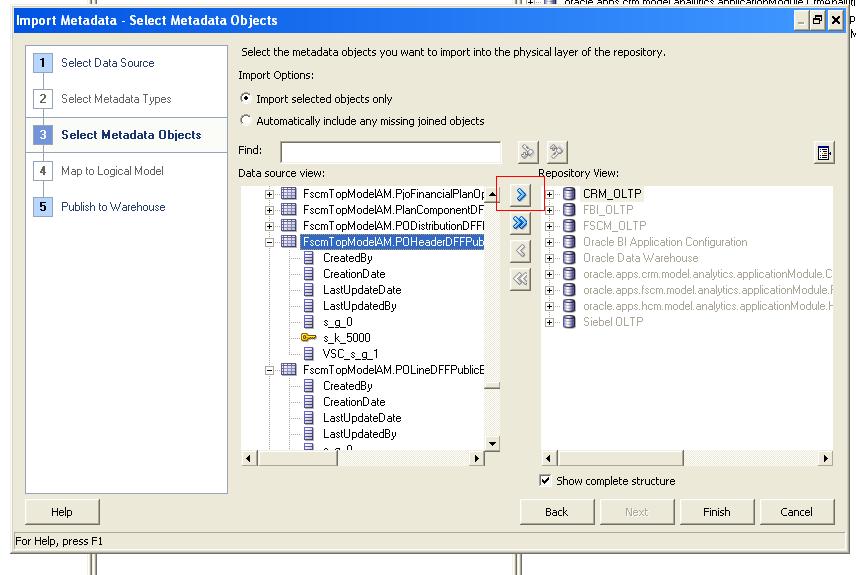
Navigate to the Import Metadata window as shown in Figure 25, Importing Descriptive Flexfield Changes.
In Data source view pane, select the key flexfield view objects, and import the view objects into the Repository View (physical layer) pane using the right arrow.
Identify the Logical Tables and the Logical Table Sources (LTS) in this DFF VO which must be added.
Expose the newly added DFF attributes from the Logical Table into the necessary presentation subject areas as required.