Step 2: Creating Admin Server, generating SSL certificates, and cloning Managed Servers

In this step, on the machine known in the diagram as host1, you deploy a WebLogic domain with the Endeca Server application in it, start the Admin Server, generate SSL certificates on it, and then create three Managed Servers.

It is assumed that on all three machines, the required software is already installed but the WebLogic Server has not been started.

To create an Admin Server, generate SSL certificates for the Endeca Server on it, and create Managed Servers, do the following:

  1. Create a WebLogic domain for the Endeca Server.

    See Creating the WebLogic domain for Endeca Server.

    This procedure assumes that you have created a WebLogic domain endeca_server_domain. Once you create this domain, the only machine that is currently configured in it becomes the Admin Server.

  2. Start the Admin Server. On host1, go to $DOMAIN_HOME/<domain_name>/bin, and run:
    startWebLogic.sh
  3. Generate SSL certificates for the Endeca Server on the Admin Server. See Creating SSL certificates.

    This step is required only if you have installed the Endeca Server in a secure mode with SSL (this is assumed by this procedure and the subsequent instructions).

    Note: if you previously installed the Endeca Server software on a single machine, the Endeca Server Java application may have been deployed on the Admin Server. This is a valid configuration for single-machine deployments. However, in the Endeca Server cluster deployment, even though you initially start the Endeca Server Java application on the Admin Server to generate the SSL certificates for it, the Endeca Server should be eventually started on Managed Servers only — this will be evident in the final steps of the entire deployment procedure for the Endeca Server cluster.
  4. Create the first Managed Server:
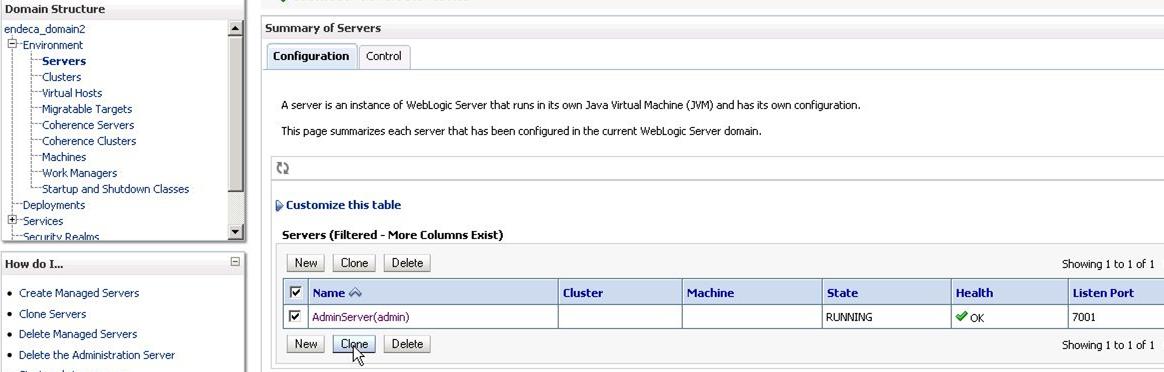
    1. Access the Administration Console: http://host1:7001/console.
    2. Select Lock & Edit.
    3. Go to Environment > Servers and select the Admin Server.

      The Clone option is activated.


    4. Click Clone.

      The next window opens.

    5. Change the Server Name (this is the Managed Server name) to Managed-1.
    6. Change the Server Listen Port to be 7003, leave the other fields unchanged, and click OK.

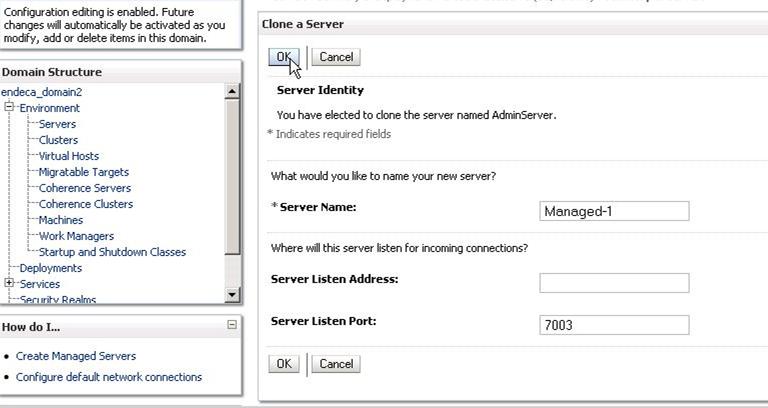
      The server named Managed-1 is created, but its SSL Listen Port must be enabled and specified.
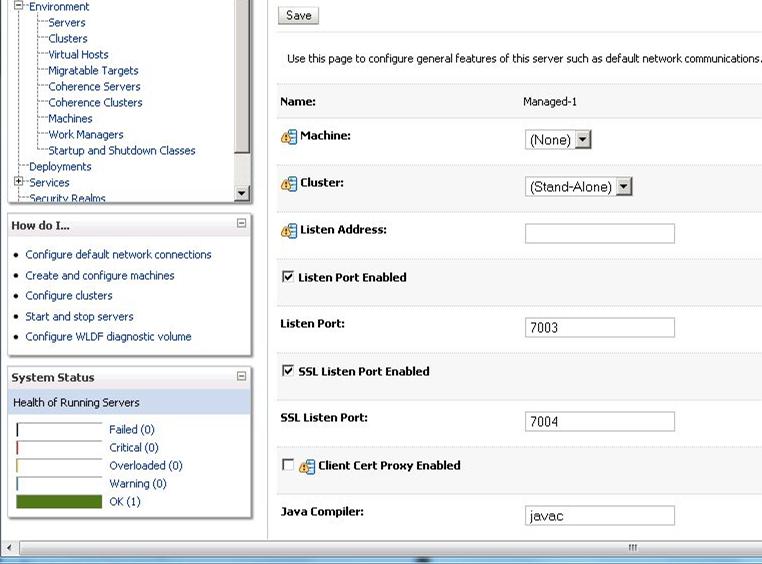
    7. Click Managed-1 to edit it, and in the edit screen, check SSL Listen Port Enabled, change SSL Listen Port to 7004, leave other options unchanged, and click Save.
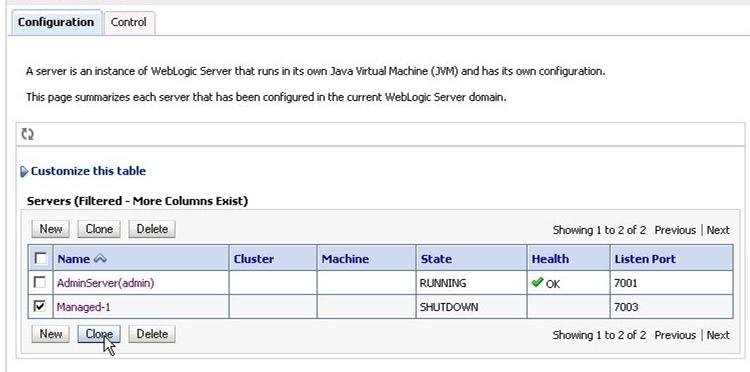
    Proceed to create two more Managed Servers.
  5. Create Managed-2. Go to Environment > Servers, click Managed-1 and select Clone.
  6. Change the server name to be Managed-2, and its Listen Port to be 7003.
  7. In the edit screen for this server, verify that the SSL Listen Port for it is already enabled and listed as 7004.
  8. Save the changes.
  9. Create Managed-3 by repeating steps 5 - 8 for it, changing the name to Managed-3, and keeping the ports the same as for Managed-1 and Managed-2.
    Important: For the Endeca Server cluster to work, the ports on all three Managed Servers should be the same. Additionally, if one of the Managed Servers shares the machine with an Admin Server (as in the example diagram used in this procedure), then the ports for the Admin Server (7001, 7002) should be different from the ports for the Managed Servers (7003, 7004).

As a result, on host1, you should have created a WebLogic domain for the securely installed Endeca Server, in which four servers are configured: one Admin Server and three Managed Servers. One of the Managed Servers, Managed-1, is configured to run on the same machine as the Admin Server (host1). Note also that while the Admin Server is running on host1, the Managed Servers are created but not running yet.

The next steps involve using pack.* and unpack.* scripts to create a WebLogic Server template based on this configuration, and deploying it on two of the three Managed Servers, on host2 and host3. (There is no need to unpack the domain template on host1 because it already contains the configuration for this WebLogic domain.)