| Oracle® Healthcare Transaction Base Installation Guide Release 6.1.1 Part Number E37798-03 |
|
|
View PDF |
| Oracle® Healthcare Transaction Base Installation Guide Release 6.1.1 Part Number E37798-03 |
|
|
View PDF |
The HTB instance is now deployed. It requires certain amount of initial configuration to start configuring and using the instance for your particular implementation. If it is not already running, you must start your HTB instance before continuing.
This section contains the following topics:
Log into the Oracle E-Business Suite UI as sysadmin/sysadmin. The URL will include the port that the Apache server created during the E-Biz install.
Select system administrator responsibility.
Select System under Profile heading. This displays Oracle Applications.
Deselect Site option in the Display group.
Select Application option in the Display group.
Enter Clinical Transaction Base in the associated field.
Enter FND: Migrated to JRAD in the search field next to the Profile textbox.
Click Find to return the current setting.
Select Yes and save the configuration.
Enter Healthcare Terminology Server in the application field.
Enter FND: Migrated to JRAD in the search field again.
Click Find to return the current setting.
Select Yes and save the configuration.
Clear any values present in the application field.
Deselect Application option in the Display group.
Select Site option in the Display group.
Enter FND: View Object Max Fetch Size in the search field next tto the Profile textbox.
Click Find to return the current setting.
Enter -1 as the new site level value.
Save the configuration.
Switch to the Security:User:Define application menu.
Create a new user HTBADMIN with a secure password. You will need to change the password on first login.
Switch to the Security:User:Define Oracle Application.
Add the following responsibilities to the new HTBADMIN user account. You can retrieve the account by using the View > Query by Example menu item to enter the HTBADMIN user and run the query. Do not change or add to the Effective Dates that are defaulted.
Healthcare Application Developer
Healthcare Configuration Administrator
Healthcare Messaging Administrator
Healthcare Security Administrator
Trading Community Manager
Global HRMS Manager
iSetup
System Administrator
Note that you may need to license HR using adlicmgr.sh to have the Global HRMS Manager responsibility show up.
Perform the following steps to configure HTB Object Default Owning Organization:
Using System Administrator responsibility, navigate to Profile: System application.
Find HR:Business Group profile option. Make note of the value set at site level for this profile option. The default value is Setup Business Group.
Find CTB:Business Group ID profile option and set the site level value same as the value found in the step 2.
Find CTB: Security Profile profile option.
Set CTB: Security Profile profile option to the site level value noted in the step 2.
These two profile options control the Owning Organization and Security Profile for all of the HL7 RIM objects that you will create and query using messaging and HTB APIs.
Configure HTB Internal Object Identifiers using the Healthcare Configuration User Interface. Refer to HTB User Interface Guide (Configuring Object Identifiers (OIDs).
This step is optional and is required only if you plan to use Oracle Trading Community Architecture's (TCA) Data Quality Management tool (DQM) to identify duplicate person entries. DQM is installed when you install Oracle E-Business Suite Release 12. To configure DQM options for HTB, refer to HTB Implementation and System Administrator Guide (Using TCA DQM).
The EMPI Match and Dedup context is required for HTB to properly create persons. This does not enable any matching. It only provides the context for the matching and deduplication checks should they be configured. The context can be setup using EMPISetup.java code. This puts the default organization into your HTB database. Make note of this organization and do not remove it. You will need to update the variables for your specific instance. Note that this code requires your client to be setup including the configuration of jndi.properties and the presence of the htbclnt.jar file from $CTB_TOP/java/jar on the server.
An Operating Unit is required to use Concurrent Manager with E-Business Suite (EBS) R12. The following steps describe the process to create a dummy Operating Unit. If you plan to use General Ledger application features within EBS, you must define and create the Operating Unit carefully depending on the requirements of your organization.
Add the General Ledger Responsibility.
Log into apps using the System Administrator user.
Add the General Ledger Super User responsibility to the user.
Use $ADMIN_SCRIPTS_HOME/adoacorectl.sh to stop and restart apps so that the new responsibility exists when you log in again.
Edit the Flexfields.
With the Oracle Ledger Super User responsibility navigate toSetup > Financials > Flexfields > Keys > Segments
Use View/Find menu option to find the application: General Ledger with title Accounting Flexfield
Click OK.
Select the current structure, select Allow Dynamic Inserts.
Click Segments and add two new segments. The names are not important.
Create two Value Sets to use in your two new segments (Value Set button). Validation Type cannot be None. They can both be set to Independent. You can close the Value Set window and then select the newly created Value Sets from the Segment summary.
Use the Flexfield Qualifiers button to select a qualifier for each segment. One segment must have the qualifier Natural Account Segment and the other one Balancing Segment.
Save everything?, navigate back to Key Flexfield Segments window listing Structures.
Select Freeze Flexfield Definition and compile your structures.
Navigate back to Segments and verify that Value Sets are still associated with Segments. If not, deselect Freeze Flexfield Definition, select Value Sets again and go back to the step h.
Create a Calendar.
Navigate to Setup > Financials > Calendars and select Types.
Create a new Period Type with 1 period per year. Save changes and close Period Types window.
Navigate to Setup > Financials > Calendars and select Accounting.
Create a new calendar.
Populate the Calendar field with any name.
Populate the Prefix field with any name.
Select the Type field and then use the elipsys to select your recently created Period Type.
Populate the Year with the current year, the Quarter and Num field both with the number 1.
Select valid dates for both the From and To fields and the Name gets populated for you. The dates do not need to be in the future for this to work.
Setup a new Account.
Navigate to Setup > Financials > Accounting Setup Manager and select Accounting Setups.
Click Create Accounting Setup.
Click Create a Legal Entity and fill in the required fields with information. Search for your territory. Examples of territories are United States and Canada. Use Create New Address if there are no existing addresses to select.
Click Apply to complete creation of your new Legal Entity.
Navigate back on Create Accounting Setup > Assign Legal Entities screen, click Add Another Row and then select your Legal Entity.
Go to the next step? and enter a name for your Primary Ledger.
Select Accounting Flexfields in Charts Accounting, your calendar in Accounting Calendar and put USD for Currency.
Click Next and then click Finish to validate your new Ledger.
Click on Define Accounting Options.
Click the Update icon for the Ledger Options row on your new Primary Ledger.
Do not modify anything and click Next until you finish the process by clicking Finish.
Select Complete.
Click Yes to save your new accounting setup.
Select Return to Accounting Setup.
Click Go next to Search by Ledger and select Update Accounting Options on your ledger.
Click the Update icon for the Operating Units row on your new Primary Ledger.
Select Add Operating Unit and enter a unique name.
Select Setup Business Group for your Business Group and your new Legal Entity for the Default Legal Context.
Click Apply.
Select Complete and the Operating Unit is available.
Set the Profile Options.
Using the System Administrator Responsibility navigate to Profile and select System to open Forms
Verify/set the following profile options:
MO: Security Profile set to Setup Business Unit
MO: Operating Unit set to the Operating Unit you created
This is an optional step and is only needed if you are using HL7 messaging and require MLLP interface support.
You now should have a newly configured HTB environment. To let the source systems or an interface/integration engine send message to the Inbound Message Processor via an HL7 MLLP interface, you must install HTB Gateway. HTB Gateway is supplied in a zip file under CTB_TOP on your E-Business Suite Apps server.Log in as the appl user and perform the following steps to install HTB Gateway to your new instance.
Unzip HTB Gateway at the same level as the IAS Oracle Home by issuing the following commands:
cd $IAS_ORACLE_HOME/..unzip $CTB_TOP/java/HTBGateway.zip
This creates the HTBGateway_V5 directory structure at the same level as the $IAS_ORACLE_HOME.
Update the jndi.properties and config.xml files in the config directory with the hostnames, port numbers, and user information for your new instance.
Copy the htbclnt.jar file from under $CTB_TOP/java/jar to the HTBGateway_V5/lib directory. Once these changes have been applied, you can start HTB Gateway by using the startGateway.sh script provided.
Oracle E-Business Suite creates certain environment variable files for you. There is also a mechanism to extend this set of variables in such a way that future upgrades or patch applications do not modify your settings. Perform the following steps to configure your environment variables properly:
On the Database Server, logged in as the oracle owner, there is a .bash_profile file in your home directory. Edit this file and add the following line at the end of the file. You must replace ${ORACLE_HOME} with the actual location where you created your oracle home for the database. You must also replace the <${ORACLE_SID}_${HOSTNAME}> with the actual env file that exists in your database owner oracle home.
. ${ORACLE_HOME}/<${ORACLE_SID}_${HOSTNAME}>.env
On the Applications Server logged in as the appl manager user there is a .bash_profile file in your home directory. Edit this file and add the line at the end of the file. Replace ${APPL_TOP} with the actual path of $APPL_TOP.
. ${APPL_TOP}/APPSORA.env
If you look at the $APPL_TOP/APPSORA.env file you will see that it is preconfigured to all your applications environment files that are created by autoconfig. It has already added the sourcing of a custom<${ORACLE_SID}_${HOSTNAME}>.env file. You should create this file and add the following contents to the file. The value of "/u01/oracle" is used as an example only. The last set command assumes that you want to have vi as the default editor. The OC4J_HOME is dependant on whether you performed a 10gAS or Stand Alone OC4J installation. In the 10gAS installation, the HTBCLIENT is not needed.
OC4J_HOME=/u01/oracle/htb_oc4jHTBGATEWAY=/u01/oracle/HTBGateway_V5export OC4J_HOME HTBGATEWAYHTBCLIENT=$OC4J_HOME/htbclientexport HTBCLIENTPATH=$PATH:.export PATHset -o vi
Save and exit the file and you will have the correct environment variables set on each server when you log in.
This step is optional and is required only if you plan to use IMP, OMP, and MTK. Perform the following steps to load metadata:
Log into the Oracle E-Business Suite UI as HTBADMIN user.
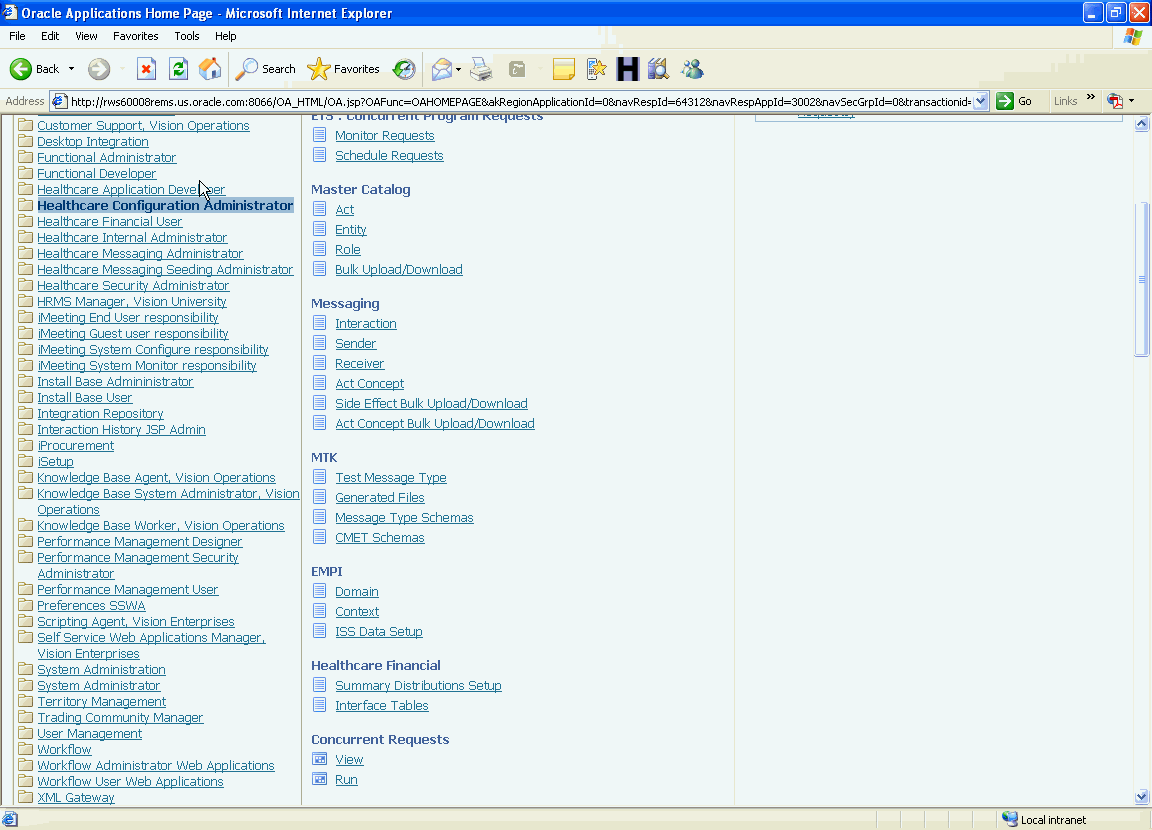
Select Healthcare Configuration Administrator Responsibility.
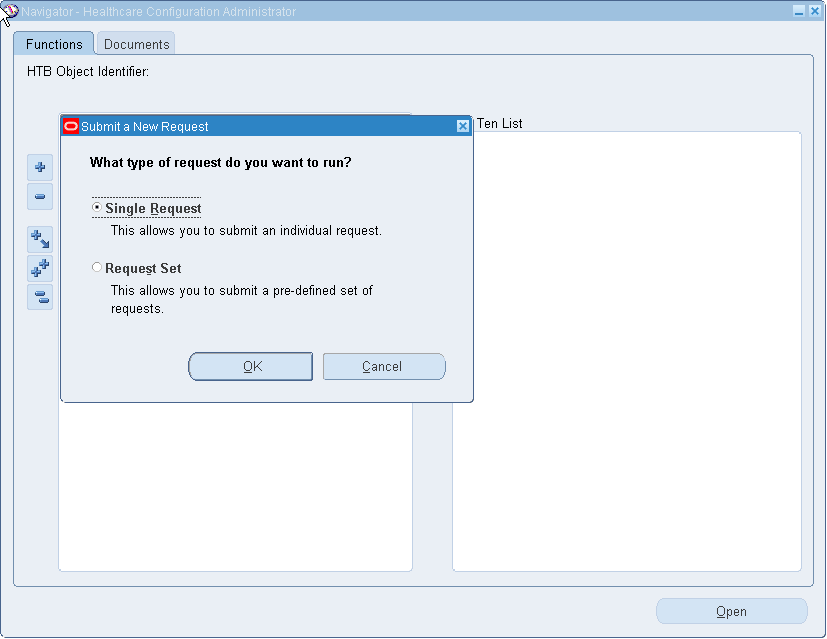
Select Run under Concurrent Requests.
Select Single Request type
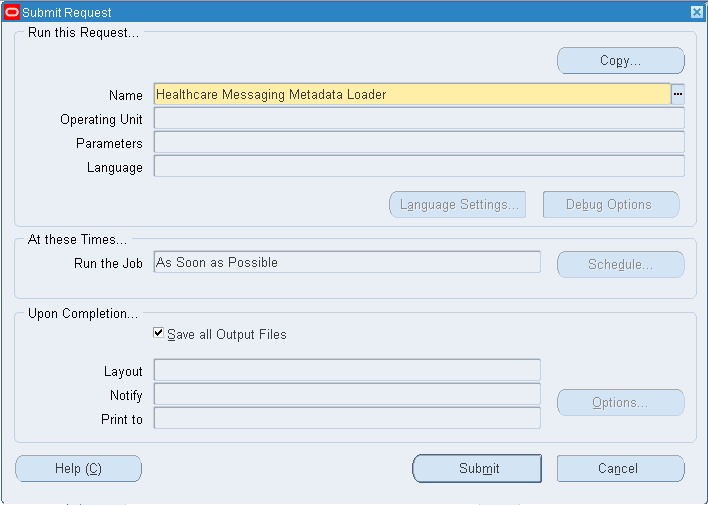
In the Run this Request window, enter Healthcare Messaging Metadata Loader in the name field.
Click Submit to execute the Healthcare Messaging Metadata Loader concurrent program.
The concurrent program extracts metadata from messaging MIF files and loads it into the following tables:
CTB_MS_CMPLX_TYP_METDATA
CTB_MS_CMPLX_TYP_ATTRBTS
Since this metadata is used by IMP, OMP, and MTK, it is a prerequisite for using these three components. Concurrent program truncates both the tables before loading metadata so it can be executed more than once, if there is any system error.
To create all the language mappings in a new instance of HTB, you must run the Healthcare ETS Maintenance Program in the DEFAULT mode after the installation.
Log into the Oracle E-Business Suite UI as HTBADMIN user.
Click Healthcare Configuration Administrator.
Under ETS: Concurrent Program Requests, click Schedule Requests.
For Program Name, enter 'Healthcare ETS Maintenance Program' as the field.
For Request Name, provide a name to identify this running instance of the concurrent program such as 'ETSMaintenance1'. Click Next.
For Run Mode, enter DEFAULT. Click Next.
Review the schedule details and make changes if required. Click Next.
Review the Notifications field and make changes if required. Click Next.
Review the Printing settings and make changes if required. Click Next.
Review the summary settings. Click Submit to submit the Concurrent Program request.
Once submitted, click OK and review the status of all the requests submitted. Identify your request id and click it to monitor the detailed logs or status.
|
Copyright © 2012, 2013, Oracle and/or its affiliates. All rights reserved. Legal Notices |
|