| Oracle® Healthcare Operating Room Analytics Installation Guide Release 1.0.1 E16679-02 |
|
| PDF · Mobi · ePub |
| Oracle® Healthcare Operating Room Analytics Installation Guide Release 1.0.1 E16679-02 |
|
| PDF · Mobi · ePub |
Installation Guide
Release 1.0.1
E16679-02
November 2012
Oracle Healthcare Operating Room Analytics (ORA) release 1.0.1 is an analytical reporting application. ORA generates both predefined and custom reports of key metrics across the operating room spectrum.
ORA is built on top of Oracle Business Intelligence Enterprise Edition (OBIEE) infrastructure. This document presents instructions for installing ORA. It also describes the tasks that you must complete before you can install the ORA application.
ORA is integrated with several other products including Informatica and Oracle Business Intelligence Enterprise Edition (OBIEE).
This installation guide is intended for users who are responsible for installing Oracle Operating Room Analytics. You should be familiar with:
Oracle Database and Database Schema
Oracle Business Intelligence Enterprise Edition (OBIEE) application
This section presents an overview of the ORA requirements. It also describes the tasks that you must complete before you can install the ORA application. Specifically, this section includes the following topics:
The required technology stack for Oracle Operating Room Analytics consists of the following products:
Oracle Database 11.2.0.2
Oracle Business Intelligence Enterprise Edition (OBIEE) 11.1.1.6.0
Table 1 System Requirements References
| Product | Reference |
|---|---|
|
Oracle Database 11.2.0.2 |
Database Installation Guide for <platform> |
|
Oracle Business Intelligence Enterprise Edition (OBIEE) 11.1.1.6.0 |
System Requirements and Supported Platforms for Oracle Business Intelligence Suite Enterprise Edition Oracle Business Intelligence Infrastructure Installation and Configuration Guide |
|
Other Technology Stack Components |
My Oracle Support / Certifications |
Note:
Download Oracle Database 11.2.0.2 from My Oracle Support Article ID 988222.1It is important to get the technology stack products from the ORA media pack because newer versions of the technology stack products may have become available but may not be compatible with ORA.
For more information about certifications, refer to Finding Certification Information.
ORA supports those Internet browsers supported by OBIEE. For a list of the browsers supported by OBIEE, refer to System Requirements and Supported Platforms for Oracle Business Intelligence Suite Enterprise Edition.
ORA supports the following platforms:
Windows32 (Windows 2003/ Windows 2008)
Sun SPARC Solaris (64-bit)
HP-UX 11i (11.31) (Itanium-2)
Linux x86
Before you can install the ORA application, you must complete the following pre-installation tasks:
Install Oracle Database 11.2.0.2
Follow the instructions in Database Installation Guide for <platform>.
Install Oracle Business Intelligence Enterprise Edition (OBIEE) 11.1.1.6.0
Install the following patches available on My Oracle Support:
14223977
14226980
13960955
14226993
14228505
13867143
14142868
Note:
Oracle recommends that you enable HTTPS on the middle-tier computer that is hosting the Web services, since the trusted user name and password that are passed can be intercepted.The Oracle Operating Room Analytics media pack is available both as physical media and as a disk image from the Oracle E-Delivery Web site.
The media pack contains the technology stack products and the ORA application.
To receive the physical media, order it from Oracle Store at https://oraclestore.oracle.com.
To download the Oracle Operating Room Analytics media pack from eDelivery, do the following:
Go to http://edelivery.oracle.com and log on.
From the Select a Product Pack drop-down list, select Health Sciences.
From the Platform drop-down list, select the appropriate operating system.
Click Go.
Select Oracle Healthcare Operating Room Analytics 1.0.1 Media Pack for Operating System and click Continue.
Download the software.
This chapter presents an overview of the ORA installation process. It also describes the ORA Installation tasks that you must complete for different environments. This section includes the following topics:
Note:
All references to${MEDIA_PACK} in this document refer to Media Pack directory respectively.The following steps are involved in installing ORA on Windows and Unix:
Perform the following steps to set up the database:
Create a directory on the server and copy the contents of the software folder on the media to this directory.
Install the Oracle database.
Connect to the database as the SYSTEM user.
Create the tablespace APPS_TS_TX_DATA using the following command:
CREATE BIGFILE TABLESPACE APPS_TS_TX_DATA DATAFILE '+DATA_xx /my_dbspace/ APPS_TS_TX_DATA_bigfile.dbf' SIZE 4G REUSE
AUTOEXTEND ON NEXT 8G MAXSIZE UNLIMITED
EXTENT MANAGEMENT LOCAL
Run the CREATE_ORA_USER.SQL script. This script creates a user EHA_ORA.
The script prompts for the Default_Table_Space name. Enter the default tablespace for the user. You can enter any valid tablespace name for the user. Oracle recommends that you use the applications tablespace APPS_TS_TX_DATA as the default tablespace.
The script also prompts for the ORA user password. Enter a valid password and continue.
Inspect the log file create_ORA_user_<DB_name>.log located in the working directory for errors. <DB_name> is the database name.
Connect to the database as the new user EHA_ORA with the following credentials:
Username: EHA_ORA
Password: Enter the same password entered in the step 5.
Run the DDL script, EHA_ORA_DDL_1.1.sql, to create the database objects such as tables, views, indexes, procedures, functions, constraints, and triggers.
The script prompts for the Index_Table_Space for the EHA_ORA user. Enter the tablespace for the indexes. You can enter any valid tablespace name. Oracle recommends that you use the Apps tablespace APPS_TS_TX_IDX as the index table space.
Inspect the log file ORA_DDL_1_<DB_name>.log located in the working directory for errors. <DB_name> is the database name.
Run the EHA_ORA_INSERT_SEED_DATA.SQL script. The script inserts seed data for ORA application into the database. Inspect this log file after each step to see the output log and check for errors during the setup.
Inspect the log file ORA_insert_seed_data_<DB_name>.log located in the working directory for errors. <DB_name> is the database name.
Create a schema, for example, EHA_READ_ONLY_ORA. Grant this schema connect and create synonym privileges.
For example,
grant connect to EHA_READ_ONLY_ORA;
                        grant create synonym to EHA_READ_ONLY_ORA;
Execute the ora_grants.sql script passing the name of the read only schema as a parameter from EHA_ORA user.
Execute the ora_synonyms.sql script from EHA_READ_ONLY_ORA user passing the EHA_ORA user as input parameter.
If Oracle Weblogic instance does not have any roles or policies from other applications, perform the following steps to create roles in the Weblogic instance where OBIEE is installed:
Log into WebLogic Enterprise Manager where the rpd and webcat is deployed.
Expand the Weblogic Domain node.
Right-click bifoundation_domain and then navigate to Security > Application Roles.
Select Select Application Stripe to search and then select obi.
Click Search.
Click Create.
Enter the role name and click OK.
The following roles have to be created:
Analyst
Business Analyst
Department Manager
Executive - Financial Officer
Chief of Anesthesia
Chief of Surgery
Enterprise User
Presentation Server Administrators
If Weblogic instance has policies and roles for other deployed applications, perform the policy migration using the following steps:
Create a folder for the policy store migration.
Windows: <DRIVE>:\PolicyStoreMigration
<DRIVE>:\PolicyStoreMigration\Prod
UNIX: /PolicyStoreMigration/ORA
Create sub-folders for ORA and the current production instances.
Windows: <DRIVE>:\PolicyStoreMigration\ORA
/PolicyStoreMigration/Prod
UNIX: /PolicyStoreMigration
Copy system-jazn-data.xml supplied with ORA to the ORA folder.
Copy the system-jazn-data.xml from:
Windows: {Middleware_Home}/ user_projects/domains/bifoundation_domain/config/fmwconfig folder to the Prod folder
UNIX: {Middleware_Home}\ user_projects\domains\bifoundation_domain\config\fmwconfig folder to the Prod folder.
Note:
Oracle recommends that you take a backup of all the files before merging the policies.Copy jps-config-policy.xml supplied with ORA to the PolicyStoreMigration folder.
Open the jps-config-policy.xml file.
Edit the location attribute value in the <serviceInstance> tag for source and target to reflect the actual paths in your environment.
<serviceInstance name="srcpolicystore.xml"provider="policystore.xml.provider" location="C:\PolicyStoreMigration\ORA\ system-jazn-data.xml ">
<serviceInstance name="policystore.xml" provider="policystore.xml.provider"location="C:\PolicyStoreMigration \Prod \ system-jazn-data.xml ">
Run the Oracle WebLogic Scripting Tool (WLST) in the command prompt.
Windows: {Middleware_Home}/Oracle_BI1/common/bin/wlst.cmd
UNIX: {Middleware_Home}/Oracle_BI1\common\bin\wlst.sh
Run the following command in offline interactive mode:
migrateSecurityStore(type="appPolicies", srcApp="obi",configFile="C:/PolicyStoreMigration/jps-config-policy.xml",src="sourceFileStore", dst="targetFileStore", overWrite="false")
The merged PolicyStore file is now available in the Prod folder. The PolicyStore should contain the following roles in addition to others:
Analyst
Business Analyst
Department Manager
Executive - Financial Officer
Chief of Anesthesia
Chief of Surgery
Enterprise User
Presentation Server Administrators
Stop the Oracle WebLogic Server.
Copy the merged system-jazn-data.xml from Prod folder to:
Windows: {Middleware_Home}/user_projects/domains/bifoundation_domain/config/fmwconfig
UNIX: {Middleware_Home}\user_projects\domains\bifoundation_domain\config\fmwconfig
Start the Oracle WebLogic Server.
Perform the following steps to create users in Weblogic:
Log into the Weblogic console.
Click Security Realm > myrealm.
Navigate to the Users and Groups > Users.
Click New.
Enter a username and password. Click OK.
Perform the following steps to assign users or groups to the appropriate application roles:
Log into the Weblogic Enterprise Manager.
Expand the Business Intelligence node.
Navigate to coreapplication > Security.
Click Configure and Manage Application Roles.
Select the role you want to add users to and the click Edit.
In the Members section, click Add to add the user.
Click OK.
To install the ORA reports on Windows and Unix:
Place the OracleHealthcareAnalyticsApps.rpd in the following folder:
Windows: <DRIVE>:\Oracle\MiddleWare\instances\instance1\bifoundation\OracleBIServerComponent\coreapplication_obis1\repository
UNIX: Oracle/MiddleWare/instances/instance1/bifoundation/OracleBIServerComponent/coreapplication_obis1/repository
Extract the contents of OracleHealthcareAnalyticsApps.zip in the following folder:
Windows: <DRIVE>:\Oracle\MiddleWare\instances\instance1\bifoundation\OracleBIPresentationServicesComponent\coreapplication_obips1\catalog
UNIX: Oracle/MiddleWare/instances/instance1/bifoundation/OracleBIPresentationServicesComponent\coreapplication_obips1/catalog
Extract the contents of help.zip in the following folder:
Windows - <DRIVE>:\Oracle\MiddleWare\Oracle_BI1\bifoundation\web\app\res\help
UNIX - Oracle/MiddleWare/Oracle_BI1/bifoundation/web/app/res/help
Extract the contents of help.zip in the following folder:
Windows - <DRIVE>:\Oracle\MiddleWare\user_projects\domains\bifoundation_domain\servers\bi_server1\tmp\_WL_user\analytics_11.1.1\7dezjl\war\res\help
UNIX - Oracle/MiddleWare/user_projects/domains/bifoundation_domain/servers/bi_server1/tmp/_WL_user/analytics_11.1.1/7dezjl/war/res/help
In the Oracle BI Administration Tool, open the newly installed Oracle BI repository (OracleHealthcareAnalyticsApps.rpd) in the offline mode to configure the static variables and connections.
Note:
The OBIEE BI Administration Tool is supported only on Windows. If ORA is installed on Unix, copyOracleHealthcareAnalyticsApps.rpd to a Windows system to perform modifications described in the following sections. Once the modifications are complete, copy the OracleHealthcareAnalyticsApps.rpd back to the Unix system.In the Oracle BI Administration Tool, select File > Open > Offline.
Navigate to the OracleHealthcareAnalyticsApps.rpd, and then click Open.
The Open Offline dialog box appears.
Enter the repository password to log into the OracleHealthcareAnalyticsApps.rpd file.
The default password is SADMIN123.
To change the password:
From the File menu, select Change Password.
Enter the old password and then the new password.
Confirm the new password.
Click OK.
In the Oracle BI Administration Tool, select Manage, and then select Variables.
The Variable Manager dialog box appears.
Expand Repository and then Variable in the left pane.
Click Static.
Double-click and modify the following static variables:
| Variable Name | Instruction |
|---|---|
|
OLAP_DSN |
Enter the Service Name of database hosting ORA database schema. |
|
OLAP_USER |
Enter the name of ORA read-only database schema, for example, EHA_READ_ONLY_ORA. |
|
OLAPTBO |
Enter the name of ORA read-only schema, for example, EHA_READ_ONLY_ORA. |
|
ORRoomBusinessUnitHierarchy |
Enter the operational organization hierarchy name. This value must match with the value specified for ETL configuration parameter $$HIERARCHY_NAME in the ETL parameter file ParameterFile_ORA.prm. |
|
ORRoomHierarchyLeaf |
Enter the value of the code for operating rooms. This value must match with the corresponding value of Business Unit Sub Type in the Code Repository table, that represents the Operating Rooms. |
|
CancellationProviderReasonCode |
Enter the value of the category code for cancellation reasons with provider category. This value must match with the corresponding value in the Code Repository table. |
|
CancellationSystemReasonCode |
Enter the value of the category code for cancellation reasons with system category. This value must match with the corresponding value in the Code Repository table. |
|
DelayProviderReasonCode |
Enter the value of the category code for delay reasons with provider category. This value must match with the corresponding value in the Code Repository table. |
|
DelaySystemReasonCode |
Enter the value of the category code for delay reasons with system category. This value must match with the corresponding value in the Code Repository table. |
|
ElectiveCaseTypeCode |
Enter the value of the code for the elective case type. This value must match with the corresponding value in the Code Repository table. |
Click OK after each modification.
Close Variable Manager.
Modify the connection pools in the RPD as follows:
In the physical layer, expand the EHI Applications Data Warehouse node and double-click EHI Applications Data Warehouse Connection Pool.
Change the password to the password of the ORA read-only schema.
Click OK.
Repeat the above steps for Internal System Connection Pool under the Externalized Metadata Strings node as well.
From the File menu, select Save to save the rpd.
Start BI Services manually. In the Windows Start Menu, select All Programs > Oracle Business Intelligence > Start BI Services.
Log into Fusion Middleware Control:
https://<host name>:7001/em
Expand the Business Intelligence folder and select the coreapplication node.
Click the Repository tab on the Deployment page.
Click Lock and Edit Configuration.
In the Upload BI Server Repository section, click Browse to select the OracleHealthcareAnalyticsApps.rpd.
Enter the repository password (SADMIN123) in the Repository Password and Confirm Password fields.
Enter the new password that you have set up.
Enter the location of the OracleHealthcareAnalyticsApps catalog in the BI Presentation Catalog section.
Click Apply.
Click Activate Changes.
Click the Overview tab.
Click Restart.
Click Yes.
Open your browser and log into OBIEE.
Your security privileges determine what reports you can see and what you can do in ORA. To log in to ORA, you must have a browser on your computer and a URL, username, and password provided by your company.
Open your browser and enter the URL provided by your company.
Figure 1 displays the ORA login page.
Figure 1 Oracle Healthcare Operating Room Analytics Login Page
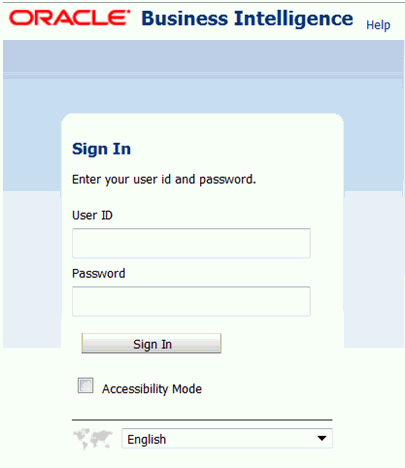
Enter the user ID and password created in Section 3.1.2, "Role and Policy Set Up".
Click Login.
After your login credentials are authenticated, your default dashboard page is displayed.
For more information, see the following documents in the Oracle Business Intelligence Enterprise Edition Release 11.1.1.6.0 documentation set.
Oracle Business Intelligence Enterprise Edition (OBIEE) Documentation
The Oracle Business Intelligence Suite Enterprise Edition Online Documentation Library (Part E21764) documentation set includes:
Oracle® Fusion Middleware User's Guide for Oracle Business Intelligence Enterprise Edition 11g Release 1 (11.1.1) (Part E10544)
Oracle® Fusion Middleware Metadata Repository Builder's Guide for Oracle Business Intelligence Enterprise Edition 11g Release 1 (11.1.1) (Part E10540)
Oracle® Fusion Middleware System Administrator's Guide for Oracle Business Intelligence Enterprise Edition 11g Release 1 (11.1.1) (Part E10541)
Oracle® Fusion Middleware Scheduling Jobs Guide for Oracle Business Intelligence Enterprise Edition 11g Release 1 (11.1.1) (Part E18562)
Oracle® Fusion Middleware Security Guide for Oracle Business Intelligence Enterprise Edition 11g Release 1 (11.1.1) (Part E10543)
Oracle® Fusion Middleware Developer's Guide for Oracle Business Intelligence Enterprise Edition 11g Release 1 (11.1.1) (Part E10545)
Oracle® Fusion Middleware Integrator's Guide for Oracle Business Intelligence Enterprise Edition 11g Release 1 (11.1.1) (Part E16364)
ORA 1.0.1 uses the industry recognized lexicon Glossary of Times Used for Scheduling and Monitoring of Diagnostic and Therapeutic Procedures © to define procedural times in the product. Using this standard minimizes impediments to data comparison and analysis that may occur with differing semantics, allowing you to conduct comprehensive analysis of OR scheduling, utilization, and efficiency across multiple organizations. This document is the copyrighted property of the American Association of Clinical Directors (AACD), and is used with its permission.
Your source for the latest information about Oracle Operating Room Analytics is Oracle Support's self-service Web site, My Oracle Support (formerly MetaLink).
Before you install and use an Oracle software release, always visit the My Oracle Support Web site for the latest information, including alerts, release notes, documentation, and patches.
You must register at My Oracle Support to obtain a user name and password account before you can enter the Web site.
To register for My Oracle Support:
Open a Web browser to http://support.oracle.com.
Click the Register here link to create a My Oracle Support account. The registration page opens.
Follow the instructions on the registration page.
To sign in to My Oracle Support:
Open a Web browser to http://support.oracle.com.
Click Sign In.
Enter your user name and password.
Click Go to open the My Oracle Support home page.
The fastest way to search for product documentation, release notes, and white papers is by the article ID number.
To search by the article ID number:
Sign in to My Oracle Support at http://support.oracle.com.
Locate the Search box in the upper right corner of the My Oracle Support page.
Click the sources icon to the left of the search box, and then select Article ID from the list.
Enter the article ID number in the text box.
Click the magnifying glass icon to the right of the search box (or press the Enter key) to execute your search.
The Knowledge page displays the results of your search. If the article is found, click the link to view the abstract, text, attachments, and related products.
In addition to searching by article ID, you can use the following My Oracle Support tools to browse and search the knowledge base:
Product Focus — On the Knowledge page, you can drill into a product area through the Browse Knowledge menu on the left side of the page. In the Browse any Product, By Name field, type in part of the product name, and then select the product from the list. Alternatively, you can click the arrow icon to view the complete list of Oracle products and then select your product. This option lets you focus your browsing and searching on a specific product or set of products.
Refine Search — Once you have results from a search, use the Refine Search options on the right side of the Knowledge page to narrow your search and make the results more relevant.
Advanced Search — You can specify one or more search criteria, such as source, exact phrase, and related product, to find knowledge articles and documentation.
Be sure to check My Oracle Support for the latest patches, if any, for your product. You can search for patches by patch ID or number, or by product or family.
To locate and download a patch:
Sign in to My Oracle Support at http://support.oracle.com.
Click the Patches & Updates tab.
The Patches & Updates page opens and displays the Patch Search region. You have the following options:
In the Patch ID or Number is field, enter the primary bug number of the patch you want. This option is useful if you already know the patch number.
To find a patch by product name, release, and platform, click the Product or Family link to enter one or more search criteria.
Click Search to execute your query. The Patch Search Results page opens.
Click the patch ID number. The system displays details about the patch. In addition, you can view the Read Me file before downloading the patch.
Click Download. Follow the instructions on the screen to download, save, and install the patch files.
Certifications provide access to product certification information for Oracle and third party products. A product is certified for support on a specific release of an operating system on a particular hardware platform, for example, Oracle Database 10g Release 2 (10.2.0.1.0) on Sun Solaris 10 (SPARC). To find certification information:
Sign in to My Oracle Support at http://support.oracle.com.
Click the Certifications tab. The Certifications page opens and displays the Find Certifications region.
In Select Product, enter Oracle Healthcare Operating Room Analytics.
Click the Go to Certifications icon.
The right pane displays the certification information.
Select a certification to view the certification details.
You can also use the Oracle Technology Network Web site to open PDF versions of user and reference documentation.
Visit the Oracle Technology Network Web site at the following address:
http://www.oracle.com/technology/index.html
Use the Documentation menu and the Documentation Index to find the manual you want, and then click its title to download and open the PDF version of the manual.
For information about Oracle's commitment to accessibility, visit the Oracle Accessibility Program website at http://www.oracle.com/pls/topic/lookup?ctx=acc&id=docacc.
Oracle customers have access to electronic support through My Oracle Support. For information, visit http://www.oracle.com/pls/topic/lookup?ctx=acc&id=info or visit http://www.oracle.com/pls/topic/lookup?ctx=acc&id=trs if you are hearing impaired.
Oracle® Operating Room Analytics Installation Guide, Release 1.0.1
E16679-02
Copyright © 2010, 2012 Oracle and/or its affiliates. All rights reserved.
This software and related documentation are provided under a license agreement containing restrictions on use and disclosure and are protected by intellectual property laws. Except as expressly permitted in your license agreement or allowed by law, you may not use, copy, reproduce, translate, broadcast, modify, license, transmit, distribute, exhibit, perform, publish, or display any part, in any form, or by any means. Reverse engineering, disassembly, or decompilation of this software, unless required by law for interoperability, is prohibited.
The information contained herein is subject to change without notice and is not warranted to be error-free. If you find any errors, please report them to us in writing.
If this is software or related documentation that is delivered to the U.S. Government or anyone licensing it on behalf of the U.S. Government, the following notice is applicable:
U.S. GOVERNMENT RIGHTS Programs, software, databases, and related documentation and technical data delivered to U.S. Government customers are "commercial computer software" or "commercial technical data" pursuant to the applicable Federal Acquisition Regulation and agency-specific supplemental regulations. As such, the use, duplication, disclosure, modification, and adaptation shall be subject to the restrictions and license terms set forth in the applicable Government contract, and, to the extent applicable by the terms of the Government contract, the additional rights set forth in FAR 52.227-19, Commercial Computer Software License (December 2007). Oracle America, Inc., 500 Oracle Parkway, Redwood City, CA 94065.
This software or hardware is developed for general use in a variety of information management applications. It is not developed or intended for use in any inherently dangerous applications, including applications that may create a risk of personal injury. If you use this software or hardware in dangerous applications, then you shall be responsible to take all appropriate fail-safe, backup, redundancy, and other measures to ensure its safe use. Oracle Corporation and its affiliates disclaim any liability for any damages caused by use of this software or hardware in dangerous applications.
Oracle and Java are registered trademarks of Oracle and/or its affiliates. Other names may be trademarks of their respective owners.
Intel and Intel Xeon are trademarks or registered trademarks of Intel Corporation. All SPARC trademarks are used under license and are trademarks or registered trademarks of SPARC International, Inc. AMD, Opteron, the AMD logo, and the AMD Opteron logo are trademarks or registered trademarks of Advanced Micro Devices. UNIX is a registered trademark of The Open Group.
This software or hardware and documentation may provide access to or information on content, products, and services from third parties. Oracle Corporation and its affiliates are not responsible for and expressly disclaim all warranties of any kind with respect to third-party content, products, and services. Oracle Corporation and its affiliates will not be responsible for any loss, costs, or damages incurred due to your access to or use of third-party content, products, or services.
Copyright © 2010, 2012, Oracle and/or its affiliates. All rights reserved. Legal Notices |
|