| StorageTek Tape Analytics Administration Guide Release 2.0 E39010-01 |
|


 Previous |
 Next |
This chapter provides concepts and procedures for managing Simple Network Management Protocol (SNMP) connections between STA and the libraries. For general SNMP information, see the StorageTek SL150/SL500/SL3000/SL8500 SNMP Reference Guide. To initially configure SNMP for STA, see the STA Installation and Configuration Guide.
Libraries are monitored via the SNMP interface, with STA being a client agent and each library being a server agent.
Oracle recommends the SNMP v3 protocol. The authentication, encryption, and message integrity features in SNMP v3 provide a secure mechanism for sending library data. However, you can optionally choose SNMP v2c for one or more libraries (see ”SNMP Configuration” in the STA Installation and Configuration Guide).
To set up SNMP connections, you must configure an SNMP user and an SNMP trap recipient on STA and each library. All libraries must use the same SNMP user and trap recipient.
|
Caution: Oracle's Service Delivery Platform (SDP) also uses SNMP. When defining SNMP user names for STA, do not make changes to the library SNMP configuration that conflict with SDP's requirements. Contact Oracle Support for assistance. |
A library connection test establishes or re-establishes the SNMP handshake between STA and the library. You can perform one connection test at a time.
|
Note: A connection test should be run only when required. Though it typically takes less than a second to test a library connection, no traps will be received from any libraries while the STA SNMP engine is restarted. |
When to Perform a Connection Test
Oracle recommends that you perform a library connection test whenever you perform any of the activities in Table 5-1, as each may cause the SNMP connection with a library to be dropped until the next scheduled data collection. You should also perform a connection test anytime you suspect loss of SNMP data from one or more libraries. Testing will minimize the time the connection is dropped and prevent the loss of large amounts of SNMP data.
To perform a connection test, see the "Test the SNMP Connection to the Library" section within the STA Installation and Configuration Guide.
Table 5-1 Activities Prompting a Connection Test
| Activity | Description |
|---|---|
|
Modification of STA SNMP client settings |
These settings include the SNMP user name and the connection authorization and privacy passwords. After performing this activity, test the connections of all monitored libraries. |
|
Modification of library SNMP settings |
Whenever you modify these settings, the Library Engine ID field is blanked out to indicate that the SNMP connection with the library has been dropped. After performing this activity, test only the connection of the affected library. |
|
Library reboot |
Wait until the library is fully operational before initiating the connection test. If more than one library is rebooted, wait for all libraries to be fully operational, and then test only the connection for a single library. |
|
Redundant Electronics switch |
Wait until the switch has completed and the library is fully operational before initiating the connection test. |
Once an SNMP connection is established with a library, STA begins receiving SNMP traps and stores this data in the STA data store. However, this data will not be displayed in the user interface until the STA library configuration model has been built (see "STA Data Store" in the STA Data Reference Guide for a description of the types of data).
For STA to build the initial library configuration model, initiate a manual data collection once the library connection is established. During this data collection, STA retrieves configuration information, including:
Locations of activated storage cells
Partition information
Drive types, identifiers, and locations
Media types, volume serial numbers (volsers), and locations
Depending on the size and activity level of the library, the initial data collection may take several minutes to over an hour. During this process, you may see fluctuations in various analytic and summary data. Once the data collection completes, the user interface displays a complete picture of the library configuration and ongoing exchange activity.
After the initial data collection, the configuration model is updated through regular data collections. Only one data collection can be performed on a particular library at a time, and only five data collections can be running simultaneously.
|
Note: Data collections have little impact on library performance. However, a data collection during heavy library activity can take longer to complete. Scheduled and manual data collections should be performed during periods of low library activity. |
Data collections are performed in the following ways:
Scheduled Data Collections — Occur automatically every 24 hours at a defined time. This is a full collection of all library configuration data and should be scheduled during low levels of library activity. See "Change Monitored Library Details".
Triggered Data Collections — Initiated automatically whenever significant changes in the library state or configuration are detected (for example, the addition of a drive or media cartridge, or a change in partition configuration). This is a partial data collection that updates only the library configuration affected by the change.
Manual Data Collections — This is a full collection of all library configuration data, initiated manually, as long as there is an active connection to the library. You must perform a manual data collection:
When a new library connection is configured.
After modifying SNMP settings in STA (see "Change Monitored Library Details") and on the library (as described in "Library Configuration Process" in the STA Installation and Configuration Guide).
When a Redundant Electronics switch has occurred (see "Tasks to Perform After a Redundant Electronics Switch").
You should also perform a manual data collection whenever you perform any of the activities in Table 5-2. Although STA initiates a triggered data collection for some of these activities, large-scale changes may take some time to complete.
Table 5-2 Activities Prompting A Recommended Manual Data Collection
| Activity | Additional Information |
|---|---|
|
Drive addition or swap |
The lag time between the activity and notification to STA could result in data co-mingling. Before performing a manual data collection, wait 15 minutes after drive initialization. |
|
Drive removal |
Before performing a manual data collection, wait approximately one minute after removal. |
|
Modification of active storage regions or partitions |
Before performing a manual data collection, wait 15 minutes after the library controller database has been updated. |
|
Large number of media cartridge enters or ejects |
NA |
|
Suspicion that library configuration data is out of sync on STA |
See "'Missing' Media" and "Duplicate Volume Serial Numbers" in the STA User's Guide. |
|
Suspicion that a data collection failed due to a reason external to the STA server |
NA |
To perform a manual data collection, see the "Get the Latest Configuration Data From the Library" section within the STA Installation and Configuration Guide.
The Setup & Administration > Configuration > SNMP Connections > Monitored Libraries table displays the status of the most recent library connection test or data collection — scheduled, triggered, or manual. Table 5-3 describes the connection status fields.
Table 5-3 Library Connection Status Fields
| Field | Description |
|---|---|
|
Last Successful Connection |
Date and time of the most recent successful connection test or data collection. |
|
Last Connection Attempt |
Date and time when the most recent connection test or data collection was attempted. |
|
Last Connection Status |
Status of the most recent connection test or data collection. In a data collection, the status is updated throughout the process according to the screen refresh rate defined for your STA username. Possible statuses are:
|
|
Last Connection Failure Detail |
If the connection test or data collection failed or was rejected, possible causes are listed in this field. |
The following sections describe SNMP-related tasks you can perform after initially configuring a library for STA monitoring. For example, you would need to update the SNMP connection settings in both the STA application and on affected libraries if you assign a new IP address to the STA server.
To confirm a good SNMP connection between the STA server and libraries, log in to the CLI on the STA server and perform these steps for each monitored library.
|
Note: If you have configured STA to support Redundant Electronics or Dual TCP/IP on an SL3000 or SL8500 library, perform each of these steps twice: once for the primary library IP address and once for the secondary IP address. |
Test the v3 SNMP connection.
# snmpget -v3 -u SNMP_user -a SHA -A auth_pwd -x DES -X priv_pwd -l authPriv library_IP_addr 1.3.6.1.4.1.1211.1.15.3.1.0
Where:
SNMP_user is the SNMP v3 user.
SHA indicates the authentication protocol.
auth_pwd is the authorization password.
DES indicates the privacy protocol.
priv_pwd is the privacy password.
authPriv indicates that privacy is performed on the command.
library_IP_addr is the IP address of the public port on the library.
Test the v2c SNMP connection.
# snmpget -v2c -c public -l authPriv library_IP_addr
Where:
library_IP_addr is the IP address of the public port on the library.
Confirm packet routing from the STA server to the library.
# traceroute -I library_IP_addr
Where:
-I indicates to use Internet Control Message Protocol (ICMP) echo request packets instead of User Datagram Protocol (UDP) datagrams.
library_IP_addr is the IP address of the public port on the library.
Monitor TCP/IP packets sent between the STA server and the library.
# tcpdump –v host library_IP_addr > /var/tmp/file_name &
Where:
-v indicates verbose output.
host indicates to collect packets to or from the indicated host only (in this case, the library).
library_IP_addr is the IP address of the public port on the library.
file_name is the name of the file to which to save the output.
You perform the following tasks on each monitored library. For SL500, SL3000, or SL8500 libraries, log in to the library's CLI. For SL150 libraries, log in to the library's browser user interface.
With the CLI (all libraries except SL150):
snmp listTrapRecipients
Note the index number of the STA trap recipient in the displayed output.
Example 5-1 Display all SNMP trap recipients with the CLI
ADMIN> snmp listTrapRecipients
 requestId
requestId 1
Attributes Auth SHA
 AuthPass *****
Engine Id 0x80001f88807ad87e39453f
Host 192.0.2.20
Index 1
Name STAuser
Port 162
Priv DES
Priv Pass *****
Trap Level 1,2,3,4,11,13,14,21,25,27,41,45,61,63,65,81,85,100
Version v3
Object Snmp snmp
Done
Failure Count 0
Success Count 1
COMPLETED
With the SL150 browser interface:
Go to SNMP > SNMP Trap Recipients to see a list of trap recipients.
For all libraries except the SL150, you can use the CLI to first delete a trap recipient before re-adding it with new information. For the SL150, you can select and modify a trap recipient without deleting it.
With the CLI (all libraries except SL150):
snmp deleteTrapRecipient id index
Where index is the index number of the trap recipient to be deleted.
With the SL150 browser interface:
Select a trap recipient from the list.
Select Edit Trap Recipient or Delete Trap Recipient.
If modifying a trap recipient, modify the settings, and then click Save.
You perform the following tasks within the STA user interface.
Use this procedure to modify existing SNMP connection settings for STA, including the SNMP user name and passwords. For the connection to be successful, the values specified in this procedure must match the ones on the library.
Go to Setup & Administration > Configuration > SNMP Connections.
In the Client Attributes table, select a row, and then click Edit.

In the Define SNMP Client Settings dialog box, enter any changes, and then click Save.
To avoid dropped connections and lost SNMP traps, you must test the connection to all monitored libraries. See "Test the SNMP Connection to the Library" in the STA Installation and Configuration Guide.
Use this procedure to modify the SNMP connection settings for an existing library, including library IP addresses, library engine ID, and the STA server IP address. You can also change the library name, scheduled data collection time, and library time zone.
Go to Setup & Administration > Configuration > SNMP Connections.
In the Monitored Libraries table, select the library to modify, and then click Edit.
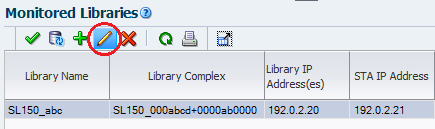
In the Define Library Connection Details dialog box, enter any connection changes, and then click Save.
After you change library connection settings, the Library Engine ID field in the Monitored Libraries table will be blank, indicating the SNMP connection has been dropped.
|
Note: When changing the library IP address, STA verifies if the new IP address is associated with the serial number of the library you are modifying. You cannot specify the IP address of another library. |
To re-establish the connection and avoid lost SNMP traps, you must test the connection to the affected library if you change any connection-related values, such as library IP address. See "Test the SNMP Connection to the Library" in the STA Installation and Configuration Guide.
Use this procedure to export all information appearing on the Setup & Administration > Configuration > SNMP Connections screen to a text file. This file is useful for troubleshooting connection issues or re-entering connection information. Passwords are not included in the file; they are masked with asterisks (*).
Go to Setup & Administration > Configuration > SNMP Connections.
At the bottom of the screen, click Export. The file will be saved with the name "SnmpConfiguration."
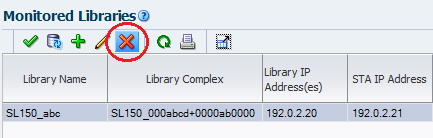
Use this procedure to remove a library SNMP connection. All existing data for the library will be removed from the STA screens, but will be retained in the STA data store (see "Removed Libraries" in the STA Data Reference Guide for the impact of this procedure).
After performing this procedure, you can delete the STA SNMP trap recipient from the library. See "Delete or Modify the STA Trap Recipient".
Go to Setup & Administration > Configuration > SNMP Connections.
In the Monitored Libraries table, select the library to remove, and then click Delete.
|
Note: This procedure does not apply to SL150 libraries. |
Use this procedure to update the library and STA SNMP configurations after upgrading to one of the following library firmware versions or higher:
SL500 – FRS 1468
SL3000 – FRS 4.0
SL8500 – FRS 8.0
Starting with these firmware versions, the library engine ID is generated with a new 32-bit value. If you do not perform this procedure, STA will be unable to receive SNMP traps from the library.
Log in to the STA user interface.
In the connection details for the upgraded library, clear the Library Engine ID field and click Save. See "Change Monitored Library Details".
Re-establish the SNMP connection with the library. See "Test the SNMP Connection to the Library" in the STA Installation and Configuration Guide.
Record the new SNMP engine ID displayed on the SNMP connections table.
Log in to the CLI on the upgraded library.
Display all SNMP trap recipients. See "Display All SNMP Trap Recipients".
Verify the SNMP Version level displayed for the STA server:
If it is ”v2c”, quit this procedure.
If it is ”v3”, continue to the next step.
Compare the displayed engine ID with the one you noted in Step 4:
If they match, quit this procedure.
If they do not match, continue to the next step.
Record the Index number of the STA trap recipient.
Delete the STA trap recipient. See "Delete or Modify the STA Trap Recipient".
Re-add the STA v3 trap recipient using the new library engine ID. See "Add A New Trap Recipient".
If a Redundant Electronics (RE) switch has occurred (SL3000 and SL8500 libraries only), do the following:
Wait 15 minutes after the newly-active card has fully initialized.
Perform a connection test to verify the library SNMP connection (see "Test the SNMP Connection to the Library" in the STA Installation and Configuration Guide).
Perform a data collection to retrieve the current library configuration data (see the "Get the Latest Configuration Data From the Library" section within the STA Installation and Configuration Guide).
If a controller card is replaced after the RE switch, update the library IP address in STA. See "Change Monitored Library Details" for instructions.
STA configuration for RE is described in the "Library Configuration Concepts" chapter in the STA Installation and Configuration Guide.
If the IP address of a library changes, you will need to update the monitored library details in STA. See "Change Monitored Library Details".
If the IP address of the STA server changes, you will need to perform the following:
Specify the STA server's new IP address as a trap recipient. See "SNMP Management Tasks — Library".
Update each monitored library's details in STA to reflect the STA server's new IP address. See "Change Monitored Library Details".
If you make a robot change (add, remove, or swap), you should perform a manual data collection to retrieve current library configuration data (see the "Get the Latest Configuration Data From the Library" section within the STA Installation and Configuration Guide).
|
 Copyright © 2012, 2014, Oracle and/or its affiliates. All rights reserved. Legal Notices |
|