| StorageTek Tape Analytics Installation and Configuration Guide Release 2.0.1 E41585-03 |
|


 Previous |
 Next |
| StorageTek Tape Analytics Installation and Configuration Guide Release 2.0.1 E41585-03 |
|
Previous |
Next |
Oracle supplies self-generated certificates to be used with HTTPS/SSL Ports. During installation, STA generates a certificate using the Java keytool and creates it on your server using your server hostname. You can optionally replace the Oracle certificate with your own approved certificate from a selected certificate authority (for example, VeriSign).
|
Note: The following procedures use Mozilla Firefox running on a Windows platform. |
Enter the HTTPS/SSL version of the URL for the STA application on the browser.
https://your_localhost.com:port number/STA/
Select I Understand the Risks, and then Add Exception.
Click View on the Add Security Certificate screen.
You then see the Certificate Viewer: your_localhost screen. The certificate is not shown as verified because it is not from a certificate authority.
You can examine the certificate further on the Certificate Viewer screen by clicking the Details tab and selecting the issuer field. The variables you may see include:
CN = The hostname of the server that the STA application has been installed on. For example,
Common Name (CN) your server name
OU = Tape Systems
O = Oracle America Inc
L = Redwood City
ST = California
C = USA
The variable field CN is the server name that the certificate was generated on.
Click Close to return to the Add Security Certificate screen.
Select Confirm Security Exception on the Add Security Certificate screen, and you will be able to use HTTPS with the proper certificate.
Go to the WebLogic console login screen using the HTTP (default is 7001) or HTTPS (default is 7002) port number you selected during STA installation.
http(s)://yourHostName:PortNumber/console/
Log in using the WebLogic Admin Console username and password you defined during STA installation.
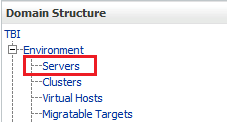
Under Domain Structure > Environment, select Servers.
Under Servers, select staUi (select the name itself, not the check box).

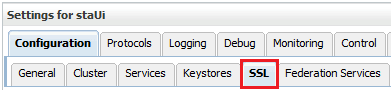
Select the Keystores tab.

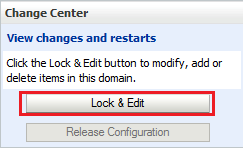
Under Change Center (top left of screen), click Lock & Edit.
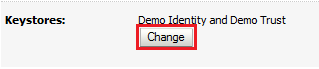
In the Keystores section, click Change.
In the Keystores drop-down menu, select Custom Identity and Java Standard Trust.
Click Save.
On the Keystores screen, enter:
Custom Identity Keystore: the path and file of the private key file.
Custom Identity Keystore Type: the keystore type. If configuring for RACF authentication, enter PKCS12.
Custom Identity Keystore Passphrase: the password supplied by the MVS system administrator.
Java Standard Trust Keystore Passphrase: the new password for the Java Standard Trust Keystore file.
|
Caution: If you forget these passwords, you must re-install STA. |
Click Save.
Select the SSL tab.
Enter the Private Key Alias and Private Key Passphrase supplied by the MVS system programmer.
To determine the Private Key Alias, use the keytool command. For example:
C:\Temp>keytool -list -keystore CLTBI.PKCS12DR.D080411 -storetype PKCS12
Enter keystore password: (password from the MVS sysadmin)
Keystore type: PKCS12
Keystore provider: SunJSSE

Your keystore contains 1 entry

tbiclient, Aug 17, 2011, PrivateKeyEntry,
Certificate fingerprint (MD5): 9A:F7:D1:13:AE:9E:9C:47:55:83:75:3F:11:0C:BB:46
Click Save.
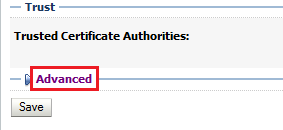
Select the Advanced link (bottom of screen).
Modify the following information:
Select the Use Server Certs check box.
From the Two Way Client Cert Behavior list, select Client Certs Requested But Not Enforced.
Select Builtin SSL Validation Only from both the Inbound Certification Validation and Outbound Certificate Validation lists.
Click Save.
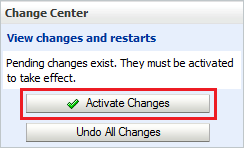
Under the Change Center (top left of screen), click Activate Changes.
Log out of WebLogic.
Stop and restart STA with the STA command. For information on command usage, see the STA Administration Guide.
# STA stop all
# STA start all
Enter the HTTPS/SSL version of the URL for the STA application on the browser.
https://your_localhost.com:port number/STA/
Select I Understand the Risks on the This Connection is Untrusted screen.
Click Add Exception.
To specify a certificate for your organization, click Get Certificate on the Add Security Certificate screen and select the appropriate file.
Click Confirm Security Exception.
|
 Copyright © 2012, 2014, Oracle and/or its affiliates. All rights reserved. Legal Notices |
|