| Oracle® Health Sciences Mobile Clinical Research Associate Server Installation and Configuration Guide Release 1.3 E38578-04 |
|
|
PDF · Mobi · ePub |
| Oracle® Health Sciences Mobile Clinical Research Associate Server Installation and Configuration Guide Release 1.3 E38578-04 |
|
|
PDF · Mobi · ePub |
This chapter includes the following sections:
Note:
For information about installing Oracle WebLogic Server, seehttp://docs.oracle.com/cd/E23943_01/doc.1111/e14142/toc.htm.You need to define a data source to point the WebLogic Server (WLS) to the database where the Mobile CRA Server database component is installed.
This section contains the following topics:
Section 4.1.3, "Configuring Data Source Server Advanced Queuing"
Section 4.1.6, "Configuring Data Source Adaptive Site-at-a-Glance Server"
Section 4.1.7, "Installing the Adaptive Site-at-a-Glance Server"
To configure data source mobile server, perform the following:
Log in to Oracle WebLogic Server (WLS) as admin by entering the URL (for example, http://<server:port number>/console).
Click Lock and Edit in the Change Center panel on the left side.
Click Services in the Domain Structure window.
Select Data Sources.
The Summary of JDBC data sources is displayed on the right-side window panel.
Click New and select Generic Data Source from the list.
In the JDBC Data Source Properties screen, perform the following:
Enter the name.
Oracle recommends that the name should match the JNDI name.
Enter jdbc/mobilecra as the name and JNDI name to connect to MCSV_ADMIN schema.
Enter Oracle as the database type.
Click Next.
In the Database Driver field, select the default value, that is, Oracle's Driver (Thin XA) for instance connections (versions: 9.0.1 and above).
Click Next.
Click Next on the Transaction Options screen.
In the Connection Properties screen, perform the following:
Enter the SID in the Database Name field.
Enter the server where mobile server database is hosted.
Enter the port number for the database.
Enter the Mobile CRA server database user name where it is hosted.
Enter password for the database user.
Re-enter the password in the Confirm password field.
Click Next.
The Properties, System Properties, and Test Table Name fields are displayed on the screen.
Click Test Configuration.
If the test is successful, the message Connection test succeeded is displayed on the screen.
Click Next.
The Select Targets screen is displayed with the list of servers.
Select the server where the Mobile CRA Server is installed.
Click Finish.
After creating jdbc/mobilecra, click Activate Changes in the Change Center panel.
To configure data source alert engine, perform the following:
Log in to WLS as admin by entering the URL (for example, http://<server:port number>/console).
Click Lock and Edit in the Change Center panel on the left side.
Click Services in the Domain Structure window.
Select Data Sources.
The Summary of JDBC Data Sources is displayed on the right-side window panel.
Click New and select Generic Data Source from the list.
In the JDBC Data Source Properties screen, perform the following:
Enter the name.
Oracle recommends that the name should match the JNDI name.
Enter jdbc/ae as the name and JNDI name to connect to MCRE_ADMIN schema.
Enter Oracle as the database type.
Click Next.
In the Database Driver field, select the default value, that is, Oracle's Driver (Thin XA) for instance connections (versions: 9.0.1 and above).
Click Next.
Click Next on the Transaction Options screen.
In the Connection Properties screen, perform the following:
Enter the SID in the Database Name field.
Enter the server where alert engine database is hosted.
Enter the port number for database.
Enter the alert engine database user name where it is hosted.
Enter password for the database user.
Re-enter the password in the Confirm password field.
Click Next.
The Properties, System Properties, and Test Table Name fields are displayed on the screen.
Click Test Configuration.
If the test is successful, the message Connection test succeeded is displayed on the screen.
Click Next.
The Select Targets screen is displayed with the list of servers.
Select the server where the Mobile CRA Server is installed.
Click Finish.
After creating jdbc/ae, click Activate Changes in the Change Center panel.
Exit the Oracle WebLogic server.
To configure data source Server AQ, perform the following:
Log in to WLS as admin by entering the URL (for example, http://<server:port number>/console).
Click Lock and Edit in the Change Center panel on the left side.
Click Services in the Domain Structure window.
Select Data Sources.
The Summary of JDBC Data Sources is displayed on the right-side window panel.
Click New and select Generic Data Source from the list.
In the JDBC Data Source Properties screen, perform the following:
Enter the name.
Oracle recommends that the name should match the JNDI name.
Enter jdbc/mobileaq as the name and JNDI name to connect to MCAQ_ADMIN schema.
Enter Oracle as the database type.
Click Next.
In the Database Driver field, select the default value, that is, Oracle's Driver (Thin XA) for instance connections (versions: 9.0.1 and above).
Click Next.
Click Next on the Transaction Options screen.
In the Connection Properties screen, perform the following:
Enter the SID in the Database Name field.
Enter the server where AQ database is hosted.
Enter the port number for database.
Enter the AQ database user name where it is hosted.
Enter password for the database user.
Re-enter the password in the Confirm password field.
Click Next.
The Properties, System Properties, and Test Table Name fields are displayed on the screen.
Click Test Configuration.
If the test is successful, the message Connection test succeeded is displayed on the screen.
Click Next.
The Select Targets screen is displayed with the list of servers.
Select the server where the Mobile CRA Server is installed.
Click Finish.
After creating jdbc//mobileaq, click Activate Changes in the Change Center panel.
Exit the Oracle WebLogic server.
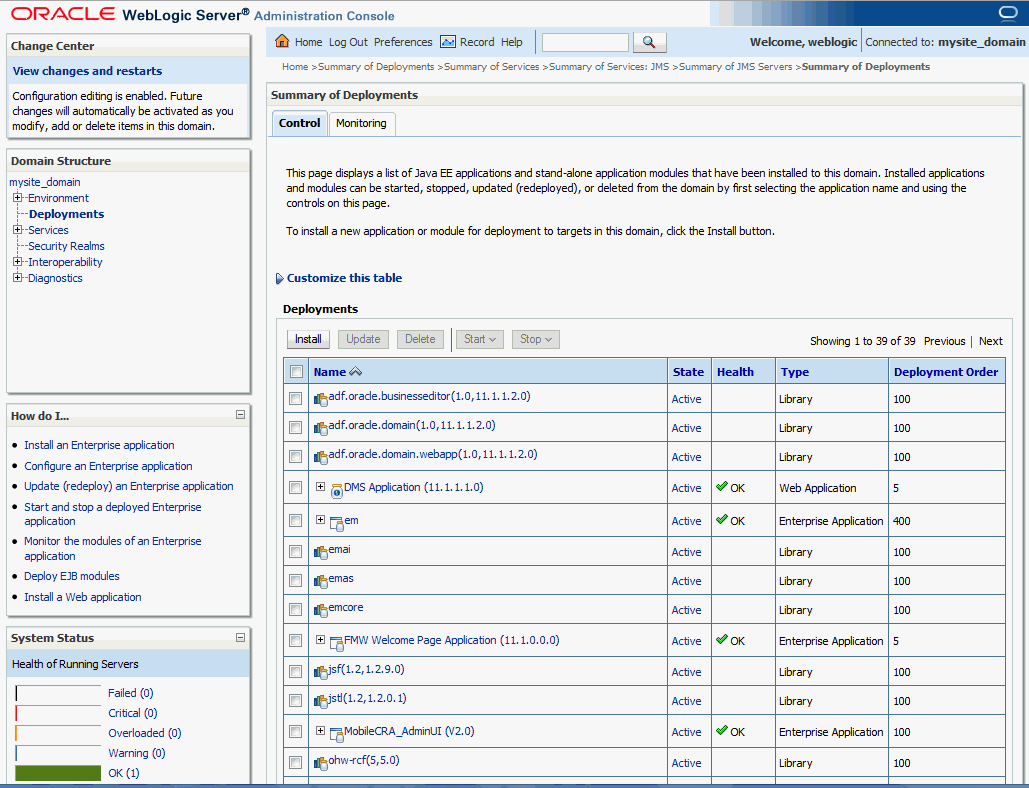
To install oracle.hs.Mobile CRA.cda.war on WebLogic server, perform the following:
Download Mobile CRA_Server_CDA_Adapter.zip to a local folder and unzip it to extract the oracle.hs.Mobile CRA.cda.war file.
Log in to the Oracle WebLogic Server Administration Console.
Within Server Administration, select Deployments.
The Summary of Deployments screen is displayed.
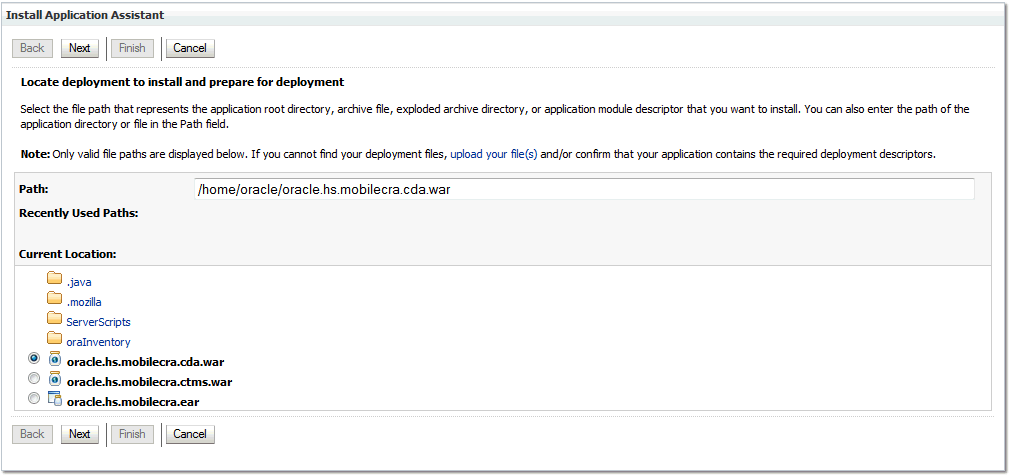
Select Install to install the application.
Browse the directory where the install package is located.
Select the oracle.hs.Mobile CRA.cda.war file.
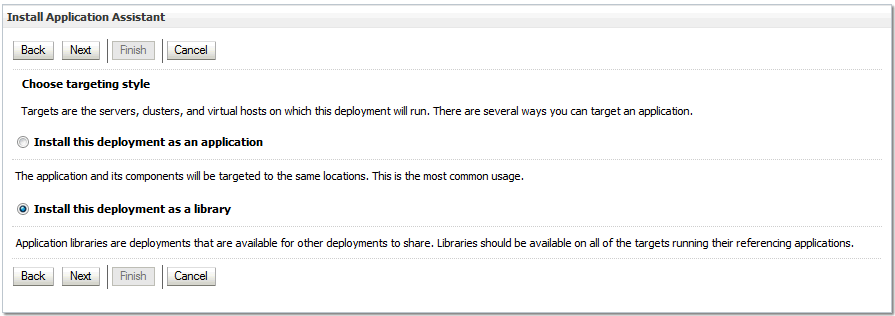
Select the Install this deployment as a library option.
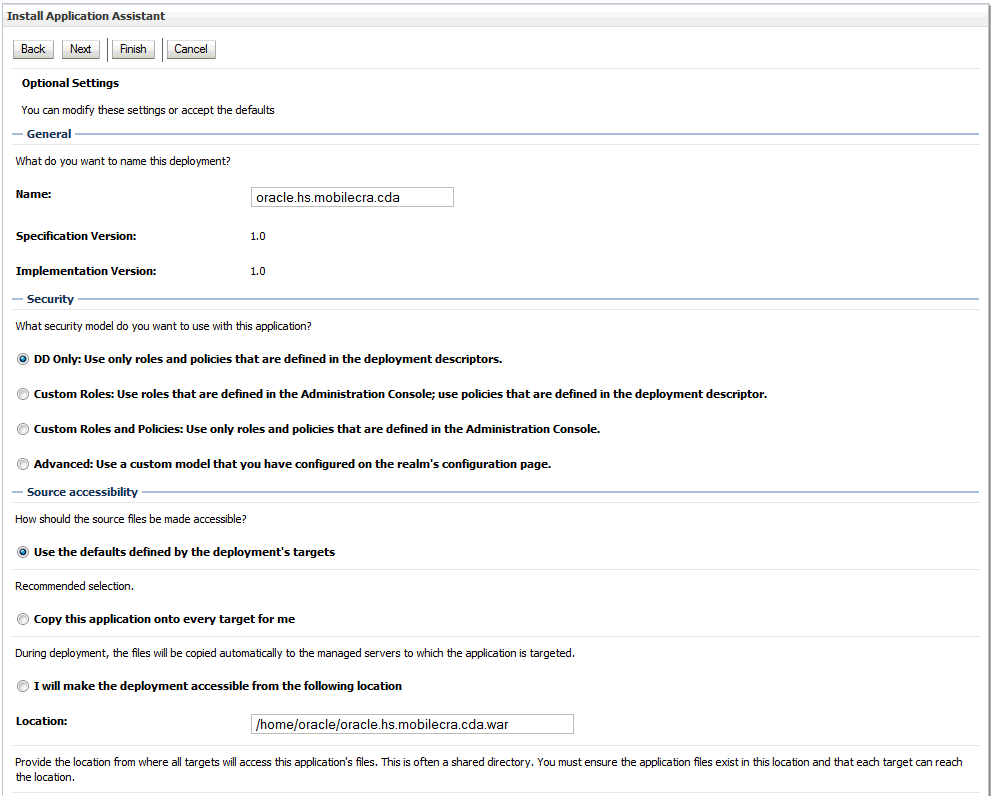
Select default settings as displayed in Figure 4-4.
Figure 4-4 Selecting the Default Settings
Select Finish to complete installation.
Click Activate Changes.
To install oracle.hs.Mobile CRA.ctms.war on WLS, follow the similar steps in Section 4.1.4.1, "Installing oracle.hs.Mobile CRA.cda.war on Oracle WebLogic Server".
Note:
Before you install oracle.hs.Mobile CRA.ear, you must define notificationService.credential.For more information about defining notificationService.credential, see the Oracle Health Sciences Mobile Clinical Research Associate Server Security Guide.
To install oracle.hs.Mobile CRA.ear on WLS, perform the following:
Log in to the Oracle WebLogic Server Administration Console.
Within Server Administration, select Deployments.
The Summary of Deployments screen is displayed.
Select Install to install the application.
Browse the directory where the install package is located.
Select the oracle.hs.Mobile CRA.ear file.
Select the Install this deployment as an application option.
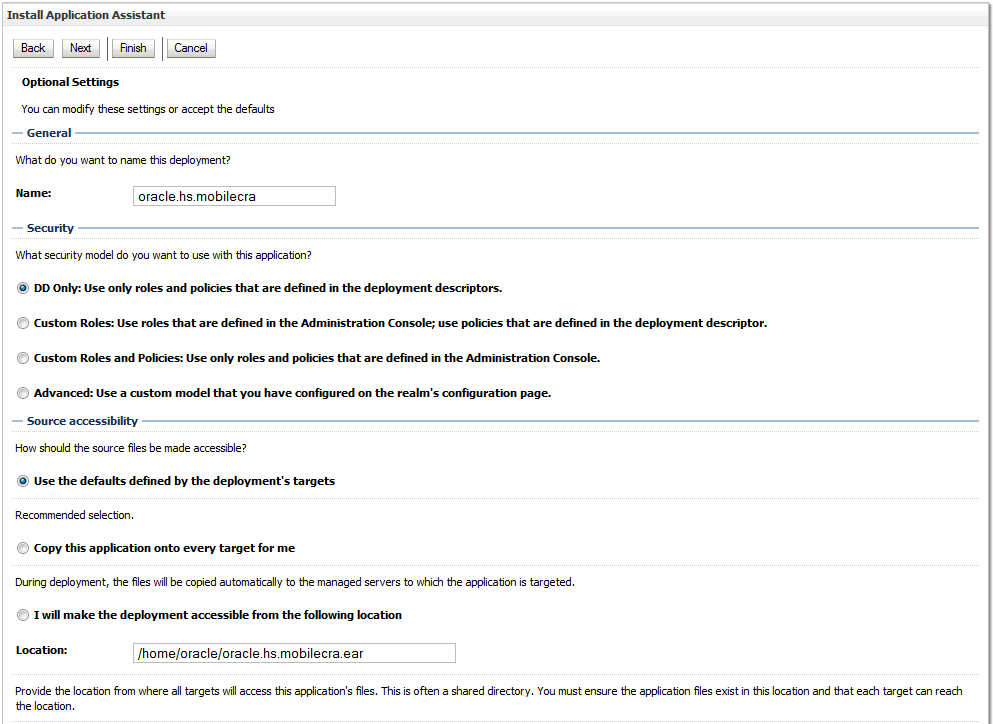
Select default settings as displayed in Figure 4-5.
Specify the name as oracle.hs.mobilecra.
Figure 4-5 Selecting the Default Settings
Select Finish to complete installation.
Click Activate Changes.
To customize the configuration file, perform the following:
From the Config folder of the media pack, select Config.xml
This is a template file where you have to update values for customization.
Create a copy of Config.xml and save it as Plan.xml.
For examples of Config.xml and Plan.xml files, see Appendix B.
Modify configuration values for your environment.
The plan.xml file lets you configure your Mobile CRA Server application to point to the right CTMS and OCDA server, push notification schedule, alert engine schedule, and so on.
Some of the basic configurations such as CTMS server information has to be setup for the application to work but the advanced configuration such as push notification configurations may be modified to suit your schedule and performance needs.
Following are the basic settings to change in the Plan.xml file:
ctmsApdater.hostname - The name of the CTMS host to which the mobile instance should connect for accessing and manipulating data. For example, server.domain.com.
ctmsAdpater.port - The CTMS port host. For example, 8080. If the default port is used, enter a value 0 instead of null.
useCDA - Use this parameter to select or deselect the OCDA option. The valid values are True and False.
If the parameter is set to True, the system uses the value for the KPIs for SAAG, subscriptions, and alerts from OCDA configurations.
If the parameter is set to False, the system uses the value for the KPIs for SAAG, subscriptions, and alerts from ASAAG configurations.
pushNotificationEngine.timeUnit - The time-out unit of the notification engine on the push notification server. For example, seconds.
notificationEngineScheduler.timeUnit - The time-out unit of scheduler on the push notification server. For example, seconds.
cdaAdapter.wsdlLocation - This is the URL of the OBIEE Web service wsdl location. Mobile CRA Server uses the OBIEE server for alerts and notifications. For example, http://<ocdaserver>/analytics/saw.dll?WSDL.
pushNotificationService.url - If you are using alerts and notifications, use this to set the URL of the push notification service. This is the URL of the hosted service provided by Oracle. For example, pushNotificationserver.domain.com:port (if port number is given).
notificationEngineScheduler.period and notificationEngineScheduler.timeUnit - If you are using alerts and notifications, use this to set the schedule for the notification engine.
notificationEngineScheduler.period along with notificationEngineScheduler.timeUnit defines the schedule for the notification scheduler. A value of 300 for notificationEngineScheduler.period along with a value of seconds for notificationEngineScheduler.timeUnit specifies a schedule of 300 seconds. Valid values for notificationEngineScheduler.timeUnit are seconds, minutes, and hours.
Advanced settings:
pushNotificationEngine.maximumPoolSize - The maximum number of threads in the pool for the push notification engine. The valid values are integer values.
pushNotificationEngine.engineLockTimeout - The duration the service should wait for the push notification engine to respond.
notificationEngineScheduler.initialDelay - The initial delay after which the notification starts after each WLS restart.
mobilecraLog.Level - Set this parameter to set up log levels. For example, INFO.
The following are levels in descending order:
SEVERE (highest value)
WARNING
INFO
CONFIG
FINE
FINER
FINEST (lowest value)
tripReport.maxBeanPoolSize - The maximum bean pool size of the trip report.
tripReport.initialBeanPoolSize - The initial bean pool size of the trip report.
Note:
The same settings are applicable for Alert Engine Scheduler.Save Plan.xml to the machine where Oracle WebLogic is installed.
Upload Plan.xml file on the server as follows:
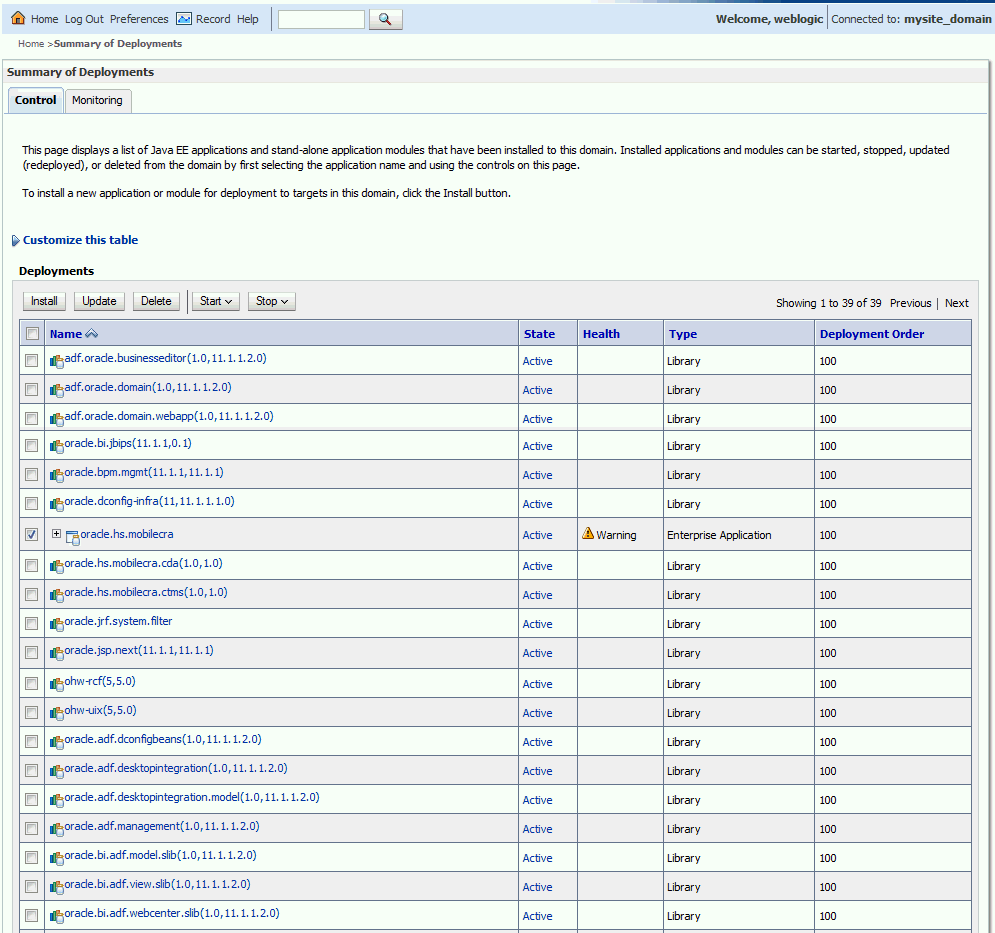
In the Deployments table, select oracle.hs.Mobile CRA.
Click Update.
In the Update Application Assistant wizard, select Update this application in place with new deployment plan changes, and click Change Path.
Figure 4-7 Changing the Deployment Plan Path
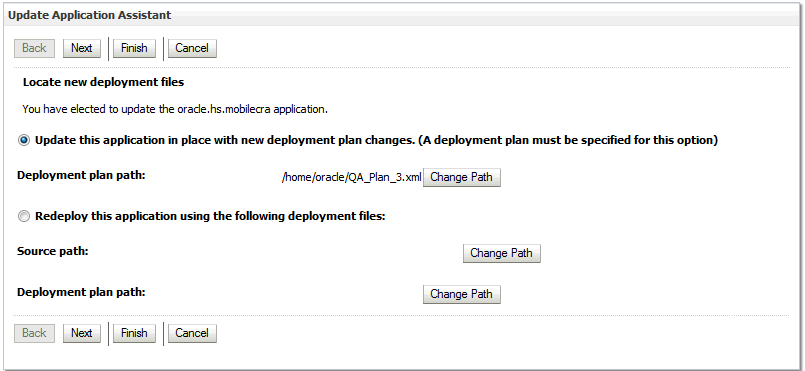
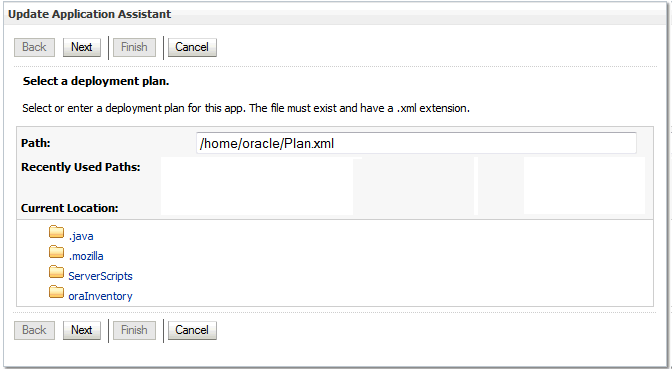
In the Path field, specify the deployment path of your environment specific Plan.xml file to upload it to the server.
Figure 4-8 Specifying the Deployment Path
Click Finish.
To configure data source mobile server, perform the following:
Log in to Oracle WebLogic Server (WLS) as administrator by entering the URL.
For example, http://<server:port number>/console
Click Lock & Edit in the Change Center panel on the left side.
Click Services in the Domain Structure window
Select Data Sources.
The Summary of JDBC data sources is displayed on the right side window panel.
Click New and select Generic Data Source from the list.
In the JDBC Data Source Properties screen, perform the following:
Enter the name.
Oracle recommends that the name should match the JNDI name.
Enter jdbc/ossdb as the name and JNDI name to connect to MCSV_ ADMIN schema.
Enter Oracle as the database type.
Click Next.
In the Database Driver field, select the default value, that is, Oracle's Driver (Thin XA) for instance connections (versions: 9.0.1 and above).
Click Next.
Click Next on the Transaction Options screen.
In the Connection Properties screen, perform the following:
Enter the SID in the Database Name field.
Enter the server where mobile server database is hosted.
Enter the port number for the database.
Enter the Mobile CRA server database user name where it is hosted.
Enter password for the database user.
Re-enter the password in the Confirm password field.
Click Next.
The Properties, System Properties, and Test Table Name fields are displayed on the screen.
Click Test Configuration.
If the test is successful, the message Connection test succeeded is displayed on the screen.
Click Next.
The Select Targets screen is displayed with the list of servers.
Select the server where the ASAAG Server will be installed.
Click Finish.
After creating jdbc/ossdb, click Activate Changes in the Change Center panel.
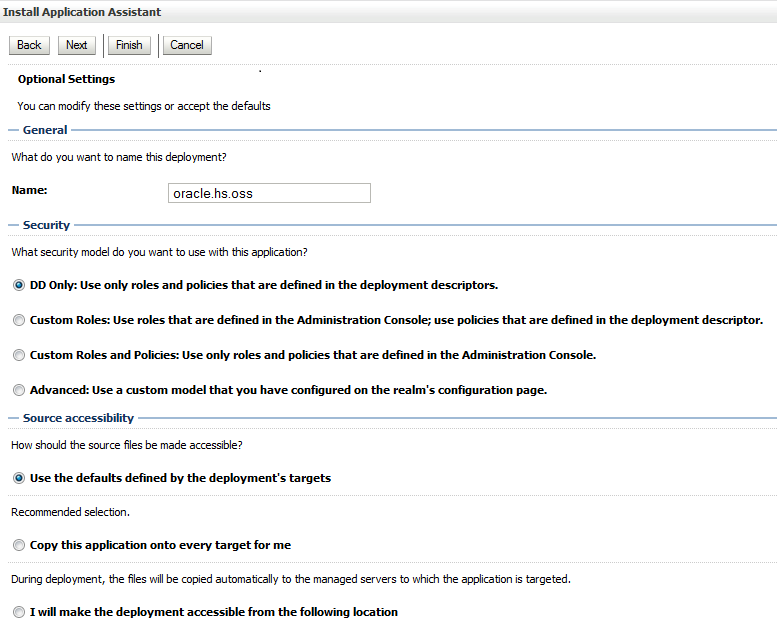
To install oracle.hs.oss.ear on WLS, perform the following:
Log in to the Oracle WebLogic Server Administration Console.
Within Server Administration, select Deployments.
The Summary of Deployments screen is displayed.
Select Install to install the application.
Browse the directory where the install package is located.
Select the oracle.hs.oss.ear file.
Select the Install this deployment as an application option.
Select default settings.
Specify the name as oracle.hs.oss.
Select Finish to complete installation.
Click Activate Changes.
Note:
Restart Weblogic server once all the installation steps are completed for ASAAG Server.To generate and use ASAAG token using the ASAAG jar, use the createToken method of TokenService Class in the jar file.
For example,
TokenService service = TokenServiceFactory.getInstance().withServiceUrl("http://<server_url>").getTokenService();
String tokenString = service.createToken(<Id>, <Key>, <userId>, <Level>)
where,
Id: The ID of the source requesting the token.
Key: For details on generating the key, see Oracle Health Sciences Mobile Clinical Research Associate Server Application Programming Interface Guide.
Level: Used to identify user, source, or client. The valid entries are User, Source, or Client.
UserId: UserId of a user registered against the client.
For more information using ASAAG Rest API, see Oracle Health Sciences Mobile Clinical Research Associate Server Application Programming Interface Guide.
For information about configuring security using Enterprise Manager, see Oracle Health Sciences Mobile Clinical Research Associate Server Security Guide.
The Mobile CRA Server uses Oracle AQ to send and receive asynchronous messages. Complete the following setup to configure Mobile CRA Server to use Oracle AQ.
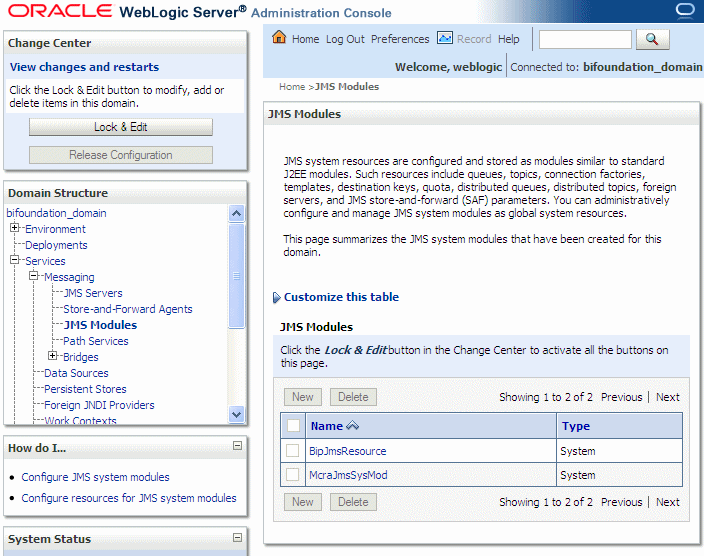
Navigate to Services, select Messaging, and then select JMS Modules.
The JMS Module screen is displayed.
Click Lock and Edit.
Click New to create a new JMS module.
The Create JMS System Module screen is displayed.
Enter McraJmsSysMod as the name of your system module.
Enter a descriptor file name (optional).
If you do not provide the descriptor file name, a default file name is assigned.
Specify the location where you may want to place the descriptor of this system module (optional).
Click Next.
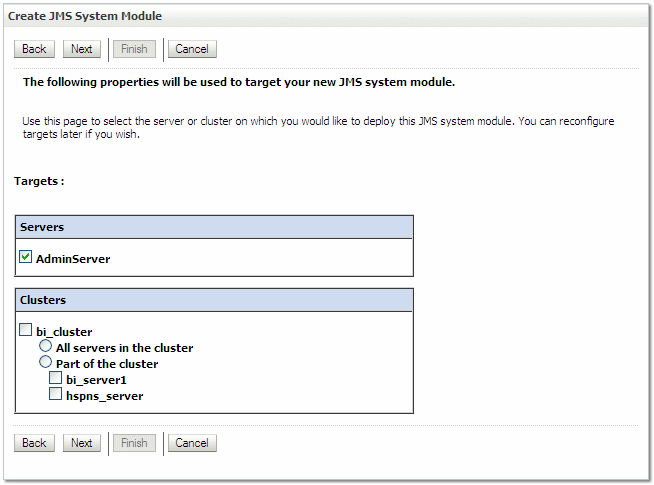
In the Targets section, select the server or cluster on which you want to deploy this JMS system module.
Click Next.
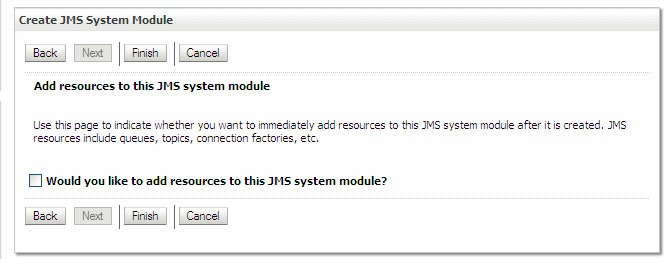
Select Would you like to add resources to this JMS system module? if you want to add resources.
Figure 4-13 Adding Resources to the JMS System Module
Click Next.
Click Finish.
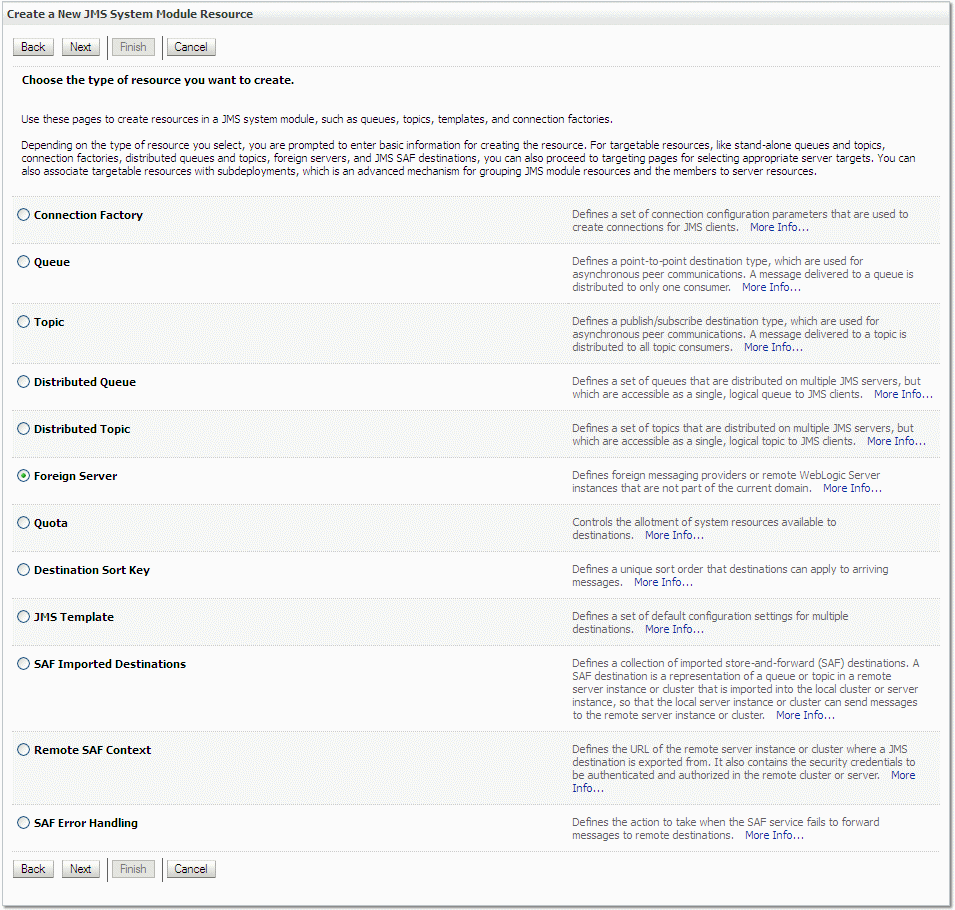
The list of resources type is displayed.
Click New.
Select Foreign Server as the resource.
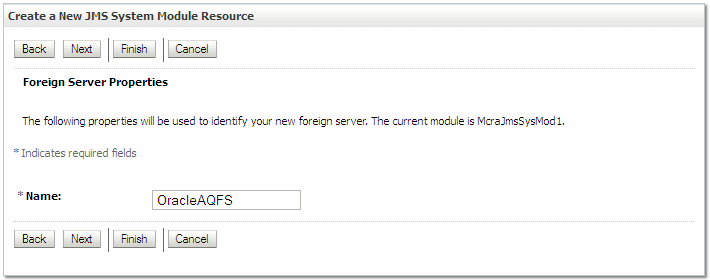
The Foreign Server Properties screen is displayed.
Enter OracleAQFS as the foreign server name.
Click Next.
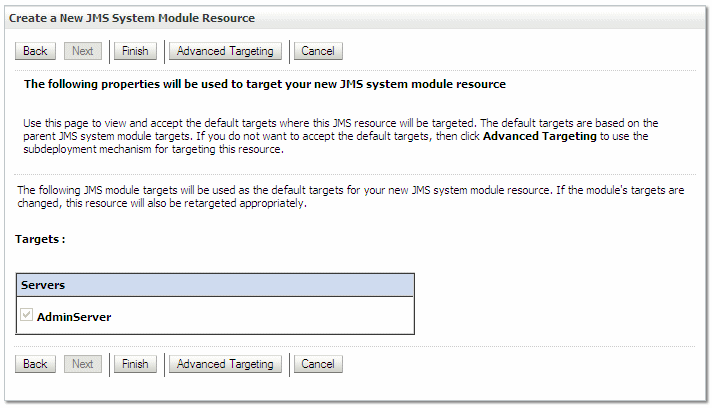
The Targets screen is displayed. Accept the default targets where the JMS resource is targeted.
The foreign server is created successfully.
Click Finish.
Click OracleAQFS.
In the Setting for OracleAQFS screen, select the Configuration tab.
Select the General subtab and enter the JNDI initial context factory name as oracle.jms.AQjmsInitialContextFactory.
Remove value from JNDI Connection URL and JNDI Properties Credential.
Enter JNDI Properties as datasource=jdbc/mobileaq.
Click Save to save the settings.
A message is displayed indicating that the settings are updated.
Select the Destinations subtab, click New, and enter the foreign destination properties in the Create a New Foreign JMS Destination screen.
Name: /jms/aq/tripReportQueue
JNDI Name: /jms/aq/tripReportQueue
Remote JNDI Name: Queues/<schema>, in which mobileaq is installed. See Section 2.2.
mobileaq.trip_report_queue is the queue that queues the trip report schema.
mobileaq is the schema in which the MCAQ_ADMIN is installed. See Section 2.2.
trip_report_queue is the queue in that schema, which the installer creates.
Select Connection Factories subtab, click New, and enter the foreign connection factory properties in the Create a New Foreign JMS Connection Factory screen.
Name: /jms/aq/mobileQueueCF
Local JNDI Name: /jms/aq/mobileQueueCF
Remote JNDI Name: XAQueueConnectionFactory
Click OK.
Click Activate Changes.
Restart the server for changes to take effect.
|
Copyright © 2012, 2014, Oracle and/or its affiliates. All rights reserved. Legal Notices |
|