Oracle® Enterprise Manager Ops Center
Managing Incidents
12c Release 2 (12.2.0.0.0)
E41232-01
January 2014
This guide provides an end-to-end example for how to use Oracle Enterprise Manager Ops Center.
Introduction
Oracle Enterprise Manager Ops Center includes rules and policies that provide in-depth monitoring and generate alerts and incidents to notify you when there is a problem.
All open incidents appear in the Message Center. You can assign incidents to others for resolution, add comments, view a list of possible causes and impacts, view recommendations, add utilities or scripts to resolve an issue, view progress, and open a service desk ticket.
The goal of this document is to give you a basic understanding of how to manage incidents. This example describes how to set up an e-mail notification for incidents on a specific set of assets, how to view and assign incidents, how to mark them repaired and how to close incidents.
See Related Articles and Resources for links to related information and articles.
What You Will Need
You need the following:
-
Enterprise Controller running in connected mode.
-
Managed assets in a user-defined group. This is not required, but it is useful to refine the notification parameters to send notification on only specific assets.
-
At least one managed asset with an open incident. To create an incident, you can change a monitoring rule threshold to a point where an alert and incident is generated. See Oracle Enterprise Manager Ops Center Tuning Monitoring Rules and Policies for details.
-
At least two users with the Fault Administrator role. This role is needed to assign, acknowledge, take action on, and close an incident.
-
At least one user with the User Management Admin role. This role is needed to set up Notification profiles for users.
-
A script to perform a task. This example uses a script that executes commands to unmount an NFS file system. In this example the script is added as a recommended action.
-
A script to perform a task. This example uses a script that executes SMF. In this example the script is added as an automated action.
How Alerts and Incidents Work
An alert indicates that a monitored asset is not performing as expected. An incident is one or more alerts for the same rule on the same asset. New alerts will update an open incident. Monitoring rules determine when an alert is triggered and the severity: Informational (info), Warning, or Critical. When an asset is not operating within the parameters defined in the monitoring rules and policies, the software generates an alert and an incident. When the same rule triggers another alert for the same asset, the incident management system correlates the alerts under the open incident and associates the worst severity level with the incident. For example, when an incident is at a Critical severity level and a new Warning alert is added to the incident, the incident severity remains at the Critical level.
Configuring Notifications
When you want to be notified of incidents without continuously monitoring the user interface, you can create one or more Notification profiles. You can configure the profiles to send an e-mail or pager message to one or more users when a new incident is created, or when an incident changes severity level. If you only want to receive messages for a group of assets that are on a critical path, you can choose to subscribe to messages for a custom list of assets.
This example shows how to create a notification profile to send a page when a critical severity incident is detected for a specific group of assets. In this case, a user-defined group of assets called HA Assets.
-
Select Administration in the Navigation pane, then select Local Users under Enterprise Controller in the Navigation pane.
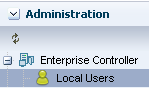
Description of the illustration local_user.png
-
Select one or more users, then click the Configure Notification Profile icon.
In this example, the selected user does not have an existing Notification profile, as indicated by the icon with the red badge in the lower right corner.
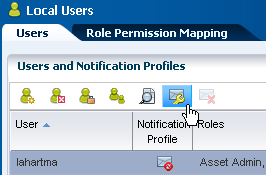
Description of the illustration user_notification.png
-
Select Subscribe to Custom List of Messages, then click Next.
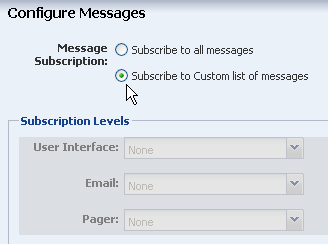
Description of the illustration configure_messages.png
-
Select the group, in this case our user-defined group is called HA Assets. Each category: User Interface, E-mail, and Pager has a drop-down menu. The default for each is None. Select the incident severity for each type of notification you want to configure, then click Next. The following are selected for this example:
-
User Interface: Incident Updates and All Severities
-
E-mail: Incident Severity >= WARNING
-
Pager: None
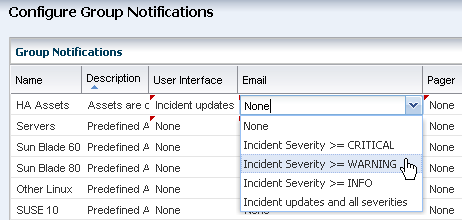
Description of the illustration configure_notifications.png
-
-
Complete the same notifications categories for the Server Pool Notifications, then click Next.
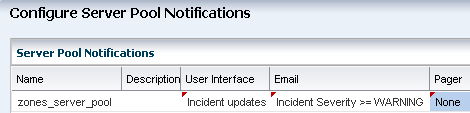
Description of the illustration server_pool_notifications.png
-
Complete the E-mail information, then click Next.
-
E-mail address: The destination e-mail address
-
Mail Host: You can enter the mail host to use in sending the e-mail, or enter local host or the name or IP address of the Enterprise Controller to send e-mails directly.
-
Port: Enter the port used by the e-mail server.
-
Mail User Name: Enter a user name, if the mail host requires a name.
-
Mail Password: Enter a password if the mail host requires a password.
-
Connection Security: Select STARTTLS or SSL/TLS for the connection security.
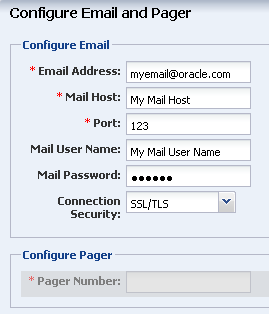
Description of the illustration configure_contact_info.png
-
-
Click Finish on the Summary page to apply the Notification profile.
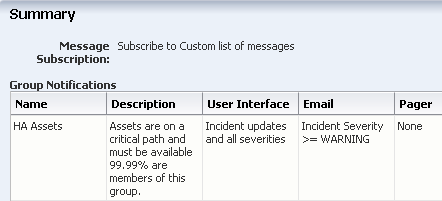
Description of the illustration notification_summary.png
The Notification Profile for the user shows enabled. You can edit the profile for other notifications.
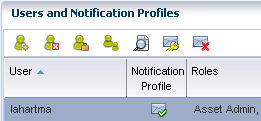
Description of the illustration notif_profile_enabled.png
Viewing Incidents
A ticker appears at the top of the UI that shows the following five incident categories: Unassigned Critical Incidents, All Relayed Incidents, My Critical Incidents, and My Warning Incidents. To view the details, click an icon.

Description of the illustration incident_ticker.png
Alternatively, you can open the Message Center in the Navigation pane to view all open incidents, and their severity. Incidents appear in the following categories in the Message Center:
-
Unassigned Incidents: Newly created incidents and those that have not been assigned an owner.
-
My Incidents: All incidents that are assigned to you. You can perform additional actions to these incidents to manage their status, such as: Take Action, mark as being repaired, acknowledge, and open a service request for the incident.
-
Incidents Assigned to Others: Incidents that are currently assigned to other users. You can view these incidents, but you cannot perform specific actions on them.
-
Relayed Incidents: All incidents reported from any discovered Oracle Engineered System. Log in to the Oracle Enterprise Manager Ops Center instance that manages each Oracle Engineered system to fix any incidents related to its assets.
Assigning Incidents
You can assign incidents one at a time, or you can assign several at the same time. In this example, there are several incidents related to file systems.
-
Click Message Center in the Navigation pane, then click Unassigned Incidents.
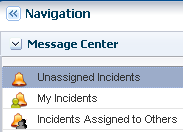
Description of the illustration unassigned_incidents.png
-
Select the incidents from the Unassigned Incident list, then click the Assign Incident(s) icon.
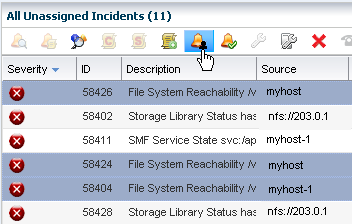
Description of the illustration assign_fs_incidents.png
-
Select a user from the Assign To drop-down menu. Only users that have the Fault Administrator role appear in the list. A text box lets you add a note to the recipient. Click Assign Incidents.
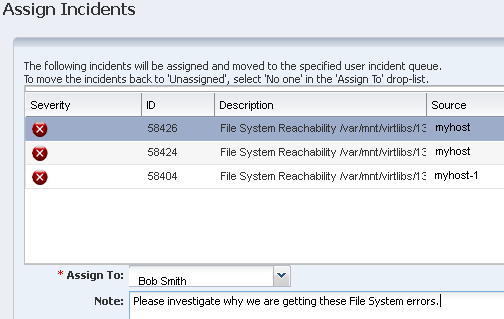
Description of the illustration assign_incidents.png
-
The incidents will move from the Unassigned category into either the Assigned to Other category or the My Incidents category, depending on the recipient.
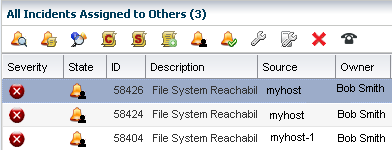
Description of the illustration assigned.png
Viewing Incident Details
You can view details about an incident, or the alerts that comprise an incident. In some cases, the information is populated by you or your coworkers. See Acknowledging and Reassigning Incidents for how to add a comment, annotation, or suggested action.
-
Click Message Center, then click My Incidents to open the incident from the Message Center.
-
To view the alerts that comprise the incident and the history of an alert, click the View Alerts icon.
Description of the illustration view_alerts.png
-
To view annotations and state changes associated with the incident, click the Annotations icon.

Description of the illustration view_annotations.png
-
To view possible impacts and causes of the incident, click the Possible Impacts and Causes icon. The information in this section is populated by members of your organization.
Description of the illustration view_causes.png
-
To view comments made by members of your organization, click the View Comments icon.
Description of the illustration view_comments.png
-
To view suggested actions, including scripts that are provided by members of your organization, click the Suggested Actions icon.
Description of the illustration view_suggested_actions.png
-
-
You can also view details from the asset view. Click Assets, then select the asset. The dashboard with the incident levels appears in the center pane. Click the tabs for the asset to view additional information. For example, click Library for more details about the library.
Acknowledging and Reassigning Incidents
In this example, three incidents are assigned to a user. After investigation, two are accepted and the third is re-assigned to a new user.
-
After reviewing the comments, annotations, and suggested actions for the incident, highlight one or more incidents and click the Acknowledge icon to indicate that you are working on the issue.
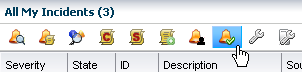
Description of the illustration acknowledge.png
-
You can add a note to describe the status. Click Acknowledge Incidents.
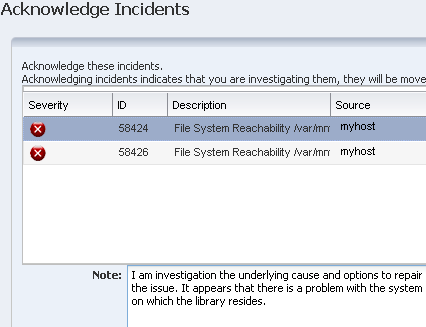
Description of the illustration acknowledge_accept.png
-
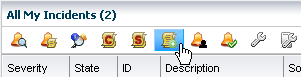
Acknowledged incidents appear with the acknowledge incident icon, which includes a green check mark. In this example, the first two incidents are acknowledged and the third incident is incorrectly assigned. Reassign an incident by selecting the incident, then clicking the Assign Incident icon.

Description of the illustration reassign.png
-
Select a user from the Assign drop-down menu, add a note to the user, then click Assign Incidents.
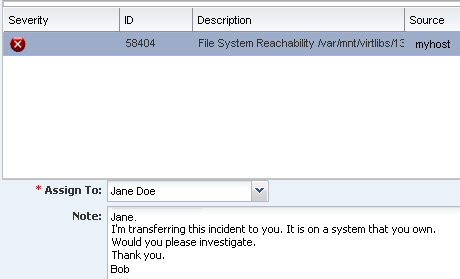
Description of the illustration reassign_note.png
The incident is now in the new user's queue for review and acknowledgment.
Provide a Comment for a Known Problem
You can provide comments on an incident throughout the incident process.
-
Select the incident, then click the Add Annotation to Incident icon.
Description of the illustration add_annotation.png
-
Select Comments from the Annotation Type drop-down menu, enter a synopsis, then enter your comment in the Note field. Click Save.
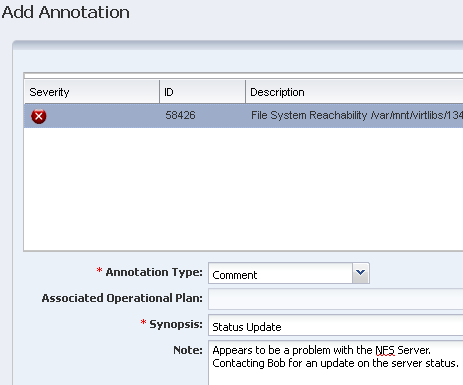
Description of the illustration add_comment.png
Take Action on an Incident
Taking action on an incident enables you to run an existing operational plan, execute a command, or run a script file on the asset. When a suggested action and associated Operational Plan for the issue is in the Incident Knowledge Base, it will appear as an option on this page.
In this example, the file system is not reachable. An Operational Plan with a script to unmount the file system is available.
-
Expand the Message Center and click My Incidents.
-
Select the incident, then click the Take Action on Incident icon.
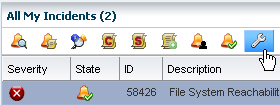
Description of the illustration take_action.png
-
Three options are available on the Take Action page: Execute a Selected Suggested Action, Execute an Operational Plan, or Execute a Command or a Script File. Select the Execute an Operational Plan option and expand the drop-down menu against the managed asset. In this case, there are two operational plans available for the asset on which the incident occurred. Click the appropriate plan.
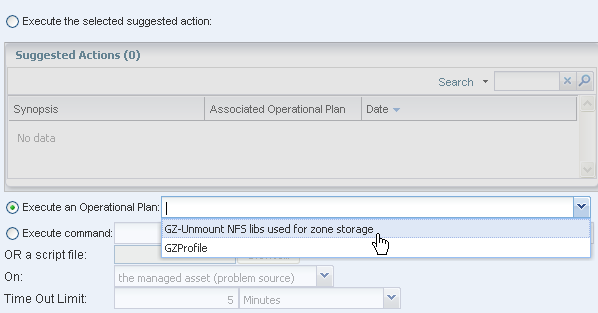
Description of the illustration take_action_plan.png
-
Click Execute Selected Action.
-
After you resolve the underlying problem, click the Mark as Repaired icon.
-
Add a note in the comment field and click Tag Incidents as Being Repaired.
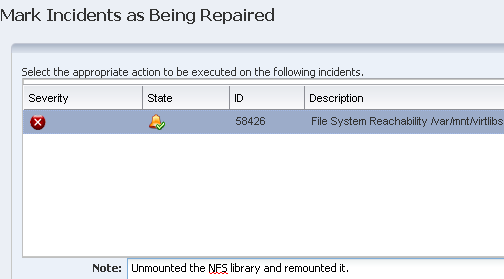
Description of the illustration mark_as_repaired.png
-
The state will change on the Incidents page.

Description of the illustration incident_state_repaired.png
Closing Incidents
Marking an incident as repaired does not remove the incident from the Message Center or your queue. Closing the incident will remove it from the queue. If another alert is generated from the same asset and monitoring rule is triggered, a new incident is generated. You can close the incident, as described below, or the software automatically closes incidents after seven days of no activity. Closed incidents are automatically deleted after 60 days.
-
Select the incident, then click the Close Incident icon.

Description of the illustration close_incident_icon.png
-
Add a note in the incident. If needed, you can disable the monitoring rule for a time by clicking the Disable check box and providing a time frame for reactivating the monitors. Click Close Incidents.
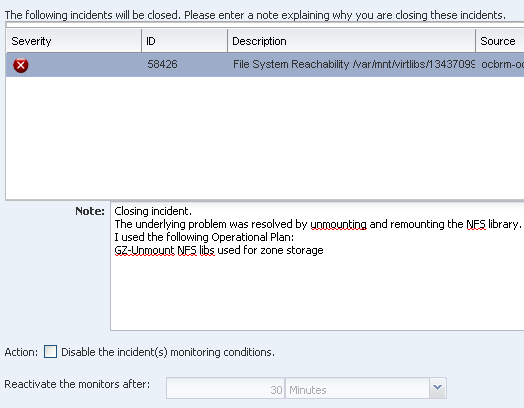
Description of the illustration close_incident.png
What's Next?
This example describes situations where information, such as operational profiles and recommended actions are already in the Incident Knowledge Base. Advanced incident management features enable you to associate operational profiles with specific types of incidents or add automated response scripts to the Incident Knowledge Base.
If you cannot resolve the issue, you can use the Auto Service Request feature to file a service request from within Oracle Enterprise Manager Ops Center.
Related Articles and Resources
The Oracle Enterprise Manager Ops Center 12c Release 2 documentation is available at http://docs.oracle.com/cd/E40871_01/index.htm.
See the Oracle Enterprise Manager Ops Center Feature Reference Guide for more information on the features.
The Oracle Enterprise Manager Ops Center Administration Guide has information about user roles and permissions, and about configuring and unconfiguring notifications.
For end-to-end examples, see the workflows and how to documentation in the Deploy How To library at http://docs.oracle.com/cd/E40871_01/nav/deployhowto.htm and the Operate How To library at http://docs.oracle.com/cd/E40871_01/nav/operatehowto.htm. See Tuning Monitoring Rules and Policies in the Operate How To library for how to customize the profiles for your environment.
Documentation Accessibility
For information about Oracle's commitment to accessibility, visit the Oracle Accessibility Program website at http://www.oracle.com/pls/topic/lookup?ctx=acc&id=docacc.
Oracle customers have access to electronic support through My Oracle Support. For information, visit http://www.oracle.com/pls/topic/lookup?ctx=acc&id=info or visit http://www.oracle.com/pls/topic/lookup?ctx=acc&id=trs if you are hearing impaired.
Oracle Enterprise Manager Ops Center Managing Incidents , 12c Release 2 (12.2.0.0.0)
E41232-01
Copyright © 2007, 2014, Oracle and/or its affiliates. All rights reserved.
This software and related documentation are provided under a license agreement containing restrictions on use and disclosure and are protected by intellectual property laws. Except as expressly permitted in your license agreement or allowed by law, you may not use, copy, reproduce, translate, broadcast, modify, license, transmit, distribute, exhibit, perform, publish, or display any part, in any form, or by any means. Reverse engineering, disassembly, or decompilation of this software, unless required by law for interoperability, is prohibited.
The information contained herein is subject to change without notice and is not warranted to be error-free. If you find any errors, please report them to us in writing.
If this is software or related documentation that is delivered to the U.S. Government or anyone licensing it on behalf of the U.S. Government, the following notice is applicable:
U.S. GOVERNMENT END USERS: Oracle programs, including any operating system, integrated software, any programs installed on the hardware, and/or documentation, delivered to U.S. Government end users are "commercial computer software" pursuant to the applicable Federal Acquisition Regulation and agency-specific supplemental regulations. As such, use, duplication, disclosure, modification, and adaptation of the programs, including any operating system, integrated software, any programs installed on the hardware, and/or documentation, shall be subject to license terms and license restrictions applicable to the programs. No other rights are granted to the U.S. Government.
This software or hardware is developed for general use in a variety of information management applications. It is not developed or intended for use in any inherently dangerous applications, including applications that may create a risk of personal injury. If you use this software or hardware in dangerous applications, then you shall be responsible to take all appropriate fail-safe, backup, redundancy, and other measures to ensure its safe use. Oracle Corporation and its affiliates disclaim any liability for any damages caused by use of this software or hardware in dangerous applications.
Oracle and Java are registered trademarks of Oracle and/or its affiliates. Other names may be trademarks of their respective owners.
Intel and Intel Xeon are trademarks or registered trademarks of Intel Corporation. All SPARC trademarks are used under license and are trademarks or registered trademarks of SPARC International, Inc. AMD, Opteron, the AMD logo, and the AMD Opteron logo are trademarks or registered trademarks of Advanced Micro Devices. UNIX is a registered trademark of The Open Group.
This software or hardware and documentation may provide access to or information on content, products, and services from third parties. Oracle Corporation and its affiliates are not responsible for and expressly disclaim all warranties of any kind with respect to third-party content, products, and services. Oracle Corporation and its affiliates will not be responsible for any loss, costs, or damages incurred due to your access to or use of third-party content, products, or services.