| Oracle® Fusion Middleware Portlet Development Guide for Oracle WebLogic Portal 10g Release 3 (10.3.6) Part Number E14244-06 |
|
|
View PDF |
| Oracle® Fusion Middleware Portlet Development Guide for Oracle WebLogic Portal 10g Release 3 (10.3.6) Part Number E14244-06 |
|
|
View PDF |
This chapter describes the process of setting up interportlet communications (IPC) between two portlets by using the Portal Event Handlers wizard in Oracle Enterprise Pack for Eclipse. This is a simple example in which minimizing one portlet changes the text string in another portlet in the portal.
Read this chapter to become familiar with the basic concepts of IPC and the IDE features that help you configure interportlet communication. For more detailed information about IPC and the IDE user interface, see Chapter 12, "Configuring Local Interportlet Communication."
This section contains the following topics:
Before you use the interportlet communication example in this chapter, you must have an existing portal development environment, consisting of a domain, Portal EAR project, Portal Web project, Datasync project, and portal. To complete the pre-requisite tasks, perform the tasks described in Oracle Fusion Middleware Tutorials for Oracle WebLogic Portal, using the information in Table 13-1 to enter the necessary values.
Create a Portal domain (server).
Note:
For detailed instructions on creating a domain using the Domain Configuration Wizard, see the Oracle Fusion Middleware Tutorials for Oracle WebLogic Portal.
Create a Portal EAR project.
Associate the EAR project with the server.
Create a Portal web project.
Create a portal.
Table 13-1 IPC Example - Environment Setup Values
| Setup Information | Notes/Values |
|---|---|
|
Domain Configuration Wizard - Welcome |
Create a new WebLogic domain (the default) Note: For detailed instructions on creating a domain using the Domain Configuration Wizard, see the Oracle Fusion Middleware Tutorials for Oracle WebLogic Portal. |
|
Domain Configuration Wizard - Select Domain Source |
In the Generate a domain configured automatically to support the following Oracle products list, select WebLogic Portal. When you do this, other components are selected automatically; keep all of them selected. |
|
Domain Configuration Wizard - Configure Administrator Username and Password |
User name: User password: Confirm user password: Note: The password must include at least one non-alphabetical character. In this case, the "0" in |
|
Domain Configuration Wizard - Configure Server Start Mode and JDK |
Development Mode (the default) JRockit SDK |
|
Domain Configuration Wizard - Customize Environment and Services Settings |
No (the default) |
|
Domain Configuration Wizard - Create WebLogic Domain |
Domain name: Domain location: Accept the default, or specify another directory on your system. |
|
Portal EAR Project Wizard |
EAR Project Name: Switch to the Portal Perspective if you are not already using it. |
|
Servers view |
Right-click the server in the Servers view and select Add and Remove Projects Associate the |
|
Portal Web Project Wizard |
Web Project Name: In the Add project to an EAR checkbox: Check the box and add to |
|
Portal Wizard |
Right-click the Portal Name: |
With a development environment set up, you can complete the steps described in this section:
In this exercise, you create individual portlets, JSPs, and backing files to establish interportlet communications within the portal project. You then add these portlets to a portal and test the project to ensure that communication is successful.
It might be helpful to become familiar with the Portal Event Handlers Wizard and backing files before attempting to replicate this example. For more information about the wizard, refer to Section 12.5, "Using the Portlet Event Handlers Wizard." For more information on backing files, refer to Section 9.4, "Backing Files."
This exercise includes five main tasks:
In this section, you create two JSP files and the JSP portlets that surface these files. You also create a backing file that contains the instructions necessary to complete the communication between the two portlets, and you add an event handler to one of the portlets. After you have created the portlets and attached the backing file, you test the project in your browser.
Note:
Before continuing with this procedure, ensure that Oracle Enterprise Pack for Eclipse is running and the ipcWebProject node is expanded.
To create the JSP files that the portlets will surface, do the following:
In the Project View, right-click the WebContent folder and select New > Portlet.
In the New Portlet dialog, enter the name aPortlet.jsp for the new portlet, and click Next.
In the Select Portlet Type wizard page, select JSP/HTML Portlet, and click Next. (See Figure 13-1.)
In the Portlet Details wizard page, select the Minimizable and Maximizable states, and click Create. (See Figure 13-2.)
Locate the aPortlet.jsp file. By default, it will be in the WebContent/aportlet folder. Double-click the file to open it in the editor.
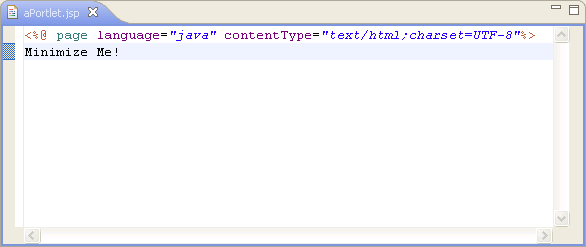
Replace the default text in the file with the text "Minimize Me!" as shown in Figure 13-3.
Figure 13-3 JSP File Showing Edited Body Text
Save the file as aPortlet.jsp
In the same directory, make a copy of aPortlet.jsp and give the name bPortlet.jsp to the copy.
Open bPortlet.jsp in the workbench editor if it is not already open.
The XML code for the JSP file appears.
Copy the code from Example 13-1 into the JSP, replacing everything from <netui:html> through </netui:html>. This code displays event handling from the backing file that you will create and attach in a subsequent step.
Example 13-1 New JSP Code for bPortlet.jsp
<netui:html>
   <% String event = (String)request.getAttribute("minimizeEvent");%>
      <head>
         <title>
            Web Application Page
         </title>
      </head>
      <body>
         <p>
            Listening for portlet A minimize event:<%=event%>
         </p>
      </body>
</netui:html>
The source should look like the example in Figure 13-4.
Save the file.
Following the same steps you used previously, generate a portlet from the bPortlet.jsp file.
Checkpoint: At this point the ipcWebProject/WebContent folder contains these files: aPortlet.jsp, aPortlet.portlet, bPortlet.jsp, and bPortlet.portlet.
To create the backing file, do the following:
In ipcTestWebProject, select the Java Resources/src folder and select File > New > Folder from the main menu.
The Create New Folder dialog box appears.
Create a folder called backing.
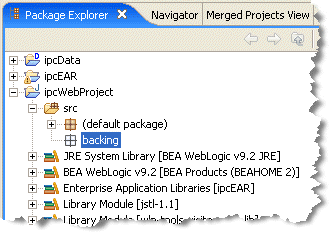
The folder backing will appear under ipcTestWebProject/src, as shown in Figure 13-5.
Figure 13-5 New Backing File Folder in Package Explorer View
Right-click the backing folder and select New > Other.
In the New – Select a wizard dialog, select Java > Class, and click Next.
The New Java Class dialog appears, as shown in Figure 13-6. The Source folder field auto-fills with the default path; leave it as is. The Package field auto-fills with backing; leave it as is.
In the Name field, enter Listening and click Finish.
The new Java class appears in the editor.
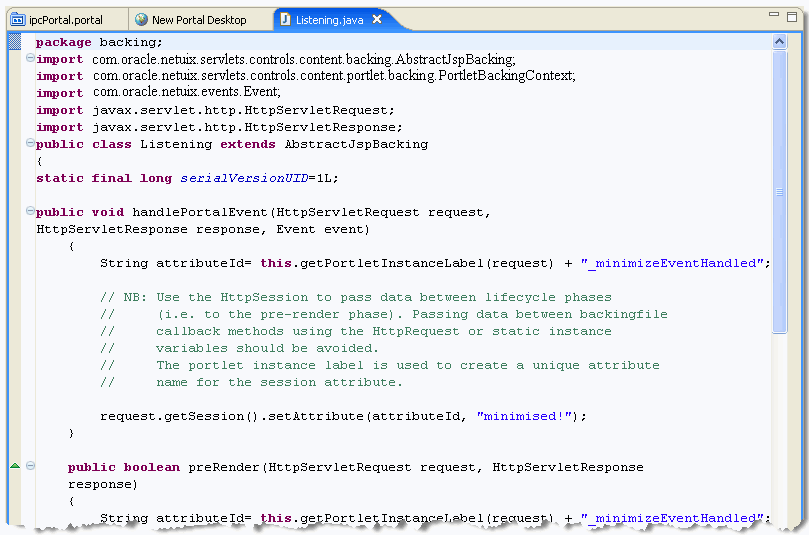
Delete the entire default contents of Listening.java, and copy the code from Example 13-2 into the file. Figure 13-7 shows the top portion of the Listening.java file as it should look after you paste the code into it.
When you're finished, save the file.
Example 13-2 Backing File Code for Listening.java
package backing;
import com.bea.netuix.servlets.controls.content.backing.AbstractJspBacking;
import com.bea.netuix.servlets.controls.portlet.backing.PortletBackingContext;
import com.bea.netuix.events.Event;
import javax.servlet.http.HttpServletRequest;
import javax.servlet.http.HttpServletResponse;
public class Listening extends AbstractJspBacking
{
   static final long serialVersionUID=1L;
   public void handlePortalEvent(HttpServletRequest request,
   HttpServletResponse response, Event event)
   {
      String attributeId= this.getPortletInstanceLabel(request) +       "_minimizeEventHandled";
       // NB: Use the HttpSession to pass data between lifecycle phases
       //     (that is, to the pre-render phase). Passing data between
       //     backing file callback methods using the HttpRequest or static
       //     instance variables should be avoided.
       //     The portlet instance label is used to create a unique
       //     attribute name for the session attribute.

      request.getSession().setAttribute(attributeId, "minimized!");
   }
   public boolean preRender(HttpServletRequest request, HttpServletResponse
   response)
   {
      String attributeId= this.getPortletInstanceLabel(request) +
      "_minimizeEventHandled";
         if (request.getSession().getAttribute(attributeId) != null)
         {
            // Reset the session flag
             request.getSession().removeAttribute(attributeId);
            // Pass minimize event notification to the JSP via the request.
            request.setAttribute("minimizeEvent", "Minimize event handled");
         }
         else
         {
            request.setAttribute("minimizeEvent", null);
         }
      return true;
   }
   private String getPortletInstanceLabel(HttpServletRequest request)
   {
      PortletBackingContext context=
      PortletBackingContext.getPortletBackingContext(request);
      return context.getInstanceLabel();
   }
}
Figure 13-7 Listening.java with Updated Backing File Code
Now you will attach the backing file created in the previous section to bPortlet.portlet. Perform the following steps:
In the Package Explorer, double-click bPortlet.portlet to open it.
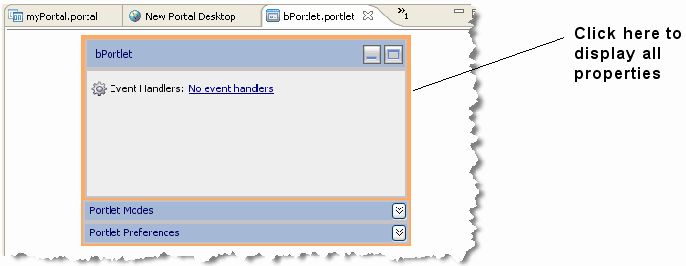
Click on the portlet in the editor, if needed, to display the portlet's properties. You should see an orange border around the outside of the portlet, as shown in Figure 13-8.
Figure 13-8 bPortlet with Outer Border Selected to Display Properties
Tip:
The Properties view is a default view in the Portal perspective. If it is not visible, select Window > Show View > Properties.
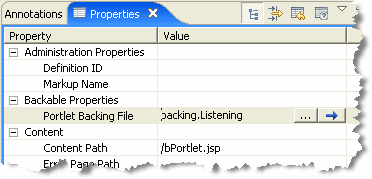
In the Properties view, enter backing.Listening into the Backable Properties > Portlet Backing File field, as shown in Figure 13-9.
Figure 13-9 Attaching the Backing File in the Properties View
Save the portlet file.
You now add the event handler to bPortlet.portlet. This handler will be set up so that it will listen for an event on a specific portlet and fire an action in response to that event. To add the event handler, perform the following steps:
Note:
bPortlet.portlet should be displayed in the Oracle Enterprise Pack for Eclipse editor. If it isn't, locate it in the ipcTestWebProject/WebContent folder in the application panel and double-click it.
Click on the portlet in the editor if needed to display its properties.
In the Properties view, click in the Value column of the Event Handlers property. A browse button appears, as shown in Figure 13-10.
Click the ellipsis button to display the Portlet Event Handlers dialog, as shown in Figure 13-11.
Figure 13-11 Portlet Event Handlers Dialog Box
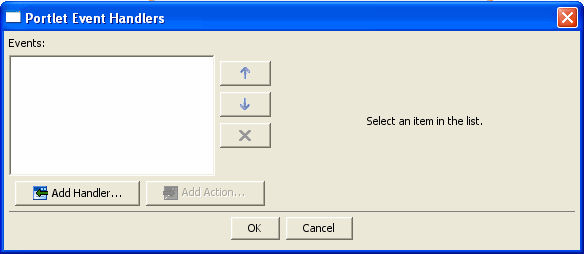
Click Add Handler to open the Event Handler drop-down list.
From the drop down list, select Handle Portal Event.
The Portlet Event Handlers dialog box expands to allow entry of more details, as shown in Figure 13-12.
Figure 13-12 Event Handler Dialog Box Expanded
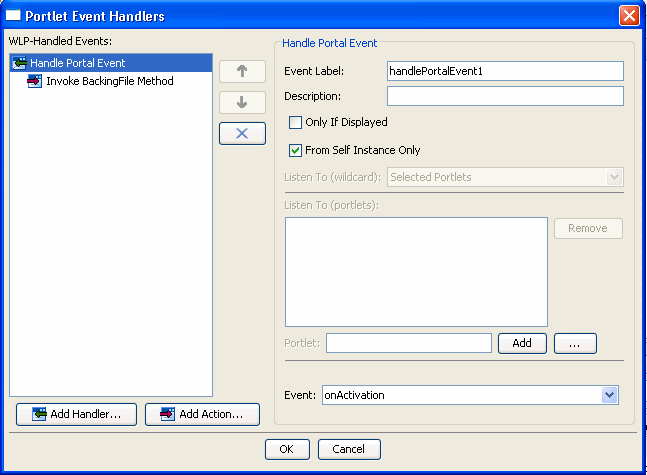
Accept the defaults for all fields except Portlet.
In the Portlet field, click the ellipses button.
The Please Choose a File dialog appears.
Click aPortlet.portlet and click OK.
The dialog box closes and aPortlet_1 appears in the Listen to (portlets): list, as shown in Figure 13-13. The label aPortlet_1 is the definition label of the portlet to which the event handler will listen.
Click the Event drop-down control to open the list of portal events that the handler can listen for and select onMinimize, as shown in Figure 13-14.
Click Add Action to open the action drop-down list and select Invoke BackingFile Method.
The Invoke BackingFile selection will not appear unless a backing file is detected by WebLogic Portal.
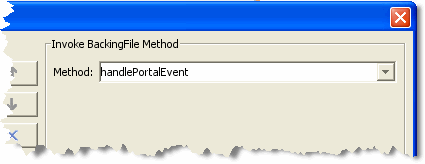
In the Method field, enter handlePortalEvent, as shown in Figure 13-15.
The dropdown menu for this field displays the last several values that you entered, if applicable.
Figure 13-15 Adding the Backing File Method
Click OK.
The event handler is added. Note that the Value field of the Event Handlers property now indicates 1 Event Handler.
Test the communication between your portlets by following these steps:
Note:
Before you begin, ensure that all files are saved.
Select ipcPortal.portal to display it in the workbench editor.
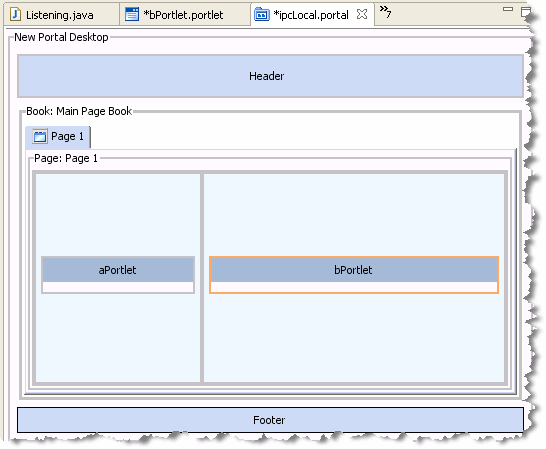
Drag both aPortlet.portlet and bPortlet.portlet from the Package Explorer view onto the portal layout, as shown in Figure 13-16.
Figure 13-16 Portal Layout with aPortlet and bPortlet Added
Save the portal.
Run the portal. To do this, right-click ipcPortal.portal in the Package Explorer view and select Run As > Run on Server.
At the Run On Server – Define a New Server dialog, click Finish.
Wait while the server starts and the application is published to the server. The portal will render in your browser (Figure 13-17).
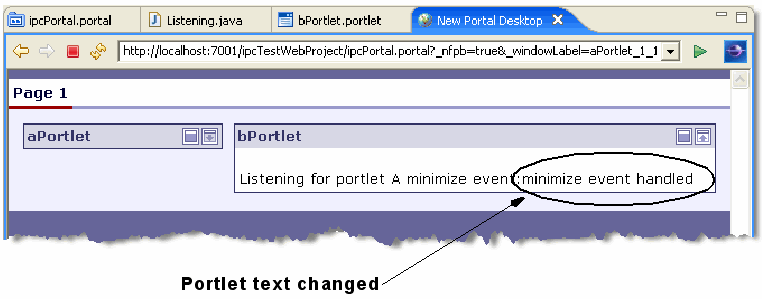
Click the minimize button to minimize aPortlet.
Note the content change in bPortlet, as shown in Figure 13-18.
Figure 13-18 ipcPortal Showing the Effect of Minimizing aPortlet
In this example, you set up your environment and you added two JSP portlets to a local portal. One portlet, aPortlet, was fairly simple, while the second portlet, bPortlet, surfaced a more complex JSP file, used a backing file, and contained a portal event handler. When you tested the communication between the portlets, you observed how the bPortlet changed when an event occurred on aPortlet. This is called local interportlet communication.