Setting Up DataStage Projects
This topic discusses considerations regarding the design of your DataStage projects and how to create a project.
Project Structure Considerations
Before you create your DataStage projects, you should consider how many projects you need to create. The number of projects you need depend on the following factors:
The PeopleSoft source transaction system that you are using.
The license codes for the Data Marts and/or EPM Applications you have purchased, or plan to implement.
Disk space management based on storing hash files, log files, and *.dsx files.
Common jobs necessary to all products (you may wish to create a separate project for the common jobs if you are implementing more than one data mart).
Based on the preceding information, you have the following options:
Create one project per PeopleSoft source.
For example, you can create a project called HCM_EPM91 for bringing data from a PeopleSoft Human Capital Management (HCM) source database.
Create one project per EPM Warehouse (such as HCM or SCM warehouses).
For example, you can create a project called CRM_EPM90 to handle all CRM-related Data Marts or EPM applications.
Create one project for all the EPM Warehouses.
For example, you can create a project called EPM90_ALL which will manage ETL jobs relating to all of the EPM Warehouses.
Because you need to create projects based on the preceding requirements, ensure that you have understood your long-term needs and requirements before creating suitable projects for importing the jobs.
Note: Certain operating systems, such as Unix, have a limit to the number of objects that can be created under one project or directory. Please check your operating system specifications before proceeding with project creation.
Note: There is no naming convention for projects.
Creating Projects
Use the following steps to create DataStage projects:
In the DataStage Administrator, enter the following information in the Attach to DataStage box:
Domain: Enter the name of the domain server machine.
You can enter localhost if the client and server are installed on the same machine.
User name: Enter the user name that is required to log onto the machine on which the domain server is installed.
The user name is the Windows login (if the server is running on a Windows platform) or the Administrator user that was used during the install (if the server is running on a Unix platform).
Password: Enter the password that is required to log onto the machine on which the domain server is installed.
DataStage server: Select the name of the server machine on which the DataStage engine is installed.
Click OK.
Click the Projects tab to view a list of available projects on the server.
Click the Add… button.
Image: DataStage Administrator - Projects tab
This example illustrates the DataStage Administrator - Projects tab.
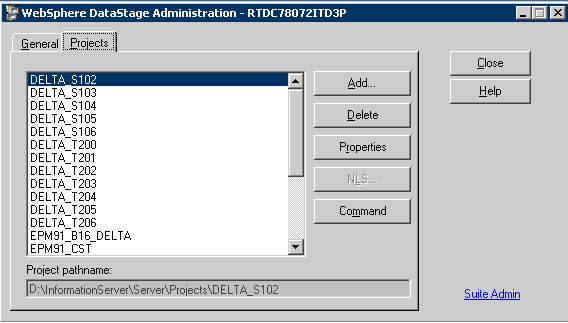
The Add Project box displays.
Enter the project name in the Name field . You can specify your own naming convention in this field.
Remember the project name is case-sensitive and you cannot change the project name after you have imported the dsx files. If you want to update or change the project, you only have the option to create a new project and import the dsx files again. DataStage Administrator automatically appends the project to the default location for a new project.
Click the Browse button to select another location if the default location is not desirable (due to disk space constraints). Do not select the Create protected project check box as this would cause the project to be read-only.
Click OK to create the project on the server.
This creates an empty project on the DataStage server. The updated list of projects displays after the copy is finished.
Repeat steps five through seven to create any additional projects.
When you are finished, click Close.