| Oracle® Argus Insight Installation Guide Release 7.0.3 E41483-01 |
|
|
PDF · Mobi · ePub |
| Oracle® Argus Insight Installation Guide Release 7.0.3 E41483-01 |
|
|
PDF · Mobi · ePub |
This chapter describes how to configure the Cognos 10 environment. You must configure the Cognos 10 environment in the order specified in this guide.
This chapter includes the following topic:
Before attempting to configure the environment, verify that you have installed all required hardware and software. For more information, see Section 1.2, "Software and Hardware Requirements."
This section describes how to set up Cognos Server and configure your environment for a new installation of Argus Insight.
This section comprises the following sub-section:
This section describes the following tasks that you must complete to configure Internet Information Services 7.0 (IIS 7.0) on the Cognos 10 Server:
To check that CGI or ISAPI is enabled in IIS:
Click Start.
Navigate to Administrative Tools and select Server Manager. The Server Manager window opens. 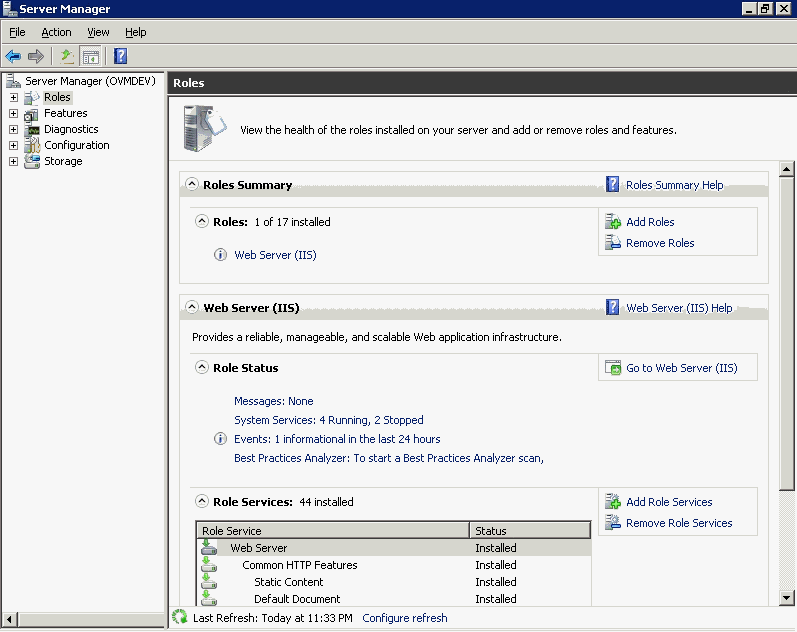
Click the Add Role Services link to the right of the Role Services section. The Add Role Services dialog box opens.
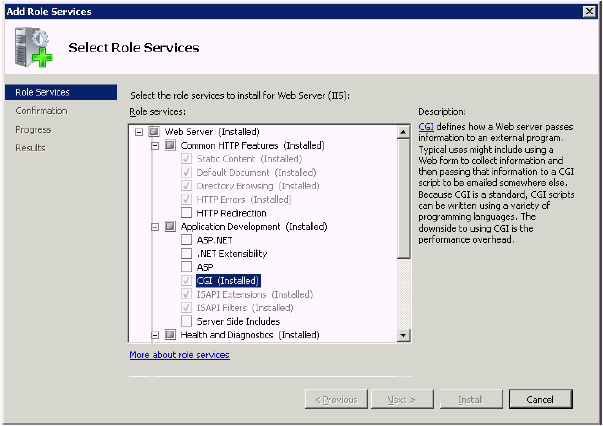
Expand Application Development (Installed).
Verify that the CGI and ISAPI Extensions are listed as (Installed).
If these role services are not installed, select the appropriate check box and then click Install. Follow the instructions on the screen to complete the installation.
If these role services are already installed, click Cancel. The system returns to the Server Manager window.
To create the Cognos 10 virtual directories:
Navigate to Roles, Web Server (IIS), and select Internet Information Services (IIS) Manager.
Expand the server node in the Connections pane.
Expand Sites.
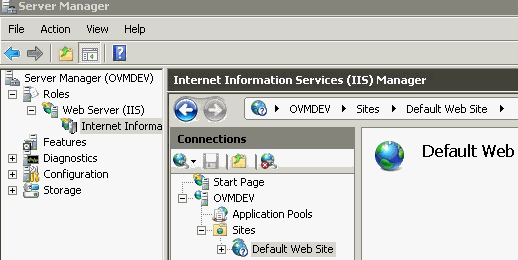
Right-click Default Web Site, and select Add Virtual Directory. The Add Virtual Directory dialog box opens.
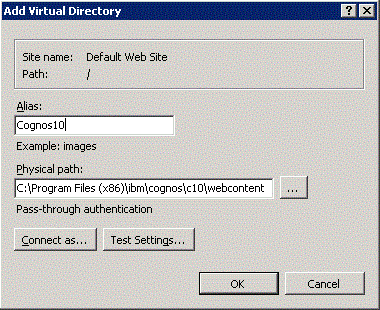
In the Alias field, enter Cognos 10.
In the Physical path field, enter the complete path to the Cognos 10 Web content directory. The default path is:
drive:\Program Files\ibm\cognos\c10\webcontent
Click OK.
Right-click your newly-created Cognos 10 virtual directory and select Add Virtual Directory. The Add Virtual Directory dialog box opens.
In the Alias field, enter cgi-bin.
In the Physical path field, enter the complete path to the Cognos 10 cgi-bin directory. The default path is:
drive:\Program Files\ibm\cognos\c10\cgi-bin
Click OK.
To edit the ISAPI or CGI extensions:
Select the server node in the Connections pane.

Double-click the ISAPI and CGI Restrictions icon.
Click the Add link in the Actions pane. The Edit ISAPI or CGI Restriction dialog box opens.
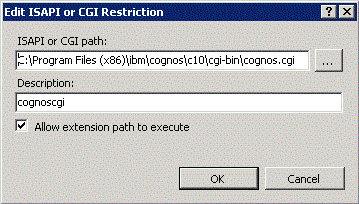
In the ISAPI or CGI path field, enter the path to either the cognos.cgi file or the cognosisapi.dll file depending on which one you will use.
Note:
For Argus Insight, Oracle recommends that you use cognos.cgi. In addition, you may need to surround the path in double quotes if it contains any spaces.The default path for each file is as follows:
drive:\Program Files\ibm\cognos\c10\cgi-bin\cognosisapi.dll
drive:\Program Files\ibm\cognos\c10\cgi-bin\cognos.cgi
Select the Allow extension path to execute check box.
Click OK.
Select the server node in the Connections pane.
Double-click the ISAPI and CGI Restrictions icon.
Click the Edit Feature Settings link in the Actions pane. The Edit ISAPI and CGI Restriction Settings dialog box opens.
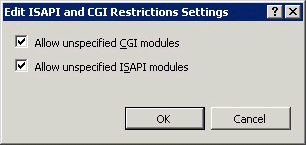
Select the Allow unspecified CGI Modules check box.
Click OK.
To add the module mapping:
Open the Internet Information Services (IIS) Manager.
Expand the virtual directory folder and click the cgi-bin virtual directory.
Double-click the Handler Mappings icon.
Click the Add Module Mapping link in the Actions pane. The Add Module Mapping dialog box opens.
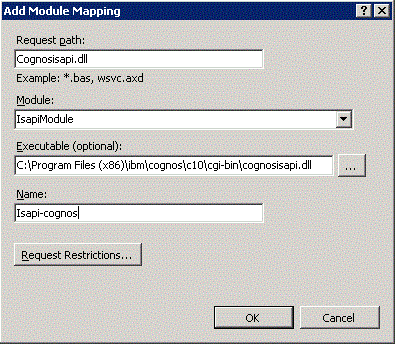
In the Request path field, enter either *.cgi or *.dll depending on which one you need.
In the Module field, select either CGIModule or IsapiModule from the list.
In the Executable field, you enter a value depending on the module you are using.
If you are using an ISAPI Module, you must enter the complete path to the cognosisapi.dll. You can click the ellipsis icon to browse to the file location.
If you are using a CGI Module, you do not need to enter a value into the Executable field.
In the Name field, enter a realistic name for this mapping. For example, ISAPI-Cognos.
Click Request Restrictions.
Click the Mapping tab, and select Invoke handler only if request is mapped to: File.
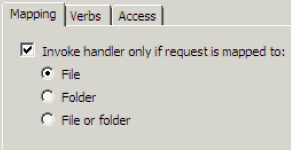
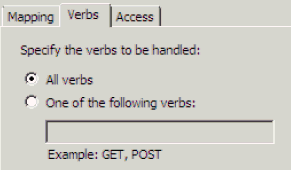
Click the Verbs tab, and select All verbs.
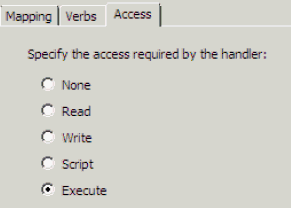
Click the Access tab, and select Specify the access required by the handler: Execute.
Click OK to save your changes. The system returns to the Add Module Mapping dialog box.
Click OK.
Depending on the method used in Section 8.1.1.3, "Editing ISAPI or CGI Extensions," the system may display the following message:
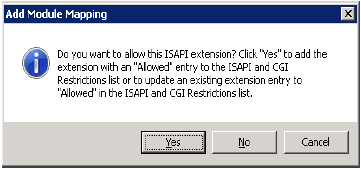
Click Yes. Your new module mapping should be added to the Module Mapping List.
For Cognos Administration to function properly, you must manually edit the directive that you added to the IIS configuration file in the previous step (see Section 8.1.1.4, "Adding the Module Mapping").
To edit the module mapping:
Navigate to the following folder:
COGNOS_HOME/c10/cgi-bin
Note:
Ensure that you have access permissions on the cgi-bin folder so you can save the changes you make to the web.config file.Open the web.config file for editing.
Locate the appropriate add name statement in the web.config file depending on whether you are using CGI or ISAPI.
For CGI, locate this statement:
<add name="CGI-cognos" path="*.cgi" verb="*" modules="CgiModule" resourceType="Unspecified" />
For ISAPI, locate this statement:
<add name="ISAPI-Cognos" path="cognosisapi.dll" verb="*" modules="IsapiModule" scriptProcessor="E:\Program Files\ibm\Cognos\C10\cgi-bin\cognosisapi.dll" resourceType="Unspecified" requireAccess="Execute" preCondition="bitness32" />
Add allowPathInfo="true" to the end of the statement.
For CGI:
<add name="CGI-cognos" path="*.cgi" verb="*" modules="CgiModule" resourceType="Unspecified" allowPathInfo="true" />
For ISAPI:
<add name="ISAPI-Cognos" path="cognosisapi.dll" verb="*" modules="IsapiModule" scriptProcessor="E:\Program Files\ibm\Cognos\C10\cgi-bin\cognosisapi.dll" resourceType="Unspecified" requireAccess="Execute" preCondition="bitness32" allowPathInfo="true"/>
Save your changes and close the web.config file.
To allow the CGI application to use execute:
Open the Internet Information Services (IIS) Manager.
Expand the virtual directory folder and click the cgi-bin virtual directory.
Double-click the Handler Mappings icon.
Click the Edit Feature Permissions link in the Actions pane. The Edit Features Permissions dialog box opens.
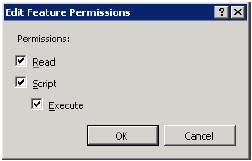
Select the Execute check box.
Click OK.
To configure the Java Database Components (JDBC) in the Cognos 10 environment:
Navigate to the following Oracle installation path:
Oracle_Installation_Path\product\Oracle_Version\client_1\sqldeveloper\jdbc\lib
Copy the ojdbc5.jar file to the following location on the Cognos 10 environment:
Cognos_Installation_Path\c10\webapps\p2pd\web-inf\lib
This section comprises the following sub-sections:
Go to IBM Cognos Administration and stop the Cognos services.
Copy the CAM_AAA_JDBC_PowerReports.jar file from the following location:
\\Argus_Insight_Server\Argus_Insight_Install_Path\java Autherntication\JDBC_PowerReport
To the following location on the Cognos 10 Server:
\\Cognos_10_Install_Path\ c10\webapps\p2pd\WEB-INF\lib
Copy the JDBC_Config_PowerReports.properties file from the following location:
\\Argus_Insight_Server\Argus_Insight_Install_Path\java Autherntication\JDBC_PowerReport
To the following location on the Cognos 10 Server:
\\Cognos_10_Install_Path\ c10\Configuration
Define the configuration parameters:
Navigate to the following folder:
\\Cognos_10_Install_Path\ c10\Configuration
Open the JDBC_Config_PowerReports.properties file for editing.
Modify the existing values of the following parameters only if the database changed from the 7.0 database:
| Parameter | Value to Enter |
|---|---|
| Server | Enter the IP address or the name of the Database Server. |
| SID | Enter the instance/service name of the Argus Insight data mart. |
| Port | Enter the database port number. |
Save and close the file.
Copy AI.ini and ArgusSecureKey.ini from the following location:
\\<Argus_Insight_Server>\Windows
To the following location:
\\Cognos_10_Install_Path\C10\configuration
Navigate to the following folder:
Program Files\ibm\cognos\c10\bin\jre\6.0\lib\security
Backup the following two JAR files:
local_policy.jar
US_export_policy.jar
Go to the following URL:
https://www14.software.ibm.com/webapp/iwm/web/preLogin.do?source=jcesdk
Note:
You will need the user ID and password from IBM Cognos to download the files required in next step.Log in to the IBM site.
Select the Unrestricted JCE Policy files for SDK for all newer versions (1.4.2+) option and click Continue.
Click I agree to agree to the license terms and then check I confirm.
Click the Download Now link.
Download the files and extract into a folder.
Locate the following two JAR files in the extract folder:
local_policy.jar
US_export_policy.jar
Copy those jar files into the following folder:
Program Files\ibm\cognos\c10\bin\jre\6.0\lib\security
Go to IBM Cognos Administration and restart the Cognos services.
To configure custom Java authentication:
Go to IBM Cognos Administration and stop the Cognos services.
Copy the CAM_AAA_JDBC_PowerReports.jar file from the following location:
\\Argus_Insight_Server\Argus_Insight_Install_Path\java Autherntication\JDBC_PowerReport
To the following location on the Cognos 10 Server:
\\Cognos_10_Install_Path\ c10\webapps\p2pd\WEB-INF\lib
Copy the JDBC_Config_PowerReports.properties file from the following location:
\\Argus_Insight_Server\Argus_Insight_Install_Path\java Autherntication\JDBC_PowerReport
To the following location on the Cognos 10 Server:
\\Cognos_10_Install_Path\ c10\Configuration
Define the configuration parameters:
Navigate to the following folder:
\\Cognos_10_Install_Path\ c10\Configuration
Open the JDBC_Config_PowerReports.properties file for editing.
Modify the existing values of the following parameters only if the database changed from the 7.0 database:
| Parameter | Value to Enter |
|---|---|
| Server | Enter the IP address or the name of the Database Server. |
| SID | Enter the instance/service name of the Argus Insight data mart. |
| Port | Enter the database port number. |
Save and close the file.
Copy AI.ini and ArgusSecureKey.ini from the following location:
\\<Argus_Insight_Server>\Windows
To the following location:
\\Cognos_10_Install_Path\C10\configuration
Navigate to the following folder:
JAVA_HOME\jre\6.0\lib\security
Backup the following two JAR files:
local_policy.jar
US_export_policy.jar
Go to the following URL:
http://www.oracle.com/technetwork/java/javase/downloads/jce-6-download-429243.html
Download the following two JAR files in the extract folder:
local_policy.jar
US_export_policy.jar
Copy those jar files into the following folder:
JAVA_HOME\jre\6.0\lib\security
Click Yes, if the Replace Files dialog box is displayed.
Go to IBM Cognos Administration and restart the Cognos services.
This section describes the following tasks that you must complete to configure the Cognos 10 environment:
You use the options in the IBM Cognos 10 Configuration window to define environment group and logging properties, security properties, and data access properties.
To open the IBM Cognos 10 Configuration window:
Click Start.
Navigate to All Programs, IBM Cognos 10, and then select IBM Cognos Configuration. The IBM Cognos Configuration window opens.
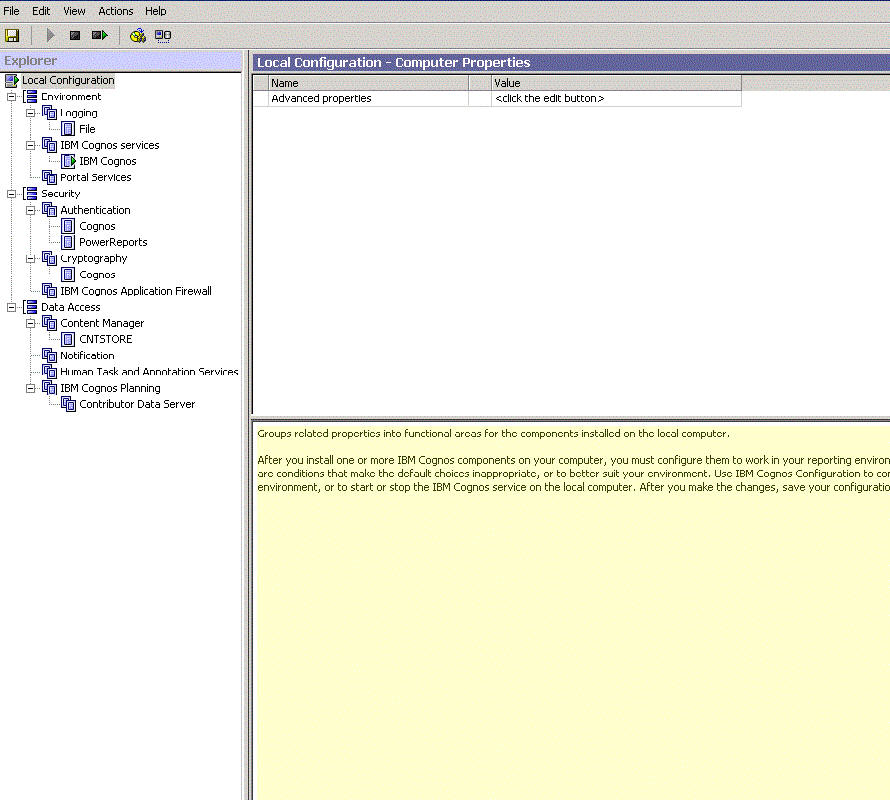
Note:
The windows displayed during the Cognos 10 configuration are labeled either IBM Cognos 10 or Cognos 10. Both labels refer to the same Cognos configuration.To define the security properties:
Open the IBM Cognos 10 Configuration window.
Navigate to Security, Authentication, and select Cognos.
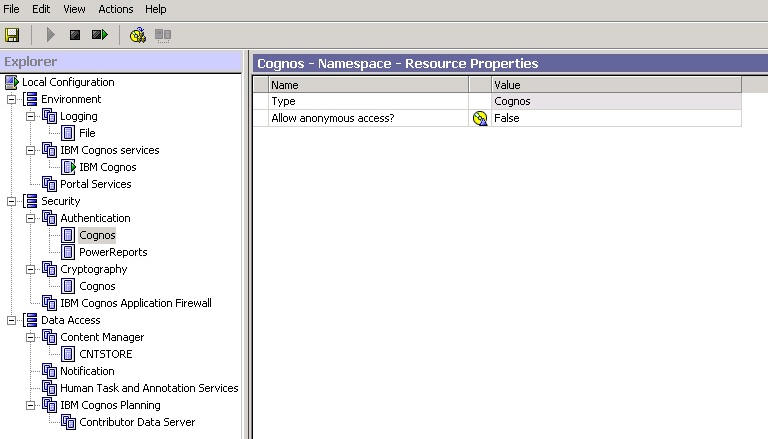
Set the Allow anonymous access? property to True.
Navigate to Security and select IBM Cognos Application Firewall.
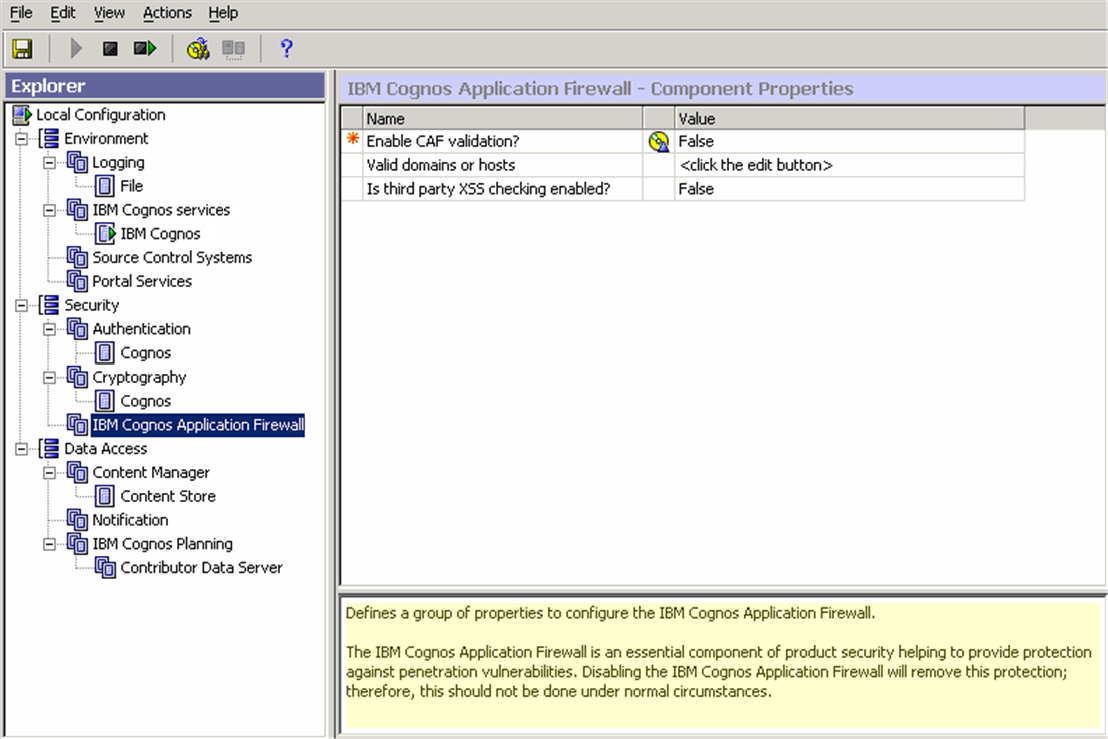
Set the Enable CAF validation? property to False.
To define the data access properties:
Open the IBM Cognos 10 Configuration window.
Navigate to Data Access, Content Manager, right-click Content Store, and then select Delete from the menu.
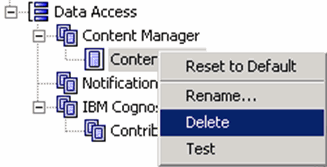
The system prompts for confirmation that you want to delete the Content Store.
Click Yes.
Navigate to Data Access, right-click Content Manager, select New resource, and then select Database.

Complete the New Resource - Database dialog box as follows:
In the Name field, type CNTSTORE. This is the name of the database resource.
In the Type field, select Oracle database.
Click OK.
The system returns to the IBM Cognos Configuration window, selects the newly-created CNTSTORE resource database, and displays the resource properties for the database.
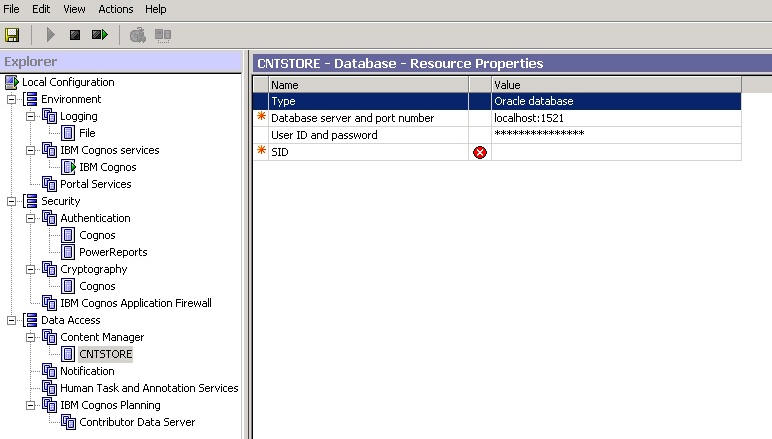
Enter the value for the Database server and port number as:
Database_Server_Name:1521
where:
Database_Server_Name is the name of the server where your content store database is stored.
Select User ID and password, and click the icon next to it. The Value - User ID and password dialog box opens.
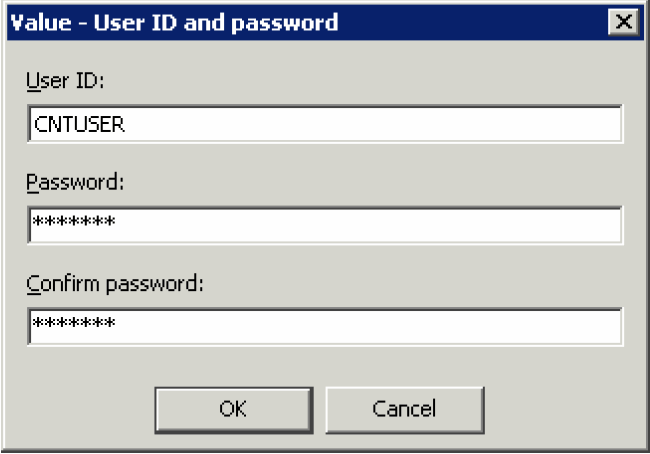
In the User ID field, type the ID for the content store database user.
In the Password field, type the password for the content store database user.
In the Confirm password field, re-enter the password for verification.
Click OK.
Note:
The contents store database user is created in the Cognos content store database. This user is given grants of Connect, Resource, and Create View, along with Unlimited Tablespace Grant.The character set of the Cognos content store database should only be UTF.
Make sure that the content store database entry is added in the TNSNames.ora file on the Cognos 10 server.
Enter the database instance name for the Cognos 10 repository in the Service name field.
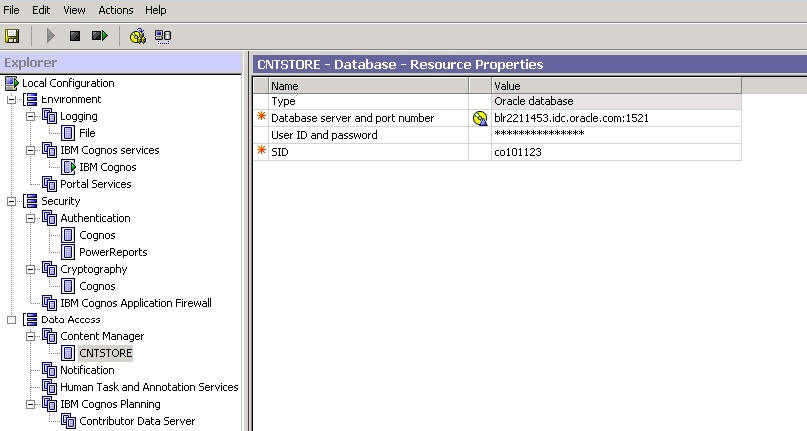
To create the namespace for Argus Insight authentication:
Open the IBM Cognos 10 Configuration window.
Navigate to Security, right-click Authentication, click New resource, and then select Namespace.

Complete the New Resource – Namespace dialog box as follows:
In the Name field, type PowerReports.
In the Type field, type Custom Java Provider.
Click OK.
The PowerReports - Namespace - Resource Properties window opens.
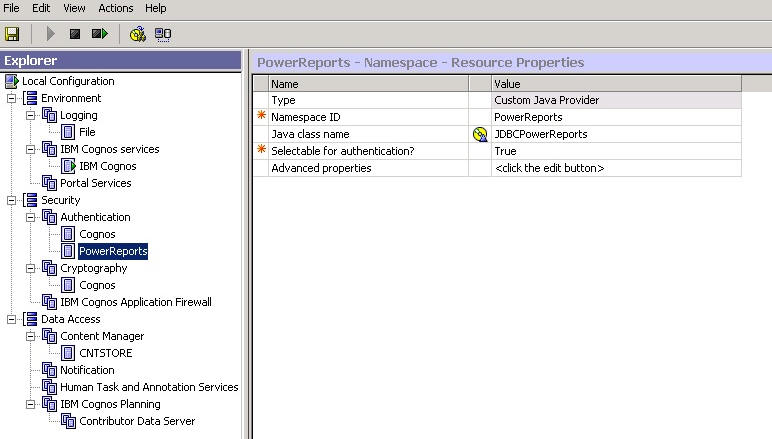
Set the Namespace ID property to PowerReports.
Set the Java class name property to JDBCPowerReports.
To save the configuration and start the Cognos 10 service:
Open the File menu and select Save to save your changes to the configuration settings. The system displays the following dialog box and lists each task as it is performed:
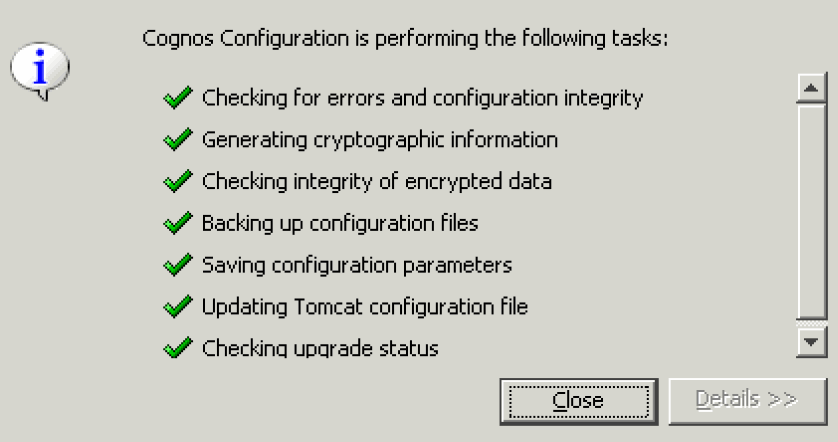
Click Close when the system completes all the configuration tasks.
Click the Start icon in the IBM Cognos Configuration window to run the Cognos 10 service.
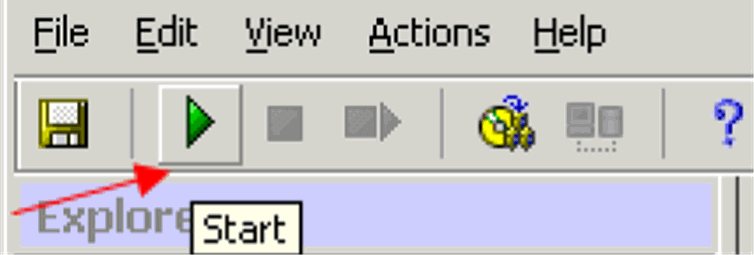
The system begins to run the IBM Cognos 10 service.
If there are no problems with the configuration, the system completes the test phase and starts the IBM Cognos 10 service successfully.
If there are possible problems with the configuration, the system stops running the service and displays a warning message. When you click OK to acknowledge the warning message, the system opens another dialog box with more information. For example:
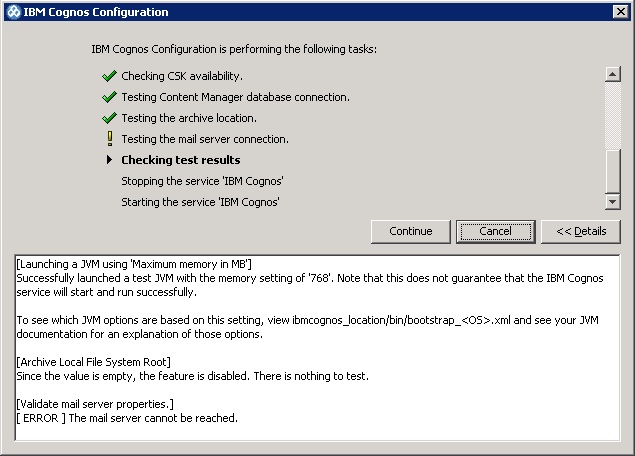
At this point, you can:
Click Details for more information about the warnings and errors.
Click Cancel to stop the process. If the warnings or errors are due to reasons other than mail server connection failure, cancel the process and check your configuration again.
Click Continue to ignore the warnings and errors, and complete the process of starting the IBM Cognos 10 service. For example, you can ignore warnings that the mail server cannot be reached (see the previous illustration).
Click Close to exit.
Open the File menu and select Exit to exit from the IBM Cognos 10 configuration.
To create Cognos Data Source (PRMART):
Log in to the Cognos 10.
The IBM Cognos 10 Home page opens.

Note:
If your security settings on the server do not permit you to view the Cognos connection, add the site URL (http://Cognos_10_ Server/cognos10) to the list of local intranet sites.Click Administer IBM Cognos content. The IBM Cognos Administration window opens.
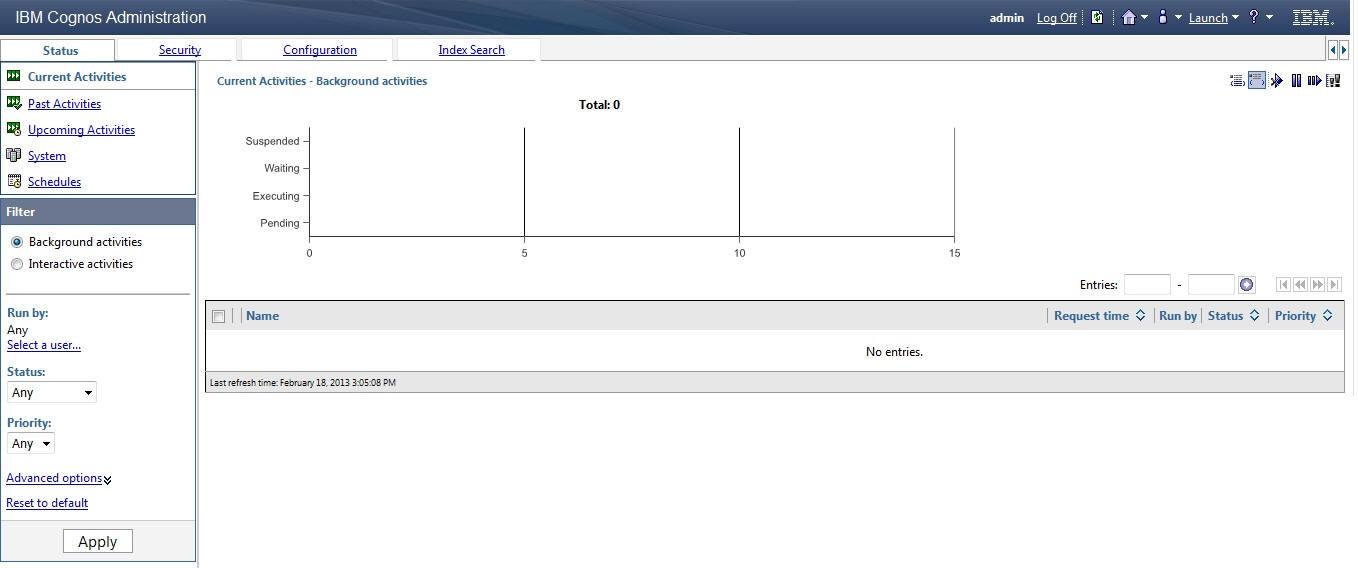
Click the Configuration tab.
Click Data Source Connections.
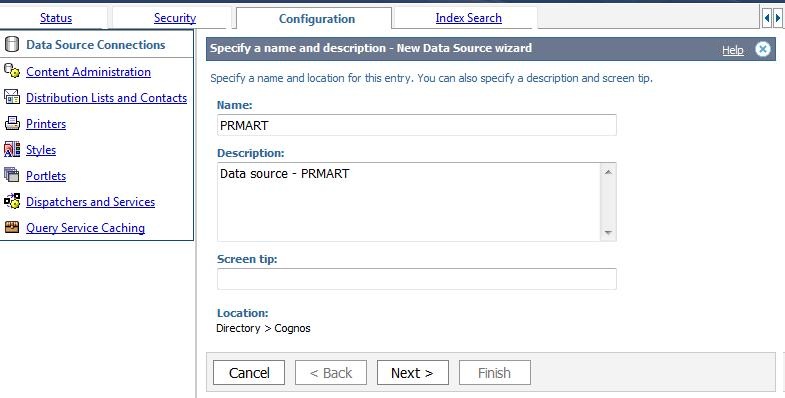
Click New Data Source icon. The Specify a name and description - New Data Source Wizard page opens.
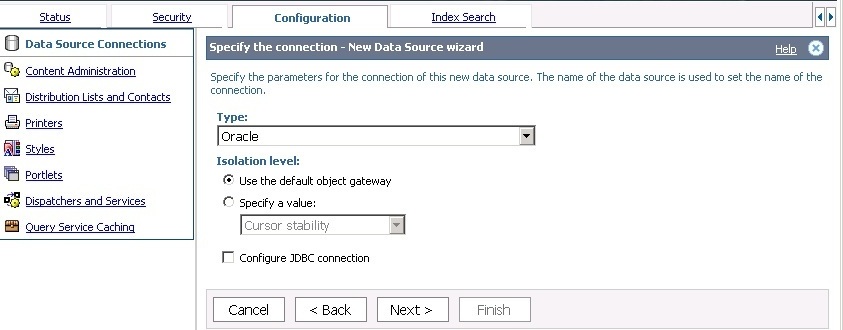
Enter the Name and Description of the data source, and click Next. The Specify the connection - New Data Source Wizard page opens.
Specify parameters for the connection, and click Next.
Enter the connection string in SQL *Netconnect string:, and click Test the connection... 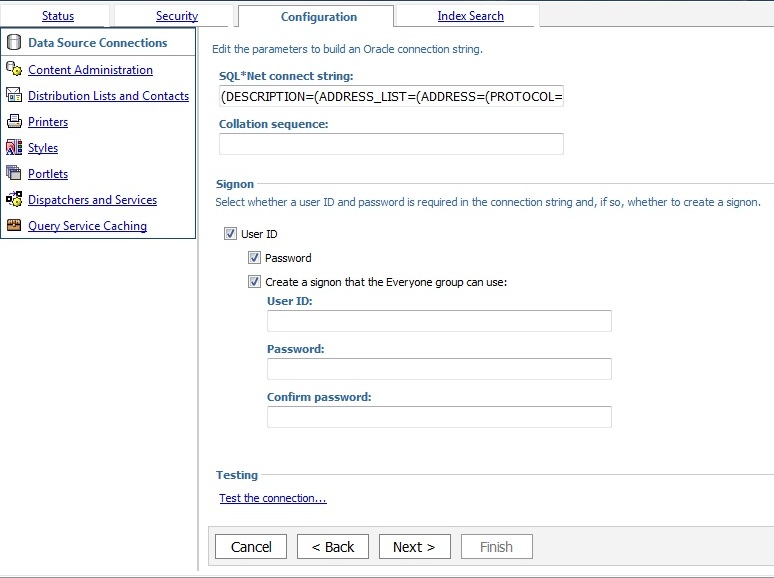
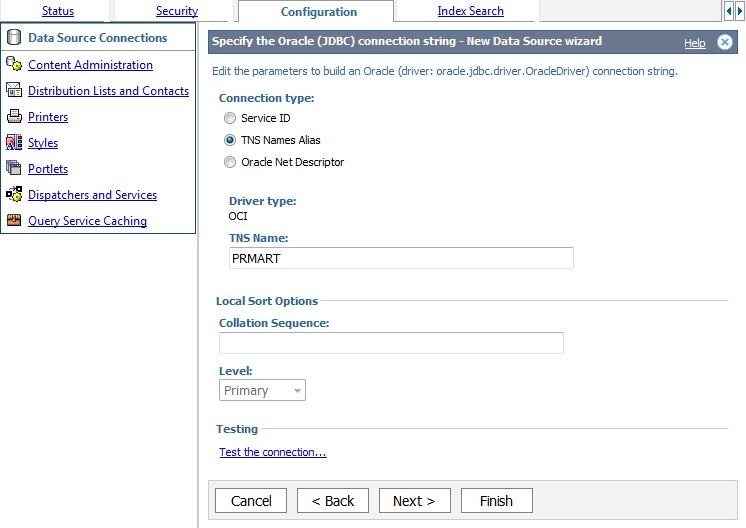
Click Next. The Specify the Oracle (JDBC) connection string - New Data Source wizard page opens.
Specify the Connection type, and click Next. The Specify the commands - New Data Source wizard page opens.
Specify the commands for connection.
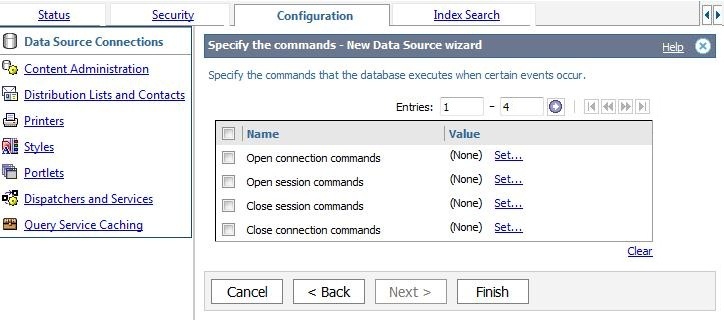
For more information on Cognos commands, refer to Argus Insight Extensibility Guide > Section 4.2 Applying Argus Data Security and Section 4.3 Applying Enterprise Security.
Click Finish. The PRMART data source is created.
This section includes the following topics:
To activate the PowerReports namespace:
Open the Cognos 10 configuration.
Click Start, All Programs, IBM Cognos 10, and then select IBM Cognos Configuration. The IBM Cognos Configuration window opens.
Navigate to Security, Authentication, and then select Cognos. The system displays the Cognos - Namespace - Resource properties pane.
Set the Allow Anonymous access? property to False.
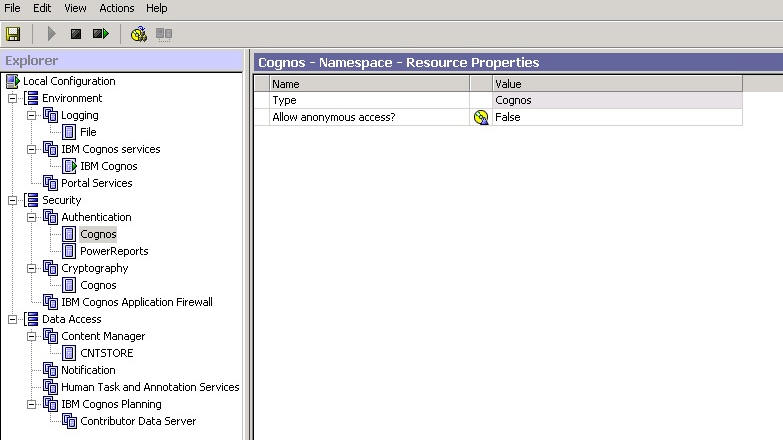
Open the File menu and select Save.
Open the Actions menu and select Restart to restart the Cognos 10 service. The system displays status information about each task being performed during the restart.
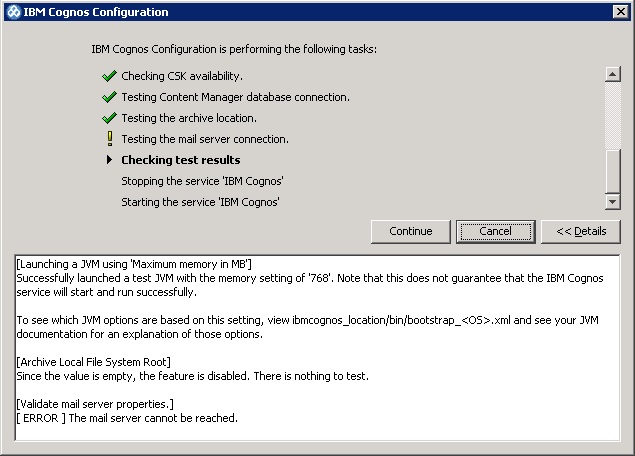
During the Cognos service restart, the system may display the following message if there are any warnings:

Process any warning message as follows:
Click OK.
Click Details to obtain more information about the warning.
Depending on the type of warning, you can:
— Click Continue to ignore the warning and continue with the process of restarting the IBM Cognos 10 service. For example, you may want to ignore a warning that the connection to the mail server failed.
— Click Cancel to stop the restart process. If the warnings are due to reasons other than a mail server connection failure, you should stop the process, check your configuration, and then restart the IBM Cognos 10 service.
Wait until the system performs all the configuration tasks and displays the status for each task.
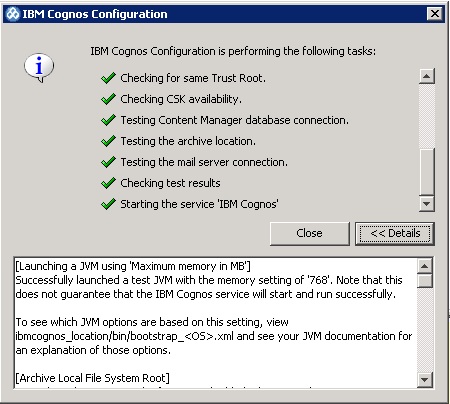
Click Close to exit the Cognos configuration.
Note:
Make sure that you remove the Everyone user group from the Directory Administrator and System Administrator roles of Cognos. Before doing this, make sure that you have a valid user as part of the System Administrator role in Cognos.If you have not added any user as part of the System Administrator role in Cognos, then you have to add Everyone user group in System Administrator roles of Cognos again.
To add the Everyone user group in the System Administrator role of Cognos:
Connect to the Content Store database as the content store user.
Navigate to the following folder:
Cognos_10_Install_Path\C10\configuration\schemas\content
Run the AddSysAdminMember.sql script.
Commit the changes.
To configure enterprise specific roles and permissions:
Log in to the Cognos 10 Server as an administrator user.
Create an Enterprise-specific role for each enterprise. For example:
ENT1_Role for Enterprise 1
ENT2_Role for Enterprise 2
Add all users belonging to the specific enterprises to their respective roles. For example:
Add ENT1_user to ENT1_Role
Note:
If a user is a member of multiple enterprises, the user must be added to the roles for all the enterprises.Create a folder in Public Folders for each enterprise. For example:
ENT1_Folder for Enterprise 1
ENT2_Folder for Enterprise 2
Select the required permissions of the Enterprise-specific role for the Enterprise-specific folder. For example,
Add ENT1_Role to the ENT1_Folder and provide the Read, Write, Execute, and Traverse permissions on this folder.