| Oracle® Argus Insight Installation Guide Release 7.0.3 E41483-01 |
|
|
PDF · Mobi · ePub |
| Oracle® Argus Insight Installation Guide Release 7.0.3 E41483-01 |
|
|
PDF · Mobi · ePub |
This chapter provides information about configuring the Argus Insight application and the Argus Insight scheduling service.
This chapter includes the following topics:
To log in to the Argus Insight application:
Log in with rights to a workstation from where you can access the Argus Insight application.
Start Internet Explorer.
Start the Argus Insight application by typing the following URL in the Address bar:
http://Argus_Insight_WebServer_Name:port_number/default.asp
Press Enter. The Argus Insight Login screen opens.
Log in to the Argus Insight application:
In the User Name field, type admin.
In the Password field, enter the password for the admin user. This password is the same as the password of the admin user in Argus Safety.
Click Login.
Note:
If you are using a Single Sign On (SSO) environment, you must ensure that SSO tools such as OAM are disabled on the Argus Insight Web Server for initial configuration. The only administrator user in Argus Insight is a non-LDAP user. A non-LDAP user cannot log in to Argus Insight with SSO tools set to Enabled.Note:
In case of a multi-tenant setup, you must ensure that all the configuration is done using the default enterprise.This will help in copying the configuration to a different enterprise
All the global configuration is available in the default enterprise.
Profile switches are a collection of settings that let you configure the default behavior of the system. This section describes the profile switches that you must set to establish connectivity with your Business Intelligence tool and to be able to run the initial ETL.
For detailed information about all the profile switches, see the following documents:
Oracle Argus Insight CMN Profile Enterprise Table Guide (CMN_PROFILE_ENTERPRISE.pdf)
Oracle Argus Insight CMN Profile Global Table Guide (CMN_PROFILE_GLOBAL.pdf)
To access and modify the Argus Insight profile switches:
Log in to the Argus Insight application.
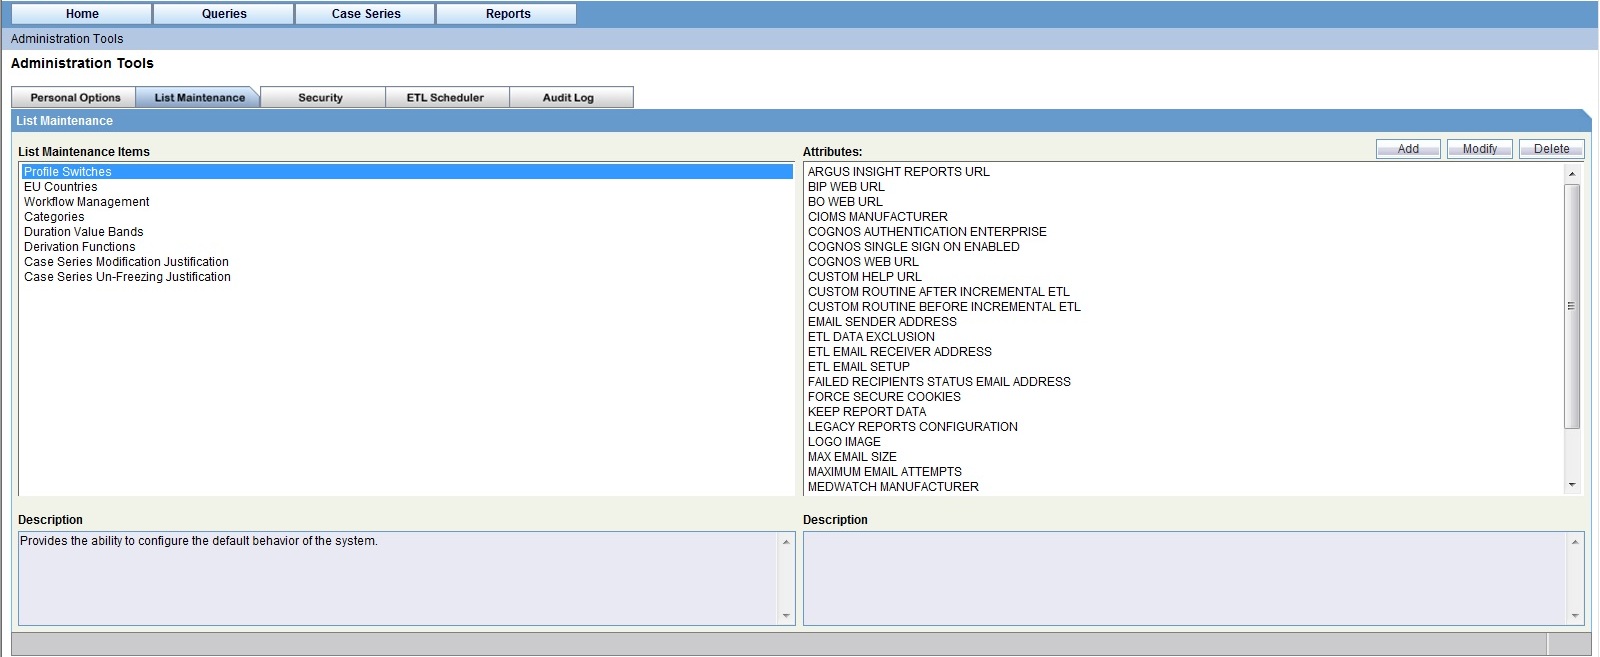
Click the Tools tab in the upper-right corner of the Argus Insight Home page. The ADMINISTRATION TOOLS page opens.
Click the List Maintenance tab.
Select Profile Switches from the List Maintenance Items group. The system updates the Attributes group with the profile switches that you can configure. See Figure 4-1.
To set the data attributes:
Click the List Maintenance tab on the ADMINISTRATION TOOLS page.
Select Profile Switches from the List Maintenance Items group.
Select POPULATE AFFILIATE DATA from the Attributes group.
Click Modify. The following Modify Attribute dialog box opens:
Click the Value field, and enter one of the following numeric values:
| 0 | = | Do not bring any affiliate data into the data mart. |
| 1 | = | Bring all affiliate data into the data mart. |
Click OK to save your changes and return to the List Maintenance tab.
Select POPULATE INTERCHANGE DATA from the Attributes group.
Click Modify. The following Modify Attribute dialog box opens:
Click the Value field, and enter one of the following numeric values:
| 0 | = | Do not bring any interchange data into the data mart. |
| 1 | = | Bring all interchange data into the data mart. |
| 2 | = | Bring only the SAFETYREPORT, MESSAGES, and EDI_INFO tables data into the data mart. |
Click OK to save your changes and return to the List Maintenance tab.
Select LEGACY REPORTS CONFIGURATION from the Attributes group. Argus Insight uses this attribute to determine if Legacy Report Configuration profile items are visible/invisible.
Click Modify. The following Modify Attribute dialog box opens:
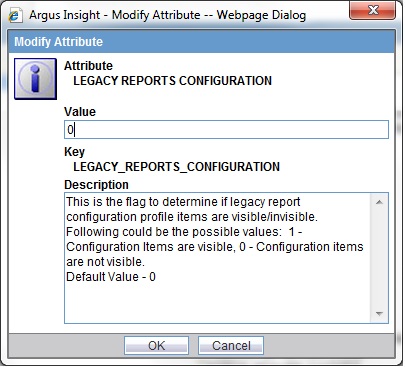
Click the Value field, and enter one of the following numeric values:
| 1 | = | Configuration items are visible |
| 0 | = | Configuration items are not visible |
Note:
If Legacy Reports Configuration switch is set to 1, then legacy reports switches becomes available for obsolete reports, and you must configure the following switches:POPULATE NARRATIVE LANGUAGES TABLE
COMPANY LOGO PATH
DAYS TO LOCK
UDN COLUMN FOR SUPPLIER NAME
FOLLOW-UP ACTION CODE
POPULATE DLL SLL REPORTS TABLE DATA
To configure these switches, refer to Argus Insight 7.0.2 Installation Guide.
Click OK to save your changes and return to the List Maintenance tab.
The following attributes relate to sending and receiving email after an extract, transform, and load (ETL) operation has completed, as well as sending email for scheduled reports.
ETL EMAIL SETUP
ETL EMAIL RECEIVER ADDRESS
EMAIL SENDER ADDRESS
FAILED RECIPIENTS STATUS EMAIL ADDRESS
MAX EMAIL SIZE
Note:
In previous releases, the three attributes for report scheduling (that is, EMAIL SENDER ADDRESS, FAILED RECIPIENTS STATUS EMAIL ADDRESS, and MAX EMAIL SIZE) were part of the Mailconfig.xml file. Beginning with Argus Insight 7.0, these attributes were moved to the List Maintenance section.To configure the attributes related to email messages and delivery:
Click the List Maintenance tab on the ADMINISTRATION TOOLS page.
Select Profile Switches from the List Maintenance Items group.
Define whether to send email following the failure or success of an extract, transform, and load (ETL) operation.
Select ETL EMAIL SETUP from the Attributes group.
Click Modify. The following Modify Attribute dialog box opens:
Click the Value field, and enter one of the following numeric values:
| 0 | = | Send no email message after an ETL operation. |
| 1 | = | Send an email message only if an initial or incremental ETL fails. |
| 2 | = | Send an email message only if an initial or incremental ETL succeeds. |
| 3 | = | Send an email message after any initial or incremental ETL (failure or success). |
Click OK to save your changes and return to the List Maintenance tab.
Specify the email address of each administrator who should receive email status messages of the ETL process.
Select ETL EMAIL RECEIVER ADDRESS from the Attributes group.
Click Modify. The following Modify Attribute dialog box opens:
Click the Value field, and enter the email address of each administrator who should receive email status messages of the ETL process. Use a semi-colon to separate each entry.
If you leave the Value field blank, then Argus Insight sends no email messages.
Click OK to save your changes and return to the List Maintenance tab.
Specify the email address of the person who will send all the Argus Insight email messages.
Select EMAIL SENDER ADDRESS from the Attributes group.
Click Modify. The following Modify Attribute dialog box opens:

Click the Value field, and enter the email address of the person on whose behalf Argus Insight sends all email messages.
If you leave the Value field blank, then Argus Insight sends no email messages.
Click OK to save your changes and return to the List Maintenance tab.
Specify the email address of the user who will receive information about undeliverable emails:
Select FAILED RECIPIENTS STATUS EMAIL ADDRESS from the Attributes group.
Click Modify. The following Modify Attribute dialog box opens:
Click the Value field, and enter the email address of the user who will receive information about undeliverable emails.
Click OK to save your changes and return to the List Maintenance tab.
Specify the maximum size of an email message sent from the Argus Insight Web Server:
Select MAX EMAIL SIZE from the Attributes group.
Click Modify. The following Modify Attribute dialog box opens:
Click the Value field, and enter a numeric value that defines the maximum attachment size limit (in KB) of the mail server in the organization.
Click OK to save your changes and return to the List Maintenance tab.
Depending on the value set in the MAX EMAIL SIZE attribute, some reports may be too large to send by email. For such reports, users can view the reports at a specified URL.
To define the URL where users can access reports that cannot be sent by email:
Click the List Maintenance tab on the ADMINISTRATION TOOLS page.
Select Profile Switches from the List Maintenance Items group.
Select ARGUS INSIGHT REPORTS URL from the Attributes group.
Click Modify. The following Modify Attribute dialog box opens:
Click the Value field, and enter the URL for the Argus Insight application for accessing scheduled reports that cannot be sent to the configured email ID, due to mail size limit. For more information on mail size limit, see Section 4.2.3, "Setting the Email Attributes."
Click OK to save your changes and return to the List Maintenance tab.
You can specify the image to use for the following logos:
LOGO IMAGE. This image is used in the following reports:
— CIOMS report
— CIOMS II Line Listing report
— US FDA MedWatch 3500A report
These reports are called the Argus Reports. By default, a logo does not print on these reports.
To specify the image for the logo used in the Argus Reports:
Click the List Maintenance tab on the ADMINISTRATION TOOLS page.
Select Profile Switches from the List Maintenance Items group.
Select LOGO IMAGE from the Attributes group.
Click Modify. The following Modify Attribute dialog box opens:
Click the Value field, and enter the complete path to the GIF image on the Argus Insight Web Server that you want to use as the logo for the Argus Reports. For example:
C:\apr_logo.gif
To ensure the logo fits in the report layout, the size of the image must be 155 pixels (width) by 53 pixels (height).
Click OK to save your changes and return to the List Maintenance tab.
If you are using BIP as your Business Intelligence tool with Argus Insight, you need to set the following BIP-specific attributes:
BIP WEB URL
KEEP REPORT DATA
To define the attributes required for BIP, execute the following steps:
Click the List Maintenance tab on the ADMINISTRATION TOOLS page.
Select Profile Switches from the List Maintenance Items group.
Select BIP WEB URL from the Attributes group.
Click Modify. The following Modify Attribute dialog box opens:
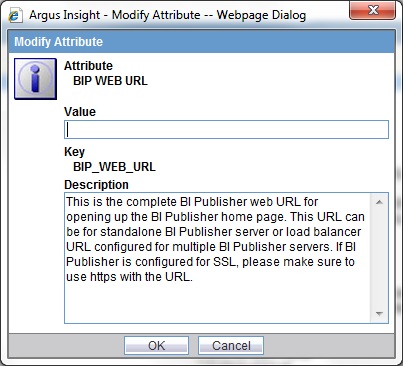
Click the Value field, and enter the name of the BIP Web URL to open the BIP Home Page. This URL can be the BI Publisher URL for standalone BI Publisher server or the Load Balancer URL configured for multiple BI Publisher servers. If BI Publisher is configured for SSL, you must use https with the URL. For example:
https://<server name>:<Port Number>/xmlpserver
Click OK to save your changes and return to the List Maintenance tab.
Select KEEP REPORT DATA from the Attributes group. This attribute is used to determine if the report log tables needs to be populated or not.
Click Modify. The following Modify Attribute dialog box opens:
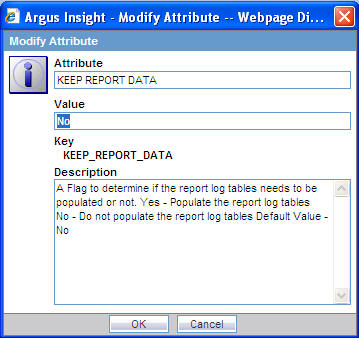
Enter Yes or No in the Value field.
The value Yes denotes that the Report Log tables should be populated. The value No denotes that the Report Log tables should not be populated
Click OK to save your changes and return to the List Maintenance tab.
If you are using BusinessObjects as your Business Intelligence tool with Argus Insight, you need to complete the following tasks to define those attributes that are required for BusinessObjects configurations only:
To define the attributes required for the BusinessObjects Servers:
Click the List Maintenance tab on the ADMINISTRATION TOOLS page.
Select Profile Switches from the List Maintenance Items group.
Define the BusinessObjects Server Web URL that Argus Insight uses:
Select BO WEB URL from the Attributes group.
Click Modify.

Click the Value field, and enter either the IP address or the host name of the BusinessObjects Server.
In addition, specify the cluster name if you are using the BusinessObjects clustering feature.
Note:
In the case of a single-server environment (that is, Argus Insight and BusinessObjects are hosted on the same server), you must enter the IP address to avoid problems when accessing the BusinessObjects Home page. These problems may be caused due to the session interference of Argus Insight and BusinessObjects web application.Click OK to save your changes and return to the List Maintenance tab.
If you are using Cognos as your Business Intelligence tool with Argus Insight, you need to set the following Cognos-specific attributes:
COGNOS AUTHENTICATION ENTERPRISE
COGNOS WEB URL
POPULATE DLL SLL REPORTS TABLE DATA
COGNOS SINGLE SIGN ON ENABLED
Note:
You must configure the COGNOS AUTHENTICATION ENTERPRISE profile switch for Cognos integration. The default value of this switch is Null.To define the attributes required for Cognos:
Click the List Maintenance tab on the ADMINISTRATION TOOLS page.
Select Profile Switches from the List Maintenance Items group.
Select COGNOS AUTHENTICATION ENTERPRISE from the Attributes group.
Click Modify. The following Modify Attribute dialog box opens:
Click the Value field, and select the Enterprise Short Name from which all users are authenticated for Cognos login.
Click OK to save your changes and return to the List Maintenance tab.
Select COGNOS WEB URL from the Attributes group. Argus Insight uses this attribute to identify which Cognos 10 Web URL to use.
Click Modify. The following Modify Attribute dialog box opens:
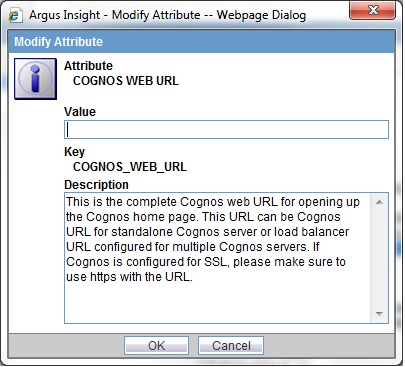
Click the Value field, and enter the name of the Cognos Web URL for opening the Cognos Home Page. This URL can be the Cognos URL for standalone Cognos server or the Load Balancer URL configured for multiple Cognos servers. If Cognos is configured for SSL, you must use https with the URL.
Example: http://<server name>/Cognos102
Click OK to save your changes and return to the List Maintenance tab.
Select POPULATE DLL SLL REPORTS TABLE DATA from the Attributes group.
Note:
The attribute mentioned below is obsolete in case of a fresh installation of Argus Insight 7.0.3.This attribute should be configured for the Detail Line Listing Report and the Simple Line Listing Report.
Click Modify. The following Modify Attribute dialog box opens:
Click the Value field, and enter one of the following numeric values:
| 0 | = | Do not populate the RPT_CASE_EVENT_PRODUCT table, which is required for DLL and SLL reports |
| 1 | = | Populate the RPT_CASE_EVENT_PRODUCT table, which is required for DLL and SLL reports |
Click OK to save your changes and return to the List Maintenance tab.
Select COGNOS SINGLE SIGN ON ENABLED from the Attributes group.
Click Modify. The following Modify Attribute dialog box opens:
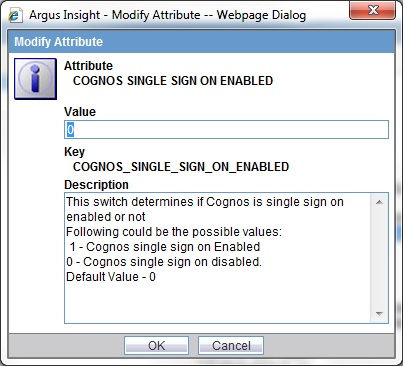
Click the Value field, and enter one of the following numeric values:
| 1 | = | Cognos single sign on enabled |
| 0 | = | Cognos single sign on disabled |
Click OK to save your changes and return to the List Maintenance tab.
In Argus Insight, you can map the following time values (entered in Argus Safety) to specific ranges called Duration Value Bands:
Time to Onset from First Dose
Time to Onset from Last Dose
You set the value of these fields in Argus Safety by navigating to Product Tab, Drug Duration of Administration, and Events Tab.
By mapping the time values to Duration Value Bands in Argus Insight, you can specify query criteria based on ranges instead of specific values for the Time to Onset fields listed above.
Using the Duration Value Bands item on the List Maintenance tab, you can configure duration value bands in hours, days, weeks, months, and years. For each band, you can specify multiple ranges by entering minimum and maximum values for each range item. Any value that falls within a configured range will map to that range.
Note:
Duration Value Band configuration must be done before running the Initial ETL.If Duration Value Bands are modified after Initial ETL, you must re-run the Initial ETL.
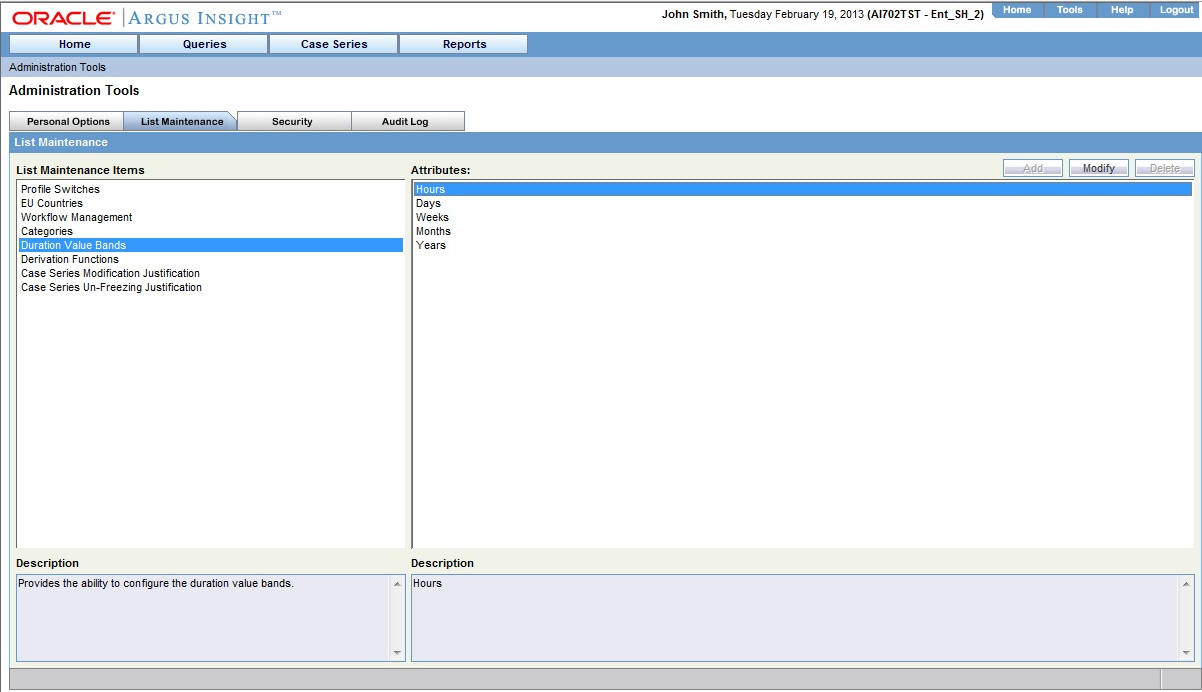
To modify a duration value band:
Click the Tools tab in the upper-right corner of the Argus Insight Home page. The ADMINISTRATION TOOLS page opens.
Click the List Maintenance tab.
Select Duration Value Bands from the List Maintenance Items group. The Attributes group displays the valid bands (Hours, Days, Weeks, Months, and Years). You can modify the values of these bands. You cannot, however, add more bands or delete an existing band.
Select the duration value band (Hours, Days, Weeks, Months, Years) you want to change, and click Modify. The Duration Value Bands Configuration dialog box displays the factory-configured ranges.
Note that:
The Label column represents the name of the range.
The Lower Range (>=) and Higher Range (<) columns contain the minimum and maximum values, respectively.
The highest value band includes all values that are greater than the highest range value specified.

Modify the values, as appropriate:
To modify an existing range, edit the values in the Lower Range (>=) and Higher Range (<) fields.
To add a range, scroll to the current highest range and click in the blank Higher Range (<) field. Enter a value greater than the current highest range and press Tab to add a new row.
To delete an existing range, click the Delete icon next to the row. Note that you cannot delete the lowest band.
If you delete an intermediate range, the system automatically converts the highest value of the deleted range to the lowest value in the next range. However, the system does not change the range labels.
Click OK to save your changes.
Argus Insight lets you create a new List Maintenance item and derive specific cases to this item based on case attributes. These attributes are supplied to the system as SQL.
For example, you can create a new List Maintenance item called Report Type 1 and derive to this item all the cases that have the Report Type attribute defined as Spontaneous, Literature, or Compassionate Use. As a result, Report Type 1 appears as an option in the query tool interface corresponding to the Report Type attribute. When you select Report Type 1 from the Report Type list and execute your query, the system returns only those cases that have the Report Type attribute specified as Spontaneous, Literature, or Compassionate Use.
You can specify more than one attribute. For example, you can create a further specialized List Maintenance item called Report Type 1 US and derive to this item all the cases that have the Report Type attribute defined as Spontaneous, Literature, or Compassionate Use, and the Country of Incidence attribute defined as United States.
Note:
There can be situations where two different List Maintenance items you create contain similar attributes in the SQL criteria. In this case, you can assign a priority level to individual List Maintenance items. The priority level determines which List Maintenance item SQL executes first.To open the Derivation Fields dialog box and configure derivation functions:
Click the Tools tab in the upper-right corner of the Argus Insight Home page. The ADMINISTRATION TOOLS page opens.
Click the List Maintenance tab.
Select Derivation Functions from the List Maintenance Items group.
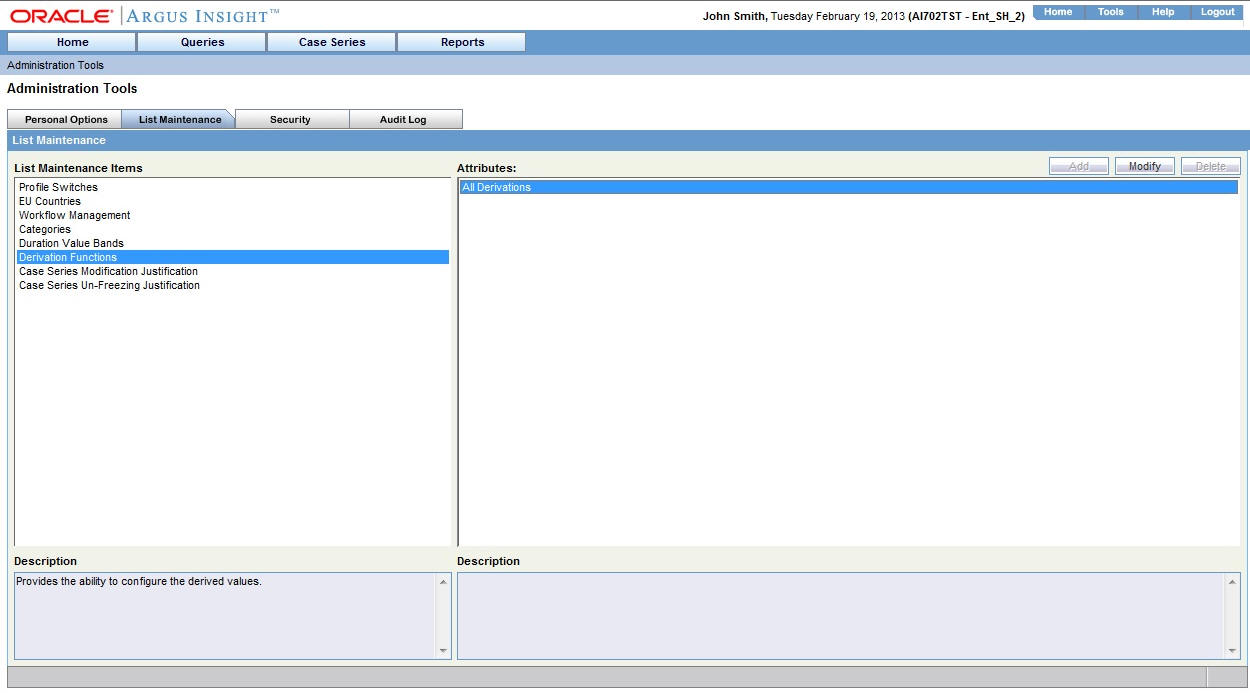
Select All Derivations from the Attributes group, and click Modify. The Derivation Fields dialog box opens.
Table 4-1 describes the icons in the Derivation Fields dialog box that you can use to add, delete, and reorder derivation field elements (rows).
Table 4-1 Icons in the Derivation Fields Dialog Box
| Click… | To… |
|---|---|
|
Add a derivation field element (row) above the currently selected row |
|
|
Add a derivation field element (row) below the currently selected row |
|
|
Delete the currently selected derivation field element (row) |
|
|
Move the selected row up |
|
|
Move the selected row down |
Table 4-2 lists the available field mapping derivation rules for Argus Insight.
Table 4-2 Field Mapping Derivation Rules
| Function Category | Function Sub-category | Argus Insight Field |
|---|---|---|
|
ANALYSIS |
BfArM Information |
Causality |
|
ANALYSIS |
Case Assessment |
Case Outcome Case Serious Listedness Determination |
|
EVENTS |
Event Information |
Lack of Efficacy |
|
GENERAL |
General Information |
Report Type Derived Pregnancy |
|
PATIENT |
Patient Information |
Age Group Gender Patient weight BMI desc |
|
PRODUCTS |
Product Drug |
Derived Drug Abuse Derived Drug Interaction Derived Overdose Last daily dose |
Note:
Causality, Report Type, Age Group, and Last daily dose are comma-separated derivation rules.This section describes the fields and check boxes in the Derivation Fields dialog box.
The LM Table field is the table name of the selected Argus field (that is, automatically populated).
The Suppress check box is available for fields associated with the list maintenance data. When suppress is enabled for a field, the corresponding list maintenance values that are not present in any case are deleted and thus not available for querying.
Note:
The Suppress check box is applicable only if the condition specified in the SQL text box covers all the cases having the selected List Maintenance field.The Value field captures the value for the new derivation field. For the following four rules, you must enter the new value for the rule as a comma-separated value:
Causality
Report Type
Age Group
Last Daily Dose
Note:
Make sure that you enter the values for these rules as defined in the following sections. Unexpected results and/or ETL errors may result if the values are not entered as specified.Parameters: VALUE, REPORTABILITY
where:
VALUE = New value for the rule
REPORTABILITY = Lower value of the group
Example: NewCausality,1
Parameters: VALUE, INC_LIT, INC_TRIAL, ABRV
where:
VALUE = New value for the rule
INC_LIT = 1 if Literature Report Type else 0
INC_TRIAL = 1 if Clinical Trial Report Type else 0
ABRV = A 3-letter abbreviation for the Report Type
Example: NewReportType,0,1,NRT
Parameters: VALUE, GROUP_LOW, GROUP_HIGH
where:
VALUE = New value for the rule
GROUP_LOW = Lowest value of the age group
GROUP_HIGH = Highest value of the age group
Example: NewAgeGroup,25,50
If you do not want to specify the High Value, then the comma is mandatory in the end.
Example: Unknown,70,
Parameters: VALUE, DAILY_DOSE_SORTING_ORDER
where:
VALUE = New value for the rule
DAILY_DOSE_SORTING_ORDER = 1 or 2 or 3 and so on to define the sorting order if there is more than 1 rule for the Last Daily Dose field
Examples: 1 -> 0to1,1; 2 -> 2to3,2 3 -> 5to8,3
The Priority field captures the priority for a list of derivation rules applied to a single List Maintenance field. The value should be from 1 to 255.
Note:
The priority for derivation rules applicable to a single List Maintenance field should be unique.The SQL field specifies the SQL statement to capture the cases for which the derivation rule is applicable.
Note:
The SQL statement must follow the correct syntax.The system does not validate the length of the new values against the database. Make sure that new values being inserted into the data mart do not exceed the limit defined in the database.
Guidelines for correct syntax:
The SQL query configured against a rule should not contain the table name. It should contain only the primary key column name(s) of the field in the SELECT clause. For example:
Correct: SELECT CASE_ID FROM RPT_CASE WHERE…
Incorrect: SELECT RPT_CASE.CASE_ID FROM RPT_CASE WHERE…
Make sure that there is only one space after the SELECT clause in the SQL query. For example:
Correct: SELECT CASE_ID, SEQ_NUM FROM RPT_PRODUCT WHERE…
Incorrect: SELECT CASE_ID, SEQ_NUM FROM RPT_PRODUCT WHERE…
Make sure that no Oracle keyword (such as DISTINCT) is used after the SELECT clause in the SQL query. For example:
Correct: SELECT CASE_ID, SEQ_NUM FROM RPT_PRODUCT WHERE…
Incorrect: SELECT DISTINCT CASE_ID, SEQ_NUM FROM RPT_PRODUCT WHERE…
To configure the Argus Insight scheduling service:
Log in to the Argus Insight Web Server.
Click Start and then select Run.
Type services.msc in the text box and click OK. The Services window opens.
Right-click Argus Insight Service and then select Properties. The Argus Insight Service Properties dialog box opens.
Set the value of the Startup type field to Automatic.
Click Start to start the Argus Insight Service.
Click OK to apply your changes and close the dialog box.
Note:
To change the interval of different service tasks, modify the entries in the Service.config file located in the Bin folder of Argus Insight. All the times in the Service.config file are specified in seconds.IMPORTANT! Ensure that the user who runs this service has administrator privileges. If the user does not have administrator privileges, either the Scheduled CIOMS Reports might not return or an LDAP user might not be able to log in to the Argus Insight application.
These are required settings because PwReports.exe file is responsible for LDAP authentication along with CIOMS and MedWatch reports.
Log in to the Argus Insight Web Server.
Click Start and then select Run.
Type dcomcnfg in the text box and click OK. The Component Services window opens.
Navigate to Console Root, Component Services, Computers, My Computer, and then select DCOM Config.
Right-click PwReports and select Properties. The PwReports Properties dialog box opens.
Click the Security tab.
Look in the Launch and Activation Permissions group, select Customize, and then click Edit. The Launch Permission dialog box opens.
Click Add. The Select Users or Groups dialog box opens.
In the Enter the object names to select field, add the following information:
machine_name\IUSR
Click OK. The system returns to the Launch Permission dialog box:
Complete the Launch Permission dialog box as follows:
Select the newly created Internet Guest Account.
Grant the listed permissions to the account by selecting all the check boxes in the Allow column.
Click OK.
Exit the Component Services program.
To configure the IIS file download limit for Windows 2008:
Go to the Internet Information Services (IIS) Manager.
Double-click ASP in the right pane. The ASP dialog box opens.
Expand Limit Properties and change the Response Buffering Limit from its default value of 4 MB to a large value such as 200000000 (200 MB).
Click Apply to save the changed value.
Restart the IIS service.
Click Start and select Run.
Type iisreset -start in the text box.
Click OK.
Defining a value for the ASPMaxRequestEntityAllowed setting is optional.
You may need to set this value only if you use custom SQL scripts in advanced conditions and only if the scripts have more than 70,000 characters.
If you receive AJAX errors when saving your custom SQL scripts that have more than 70,000 characters, you can increase the value of the ASPMaxRequestEntityAllowed setting in the MetaBase.xml file. Increasing the setting ensures that the ASP can post that much data onto the server.
To change the value of the ASPMaxRequestEntityAllowed setting:
Stop the Internet Information Services (IIS):
iisreset /stop
Navigate to the following folder:
\WINDOWS\system32\inetsrv
Open the MetaBase.xml file for editing.
Find the following line in the file:
ASPMaxRequestEntityAllowed=
Set this value to the lowest possible value that allows for the functionality you need. A common value is 500000. The maximum value is 1,073,741,824 bytes.
Save the file.
Restart the Internet Information Services (IIS):
iisreset /start
Alternatively, you can use DOS commands to change the value of the ASPMaxRequestEntityAllowed setting:
Open the DOS command prompt.
Change to the following directory:
cd drive:\inetpub\adminscripts
where drive is the hard disk where IIS is installed.
Enter the following command:
cscript adsutil.vbs set w3svc/ASPMaxRequestEntityAllowed value
where value is the lowest possible value that allows for the functionality you need. A common value is 500000. The maximum value is 1,073,741,824 bytes.
Restart the Internet Information Services (IIS):
iisreset /start
Before configuring export and import functions, be aware of the following:
Before importing or exporting to or from a network drive, verify that you have mapped the network drive. This tool does not support direct access to network drives.
Before copying Argus Data, incremental ETL should be completed on Source Insight Database from Source Argus.
It is assumed that the configuration of the instance of Argus used to run Initial and Incremental ETL on the source Insight data mart will also be copied and applied on the new Argus Instance which will be associated with the new Insight data mart.
Data must be imported after loading Factory Data and before running Initial ETL on destination environment.
In a multi-tenant environment, you must ensure that all the enterprises which are part of the source Argus Insight database, have been created in the Target Argus Insight database.
To export data:
Start the Argus Insight Schema Creation Tool.
Click Export Data. The Export Utility dialog box opens.
Enter the name of the schema owner, the schema password, and the name of database.
Enter the complete directory path and file name for the export dump file. You can choose to:
Keep the default file location and name as specified.
Click the ... button next to the Export Dump File Name field. When the Export Dump File dialog box opens, navigate to the appropriate location, enter the file name in the File name field, and then click Save. The system returns to the Export Utility dialog box.
Enter the complete directory path and file name for the log file. You can choose to:
Keep the default file location and name as specified.
Click the ... button next to the Log File Name field. When the Log File dialog box opens, navigate to the appropriate location, enter the file name in the File name field, and then click Save. The system returns to the Export Utility dialog box.
Click Export to continue with the data export. This displays the Import Dump Information dialog box, as shown in the following figure:
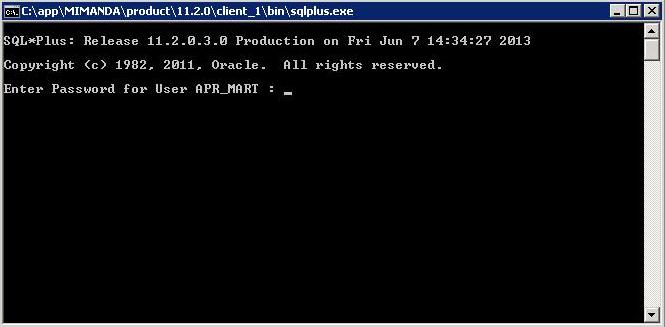
Verify the list of files and Click OK. This displays the following command screen:
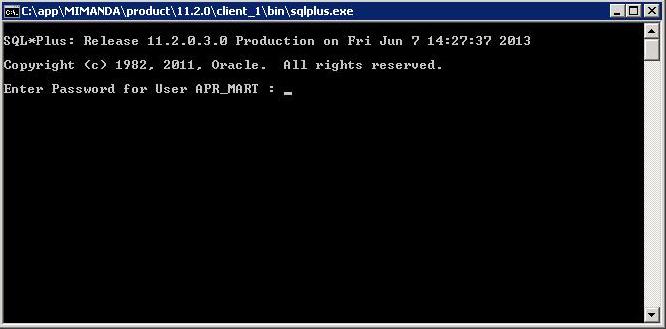
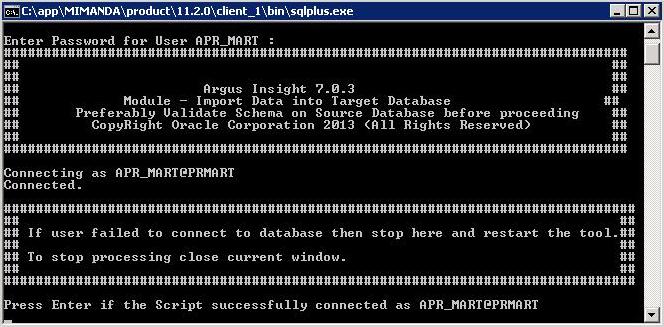
Enter the password for the APR_MART user and press Enter. This displays the following command screen:
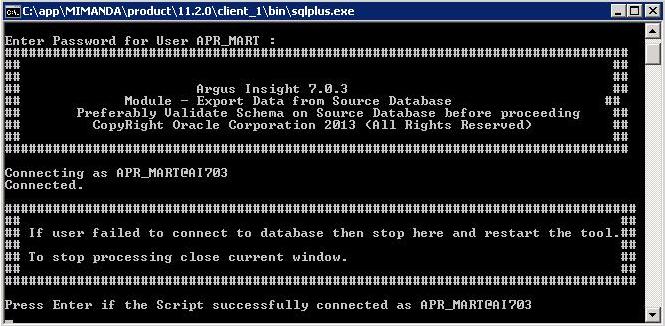
Verify that the script is successfully connected as <APR_MART User Name>@<Argus Insight Database Name> and press Enter. This displays the screen, with the Argus Insight Mart details.
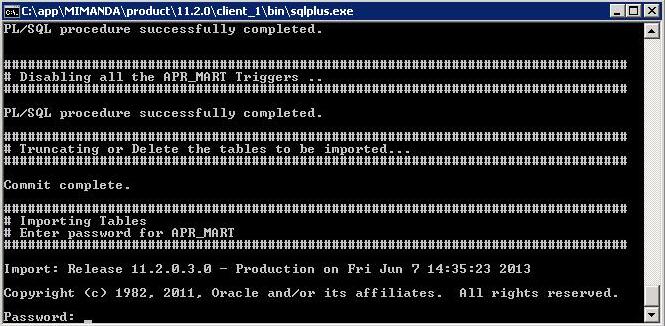
Verify the details mentioned on the command screen and press Enter. This displays the following command screen:
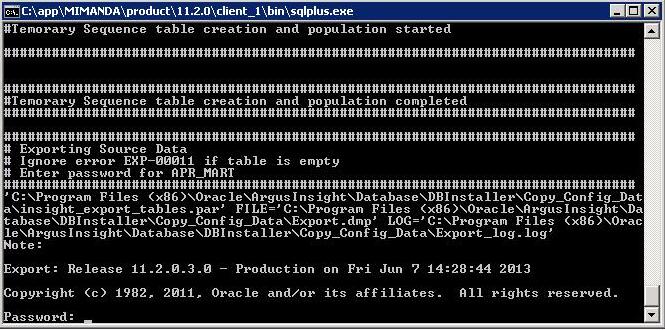
Enter the password for the APR_MART user and press Enter. This displays a commit complete message along with the confirmation that the data has been exported successfully. Press Enter to continue.
The system displays a message when the Argus Insight configuration data has been exported:
Click OK to close the dialog box. Be sure to review the log files for information about the export as well as export errors, if any.
Log files are in the following folder:
\Program Files\Oracle\ArgusInsight\Database\DBInstaller\Copy_Config_Data
To import data:
Start the Argus Insight Schema Creation Tool.
Click Import Data. The Import Utility dialog box opens.
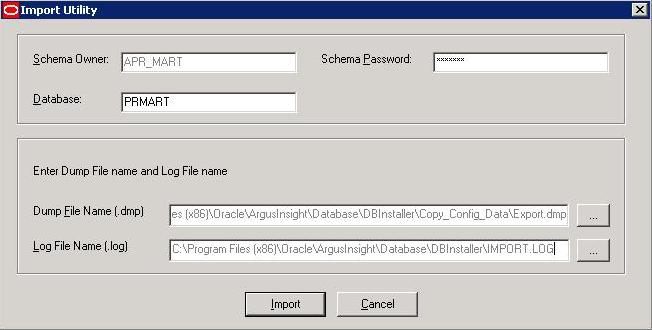
Enter the name of the schema owner, the schema password, and the name of database.
Enter the complete directory path and file name for the dump file. You can choose to:
Keep the default file location and name as specified.
Click the ... button next to the Dump File Name field. When the Import Dump File dialog box opens, navigate to the appropriate location, enter the file name in the File name field, and then click Open. The system returns to the Import Utility dialog box.
Enter the complete directory path and file name for the log file. You can choose to:
Keep the default file location and name as specified.
Click the ... button next to the Log File Name field. When the Log File dialog box opens, navigate to the appropriate location, enter the file name in the File name field, and then click Open. The system returns to the Import Utility dialog box.
Click Import to continue with the data import.
The system opens a dialog box that lists the prerequisites to importing data.
Review the prerequisites and verify that your system complies with the requirements.
If you have not met all the prerequisites, click Cancel to stop the data import. Complete all prerequisites before restarting the data import process.
If you have met all the prerequisites, click OK. The system displays the following command screen:
Enter the password for the APR_MART user and press Enter. This displays the following command screen:
Verify that the script is successfully connected as <APR_MART User Name>@<Argus Insight Database Name> and press Enter. This displays the screen with the Argus Insight Mart details.
Verify the details on the command screen and press Enter. This displays the following command screen:
Enter the password for the APR_MART user and press Enter. This displays a confirmation message that the data has been imported successfully along with the location of the log file.
Press Enter to continue. When the Argus Insight configuration data has been imported, the system displays the following message:
Click OK to close the dialog box. Be sure to review the log files for information about the import as well as import errors, if any.
Log files are in the following folder:
\Program Files\ArgusInsight\DBInstaller\Copy_Config_Data\Log
Using Argus Safety to configure enterprises for Argus Insight is supported in multi-tenant installations only.
In addition, you must be a valid LDAP user and you must have access to the Argus Safety global home page. See the Global Enterprise Management section of the Argus Safety Installation Guide for detailed steps on logging and accessing Argus Safety global home page.
To create an enterprise in Argus Insight:
Log in to the Global Enterprise Management portlet.
Select an enterprise from the Enterprises folder in the left pane. The Enterprises folder includes only those enterprises that you have privilege to access:
Click Copy Enterprise to Insight to initiate the creation of the selected enterprise in Argus Insight.
Note that the Copy Enterprise to Insight button:
Is disabled if the selected enterprise already exists in Argus Insight.
Is enabled if you have Copy Configuration role in any of the listed enterprises.
The system opens the following screen:
Use the Copy Enterprise Configuration From field to select the source enterprise from which the information will be copied.
Note that the drop-down list includes only those enterprises that meet the following two conditions:
The enterprise has already been created in Argus Insight.
You have been assigned Copy Configuration privileges for the enterprise.
Click Setup. The system begins to copy the configuration and displays status information throughout the process:
Click Finish to complete the creation of the enterprise in Argus Insight.
For security reasons, you should configure permission settings for certain files and folders on the Argus Insight Web Server. The permission settings ensure that only the IIS user can access these files. Local system login accounts that are not part of the Administrators group cannot make changes to the files.
For the user under which IIS is running, the ai.ini file requires a permission of Full Control.
For the user under which IIS is running, the following folders require a permission of Full Control:
CacheTemp
ScheduledReports
PDFReports
ASP
Bin
|
Copyright © 2010, 2013, Oracle and/or its affiliates. All rights reserved. Legal Notices |
|