In the Function Builder, you select a function and specify the connection and members that you want the function to use. The Function Builder then creates the function using the proper syntax and enters it into the selected cell. You can edit these functions.
The selections available to you in a given Function Builder field are limited by your selections in other fields of the Function Builder. For example, only the connections supported by the selected function are displayed, and only the dimensions supported by the function you select are displayed.
A cell reference can be selected for each function argument. If you know argument input values, you can create functions in offline mode. Type-in functionality is available for each argument.
Note: | You can use functions that were created in the Function Builder prior to Release 11.1.2.2.310. However, starting with Release 11.1.2.2.310, the Function Builder uses commas (,) to separate member list arguments rather than semicolons (;). Both characters are supported by the new Function Builder, but when you modify a function created in the previous version, you are prompted to convert to the new comma-separated format. If you choose not to convert, then none of your modifications to the function are applied. |
 To create functions using the Function Builder:
Connect to the appropriate data source.
Function Builder supports shared or private connections.
In the sheet, select the cell in which you want to enter the function.
In the Smart View Panel, navigate to the database on which you want to base the function, right-click the database name, and then select Build Function.
Accessing the Function Builder in this way will prepopulate the Connection field of the Function Arguments dialog box with specific connection information, as described in step 4.
Alternatively, from the Smart View ribbon, select Functions, and then Build Function.
When you access the Function Builder in this way, the Connection field in the Function Arguments dialog box is blank. You may provide connection information, as described in step 4. Or, if there is an active connection on the sheet, select HSACTIVE from the drop-down list.
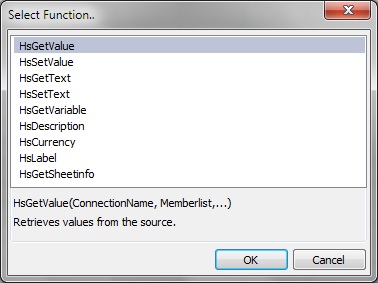
In Select Function, select a function from the list and click OK.
Note:
Not all functions are available to all providers. See Table 19, Smart View Functions and Supported Providers for a list of functions and the supported providers.
The Function Arguments dialog box is displayed with the Connection field automatically populated with connection information in one of the following formats.
For shared connections:
WSFN|ProviderType|Server|Application|Database
The WSFN parameter above signifies that this function is a Workspace function and uses a shared connection.
For private connections:
PrivateConnectionName
To manually enter the connection info, use the syntax above.
In Function Arguments, for each argument in the selected function, do one of the following:
Click the right-most button,
 .
.For example, for HsGetValue, click
to select members from Member Selection; for HsLabel and HsGetVariable, select from drop-down lists of labels or variables.Essbase only: Note that when variable names are duplicated, their fully qualified name is displayed in the drop-down list. This helps to identify variables defined at the global, application, and database levels.
To type arguments manually, enter the argument in the text box. For example, to type a member, use the format: dimension#member; such as Year#Qtr1 or Year#Jan.
To use cell references, follow the procedure in Using Cell References.
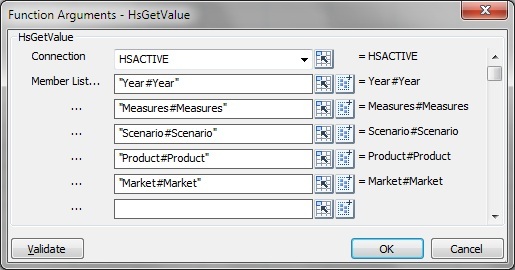
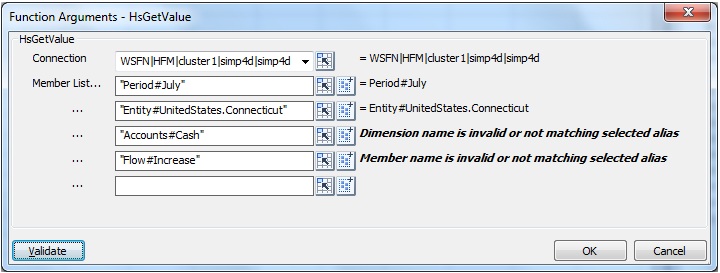
Figure 59, Function Builder, Function Arguments Dialog Box for HsGetValue Based on the Essbase Sample Basic Database shows a completed Function Arguments dialog box for the HsGetValue function.
Figure 59. Function Builder, Function Arguments Dialog Box for HsGetValue Based on the Essbase Sample Basic Database
The arguments listed in Function Arguments vary depending on the function selected in step 4.
Notes:
For HsGetSheetInfo, use a cell reference. See Using Cell References for more information.
For HsSetValue only: Select Data or Cell Reference and enter the value to submit.
For HsGetText and HsSetText only:
Select Comments or Cell Reference, and then enter the cell text to submit
Select Cell Text Label, and then select a label from the drop-down menu
If an active worksheet connection is available, you can select HSACTIVE from the Connection drop-down list.
Click Validate and correct any errors that may be noted.
Some of the errors you may see are:
Connection offline or invalid
Invalid selection
Member name is invalid or not matching selected alias
Dimension name is invalid or not matching selected alias
Incomplete Dimension#Member combination
Generic “Error” in cases of missing quotation marks or other minor syntax errors
Figure 60, Function Builder Validation Errors shows errors in the Function Arguments dialog box with after clicking the Validate button. In the following example from the Financial Management Simple application, there are errors in the syntax for two of the Dimension#Member combinations. The first error is that the Dimension name is invalid or not matching the selected alias. The second error is that the member name is invalid or not matching the selected alias.
When the function validation is successful, click OK to insert the function in the selected cell.
To execute the function, follow the procedure in Running Functions.
You can enter references to single cells for connection, label, data/text, or variable arguments. You can also enter references to two contiguous or noncontiguous cells for dimension/member references. References cannot be made to cell ranges of more than two cells.
To use cell references:
In the Function Arguments dialog box, for each argument in the selected function, click the Cell Reference button,
 .
.Depending on the type of argument selected, a Cell Reference dialog box is displayed.
If you select a connection, label, data/text, or variable argument, the Select Single Cell Reference dialog box is displayed.
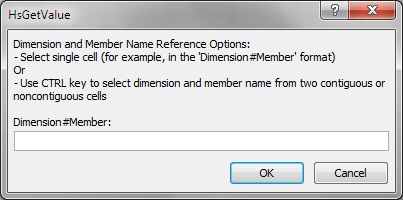
If you select a member list argument, the Cell Reference dialog box for a dimension and member name cell reference is displayed.
In the grid, perform an action:
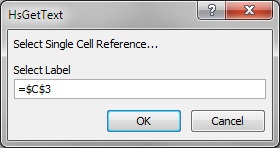
For the Single Cell Reference dialog box, depending on the type of argument, click a single cell to reference; for example, a cell containing a variable.
Figure 63, Cell Reference Dialog Box with Single Cell for Label Argument Selected shows the Single Cell Reference dialog box with a cell selected for a label argument.
For the Dimension and Member Name Cell Reference dialog box, do one of the following:
Click a single cell to reference; for example, a cell that contains both a dimension and a member name.
Pressing the Ctrl key, select two contiguous or noncontiguous cells; for example, a dimension and a member cell.
You may press Ctrl, click in two cells from different areas of the worksheet or two adjacent cells. Each cell selection much be performed by a single click while the Ctrl key is still pressed.
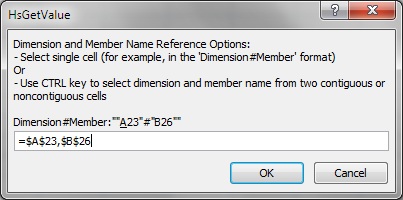
Figure 64, Cell Reference Dialog Box with Two Noncontiguous Cells Selected shows the Dimension and Member Name Cell Reference dialog box with two noncontiguous cells selected.
Click OK in the Cell Reference dialog box.
In Function Arguments, the text field for the argument contains the referenced cell or cells in the format shown in Table 20.
Table 20. Cell Reference Formats
Cell Reference Form in Function Arguments Single cell ""&A3&"" See “Notes” below this table for a full explanation.
Two contiguous cells ""&A3&"#"&B3&"" Two noncontiguous cells ""&A5&"#"&B9&"" Notes:
For a single cell reference, if the member name that you selected in step 3 is displayed as dimension#member in the grid, then the argument selection is complete. For example, if the member is displayed in the grid as Year#Qtr 2 in cell A3, then ""&A3&"" is complete.
If only the member name is displayed in the grid, then you must manually enter the dimension name followed by # between the first two sets of double quotation marks. For example, if the member is displayed as Qtr2 in cell A3, then you must enter Year# between the quotation marks: "Year#"&A3&""
If an argument text field contains text before you select a reference cell, the cell reference text is appended to this text. Therefore, delete any unwanted text in the field before selecting a cell for reference.