| Oracle® Argus Mart Installation and Administration Guide Release 7.0.3 E48402-01 |
|


 Previous |
 Next |
| Oracle® Argus Mart Installation and Administration Guide Release 7.0.3 E48402-01 |
|
Previous |
Next |
When you run ETL to transfer data from the Argus Safety database to Argus Mart a default enterprise is automatically fetched into Argus Mart. In addition to the default enterprise, Argus Mart also enables you to create multiple enterprises by using:
The configuration of default enterprise.
The configuration of any other existing enterprise in Argus Safety Database.
This chapter explains the step-by-step procedure that you need to execute to create multiple enterprises in Argus Mart in a multi-tenant environment.
|
Note: In case of a Multi-tenant setup, you can create additional enterprises after initial or incremental ETL as well. |
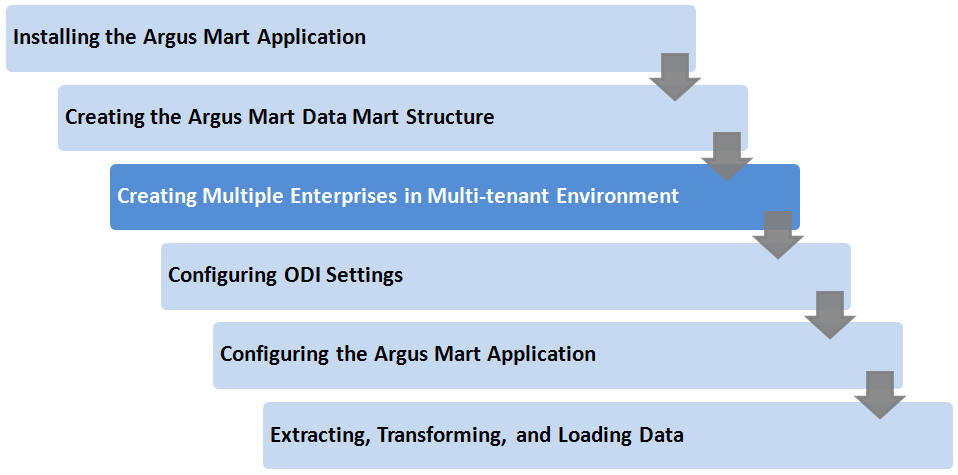
The following figure depicts your progress in the complete installation process:
To create multiple enterprises in Argus Mart, execute the following steps:
Double-click the am_create_enterprise.bat file located at the following path:
...\ArgusMart\Database\Utils\am_create_enterprise.bat
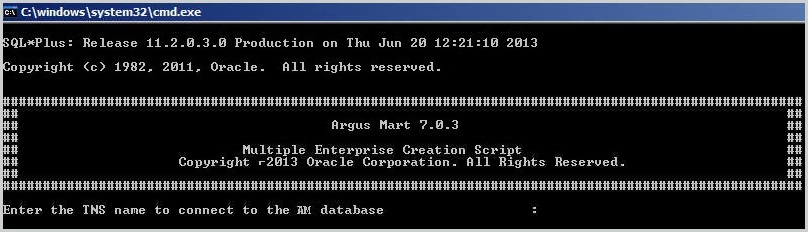
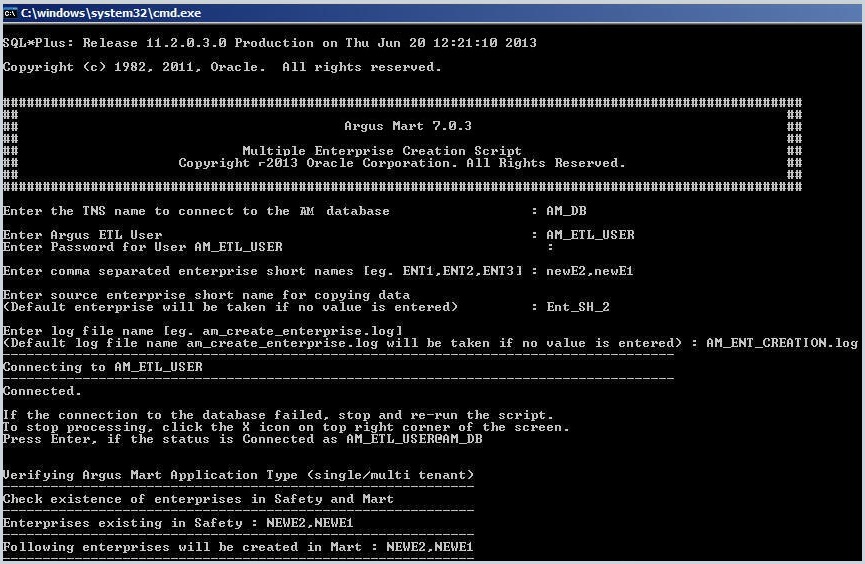
This displays the Argus Mart Enterprise Creation Screen as shown in the following figure:
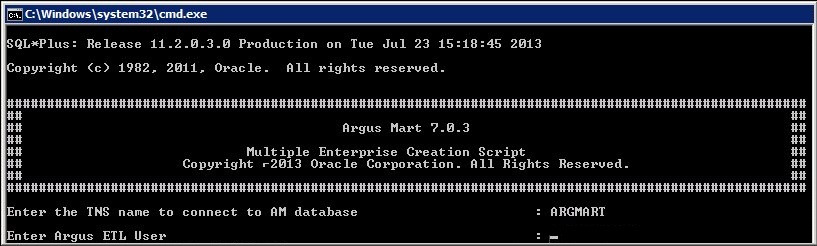
Specify the TNS Name to connect to the Argus Mart database in the Enter the TNS name to connect to the AM database field, and press Enter. This displays the following text on the command screen:
Enter the following parameters for the user who have administrator rights to access the ETL process.
|
Note: This user is referred to as Argus ETL User in the Creating a New Database Schema for Argus Mart section. If the user is not the database owner with the administrator rights for the ETL process, the system displays an error message. |
Enter the Argus Mart Database Owner in the Enter Argus ETL User field, and press Enter.
Enter the password in the Enter Password for User field, and press Enter.
Enter the name of the enterprises, which you want to create in Argus Mart, in the Enter comma separated enterprise short names field, and press Enter.
If you want to enter multiple values in this field, they must be separated by a comma.
Enter the Source Enterprise name using which you want to create new enterprises in the Enter source enterprise short name for copying data field, and press Enter.
If there is no input to this field, the Default Enterprise, configured during initial schema creation is considered as the Source Enterprise.
Enter the name of the log file in the Enter log file name field, and press Enter.
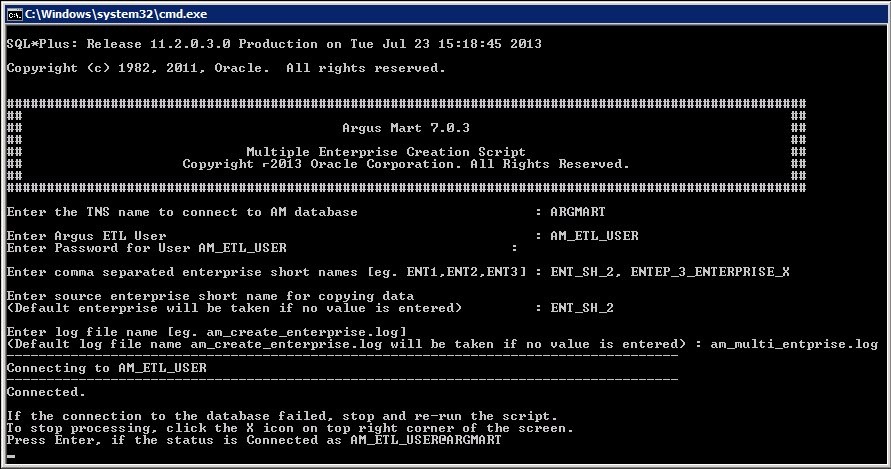
The system displays a Connecting status message and once connected displays Connected, as shown in the following figure:
The system also validates that the Argus Mart database is a multi-tenant database, which supports creation of multiple enterprises and the factory data has already been loaded to the database. If any of these requirements are not met, the system displays an error message.
Once done, the system starts verifying the status of enterprises created in Argus Safety and Argus Mart. The Enterprise Names that you have entered in Step 5 must already be there in the Argus Safety database and should not be already created in Argus Mart.
The system displays the name of the enterprises that exist in Argus Safety, and the enterprises that will be created in Argus Mart, as shown in the following figure:
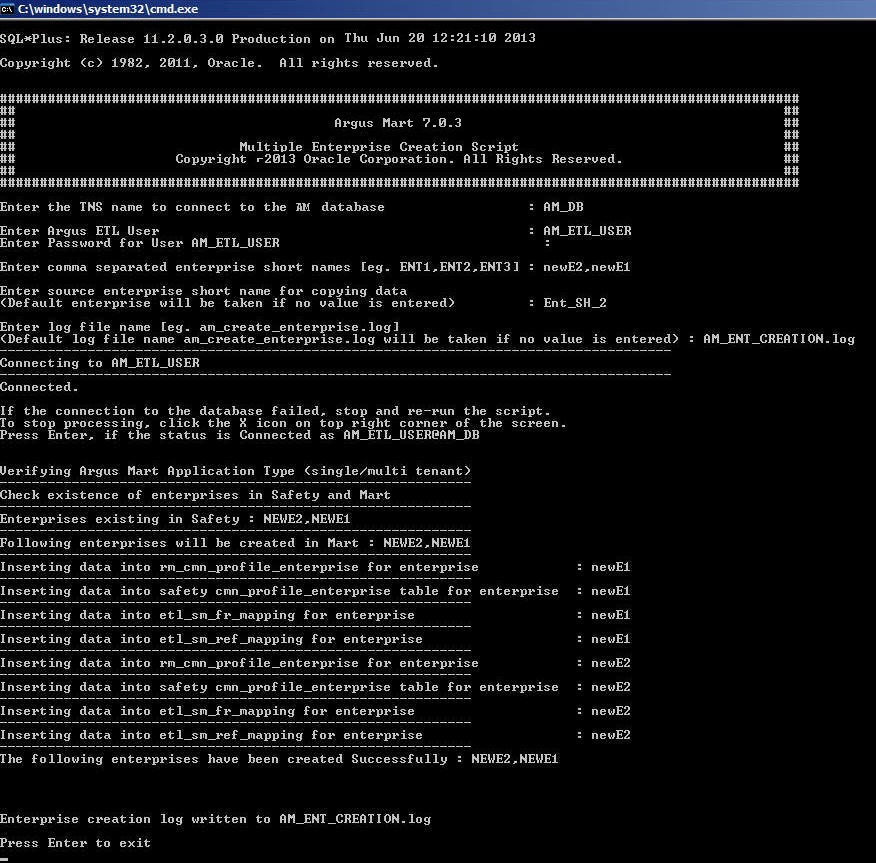
After displaying the final list of enterprises that will be created in Argus Mart, the data is inserted into the tables referring the Source Enterprise.
Once done, the system displays the names of the enterprises that have been created successfully along with the name of the log file, as shown in the following figure:
Press Enter to exit from the window.
|
 Copyright © 2011, 2013, Oracle and/or its affiliates. All rights reserved. Legal Notices |
|