| Oracle® Argus Mart Installation Guide Release 1.0 E38590-01 |
|
|
PDF · Mobi · ePub |
| Oracle® Argus Mart Installation Guide Release 1.0 E38590-01 |
|
|
PDF · Mobi · ePub |
Once you have installed Oracle Data Integrator (ODI), you must configure certain settings to be able to use it for running the ETL process.
All the ODI related data has been zipped into a file, which is a part of the installation package and is available at the following path:
...\ArgusMart\ODI\AM.zip
However, there are certain tasks that you need to execute before and after importing this zip file. All these tasks are covered in sequence in the later sections.
This chapter explains the step-by-step procedure to configure all the ODI related tasks using the Oracle Data Integrator Studio. The configuration of these tasks using the Oracle Data Integrator Console is not supported for this release.
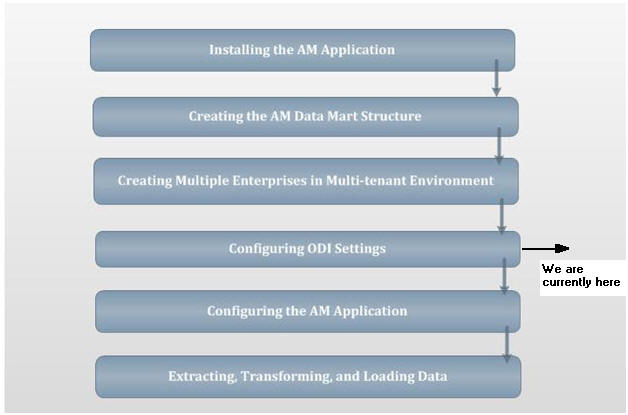
The following figure depicts your progress in the complete installation process:
This chapter comprises the following sub-sections:
There are certain tasks that you need to execute before configuring the ODI settings. All these tasks are explained in this section.
This section comprises the following sub-sections:
You must create two separate database users for Master and Work Repositories and grant them the necessary privileges.
Note:
You need to create these users in the AM instance that maintains the ODI metadata.To do so, you must log on to the SQL developer as a SYS user and execute the following commands to create the users:
CREATE USER odi_master IDENTIFIED BY manager;CREATE USER odi_work IDENTIFIED BY manager;
Where odi_master refers to the Master Repository User Name and odi_work refers to the Work Repository User Name.
Note:
While creating ODI Master and Work schemas, the database administrator must create a new default Tablespace for these schemas. In addition, the administrator must ensure that no objects of ODI Master and Work schemas exist in any other Tablespace.Once you have created two separate database users for Master and Work Repositories, you must grant them the necessary privileges using the following commands in SQL Developer:
GRANT RESOURCE, CREATE SESSION, CONNECT TO odi_master;
GRANT RESOURCE, CREATE SESSION, CONNECT TO odi_work;
GRANT EXECUTE ON DBMS_LOCK TO odi_work;
Where odi_master refers to the Master Repository User Name and odi_work refers to the Work Repository User Name.
To create the Master Repository, execute the following steps:
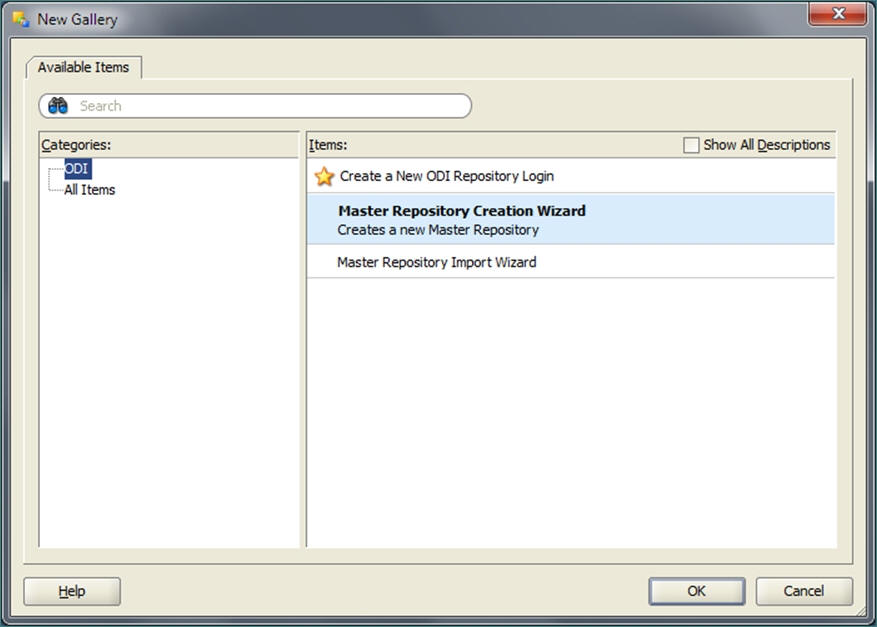
Open the Oracle Data Integrator and select File > New.
This displays the New Gallery dialog box, as depicted in the following figure:
Click OK. This displays the Master Repository Creation Wizard with the Repository Connection selected in the left pane.
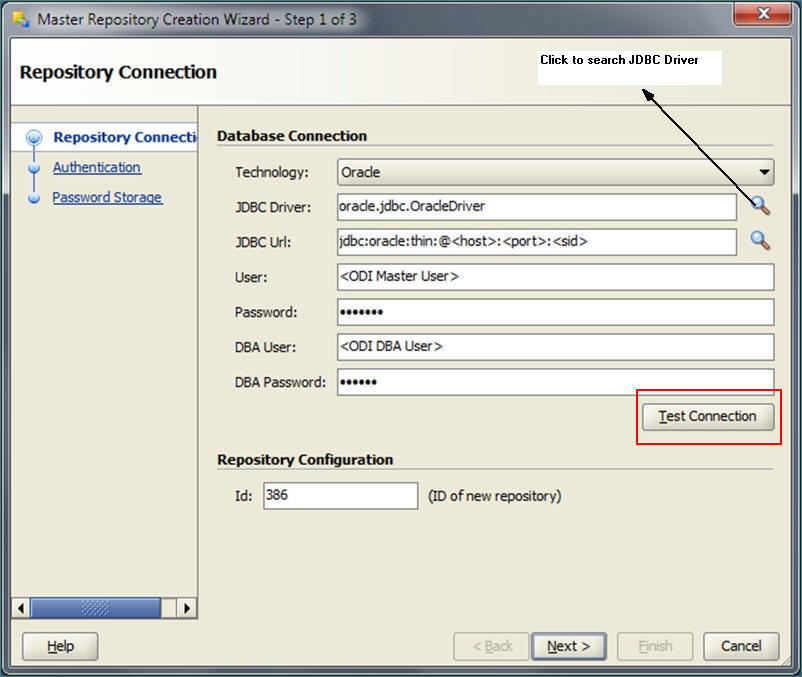
In the Database Connection section:
Enter the required JDBC Driver in the JDBC Driver field. You can click the Search icon close to the JDBC Driver field to search for the available list of drivers.
Enter the required JDBC URL in the JDBC Url field. You can click the Search icon close to the JDBC Url field to search for the available list of URL.
Enter the name of the ODI Master Repository User Name in the User field. You have already created the ODI Master Repository User Name (for example, odi_master) using Section 5.1.1, Creating the Database Users for Master and Work Repositories of this guide.
Enter the password for the ODI Master Repository User in the Password field. You have already created the ODI Master Repository Password using Section 5.1.1, Creating the Database Users for Master and Work Repositories of this guide.
Enter the name of the ODI DBA User Name, which you want to create, in the DBA User field. The ODI DBA User is created as per your inputs in this field.
Enter the password for the ODI DBA User in the Password field.
In the Repository Configuration section, specify the ID for the Master Repository. For example, 386. You must not enter 588 in this field as it would result in an error message while importing the AM.zip file. This ID has already been used while creating the AM.zip file, which you will be importing in the subsequent sections of this guide.
Click Test Connection, as highlighted in the following figure:
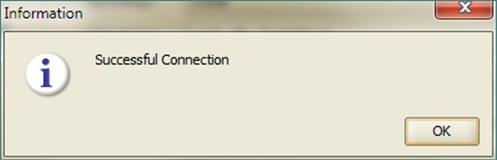
If successful, the Information dialog box is displayed with the Successful Connection message, as depicted in the following figure:
Click OK.
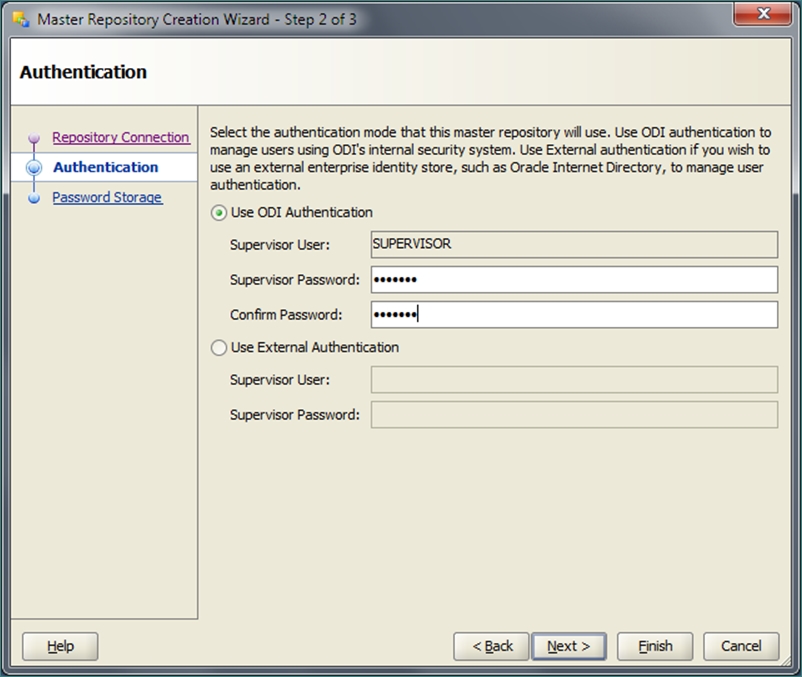
Click Next on the Master Repository Creation Wizard. This displays the Authentication screen on the Master Repository Creation Wizard, as depicted in the following figure:
On the Authentication screen:
Enter the password for the SUPERVISOR user in the Supervisor Password field. The Password that you enter in this field will be used later in the configuration process.
Re-enter the password in the Confirm Password field.
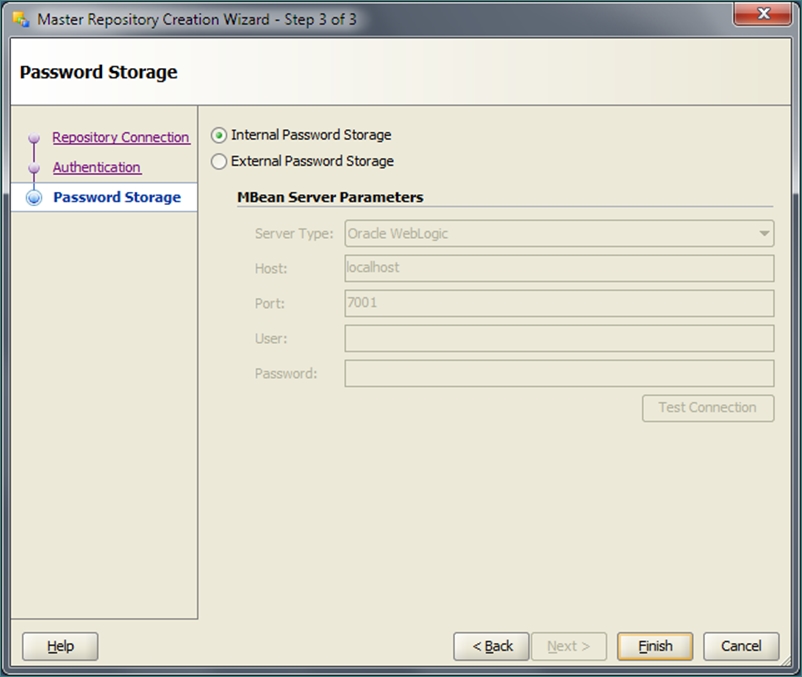
Click Next. This displays the Password Storage screen, as shown in the following figure:
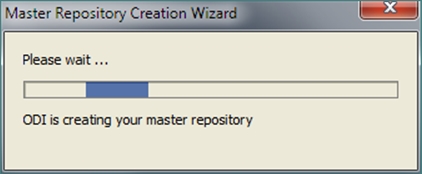
Click Finish. This displays the Master Repository Creation Wizard with the ODI is creating your master repository message, as depicted in the following figure:
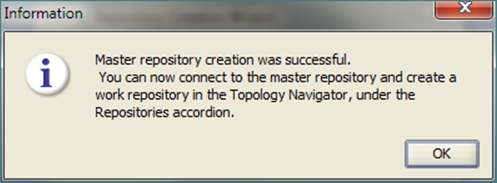
Subsequently, this displays the Information dialog box with the confirmation of the successful Master Repository Creation, as depicted in the following figure:
Click OK to complete the creation of the Master Repository.
Once you have created the Master Repository, you also need to create a login for the repository. To do so, execute the following steps:
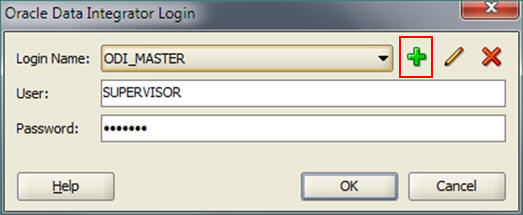
On the Oracle Data Integrator Login screen, click the + icon, as highlighted in the following figure:
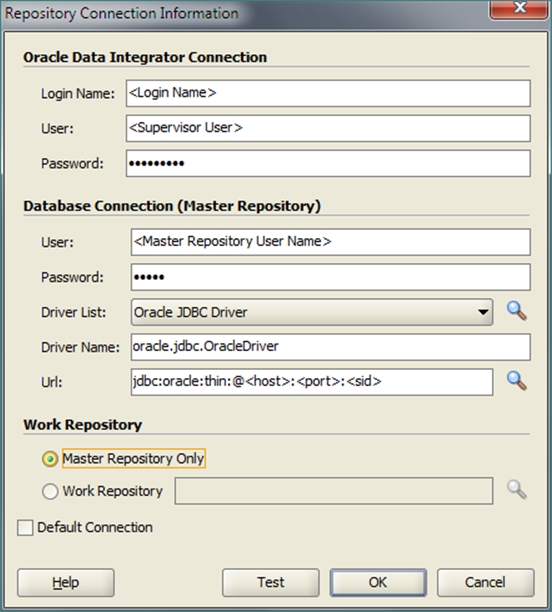
This displays the Repository Connection Information screen, as depicted in the following figure:
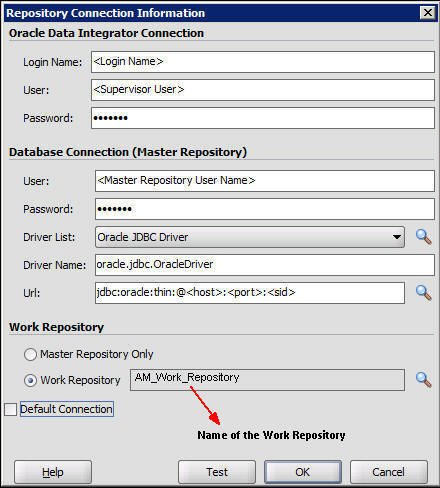
On the Repository Connection Information screen:
Specify the login name for the Repository in the Login Name field.
Enter the name of the SUPERVISOR user in the User field.
Enter the password for the SUPERVISOR user in the Password field. This password was specified in step 4 (a) of the steps to create the Master Repository section.
In the Database Connection section, enter the Master Repository User Name and Password in the User and Password fields respectively. You have already created the ODI Master Repository User Name (for example, odi_master) and Password using Section 5.1.1, Creating the Database Users for Master and Work Repositories of this guide.
Enter the database details in the Driver List, Driver Name and URL fields. You can also click the Search icon adjacent to the Driver List and URL fields to search for the required Driver List and URL.
Click OK. This creates a login for the Master Repository.
To create the Work Repository, execute the following steps:
Open the Oracle Data Integrator and connect to the repository using the Master Repository credentials that you have just created, as mentioned in the previous section.
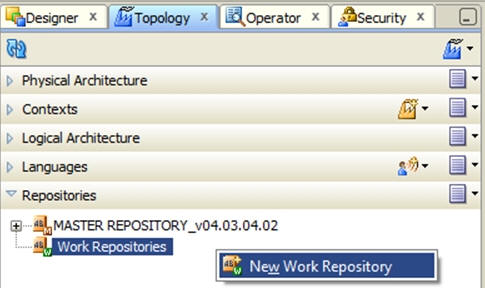
Select the Topology tab.
In the Repositories section, right-click Work Repositories and select New Work Repository, as depicted in the following figure:
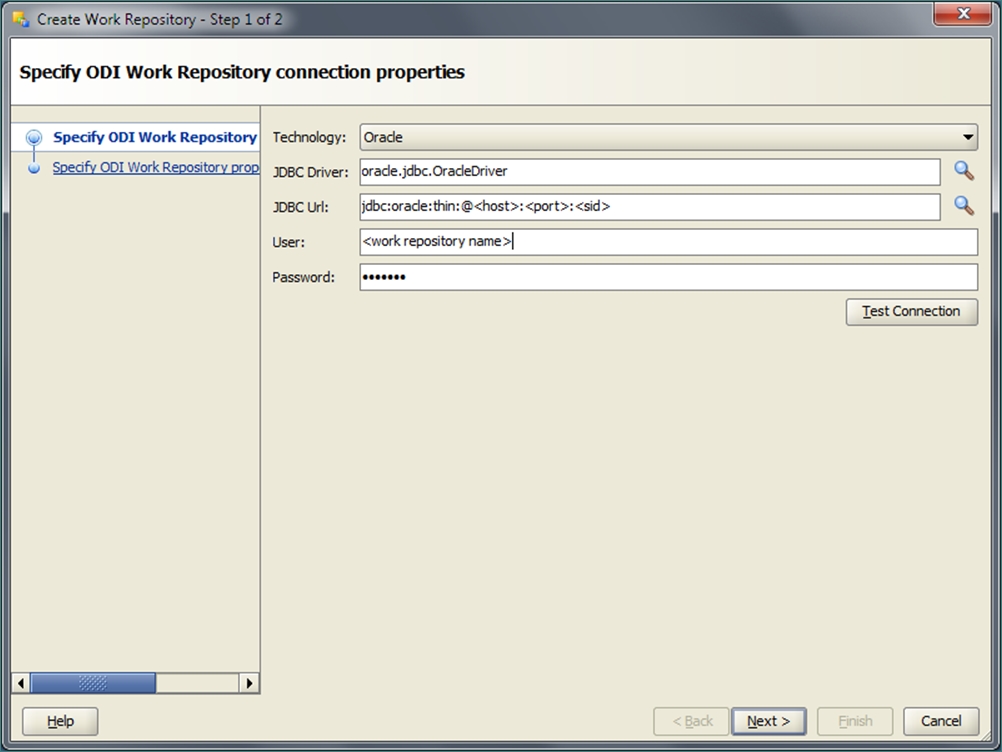
This displays the Specify ODI Work Repository connection properties screen, as depicted in the following figure:
Enter the database details in the JDBC Driver and JDBC Url fields. You can also click the Search icon close to the fields to search for the required JDBC Driver and JDBC URL.
Enter the Work Repository User Name in the User field. You have already created the ODI Work Repository User Name (for example, odi_work) using Section 5.1.1, Creating the Database Users for Master and Work Repositories of this guide.
Enter the password for the Work Repository User in the Password field. You have already created the ODI Work Repository User Name using Section 5.1.1, Creating the Database Users for Master and Work Repositories of this guide.
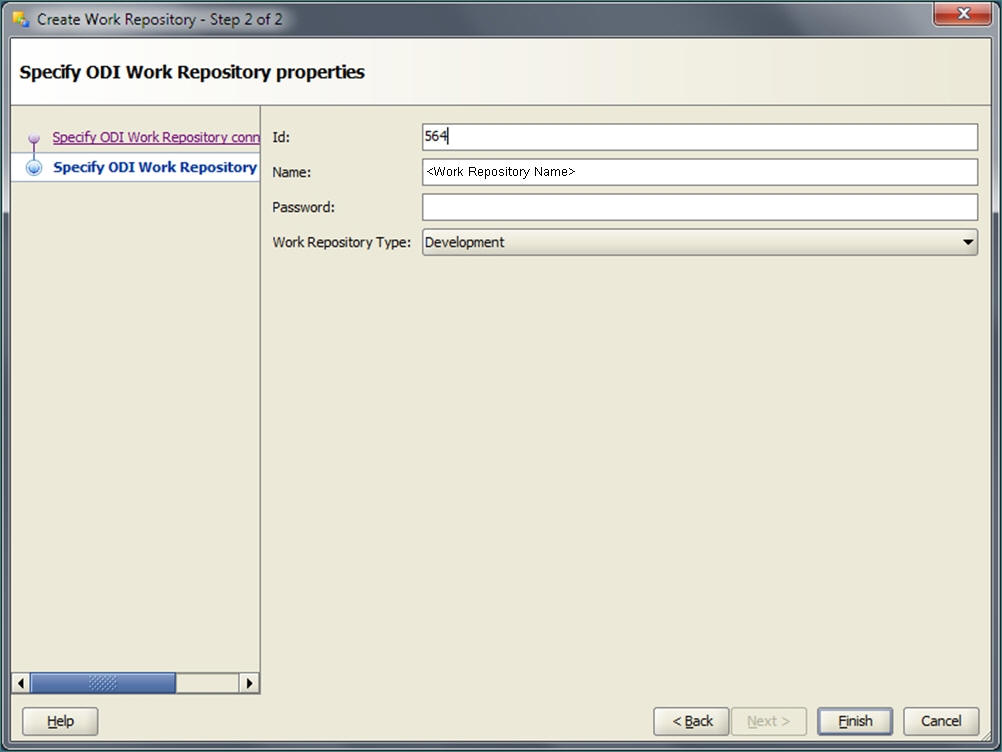
Click Next. This displays the Specify ODI Work Repository properties screen, as depicted in the following figure:
Specify the ID for the Work Repository in the Id field. For example, 564. You must not enter 589 in this field as it would result in an error message while importing the AM.zip file. This ID has already been used while creating the AM.zip file, which you will be importing in the subsequent sections of this guide.
Enter the name for the Work Repository in the Name field. For example, AM_Work_Repository.
Enter the password for the Work Repository in the Password field.
Select Development from the Work Repository Type drop-down list.
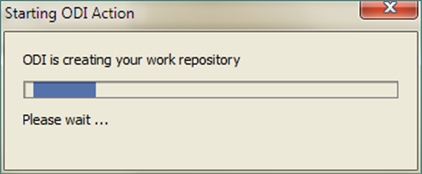
Click Finish. This displays the Starting ODI Action dialog box with the ODI is creating your work repository message, as depicted in the following figure:
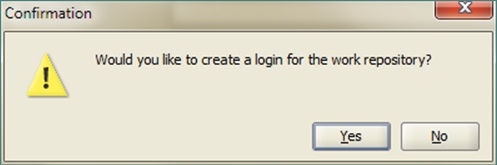
Subsequently, this displays the Confirmation dialog box with the option to create a login for the Work Repository, as depicted in the following figure:
Click Yes if you want to create a login for the Work Repository. If you click No, you can perform the steps for creating a login for the Repository, as mentioned below (Figure 5-17).
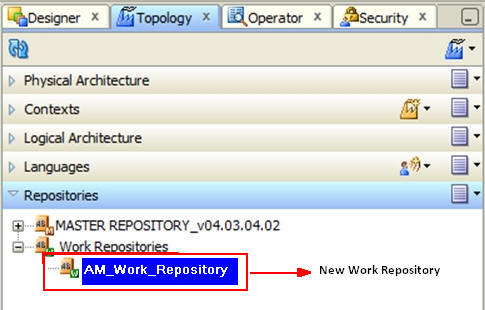
Once done, this creates a Work Repository in the Work Repositories folder of the Repositories section, as depicted in the following figure:
Once you have created the Work Repository, you also need to create a login for the repository. To do so, execute the following steps:
On the Oracle Data Integrator Login screen, click the + icon, as highlighted in the following figure:
This displays the Repository Connection Information screen, as depicted in the following figure:
On the Repository Connection Information screen:
Specify the login name for the Repository in the Login Name field.
Enter the name of the SUPERVISOR user in the User field.
Enter the password for the SUPERVISOR user in the Password field. This password was specified in step 4 (a) of the steps to create the Master Repository section.
In the Database Connection section, enter the Master Repository User Name and Password in the User and Password fields respectively. You have already created the ODI Master Repository User Name (for example, odi_master) and Password using Section 5.1.1, Creating the Database Users for Master and Work Repositories, of this guide.
Enter the database details in the Driver List, Driver Name, and URL fields. You can also click the Search icon adjacent to the Driver List and URL fields to search for the required Driver List and URL.
In the Work Repository section:
Select the Work Repository radio button and enter the name of the Work Repository in the adjacent text box (for example, AM_Work_Repository), which you have created in the previous section. You can also click the Search icon adjacent to the Work Repository name text box.
Click OK. This creates a login for the Work Repository.
Once you have created the Master and Work Repositories, you can now import the AM.zip file using the following procedure:
Open the Oracle Data Integrator and connect to the repository using the Work Repository credentials that you have just created, as mentioned in the previous section.
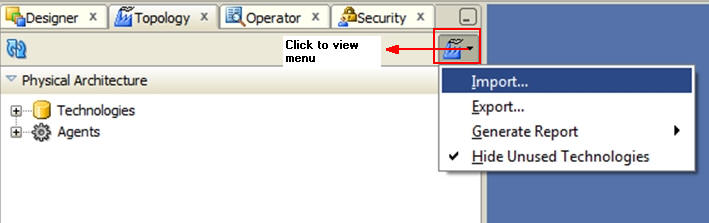
Click the down arrow just below the Designer, Topology, Operator, and Security tabs. This displays a menu, as depicted in the following figure:
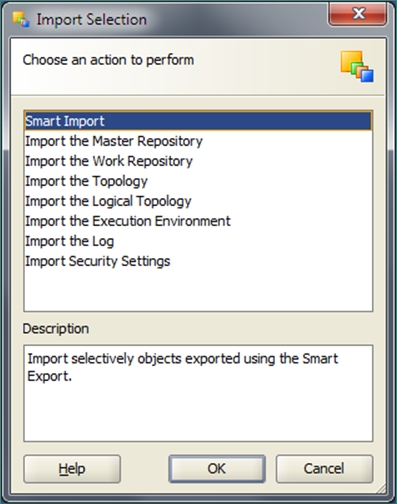
Click Import. This displays the Import Selection dialog box, as shown in the following figure:
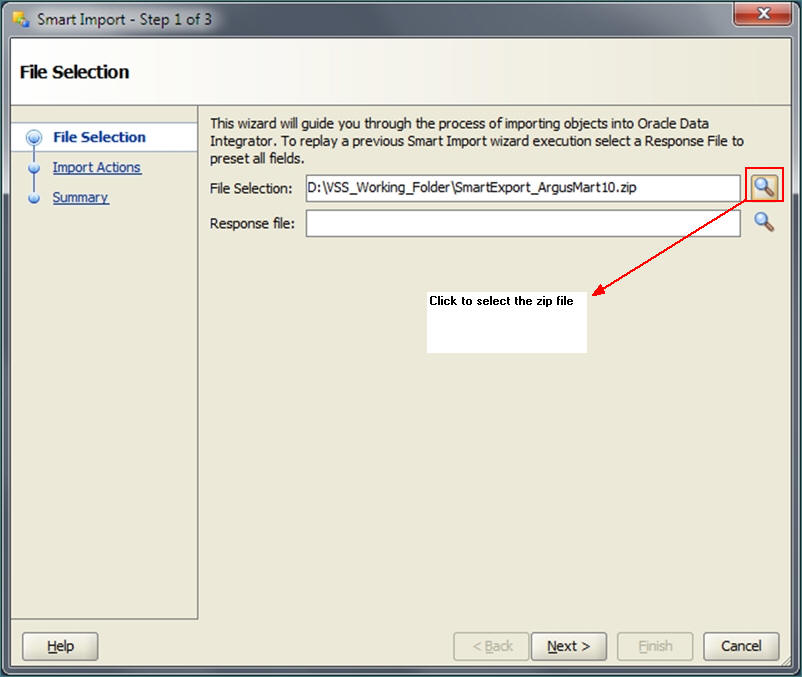
Select Smart Import and click OK. This displays the Smart Import window, as depicted in the following figure:
Click the Search icon close to the File Selection field. This displays the Select an import file window.
Navigate to the AM.zip file, saved at the following location:
...\ArgusMart\ODI\AM.zip
Select the AM.zip file and click Open. This displays the complete path of the zip file in the File Selection field. Keep the Response file field as blank.
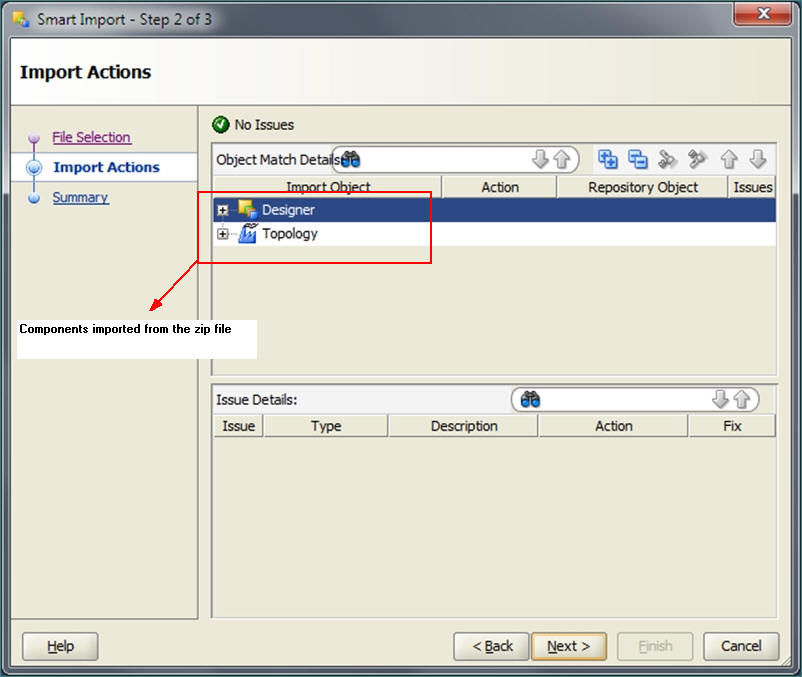
Click Next. This displays the Please wait window with a Matching Import Objects message. Subsequently, this again displays the Smart Import window listing the components that will be imported from the zip file using the Import Actions screen, as depicted in the following figure:
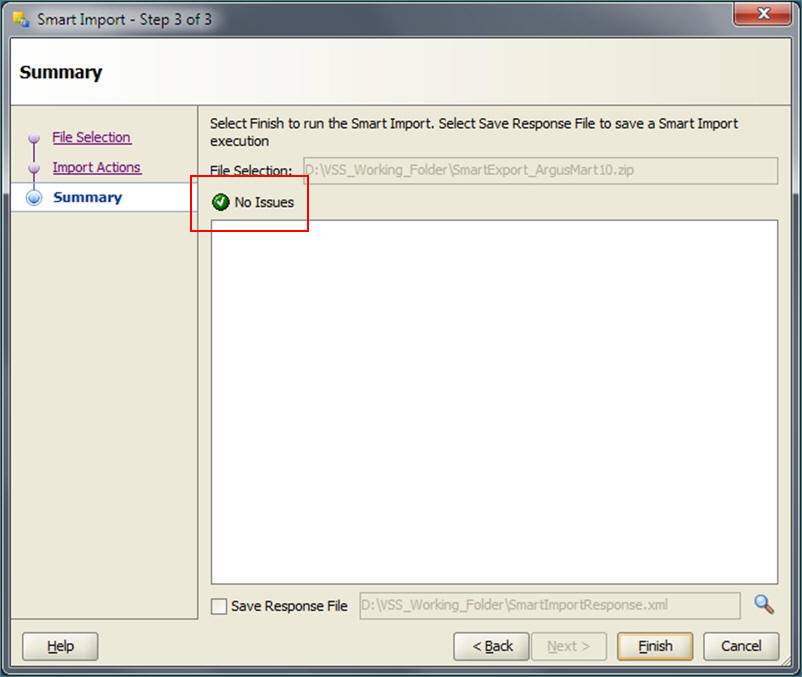
Click Next. This displays the Summary screen with the No issues message if there are no errors in the import process, as depicted in the following figure:
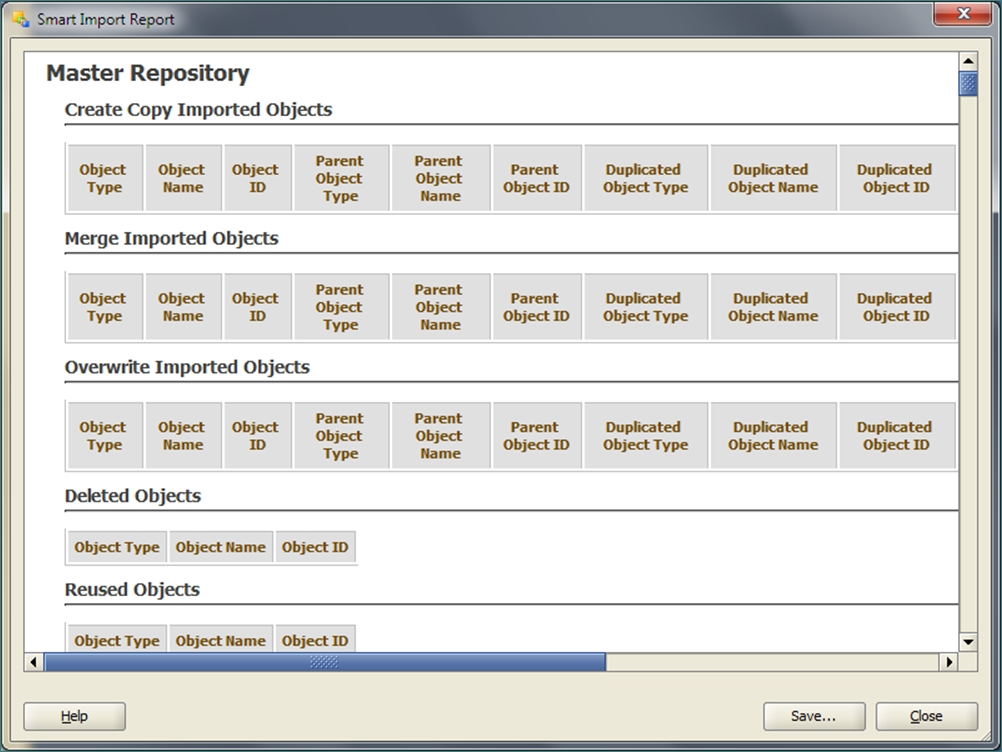
Click Finish. This displays the Please wait window with a Import in progress message. Subsequently, this displays the Smart Import Report window listing the objects imported using the zip file, as shown in the following figure:
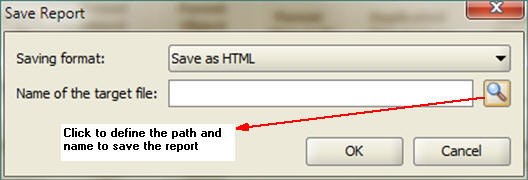
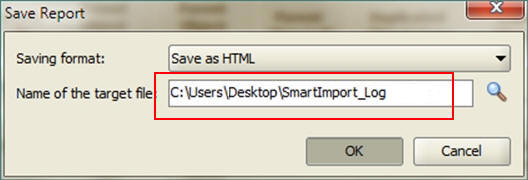
Click Save. This displays the Save Report window, as depicted in the following figure:
Click the Search icon close to the Name of the target file field. This displays the Save window.
Navigate to the path where you want to save the report and enter the name for the report in the File Name field.
Click Save. This displays the name of the report file along with the complete path in the Name of the target file field, as shown in the following figure:
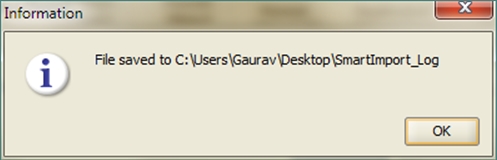
Click OK. This displays the Information dialog box displaying the path where the report file has been saved, as depicted in the following figure:
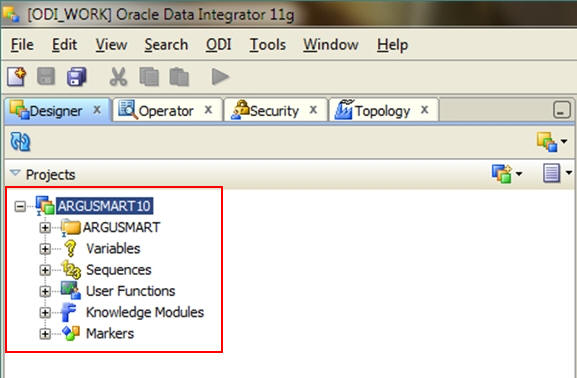
Click OK. This completes the steps to import the AM zip file. You can verify this using the Designer tab of Oracle Data Integrator. You can now view AM specific folders in the Designer tab such as ARGUSMART10 in the Projects section, as depicted in the following figure:
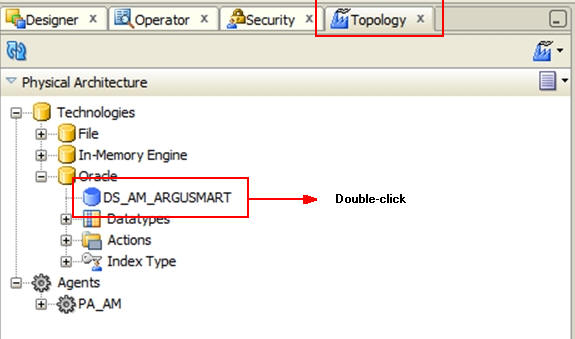
To create and test the Data Server connection, execute the following procedure:
Select the Topology tab and double-click DS_AM_ARGUSMART in the Oracle folder of the Physical Architecture section, as depicted in the following figure:
This displays the connection details in the right pane, with Definition selected by default, as depicted in the following figure:
Enter the name of the Argus ETL User (AM_ETL_USER) in the User field. This user was created in the Creating the Database Schema section of this guide.
Enter the password for the Argus ETL User in the Password field.
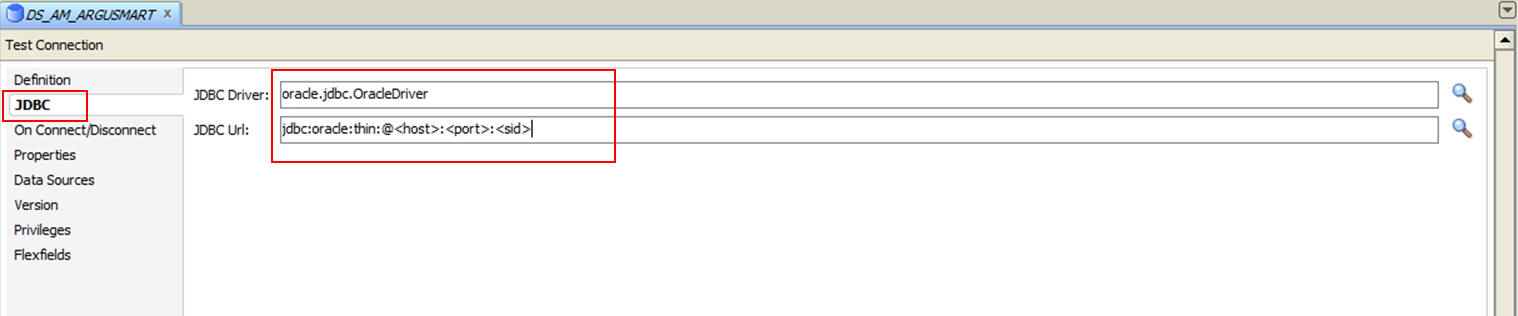
Select JDBC and enter database details of the Argus Mart schema in the JDBC Driver and JDBC Url fields, as depicted in the following figure:
You can also click the Search icon close to the JDBC Driver and JDBC Url fields to search for the required JDBC Driver and JDBC Url.
Click Test Connection, as highlighted in the following figure:
This displays a Confirmation to save data before testing the connection.
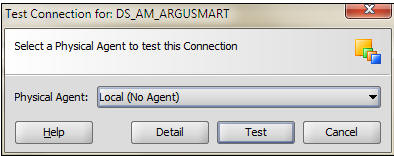
Click OK. This displays the Test Connection dialog box, as depicted in the following figure:
Select Local from the Physical Agent drop-down list.
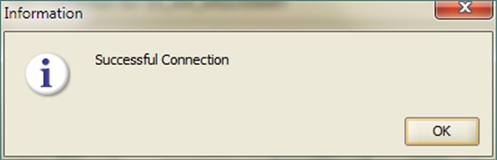
Click OK. This displays an Information dialog box with the Successful Connection message, as depicted in the following figure:
Click OK. This completes the steps to create and test the Data Server connection.
To create a new physical schema, execute the following steps:
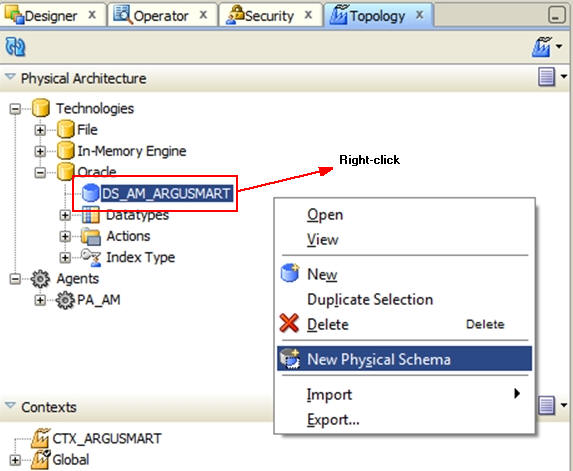
Select the Topology tab and right-click DS_AM_ARGUSMART in the Oracle folder of the Physical Architecture section. This displays a menu, as depicted in the following figure:
Select New Physical Schema.
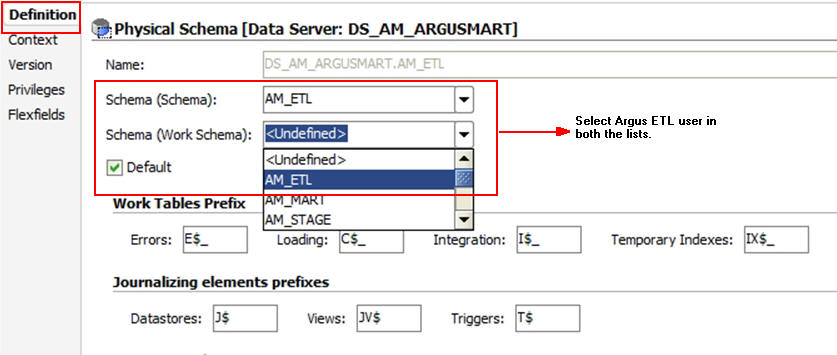
This displays the Physical Schema screen, where Definition is selected by default.
Select the Argus ETL User (AM_ETL_USER) from the Schema drop-down list. This user was created in Creating the Database Schema section of the guide.
Select the Argus ETL User (AM_ETL_USER) again from the Schema (Work Schema) drop-down list, as depicted in the following figure:
Select Context and click the + symbol. This adds a row in the empty space below the Context and Logical Schema options, as depicted in the following figure:
Select CTX_ARGUSMART from the Context drop-down list.
Select LS_AM_ARGUSMART from the Logical Schema drop-down list, as depicted in the following figure:
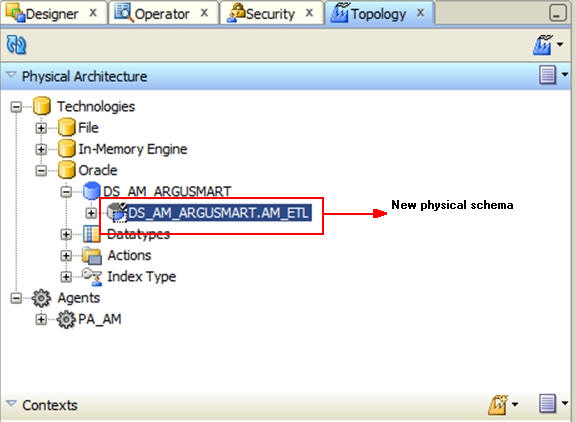
Click Save on the menu bar.
This displays the new physical schema in the Oracle folder of the Physical Architecture section, as depicted in the following figure:
To validate the Load Plan, execute the following steps:
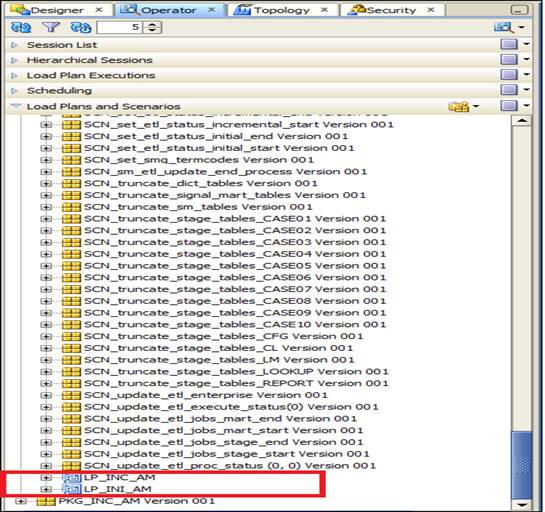
Double-click the LP_INI_AM Load Plan in the Load Plans and Scenarios > SCN_LP_ARGUSMART10 section of the Operator tab, as shown in the following figure:
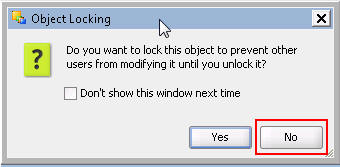
If the Object Locking screen is displayed, you can click No and proceed with the Validation process, as depicted in the following figure:
This displays the Load Plan details in the right pane, as depicted in the following figure:
Click Validate. This displays the following confirmation, if there are no issues associated with the Load Plan:
This section explains the tasks that you need to execute to manage the ODI Agent.
This section comprises the following sub-sections:
This section explains the tasks that you need to execute to manage the Standalone ODI Agent.
This section comprises the following sub-sections:
Once you have installed the standalone ODI Agent, you also need to set it up using the following steps:
Open the Oracle Data Integrator, and connect to the repository using the Work Repository credentials.
Navigate to Topology > Physical Architecture > Agents and double-click PA_AM. This displays the Agent details in the right pane.
Enter the Standalone Agent IP Address in the Host field, as depicted in the following figure:
Note:
You can change the default port for AM using this screen, if required.Navigate to the location, where ODI is installed and open the bin sub-folder.
Example: ODI_AGENT_HOME\oracledi\agent\bin
Open the odiparams.bat file in a text editor.
Edit the odiparams.bat file according to the list of changes mentioned in Table 5-1. The following are the contents of a sample odiparams.bat file:
set ODI_MASTER_DRIVER=oracle.jdbc.OracleDriverset ODI_MASTER_URL=jdbc:oracle:thin:@<HOST>:<PORT>:<SID>set ODI_MASTER_USER=<ODI Master Repository User Name>set ODI_MASTER_ENCODED_PASS=<encoded password>REM #REM # User credentials for agent startup programREM #set ODI_SUPERVISOR=SUPERVISORset ODI_SUPERVISOR_ENCODED_PASS=<encoded password>REM #REM # User credentials for ODI toolsREM #set ODI_USER=%ODI_SUPERVISOR%set ODI_ENCODED_PASS=%ODI_SUPERVISOR_ENCODED_PASS%REM #REM # Work Repository NameREM #set ODI_SECU_WORK_REP=<Work Repository>
The following table lists the required modifications in the odiparams.bat file:
Table 5-1 Required Modifications in the odiparams.bat file
| Parameter | Description |
|---|---|
|
ODI_MASTER_DRIVER and ODI_MASTER_URL |
Refers to the database details |
|
ODI_MASTER_USER |
Refers to the ODI Master Repository User Name, which you have created using Section 5.1.1 |
|
ODI_MASTER_ENCODED_PASS |
Refers to the ODI Master Repository User Password, which must encode using the steps given below the table |
|
ODI_SUPERVISOR |
Refers to the ODI SUPERVISOR User Name |
|
ODI_SUPERVISOR_ENCODED_PASS |
Refers to the ODI SUPERVISOR User Password, which must encode using the steps given below the table |
|
ODI_SECU_WORK_REP |
Refers to the Work Repository Name. For example, AM_Work_Repository. |
The following are steps that you need to execute to encode the ODI Master Repository and SUPERVISOR user password:
Open the Command window and change the directory to the ODI_AGENT_HOME\oracledi\agent\bin directory.
Where ODI_AGENT_HOME refers to the location, where ODI is installed.
The password information is always stored as an encrypted string in the odiparams.bat file. You need to encrypt the ODI Master Repository as well as the SUPERVISOR Password using the encode command.
Encode the ODI Master Repository User password using the encode command, as depicted in the following figure:
Where password refers to the Password for the ODI Master Repository User.
Similarly, encode the SUPERVISOR user password using the encode command, as shown in step 2 of this procedure.
Once you have made the required modifications to the odiparams.bat file, you can start the ODI Agent by navigating to the bin folder using the CD command, and execute the agent.bat command using the Command Prompt, as shown below :
CD/d C:\<ODI_AGENT_HOME>\oracledi\agent\bin agent.bat "-NAME=PA_AM" "-PORT=20588"
Where C:\ODI_AGENT_HOME\oracledi\agent\bin refers to the local file system path where the ODI Agent is installed.
Create the Java EE Agent for ODI with OracleDIAgent, using the following tutorial link:
Note:
You must create the Java EE Agent for ODI with OracleDIAgent (Case-sensitive) as the name.http://www.oracle.com/webfolder/technetwork/tutorials/obe/fmw/odi/odi_11g/setup_jee_agent/setup_jee_agent.htm
The Load Plan comprises a list of steps, which can be executed in sequence or in parallel. You can reduce the time taken by the ETL process by selecting to run the steps of a Load Plan in parallel.
This section explains the procedure for parallel execution of the steps of a Load Plan. In addition, this section also suggests the list of tables of a Load Plan that you can select for parallel execution.
Note:
The steps mentioned in this section enable you to reduce the total time taken to complete the ETL process. This is not a mandatory step to configure AM.To execute the steps of a Load Plan in parallel, execute the following procedure:
Double-click the LP_INI_AM Load Plan in the Load Plans and Scenarios section of the Designer tab, as shown in the following figure:
This displays the Load Plan details in the right pane.
Select Steps. This lists all the steps of a Load Plan.
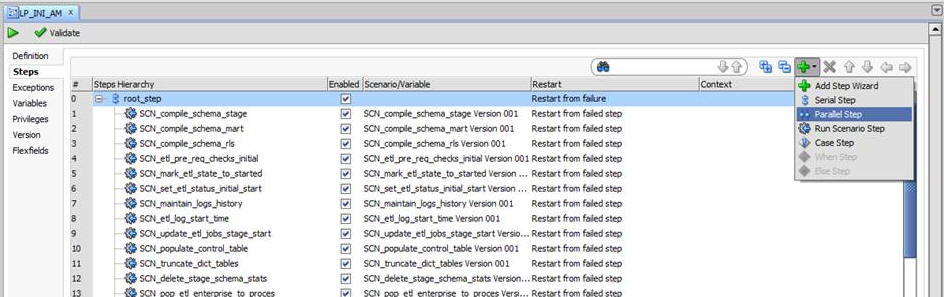
Click the down arrow next to the + icon. This displays a menu, as depicted in the following figure:
Select Parallel Step. This adds a Parallel step to the existing list of steps.
Use the Navigation buttons (Up, Down, Right, and Left arrow keys) adjacent to the + icon, to move the Parallel Step, according to the requirements.
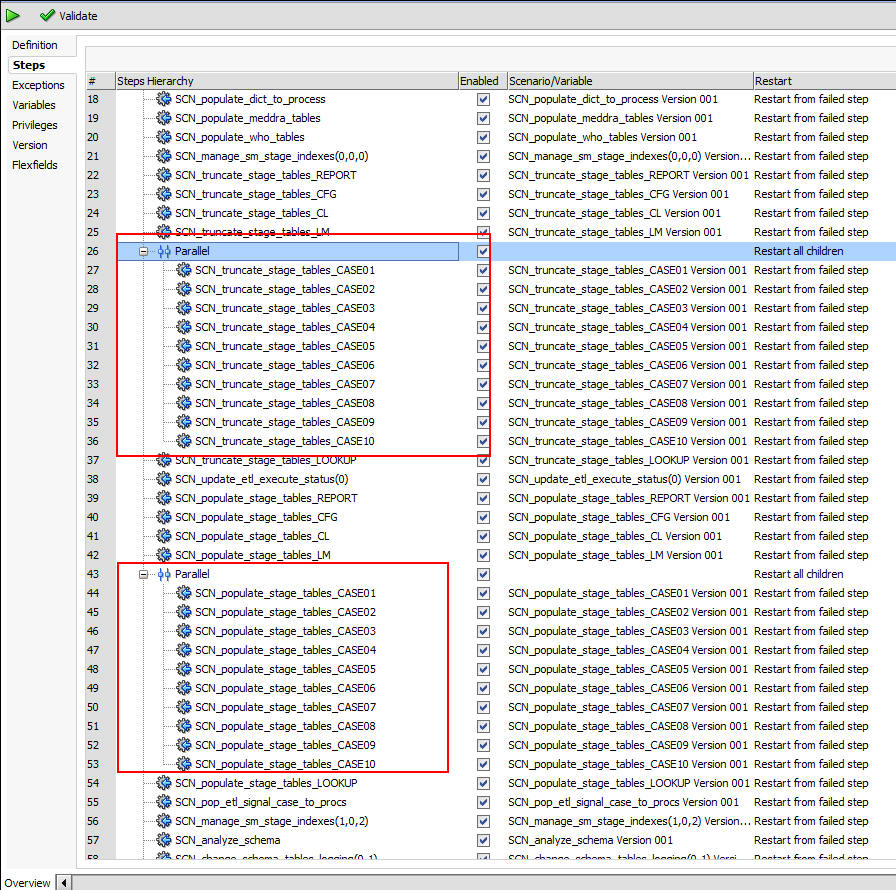
You can move all the steps that you want to execute in parallel, below the Parallel Step and use the Right Arrow key, to enable all those steps for parallel execution, as shown in the following figure:
The AM.zip file, which you have imported using Importing AM.zip File section of this chapter has the provision to execute the Staging Case Table Truncation and Population in parallel, as highlighted in Figure 5-48. The process of Truncation comprises 61 tables, which have been divided into 10 categories. These categories have been named as SCN_truncate_stage_tables_CASE01, SCN_truncate_stage_tables_CASE02, and so on. Each category contains a list of tables, which are sorted based on size. The larger tables are executed first as compared to the smaller ones.
Similarly, the process of Population also consists of 61 tables, which are divided into 10 categories. These categories have been named as SCN_populate_stage_tables_CASE01, SCN_populate_stage_tables_CASE02, and so on.
|
Copyright © 2011, 2013, Oracle and/or its affiliates. All rights reserved. Legal Notices |
|