Contents
This chapter describes how to configure the OAuth 2.0 support provided with the API Gateway. It describes how to enable the OAuth 2.0 endpoints used to manage client applications, and how to import the pre-registered examples provided with the API Gateway. It how explains how to migrate existing OAuth 2.0 applications.
The API Gateway provides the following endpoints used to manage OAuth 2.0 client applications:
| Description | URL |
|---|---|
|
Authorization Endpoint (REST API) |
|
|
Token Endpoint (REST API) |
|
|
Token Info Endpoint (REST API) |
|
|
Revoke Endpoint (REST API) |
|
|
Oracle Client Application Registry (HTML Interface) |
|
|
Oracle Client Application Registry (REST API) |
|
In this table,
GATEWAY
refers to the machine on which the API Gateway is installed.
![[Important]](../common_oracle/images/admon/important.png) |
Important |
|---|---|
|
You must first enable the OAuth listener port in the API Gateway before these endpoints are available. |
Enabling OAuth endpoints
To enable the OAuth management endpoints on your API Gateway, perform the following steps:
-
In the Policy Studio tree, select Listeners -> API Gateway -> OAuth 2.0 Services -> Ports.
-
Right-click the OAuth 2.0 Interface in the panel on the right, and select Edit.
-
Select Enable Interface in the dialog.
-
Click the Deploy button in the toolbar.
-
Enter a description and click Finish.
![[Note]](../common_oracle/images/admon/note.png) |
Note |
|---|---|
|
On Linux-based systems, such as Oracle Enterprise Linux, you must open the firewall to
allow external access to port |
The API Gateway ships with a number of pre-registered sample client applications. This section explains how to import these applications into the Client Application Registry.
|
Note |
|---|---|
|
The sample client applications are for demonstration purposes only and should be removed before moving the Authorization Server into production. |
For example, the default example client applications include the following:
| Client ID | Client Secret |
|---|---|
|
|
|
|
|
|
Importing the sample client applications
To import the pre-registered example client applications, perform the following steps:
-
Access the Client Application Registry Web interface at the following URL:
https://localhost:8089
-
Enter the default username/password of
admin/changeme. Alternatively, if you have installed the API Management Solution Pack, enterapiadmin@localhost/changeme. -
Click the Import button at the top right of the screen.
-
Select the following sample file in the dialog:
$VDISTDIR/samples/scripts/oauth/sampleapps.dat
VDISTDIRspecifies the directory in which the API Gateway is installed. -
You can also enter a Decryption Secret in the dialog. However, the
sampleapps.datfile is in plaintext format, and does not require a password. -
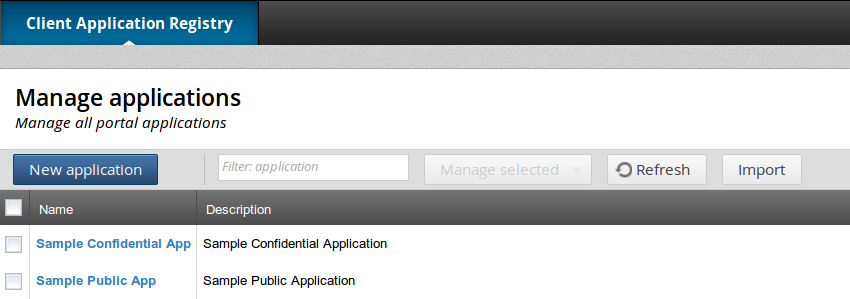
Click OK to import the two sample applications. The following screen shows these applications imported into the Client Application Registry:
Alternatively, you can use the following script to import the sample client application data without using the Client Application Registry Web interface:
$VDISTDIR/samples/scripts/oauth/importSampleData.py
You can edit this script to configure your user credentials and file location.
If you are migrating from API Gateway version 11.1.2.0.x, you can use the following script to migrate your existing OAuth client applications:
$VDISTDIR/samples/scripts/oauth/migrateFrom71.py
This script enables you to first export your existing client application data, which
you can then import as described in the section called “Importing Client Applications”.
This script has a --password parameter if you wish to encrypt the exported
data for transport.
Migrating your existing client applications
To migrate your existing client applications, perform the following steps:
-
After installing API Gateway 11.1.2.2.0, copy the
$VDISTIR/samples/oauth/migrateFrom71.pyfile to the same location in your existing API Gateway 11.1.2.0.x installation:$VDISTIR/samples/oauth/migrateFrom71.py
-
In your existing API Gateway 11.1.2.0.x installation, ensure that
$VDISTIR/samples/scripts/common.pyhas the correctdefServerNameanddefGroupNamevariables set for your existing topology. -
Run the
migrateFrom71.pyscript against your running version 11.1.2.0.x Admin Node Manager and API Gateway. The script outputs the following file:$VDISTIR/samples/oauth/appregistry/encodedapps.dat
Note If you wish to encrypt the data, run the script with the
--passwordparameter. -
Check the
encodedapps.datfile to ensure that the export has been successful. -
Import the
encodedapps.datoutput by the script into a running API Gateway 11.1.2.2.0 using the Client Application Registry web interface. For more details, see the section called “Importing Client Applications”. When importing encrypted data, you must enter a password in the Decryption Secret field.
If you are migrating from a previous API Gateway version, you must upgrade your API Gateway configuration. To generate an upgraded API Gateway version 11.1.2.2.0 configuration, perform the following steps:
-
Run the following script from your version 11.1.2.2.0 installation directory:
<11.1.2.2.0_install>/platform/bin/upgradeConfig --groups -d <previous-version-install>
  -o path/to/upgrade/output/
-
In Policy Studio, select File -> Open File.
-
Specify the following file:
path/to/upgrade/output/groups/group-2/conf/<guid>/configs.xml -
In the open configuration in the Policy Studio tree, under Key Property Stores, delete ApiKeyStore and ClientApplicationRegistry.
-
Select File -> Save -> Deployment Package to export a
.fedfile. -
Start the version 11.1.2.2.0 Admin Node Manager and API Gateway instance.
-
In Policy Studio, close the connection to the file, and connect to the now running 7.2 Admin Node Manager. Before connecting to the API Gateway instance, click Deploy.
-
Click Browse for .fed, and select the
.fedfile exported previously in step 4. -
Import the client applications using the the web-based portal on
https://localhost:8089by clicking Import, and browsing to the file created in the previous section:<11.1.2.2.0_install>/samples/oauth/appregistry/encodedapps.dat>
For more details on upgrading API Gateway configuration, see the API Gateway Installation and Configuration Guide.
