B Oracle Identity Manager Configuration Screens
This appendix describes the screens of the Oracle Identity Manager 11g Configuration Wizard that enables you to configure Oracle Identity Manager Server, Oracle Identity Manager Design Console, and Oracle Identity Manager Remote Manager.
This appendix contains the following topics:
B.1 Welcome
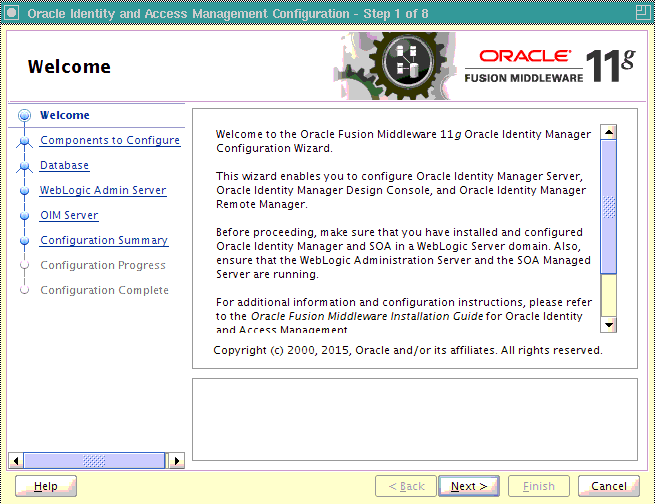
The Welcome screen is displayed each time you start the Oracle Identity Manager Configuration Wizard.
You can use the Oracle Identity Manager Configuration Wizard only once during initial setup for configuring Oracle Identity Manager Server. After configuring Oracle Identity Manager Server using this wizard, you cannot re-run this wizard to modify the configuration of Oracle Identity Manager. You must use Oracle Enterprise Manager Fusion Middleware Control to make such modifications. However, you can run this wizard on other machines, where Design Console or Remote Manager is configured, as and when needed.
Ensure that you have configured Oracle Identity Manager in a new or existing WebLogic domain before launching the Oracle Identity Manager Configuration Wizard to configure Oracle Identity Manager Server, Design Console on Windows, and Remote Manager.
If you are configuring Server, you must run this wizard on the machine where the WebLogic Administration Server is running (the Administration Server for the domain in which Oracle Identity Manager is deployed). Ensure that the Administration Server is up and running before you start configuring Oracle Identity Manager Server.
If you are configuring only Design Console, you must run this wizard on the Windows machine where Design Console should be configured. If you are configuring only Remote Manager, you must run this wizard on the machine where Remote Manager is being configured. Note that the Oracle Identity Manager Server should be configured before you can configure Design Console or Remote Manager.
B.2 Components to Configure
Use this screen to select the Oracle Identity Manager components that you want to configure. Oracle Identity Manager components include Server, Design Console, and Remote Manager.
Before configuring Oracle Identity Manager Server, Design Console or Remote Manager, ensure that you have configured Oracle Identity Manager in a new or existing WebLogic domain using the Oracle Fusion Middleware Configuration Wizard.
Figure B-2 Components to Configure Screen
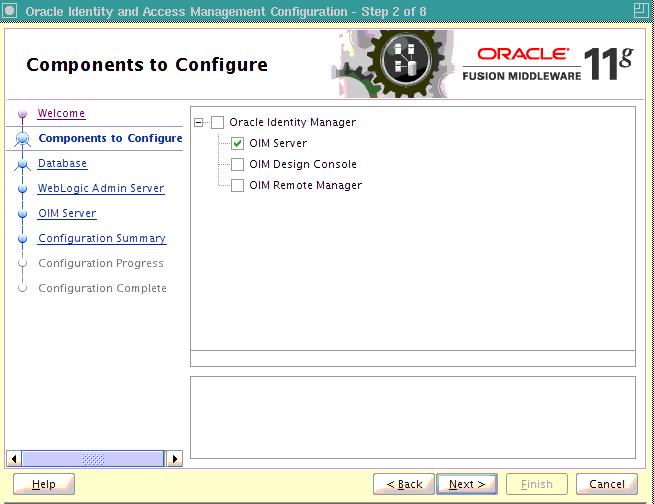
Description of ''Figure B-2 Components to Configure Screen''
Table B-1 describes the Oracle Identity Manager components that you can choose.
Table B-1 Oracle Identity Manager Configuration Choices
| Option | Description |
|---|---|
|
Oracle Identity Manager |
To configure Oracle Identity Manager Server, Design Console, and Remote Manager simultaneously on the same machine, select the Oracle Identity Manager option. |
|
OIM Server |
To configure only Oracle Identity Manager Server, select the OIM Server option. This option is selected, by default. Note that WebLogic Administration Server for the domain (the domain in which Oracle Identity Manager is deployed) should be up and running. |
|
OIM Design Console |
To configure only Oracle Identity Manager Design Console, select the OIM Design Console option. However, note that Oracle Identity Manager Server must be configured either on the local machine or on a remote machine before you can run Design Console on development machines. Design Console is supported on Windows operating systems only. |
|
OIM Remote Manager |
To configure only Oracle Identity Manager Remote Manager, select the OIM Remote Manager option. However, note that Oracle Identity Manager Server must be configured either on the local machine or on a remote machine before you can run Remote Manager. |
Note:
You can also select any combination of two of the three Oracle Identity Manager components.B.3 Database
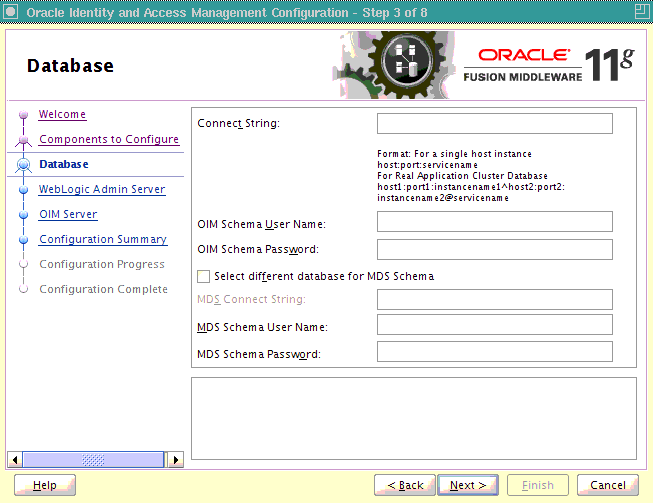
In this screen, you specify the database and schema information. Note that you should have created and loaded Oracle Identity Manager schemas using the Oracle Fusion Middleware Repository Creation Utility (RCU) before configuring Oracle Identity Manager Server. For information about creating and loading Oracle Identity Manager schemas, see Section 3.2.5, "Creating Database Schemas Using the Oracle Fusion Middleware Repository Creation Utility (RCU)".
You can use the same database or different databases for creating the Oracle Identity Manager schema and the Metadata Services schema.
Table B-2 describes the database connection information that you must specify.
Table B-2 Fields in the Database Screen
| Field | Description |
|---|---|
|
Connect String |
Enter the full path, listen port, and service name for your Oracle database. For a single host instance, the format of connect string is For example, if the hostname is aaa.bbb.com, port is 1234, and the service name is xxx.bbb.com, then you must enter the connect string for a single host instance as follows:
If you are using a Real Application Cluster database, the format of the database connect string is as follows:
|
|
OIM Schema User Name |
Enter the name of the schema user that you created for Oracle Identity Manager using the Oracle Fusion Middleware Repository Creation Utility. If you upgraded your existing Oracle Identity Manager schema to 11g Release 2 (11.1.2), enter the user name for your existing schema. |
|
OIM Schema Password |
Enter the password for the Oracle Identity Manager schema user that you set while creating the schema using the Oracle Fusion Middleware Repository Creation Utility (RCU). If you upgraded your existing Oracle Identity Manager schema to 11g Release 2 (11.1.2), enter the password for your existing schema. |
|
Select different database for MDS schema |
Select this check box if you want to use a different database for the Metadata Services (MDS) schema. |
|
MDS Connect String |
If you are using a different database for the Metadata Services (MDS) schema, enter the full path, listen port, and service name for the database associated with the MDS schema. The format of the connect string is similar to that of the standard Connect String. |
|
MDS Schema User Name |
Enter the name of the schema user that you created for AS Common Services - Metadata Services by using the Oracle Fusion Middleware Repository Creation Utility (RCU). If you upgraded your existing Metadata Services schema to 11g Release 2 (11.1.2), enter the user name for your existing schema. |
|
MDS Schema Password |
Enter the password for the AS Common Services - Metadata Services schema user that you set while creating the schema by using the Oracle Fusion Middleware Repository Creation Utility (RCU). If you upgraded your existing Oracle Identity Manager schema to 11g Release 2 (11.1.2), enter the password for your existing schema. |
B.4 WebLogic Admin Server
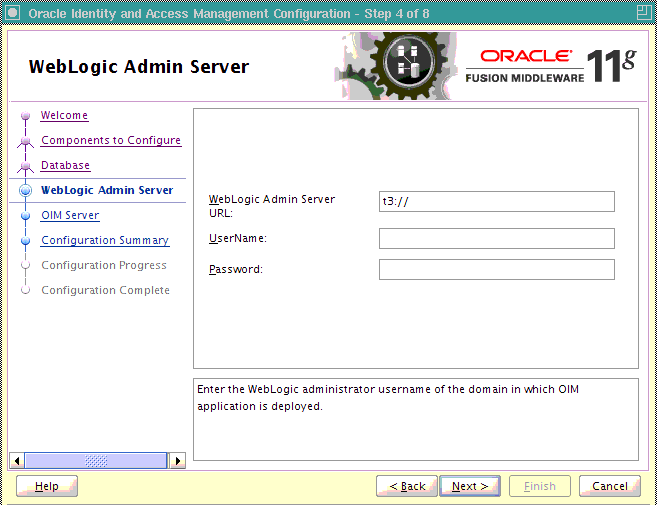
In this screen, you specify the t3 URL, user name, and password for the WebLogic administration domain in which the Oracle Identity Manager application is deployed. Ensure that the Administration Server is up and running.
Table B-3 describes the WebLogic Admin Server information that you must specify.
Table B-3 Fields in the WebLogic Admin Server Screen
| Field | Description |
|---|---|
|
WebLogic Admin Server URL |
Enter the t3 URL of the Administration Server for the WebLogic domain in the following format:
|
|
UserName |
Enter the WebLogic Administrator user name. |
|
Password |
Enter the WebLogic Administrator password. |
B.5 OIM Server
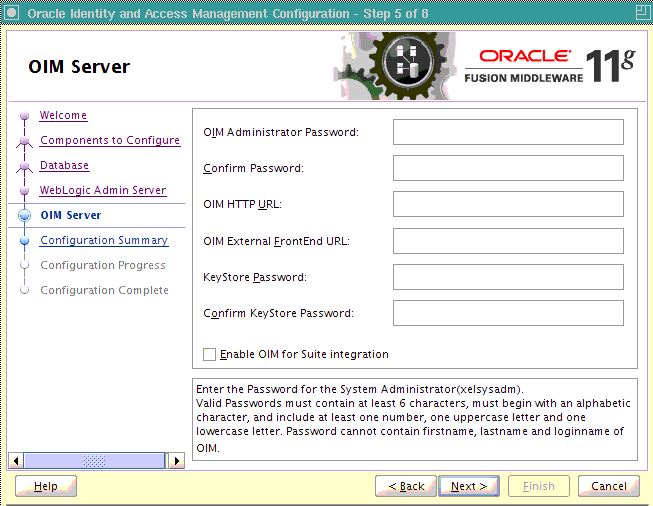
Use this screen to set a password for the for the system administrator (xelsysadm).
Table B-4 describes the Oracle Identity Manager Server parameters that you can configure.
Table B-4 Oracle Identity Manager Server Configuration Parameters
| Field Name | Description |
|---|---|
|
OIM Administrator Password |
Enter a new password for the administrator. A valid password contains at least six characters, begins with an alphabetic character, and includes at least one number, one uppercase letter and one lowercase letter. The password cannot contain first name, last name, or login name of Oracle Identity Manager. Note that you are not prompted to enter this password in upgrade scenarios. You must set a password only if you are performing a new 11g installation. |
|
Confirm Password |
Enter the new password again to confirm. |
|
OIM HTTP URL |
Enter the http URL that front-ends the Oracle Identity Manager application. For example, By default, this field contains the URL of the Oracle Identity Manager Managed Server. |
|
OIM External FrontEnd URL |
The OIM External Front End URL is of the format: For deployments where there is no Single Sign-On (SSO) configured but Oracle Identity Manager Managed Server is front-ended with Oracle HTTP Server, you must provide the http URL that front-ends the Oracle Identity Manager application. For deployments where Single Sign-On (SSO) is configured, provide the SSO URL where the Oracle Identity Manager user interface is available. For single node deployments where the Oracle Identity Manager Managed Server is not front-ended with Oracle HTTP Server, this field can be left blank. |
|
KeyStore Password |
Enter new password for the keystore. A valid password can contain 6 to 30 characters, begin with an alphabetic character, and use only alphanumeric characters and special characters like Underscore (_), Dollar ($), Pound (#). The password must contain at least one number. |
|
Confirm KeyStore Password |
Enter the new password again to confirm. |
|
Enable OIM for Suite integration |
Select the Enable OIM for Suite integration check box if you are planning to integrate Oracle Identity Manager with Oracle Access Manager. When you select this option, the Oracle Identity Manager Configuration Wizard configures LDAP sync to synchronize identity store information between the Oracle Identity Manager database store and the Oracle Access Manager LDAP directory service. |
Enabling OIM-LDAP Synchronization
In this screen, you can enable synchronization of Oracle Identity Manager roles, users, and their hierarchy to an LDAP directory if you are planning to integrate Oracle Identity Manager with Oracle Access Management.
If you want to enable LDAP Sync, you must first set up LDAP Sync for Oracle Identity Manager before selecting the Enable OIM for Suite integration option on this screen. For information about setting up OIM-LDAP Sync, see "Completing the Prerequisites for Enabling LDAP Synchronization" and "Creating OVD Adapters" in the Integration Guide for Oracle Identity Management Suite. After completing the prerequisites for enabling LDAP Synchronization, select the Enable OIM for Suite integration option.
B.6 LDAP Server
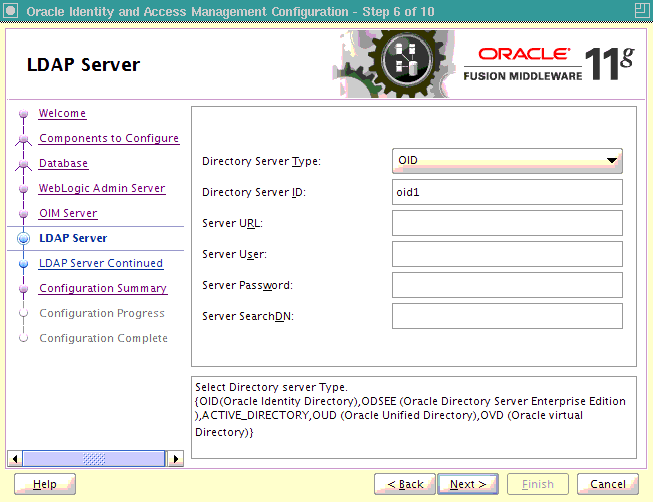
The LDAP Server screen is displayed only if you selected Enable OIM for Suite integration on the OIM Server screen. In this case, you will be connecting to the LDAP server to enable synchronization of the Oracle Identity Manager roles, users, and their hierarchy between the database and the LDAP directory used for Oracle Access Manager.
In the LDAP Server screen, you should specify the authentication information for the Directory Server.
Table B-5 describes the parameters that you must specify.
Table B-5 LDAP Server Information
| Field Name | Description |
|---|---|
|
Directory Server Type |
Select the desired Directory Server from the drop-down list. You have the following options:
|
|
Directory Server ID |
Enter the Directory Server ID. |
|
Server URL |
Enter the LDAP URL in the format:
For Microsoft Active Directory, the LDAP URL must be a SSL URL. |
|
Server User |
Enter the user name for the Directory Server administrator. For example: |
|
Server Password |
Enter the password for the Directory Server administrator. |
|
Server SearchDN |
Enter the Distinguished Names (DN). For example, This is the top-level container for users and roles in LDAP that is used for Oracle Identity Manager for reconciliation purposes. |
B.7 LDAP Server Continued
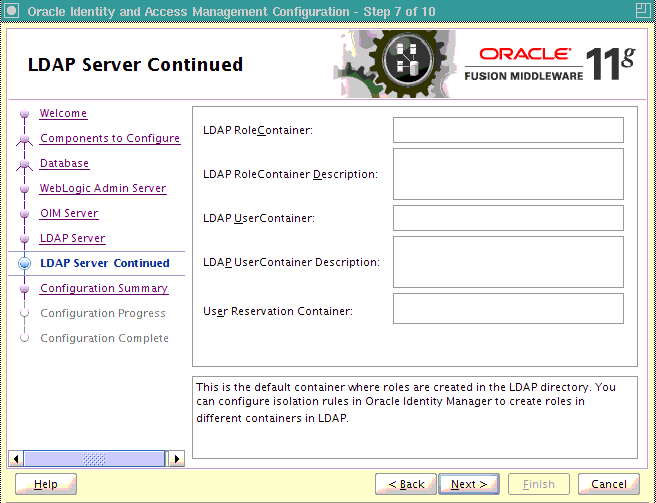
This screen is a continuation of the LDAP Server screen.
Table B-6 describes the LDAP parameters that you must specify.
Table B-6 LDAP Server Continued Information
| Field Name | Description |
|---|---|
|
LDAP RoleContainer |
Enter a name for the container that will be used as a default container of roles in the LDAP directory. |
|
LDAP RoleContainer Description |
Type a description for the role container. |
|
LDAP UserContainer |
Enter a name for the container that will be used as a default container of users in the LDAP directory. |
|
LDAP UserContainer Description |
Type a description for the user container. |
|
User Reservation Container |
Enter a name for the container that will be used for reserving user names in the LDAP directory while their creation is being approved in Oracle Identity Manager. When the user names are approved, they are moved from the reservation container to the user container in the LDAP directory. |
B.8 Configuration Summary
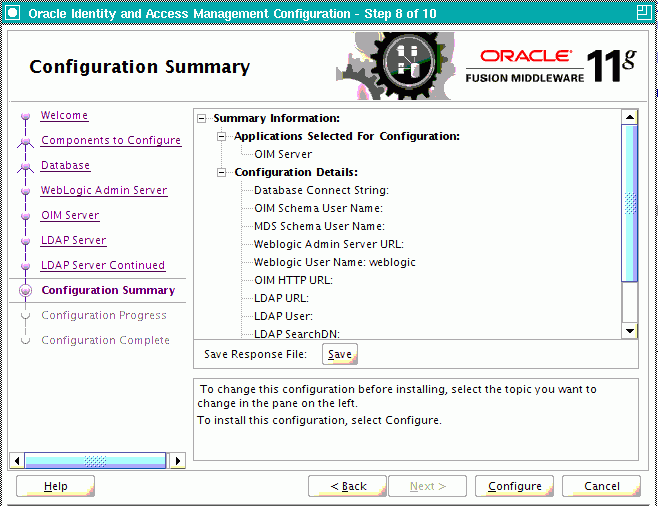
This screen displays a list of the applications or components you have selected for configuration. It includes the following information:
-
Location of your installation
-
Disk space that will be used for the installation
-
Applications or components you have selected for configuration
-
Configuration choices you made on different screens in the Oracle Identity Manager Configuration Wizard
Review this summary screen.
Additionally, you can select to create a response file from your installation selections by clicking on the Save button in the Save Response File field. A response file can be used for silent or non-interactive installations of software requiring no or very little user input.
Click Configure to start configuring the selected Oracle Identity Manager components.
