
|
|
|
Installing EAS Windows Services
Install the EAS Windows Services by following these steps:
Note: If a Windows installer prompt appears, prompting you that another version of this product is already installed and installation of this version cannot continue, you must uninstall the OEDS file from your computer. See also, Uninstalling OEDS.
Note: You can cancel the installation at any point. To cancel an installation, refer to Cancelling an OEDS Install.
Important Note: Certain interfaces require you to install specific features together. For a description of the items you need to install together, see Interface Installation Items.
If you add features, the Feature Description area displays the size, in kilobytes (KB), that the feature requires on your hard drive. If you select the Opera Electronic Distribution Suite icon, the Feature Description area displays the total size, in KB, that OEDS requires on your hard drive.
Note: If necessary, select the < Back button to make any changes or to select or deselect features.
The installation takes a few minutes to run. As part of the installation, the OEDS Configuration Editor launches and takes you through the configurations required to complete the installation and ensure Opera runs smoothly. These configurations may include information about the Oracle connection, Opera application login, rate updates, reservation configurations, interface configurations, and so on.
Note: You will see a series of black screens appear and disappear. This is part of the normal installation process.
Make any necessary changes to how the system is configured through the OEDS Configuration Editor. Select the Next > button or < Back button to navigate from screen to screen in the editor.
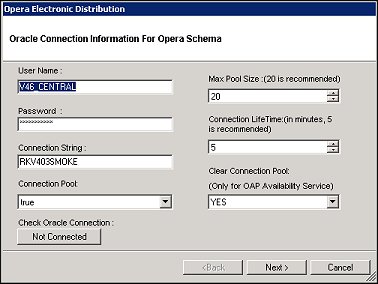
Field |
Description |
User Name |
Enter the schema name that you are connecting to. Typically, this is OPERA. |
Password |
Enter the password of the schema you are connecting to. Typically OPERA. |
Connection String |
Enter the Oracle alias as defined in the TNSNAMES file. Typically OPERA. |
Connection Pool |
Select True to use connection pooling or False to not use it. |
Check Oracle Connection |
Initially, this field displays one of two buttons; either Connected or Not Connected. Select the appropriate button to connect to or disconnect from Oracle. |
Max Pool Size |
The maximum number of connections in a pool. The recommended value is 20, but this value can vary depending on traffic volume and other factors. Note: If this is for an ADS installation and the number of threads used for the Expedia AVH service (set up on the ADS Configuration screen of the OEDS Configuration Editor), the maximum number of connections in a pool must be increased to 50. |
Connection Lifetime (in Minutes, 5 is recommended) |
Select the database connection lifetime in minutes. The old connection pool will be cleared and new connections will be made every few minutes based on the frequency selected here. Note: This value can be set to 0. |
Clear Connection Pool |
(Only for OAP Availability Service) Select YES to clear connection pool based on the Connection Lifetime that is set. |
When you have entered all of the information, select the Next > button. The wizard attempts to connect to the Oracle database.
Note: Internal application users are automatically created and will not need to be added during new installations or upgrades. Based on the type(s) of modules that are installed on the OEDS server, the OEDS wizard will automatically choose the correct internal user for each module. If multiple services are installed on the OEDS server, the OEDS wizard will default to the first service installed. For example, if GDS is installed with ADS, ADS will be the user created for that box. The following internal users will be created for their related channels: OEDS$ADS, OEDS$GDS, OEDS$OWS, OEDS$GAMING, and OEDS$EAS-HTNG.
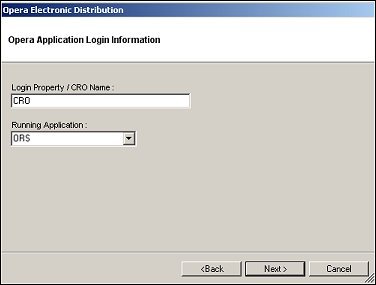
Field |
Description |
Login Property/CRO Name |
For ORS, enter the CRO ID. For PMS, enter the hotel code. |
Running Application |
Select whether you are connecting to ORS or PMS. |
When you have entered all of the information, select the Next > button.
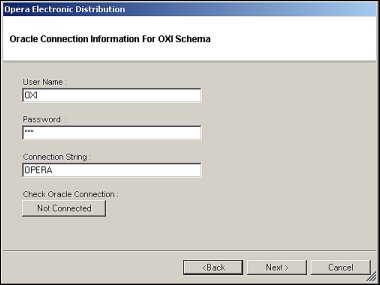
Field |
Description |
User Name |
Enter the schema name that you are connecting to. Typically OXI. |
Password |
Enter the password of the schema you are connecting to. |
Connection String |
Enter the Oracle alias as defined in the TNSNAMES file. Typically OXI. |
Check Oracle Connection |
Initially, this field displays one of two buttons; either Connected or Not Connected. Select the appropriate button to connect to or disconnect from Oracle. |
When you have entered all of the information, select the Next > button. The wizard attempts to connect to the Oracle database.
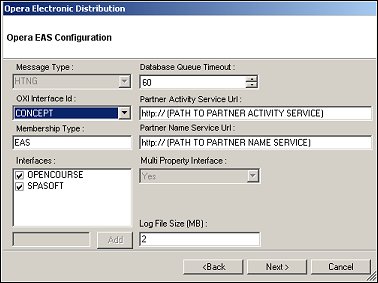
Field Name |
Description |
Message Type |
Not currently used. |
OXI Interface ID |
Select the OXI Interface ID. |
Membership Type |
Enter the membership type. |
Interfaces |
Select the appropriate check box. |
Database Queue Timeout |
Enter the time in seconds to wait on the business event or interactive queue if there is no data in the queue. |
Partner Activity Service URL |
Enter the path to the partner activity service. |
Partner Name Service URL |
Enter the path to the partner name service. |
Multi Property Interface |
Select whether this interface is used in a multi-property environment. |
Log File Size (MB) |
Enter the size of the log file in MB. This will be stored as Bytes in the config file. |
Select the Yes button to continue, or the No button to return to the Oracle Connection Information For Opera Schema screen. Select the Add button to add the selected interfaces to EAS. You can also add new custom interfaces by entering the interface and selecting the Add button.
Note: If you want to make changes to the configuration after the initial setup is complete, use the OEDS Configuration Editor found on your desktop.