
|
|
|
ORMS Configuration Seasons and Events
Note: This topic applies to ORMS ADF11.
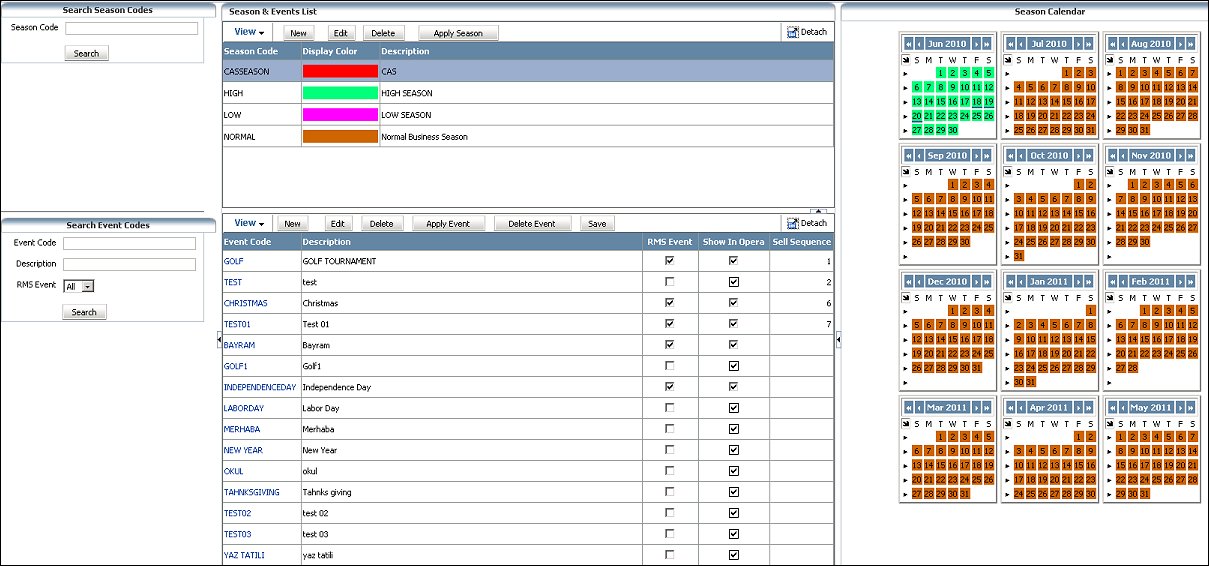
The Seasons and Events Configuration Dashboard is used to specify specific occupancy seasons and events that may be occurring for a property. This impacts revenue management by providing better data for forecasting Demand.
Seasons and Events appear on several ORMS dashboards to help with analysis, such as the Home Dashboard, Forecast Analysis Dashboard, Blocks Dashboard and Configuration>Booking Class Dashboard. Additionally, alerts can be applied to seasons' and events' dates through the Configuration>Alerts and Rules Dashboard.
In a multi-property environment with more than one modeled or pre-modeled property, the Property LOV displays in the Title Bar ![]() . Users with access rights and permissions to other properties can select the LOV and choose either the modeled or pre-modeled property they want to work with. The sections on the dashboard refresh data specific to the selected property. In a single property environment or in a multi-property environment where the user has rights to only one property, the property field is read-only.
. Users with access rights and permissions to other properties can select the LOV and choose either the modeled or pre-modeled property they want to work with. The sections on the dashboard refresh data specific to the selected property. In a single property environment or in a multi-property environment where the user has rights to only one property, the property field is read-only.
A season of "NORMAL" is automatically created and assigned for the past 365 days and 10000 days into the future, with no color code defined. Seasons truly reflect the business demand patterns for the property, but do not necessarily reflect the pricing. Seasons are good indicators for peak, medium, and low periods of demand throughout the year.
Note: Seasons should always be a minimum of 3 continuous weeks. Any time period that is shorter than that would be considered an event and should be set up as an "event," rather than a "season."
When first signing onto ORMS after Modelization and thereafter, if no user-configured Seasons have been set up for the future other than the modeled NORMAL Season (NORMAL is the default season populated for 10000 days), a popup Alert will appear. This alert will pop up when connecting to ORMS to remind the user to assign future days with corresponding Seasons other than NORMAL to avoid incorrect Forecasts. The pop up Alert will prompt the user to either:
The logic the system uses to display the Alert, is as follows:
1. The system checks that Seasons are configured based on the calendar year. For example:
In this case, the system will proceed to check that Season Codes are configured for the calendar years 2010, 2011, and 2012.
2. If there are no days in the calendar year with the NORMAL Season, then the system checks that all days of the calendar are configured with a user-defined season. In this scenario, the system does not need to verify that all configured Season Codes are used throughout the calendar year because there could be some "One-time Seasons." One-time Seasons may have been created which the property uses once and does not plan to use in the future, such as a PROMOTION Season. The PROMOTION Season may have been created at the launch of the new property when the property was being heavily promoted, and which will not be used again.
3. If one or more days with NORMAL season exist in a calendar year, there is a chance that the site has not changed the default configuration. In this case, the system will check that all configured Season Codes are used throughout the calendar year.
Season Code. Type % and a partial or the whole season code or description to search.
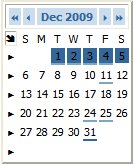
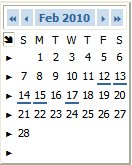
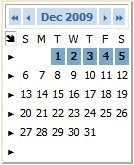
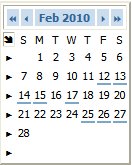
The calendar displays twelve months where you can select which dates you want to assign to a specific Season or Event. You may select one date, multiple dates, or a date range for the assignment. When the dashboard first opens, the first month in the calendar grid is the current month, with the next eleven subsequent months displayed thereafter.
The calendar allows you to apply seasons to a single date or range of dates. Highlight the dates you want to add a season to and select the Apply Season button.
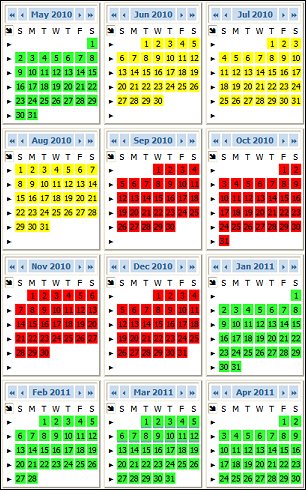
If you want to display a different set of twelve months, click on the (back) << < or (forward) > >> arrows at the top of the selected calendar month. The double arrow moves the calendar back twelve or forward twelve months, respectively. The single arrow moves the calendar back or forward one month, respectively. All other calendar months in the grid appear in sequence.
![]()
Individual Days - To select one day, simply click the one day. For several individual days not in a sequence (i.e. Monday Wednesday, and Friday) use Ctrl and click the separate days.
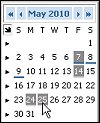
Same Days of the Week for the Month - To select a specific day of the week for the entire month, for example all Thursdays, simply place the cursor at the top of the day of the week (i.e. T) and click. You can also use Ctrl and select more than one day of the week for the entire month, for example, all Saturdays and Sundays.
Entire Week - To select the entire week, click the pointer for the appropriate week.
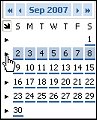
Entire Month - To select the entire month, click the arrow at the top of the month.

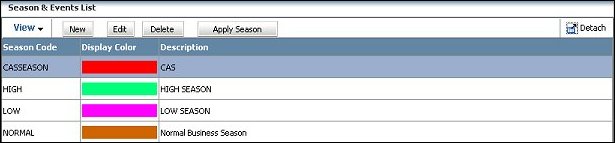
The existing seasons display in the grid. Highlight the season you want to edit, delete, or apply and then select the appropriate function button.
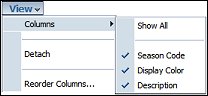
View. Select View to display options for viewing the Season section. Select or deselect the display options according to your preference. Once an item is selected or deselected, the screen will refresh with your selections displayed.
Detach. Select this button to expand the Season grid you wish to view. The expanded view will comprise the entire screen, eliminating other sections, so you can view the current grid singularly.
Season Code. Season code assigned to the season.
Display Color. Color that has been assigned to the season. In the calendar, this color is displayed if the season has been assigned to a specific or range of dates.
Description. Description of the season code that better explains the season.
New. Select to create a new season.
Edit. Select to modify the selected season.
Delete. Deletes the selected season.
Apply Season. Applies the selected season to the date or range of dates that are selected in the calendar.
When seasons get added or changed after Modelization, these changes are updated during the ORMS Optimizer Night Audit procedure (backend process that automatically runs on a nightly basis). These season updates will be available in History data and Forecast calculations.
The following screen is displayed when adding or editing a season.
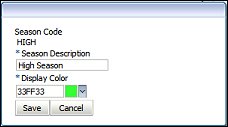
Season Code. The season code to be used in the required field.
Season Description. Type a description for the season code in the required field.
Display Color. Select the down arrow to choose the color to associate with the season. The code in the field represents the color selected in HTML format.
When you are through, select the Save button.
The Events Configuration allows for the creation of events that may be occurring that would affect the transient demand for a property and when the events are happening. These are called ORMS Events, those events that have an impact on the transient demand for that time period.
Any event that has been configured in OPERA will be displayed in this Events Configuration Tab. As new events are added throughout OPERA, then they will also be displayed here. By default, however, all events that are created in OPERA are non-ORMS events. Therefore, at this screen review all the events that have been added in OPERA to identify and define which of these are RMS events. When the ORMS license code is active, it is recommended that you create new events here in the Events Configuration Tab so you can immediately set the event as an RMS Event, if required.
Note: It is recommended to assign RMS for the last (maximum) 2 and the following 1 years in order to get a more accurate Forecast.
Event Code. Enter a % and the partial event code or the whole event code to search for.
Description. You may search for the description of the event by entering various combinations of letters. For example, by entering the first letter of the event description, i.e. the letter f, and selecting Search, all event descriptions starting with 'f' will display (i.e. Festival of Lights). To display all events that have a particular letter (i.e. 'f') within the description, enter the percentage symbol and the letter (i.e. %f ) and all event descriptions that have 'f' anywhere in the description display (i.e. Taste of Chicago, Festival of Lights).
RMS Event. Select the down arrow to search for events that are RMS Events (Yes), that are not RMS Events (No), or All Events (default).
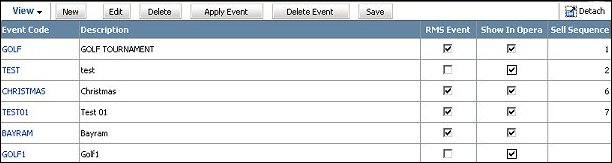
The existing events display in the grid. Highlight the event you want to edit, delete, or apply and then select the appropriate function button.
View. Select View to display options for viewing the Event section. Select or deselect the display options according to your preference. Once an item is selected or deselected, the screen will refresh with your selections displayed.
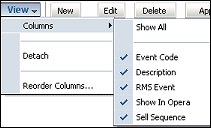
Detach. Select this button to expand the Events grid. The expanded view will comprise the entire screen, eliminating other sections, so you can view the current grid singularly.
Event Code. User-defined code for the event.
Description. Description of the event code to better explain the event.
RMS Event. When this check box is selected, it indicates that this event is an RMS Event. An event can be selected or deselected as an RMS Event directly in this column by simply clicking on the check box. (An RMS event is one that will affect transient demand.) When this check box is selected, you may select/deselect the Show in OPERA check box. If this check box is not selected, you will not be able to select/deselect the Show in OPERA check box.
Show in OPERA. This check box can be selected/deselected when the ORMS Event check box is selected. Select this check box if you want this event code to display in OPERA (i.e. Configuration>Rate Management>Property Calendar>Event Codes).
Sell Sequence. Displays the sell sequence that has been assigned to the event.
New. Select to create a new event.
Edit. Select to edit the details of the selected event.
Delete. Select to delete the selected event.
Apply Event. Applies the selected event to the date that is highlighted on the calendar.
Delete Event. Deletes the selected event from the date that is highlighted on the calendar.
The calendar allows you to add or delete events for specific days. This is accomplished by selecting the date in the calendar, specifying the event in the results grid and selecting the Add Event or Del Event buttons. Four different types of symbol can occur for each date:
The following screen displays when selecting the New or Edit buttons.
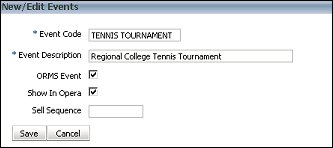
Event Code. This required field displays the event code for the event.
Event Description. This required field provides a more detailed description of the event.
ORMS Event. By default, this check box is selected. Select this check box if this event will have an impact on transient demand and affect ORMS forecasting. When this check box is selected, you may select/deselect the Show in OPERA check box. If this check box is not selected, you will not be able to select/deselect the Show in OPERA check box.
Show in OPERA. By default, this check box is selected. This check box can be selected/deselected when the ORMS Event check box is selected. Select this check box if you want this event code to display in OPERA (i.e. Configuration>Rate Management>Property Calendar>Event Codes).
Sell Sequence. Enter the sell sequence number for the event.
When you are through, select the Save button.
See Also