
|
|
|
Account Types
OPERA provides the ability to draw statistics about revenue, room nights, etc., by account type (e.g., Is this piece of business from a local business or an international business?) in such reports as the Account History and Forecast, Account Hierarchy, Profile Production Statistics, and Profile Productivity LOS Reports. To use this feature, account profiles must be identified by account types on the Sales Info Tab. The group profile can also identify the account type on the Group Profile main grid.
Use the Account Types screen to manage account types for a property or chain. Select Configuration > Profiles > Account Types to display the Account Types screen.
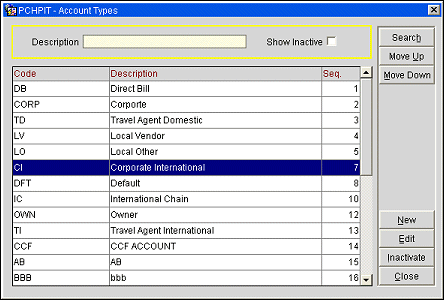
Code. Code to be used for the account type (GLP, REP, LOP). This field cannot contain more than ten characters.
Description. The description of the new account type (Global Preferred, Regional Preferred, Local Preferred).
Seq. The order of succession for items to appear in a list by assigning them a numeric order.
To add a new account type, select the New button from the Account Types screen. To edit an existing account type, highlight the account type and select the Edit button. The Account Types - New or Edit screen displays. You may also inactivate and delete unused account types codes.
Provide the following information and select the OK button:
Code. Enter a code for the account type.
Description. Enter a description for the account type code.
Display Seq. Enter a number that will control the position of this account when listed in screen displays. Account type codes that do not have a display sequence number appear in alphabetical order following the account type codes that have a sequence number assigned.
Inactive. Select this check box to inactivate the current account type code. Leave unchecked for active codes. You can also inactivate a code from the main grid by highlighting the code and selecting the Inactivate button. Inactive codes will not be available for selection on a profile, but will be available for selection in filters and queries. If you want to delete a code, you must first inactivate it and then delete it. Only inactive codes that are not currently applied to a profile can be deleted.
Move Up/Down. Use the Move Up/Move Down buttons to move a specific code up or down through the list. Note that doing so will also change the sequence number of the selected code.
New. Select the New button to create a new account code.
Edit. Select the Edit button to make changes to an existing account code.
Inactivate. Select this button to inactivate the highlighted code in the grid.
Delete. This button displays when the Show Inactive check box is selected in the Search criteria and only inactive codes display in the grid.
Close. Select Close to exit from this screen.