
|
|
|
SFTP Export - Export File Delivery Configuration Screen
When the SFTP check box option is selected on the Export File Details screen, the Delivery Configuration button allows you to configure the location and delivery method for sending the selected export file via a secure FTP channel. The Export File Delivery Configuration screen supports two options: SFTP using password authentication, or SFTP using public key authentication. Select the radio button that corresponds to your choice of SFTP delivery method.
Note: SFTP proxy servers can be configured for SFTP export files.
- Set up your proxy server (contact your Network Administrator, if necessary).
- Configure the OPERA proxy server settings to connect to the proxy server address. Access the Application Setting>General>Proxy Server and enter the proxy server in the following format: <proxy.domain.com:port number>. Example: 172.28.70.186:808.
- Configure OPERA proxy credentials for the user and password. Access the Application Setting>General>Proxy Credentials and enter in this format: proxyuser:proxypwd. Example:gen:gen1234.
- If proxy servers are used at the property for purposes other than SFTP Scheduled Reports (or SFTP Export File Delivery), you may need to bypass the proxy for the SFTP server or else the SFTP may stop working. Access the Application Setting>General>Settings>Proxy Server Bypass and enter the configured SFTP addresses in this format: *.<DOMAIN.NAME>. Example: *.ft.micros.com,172.28.70.186.
Provide the following information and select the OK button.
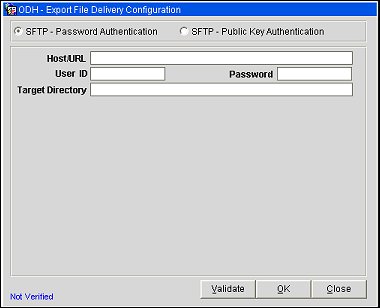
SFTP - Password Authentication. Select this radio button for SFTP using password authentication. (Selected by default.)
Host URL. Enter the URL of the FTP site to which the export file will be sent.
User ID. Enter the user ID required to log onto the FTP site.
Password. Enter the password required to log onto the FTP site.
Target Directory. Enter the name of the directory (including path) on the FTP site where the export file will be stored.
Validate. Select to test the validity of the location and delivery method information you have specified. OPERA will attempt to contact the SFTP site using the information you have provided. If the validation is successful, "Valid" will display in blue type at the bottom-left of the screen. If the validation fails, a "Connection could not be established" message screen will open and "Invalid" will display in blue type at the bottom-left of the screen.
Note: If the location and delivery method information has not been verified via selection of the Validate button, "Not Verified" will display in blue type at the bottom-left of the screen.
Provide the following information and select the OK button.
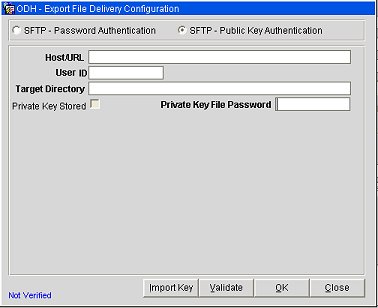
SFTP - Public Key Authentication. Select this radio button for SFTP using public key authentication
Host URL. Enter the URL of the FTP site to which the export file will be sent.
User ID. Enter the user ID required to log onto the FTP site.
Target Directory. Enter the name of the directory (including path) on the FTP site where the export file will be stored.
Private Key File Password. When public/private key files are generated (using CuteFTP or a similar tool) the private key file is generated along with a password for the private key file. Enter this private key file password in this field. As you type, asterisks are displayed. OPERA will encrypt the password and store it in the database.
Private Key Stored. This read-only check box is used as an indicator as to if the Private Key needs to be imported or if it already has. If the check box is not selected, then the Private Key needs to be imported. But if the check box is selected, then the private key has already been imported and is stored in the OPERA database.
Select the Import Key button to import the private key file (generated using CuteFTP or a similar tool). The private key will be stored in encrypted format in the OPERA database. When you select the Import Key button, the File Upload screen appears.
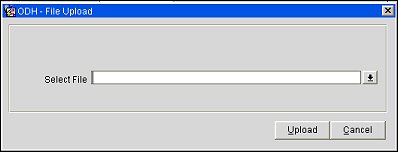
Select the down arrow on the Select File field and navigate to the file on the application server where the private key is stored. When you have navigated to the file, the filename and path show in the Select File field. Select the Upload button to save the filename and path and return to the Export File Delivery Configuration screen. The following message displays: "Private key file has been imported successfully." The read-only Private Key Stored check box will be selected on the Export File Delivery Configuration screen.
When an export using SFTP public key authentication is generated, an OPERA API will access the private key, decrypt the private key using the private key password, then use the private key to encrypt the export file. Finally, the API transmits the export to the host.
Select either the Validate or the OK button to test the validity of the location and delivery method information you have specified. If the validation is successful, "Valid" will display in blue type at the bottom-left of the screen. If the validation fails, a "Connection could not be established" message screen will open and "Invalid" will display in blue type at the bottom-left of the screen.
Note: If the location and delivery method information has not been verified via selection of the Validate button, "Not Verified" will display in blue type at the bottom-left of the screen.
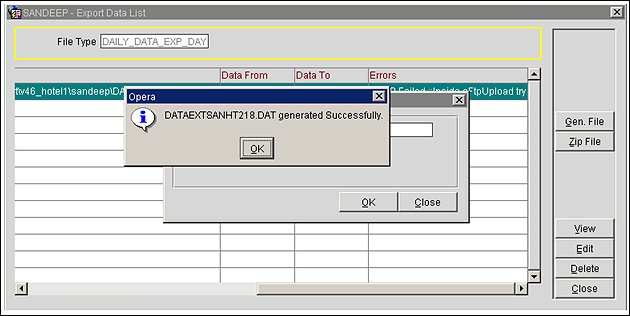
Upon successful SFTP upload of the generated file, a message appears:
See Also