
|
|
|
Design Floor Plan
Select Configuration>Reservations>Floor Plans to design the floor plans that are available from the [Shift+F5] Quick Key and from Reservations>Floor Plan menu bar option. (See Floor Plan for details.)
The Floors screen appears.
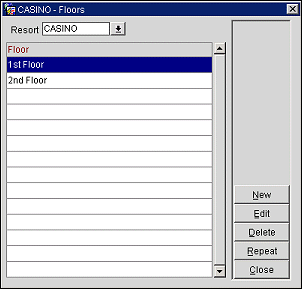
Property. Available when the OPP_MHOT Multi-property add-on license is active. Select the down arrow to choose the property for which you wish to see floor plans.
To copy a floor plan so that you can use it as a template to construct a new floor plan (with modifications) select the Repeat button on the Floors screen. The Copy Floor screen appears.
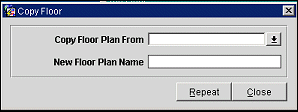
Provide the following information and select the Repeat button:
Copy Floor Plan From. Select the down arrow to choose the floor you wish to copy.
New Floor Plan Name. Enter the name you wish to assign to the new floor plan.
Once you have copied the floor plan, highlight the new floor on the Floors screen and select the Edit button to customize the floor plan.
To edit an existing floor plan, highlight your choice on the Floors screen and select the Edit button.
To create a new floor plan, select the New button. You are prompted to enter the name of the new floor plan. Enter the name and select the OK button.
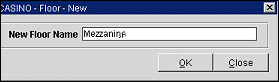
The new floor plan name appears on the Floors screen. Highlight the new floor plan and select the Edit button.
The Floor Plan Design screen appears.
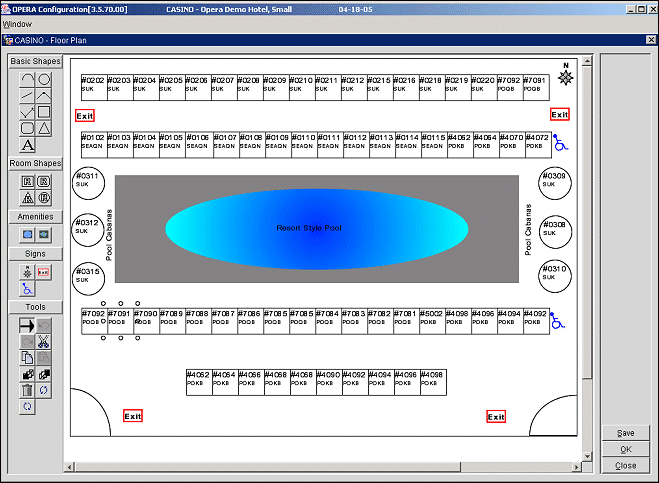
The palette of symbols and tools available for use in designing the floor plan is shown on the left-hand side of the screen. A tool tip identifies each tool and symbol when you place your cursor on it.
The central portion of the screen is a "drawing board" where you may place symbols, resize and reposition symbols, and add labels. Create your floor plan then select the Save or OK button to save it.
The best way to learn about the features of the floor plan design application is to work with the it "hands on." Create a test floor plan and experiment. Here are a few hints to get you started.
If you are adding rooms to the floor plan, select one of the room symbols from the palette. Room symbols are provided for four different room shapes.

Click on a symbol in the palette, then click in the drawing board area to add the symbol to the floor plan. Each time you click, the same symbol will be repeated in the drawing until you choose another tool or symbol from the palette.
To assign a room number to the room symbol, first click on the Select tool ![]() Then click in the symbol. (The Symbol will display "handles" when it is selected.)
Then click in the symbol. (The Symbol will display "handles" when it is selected.)

Now double click in the symbol to display the Room Number list.
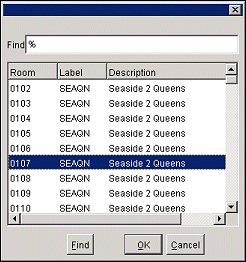
Highlight your choice and select the OK button. The symbol will be labeled with the appropriate room number and room type.

To resize a symbol, first click on the Select tool  Then click in the symbol. (The Symbol will display "handles" when it is selected.) Click and drag on any of the handles to resize the symbol.
To move a symbol, first click on the Select tool Then click inside the symbol. (The Symbol will display "handles" when it is selected.) Hold down the left mouse button while you drag the symbol to the new position.
To label a symbol, first click on the Text tool ![]() Then click in the drawing board where you want to add the label. The text entry point appears.
Then click in the drawing board where you want to add the label. The text entry point appears.
![]()
Begin typing and the text will appear in the text entry box. (The box will not show on the finished floor plan.)
![]()
When you are done entering text, click on the Select tool You can move text boxes around on the drawing board just like any other symbol. Click inside the box and hold down the left mouse button while you drag the text to the new position.
See Also