
|
|
|
Creating the EQC Channel
To create the EQC channel, select the New button in the top frame of the Channels Setup screen. The Channels screen appears.
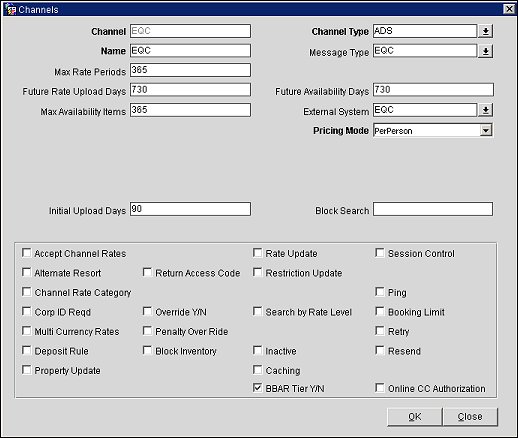
Enter the information in the following fields and select the OK button.
Channel. Enter EQC.
Channel Type. Select ADS from the list of values.
Name. Enter the name of the channel, such as "Expedia Quick Connect".
Message Type. Select EQC.
Max Rate Periods. Enter 365.
Future Rate Upload Days. This field appears only when the channel types are GDS or ADS. Enter the number of days to limit the upload of rate information for the future. If this field is left blank, an internal default of 331 days will be applied.
Future Availability Days. Enter the maximum number of days that can be updated for future availability.
Max Availability Items. Enter 365.
External System. Select EQC.
Pricing Mode. Select either PerDay or PerPerson.
Initial Upload Days. (330 must be entered here) Enter the number of days that inventory will be sent in an update message if no value is entered into the update rate or update availability screens. The number of days includes the current business date.
Block Search. Enter the business block code.
Select the following options and select the OK button.
Accept Channel Rates. Select this check box to allow the property to accept channel rates. This check box must be selected in order for Opera to accept the rate amount sent in the reservation request from the ADS. If this check box is unselected, the rate amount sent from the ADS will be ignored and the amount setup for the rate code in Opera will be used for the reservation.
Rate Update. Select this option to send rate update messages to the channel immediately after a change has been made.
Restriction Update. Select this to allow AVSTAT (Restriction messages) to be sent to the channel.
BBAR Tier Y/N. Select to enable ADS rate tiers for restrictions and rate updates.