


In this section, you add a feature that integrates with the camera of the device. You also use icons to help identify the features you create. Those icons are in a zip file that you unzip into your public_html folder.
-
Download the icons.zip file and unzip it into <mywork> >Employees > ViewController > public_html.
-
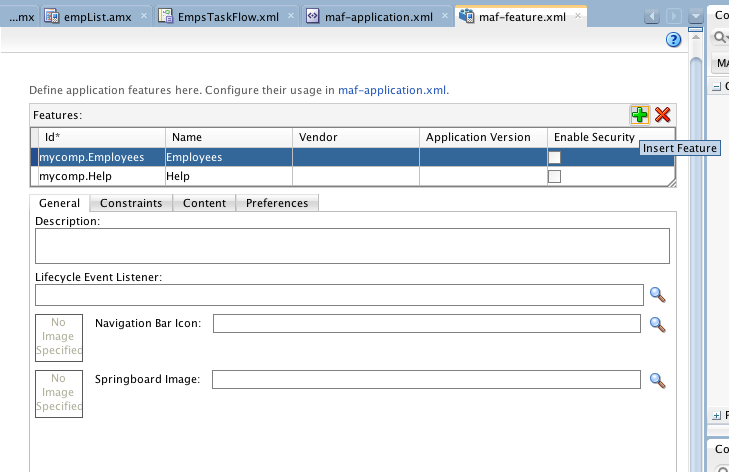
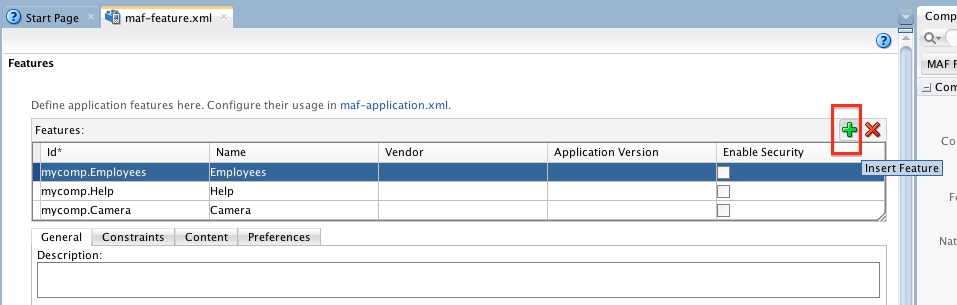
Open maf-feature.xml.

-
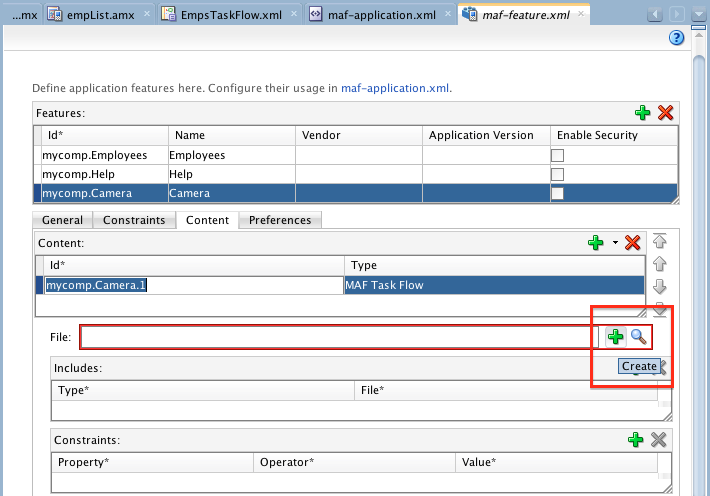
Click the Add icon to add a Feature.
-
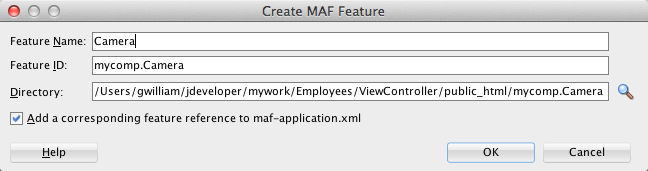
Name the Feature Camera and click OK.
-
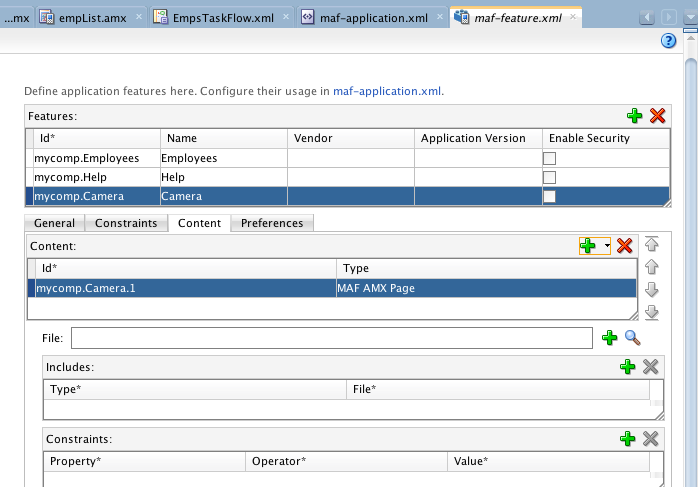
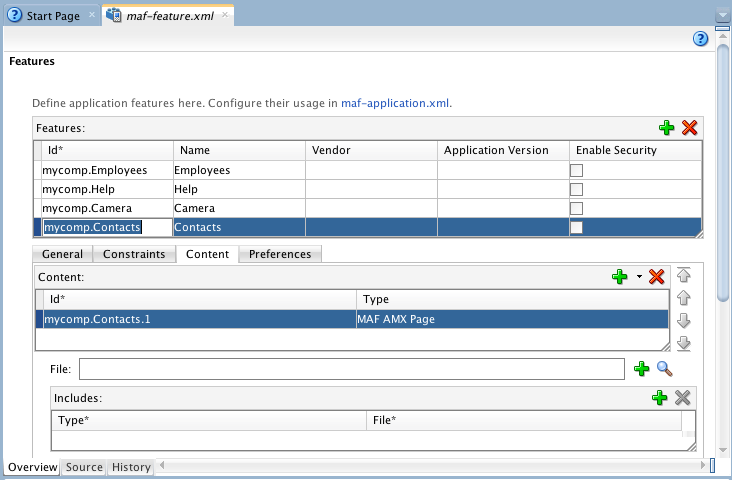
Click the Content tab.
-
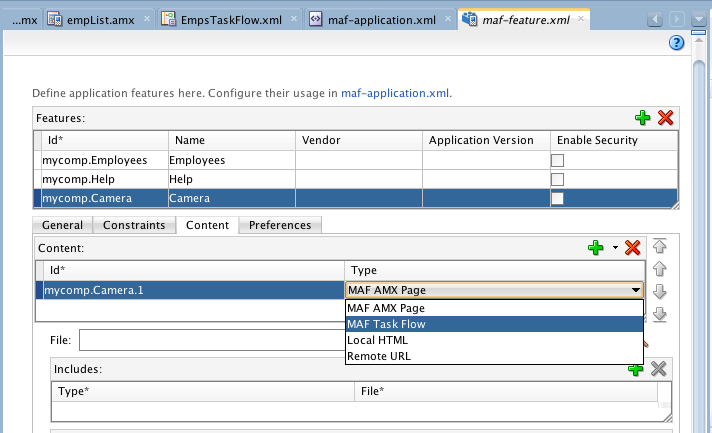
Set the Content Type to MAF Task Flow.
-
In the highlighted File field, click the Add icon to add a Task Flow.
-
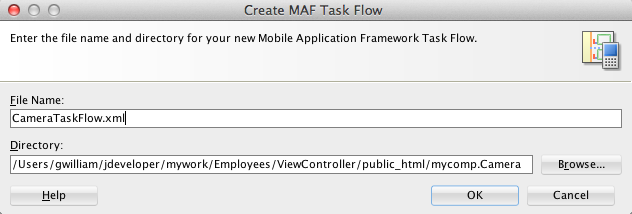
Name the Task Flow CameraTaskFlow.xml and click OK.
-
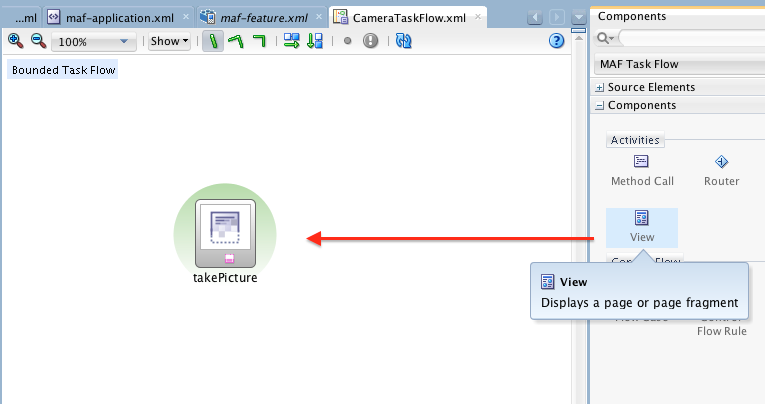
Drag a View activity to the Task Flow and name it takePicture
-
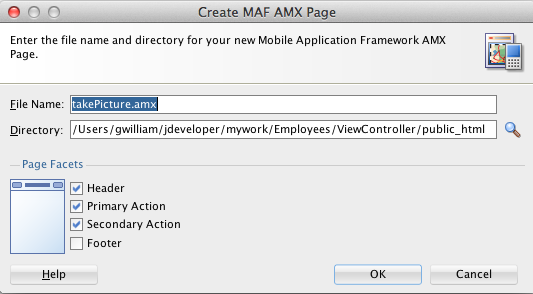
Double-click takePicture to create a page. Click OK to accept the default values and create the page.
-
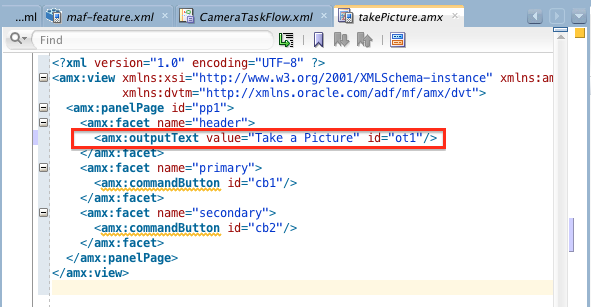
Change the Value property of the header outputText component to "Take a Picture".
-
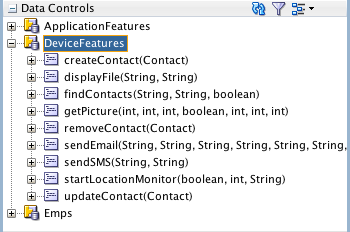
In the Data Controls palette, expand Device Features.
-
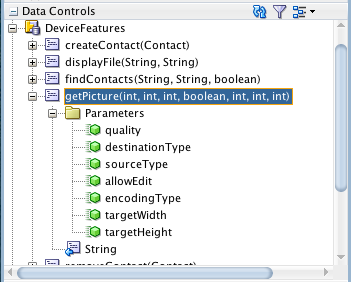
Expand getPicture(int,int,int,boolean,int,int,int). Notice the parameters that the getPicture method requires. The getPicture method allows the caller to set parameters on the method which control various aspects of the device. For example the method call can set the quality, height, and width of the results.
-
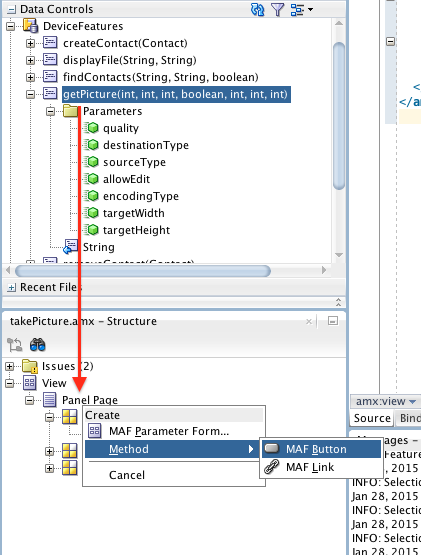
Drag getPicture(int,int,int,boolean,int,int,int) to the Panel Page in the Structure pane and drop it as a Method > MAF Button.
-
In the Edit Action Binding dialog box, enter the following values for the parameters and click OK to create the button. For Android deployment set the sourceType to 1.
Name Value quality 50 destinationType 1 sourceType 2 allowEdit true encodingType 1 targetWidth 200 targetHeight 200 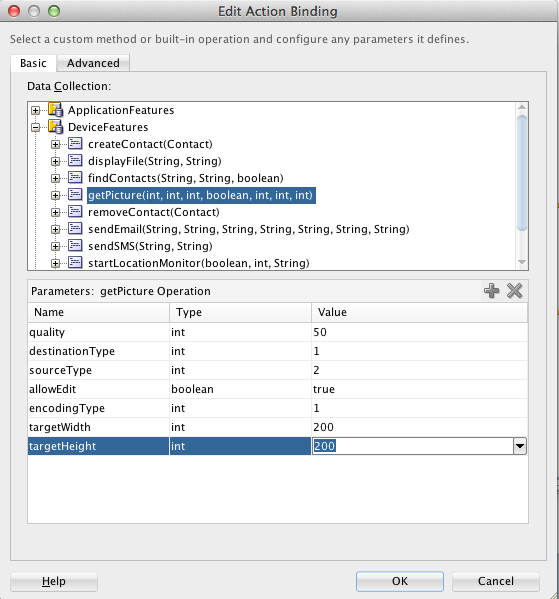
-
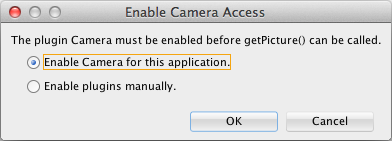
A popup pane prompts you to allow the method to access the device. Ensure that Enable Camera for this Application is selected and click OK.
-
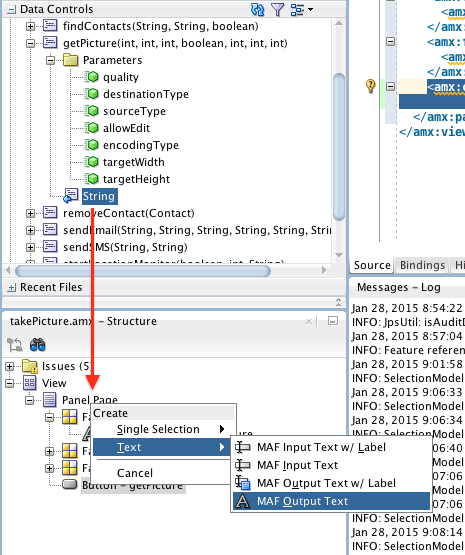
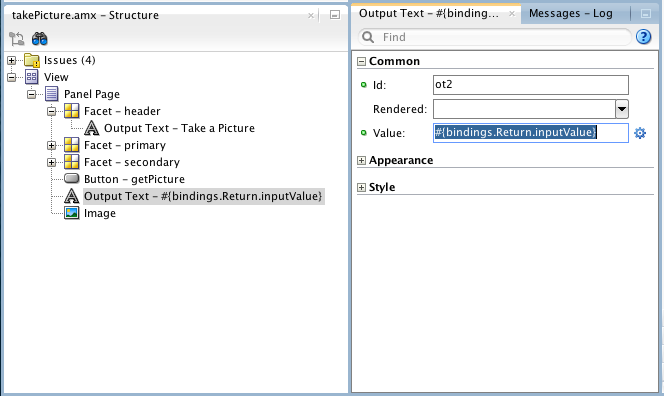
From the Data Controls palette, drag the String return from the getPicture method to the Panel Page in the Structure pane and drop it as a MAF Output Text.
-
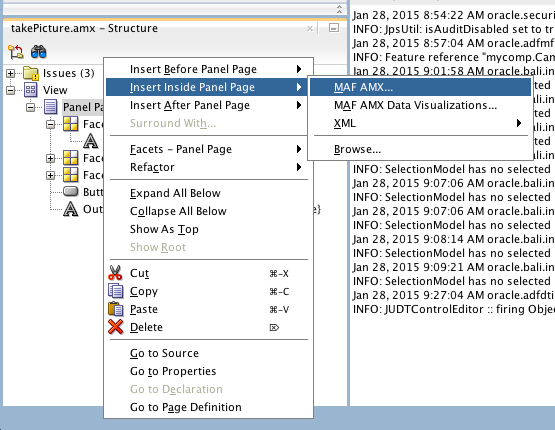
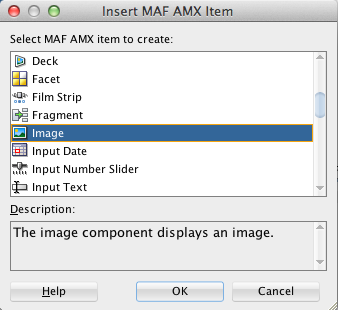
In the Structure window, right-click Panel Page and Insert an Image component.
-
In the Structure Window, select the Output Text component and then in the Properties Window, copy the binding code from the Value property.
-
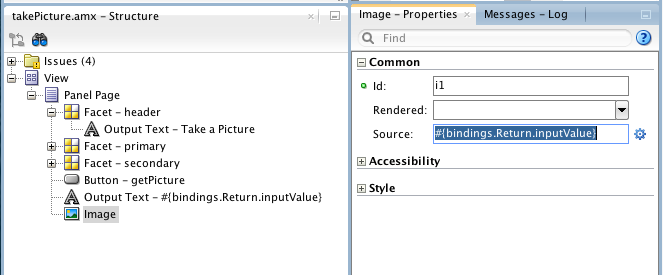
Select the image component and in the Property Inspector, paste the binding code into the Source property.
-
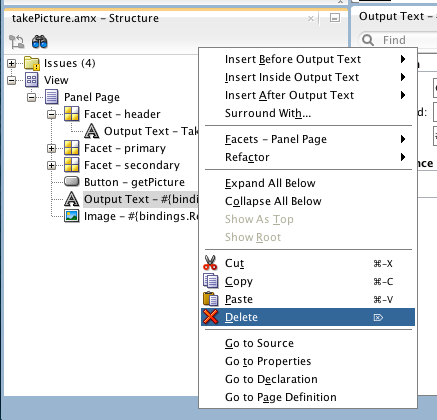
Select the outputText field in either the Code Editor or the Structure pane and delete it.
-
Save all your work
-
Then, just as you did before, deploy the application. If you are using iOS, deploy to iOS. For Android, deploy to Android.
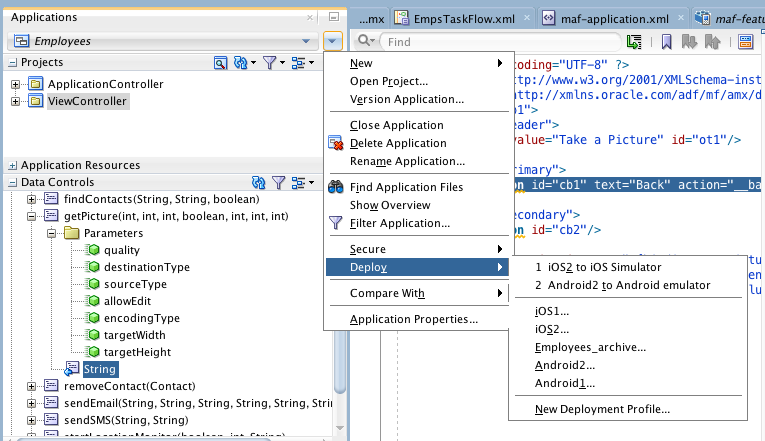
The next few steps show the results of an iOS deployment. The application on Android and iOS have a few native behavior differences. Remember also that the iOS deployment uses the photo gallery as the source for the photos whereas the Android deployment uses a built in camera.
You will see the Android deployment after this short section.
iOS deployment results
-
When the deployment is complete, the iOS simulator opens the application. Click the Camera Feature button on the navigation bar.
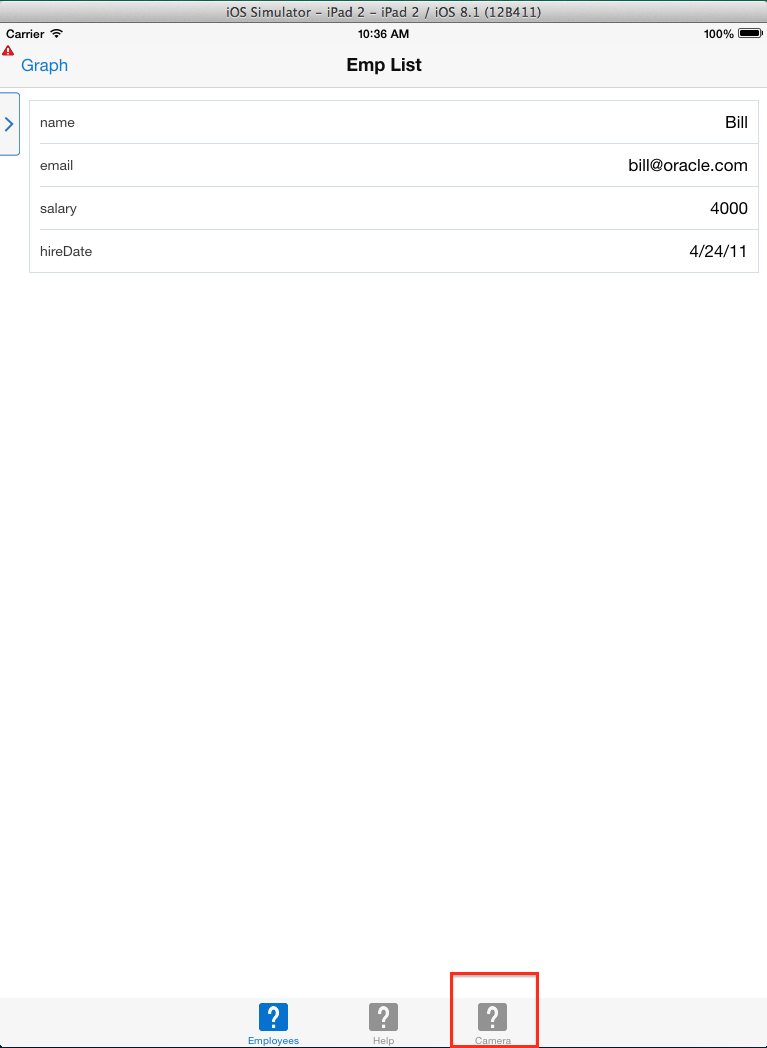
-
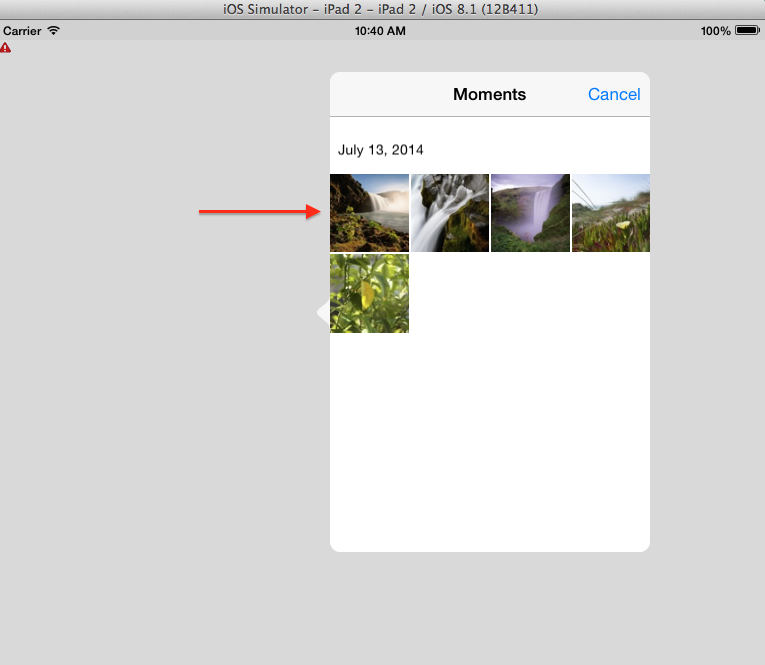
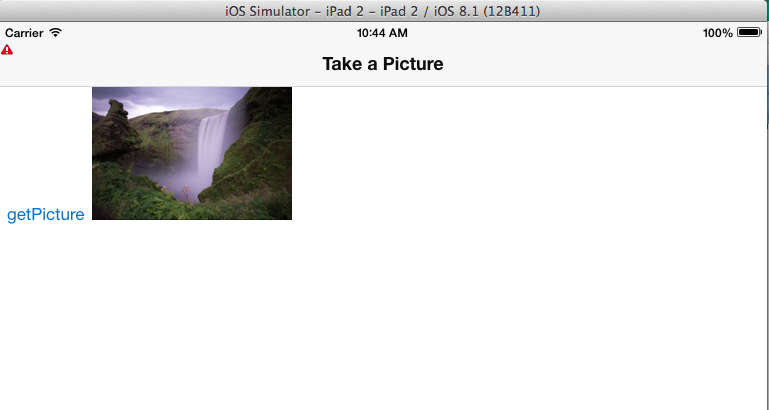
This opens the Camera page which immediately runs the getPicture method. Since it is using the gallery as the source for the picture, select one of the pictures and on the Choose Photo page, click Use.
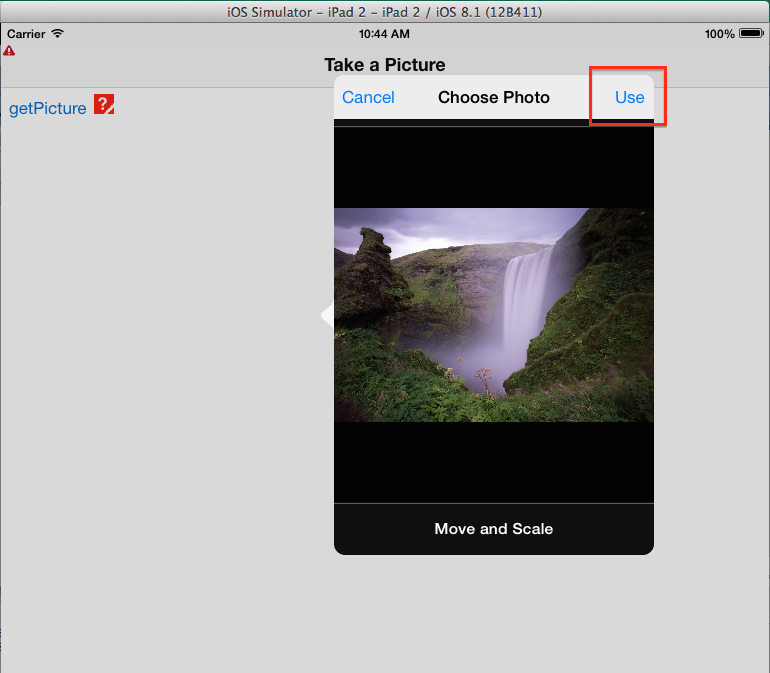
-
After you take the picture, you see the takePicture page that displays the results. If you want, you can click getPicture to take another picture. You can also click any of the other Features on the Navigation bar at the bottom of the page.
Android deployment results
-
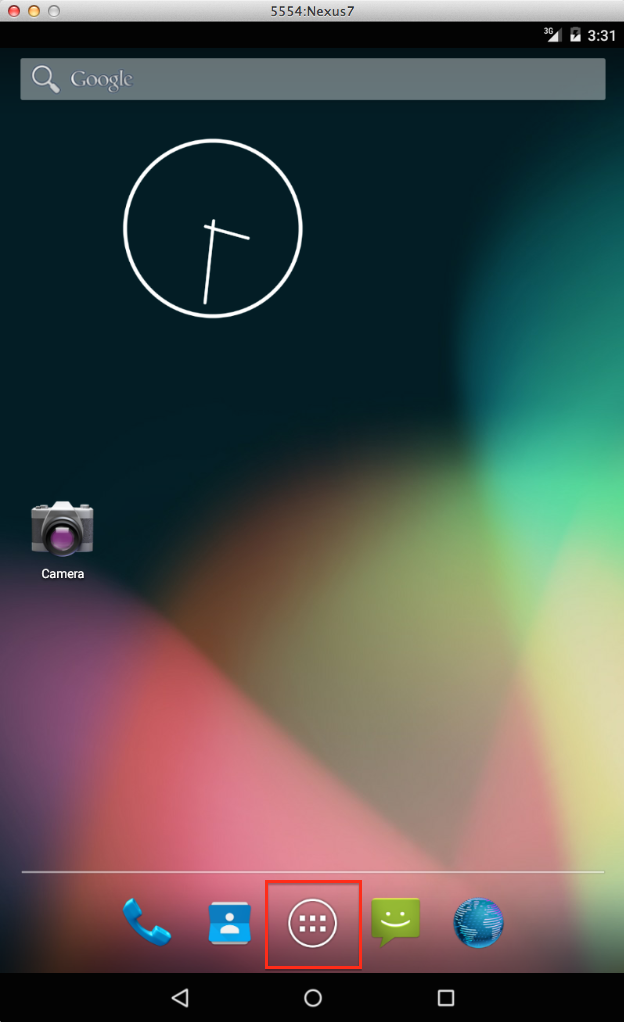
When you deploy to the Android emulator, you have to open the application. Click the circle at the bottom of the screen to see the applications.
-
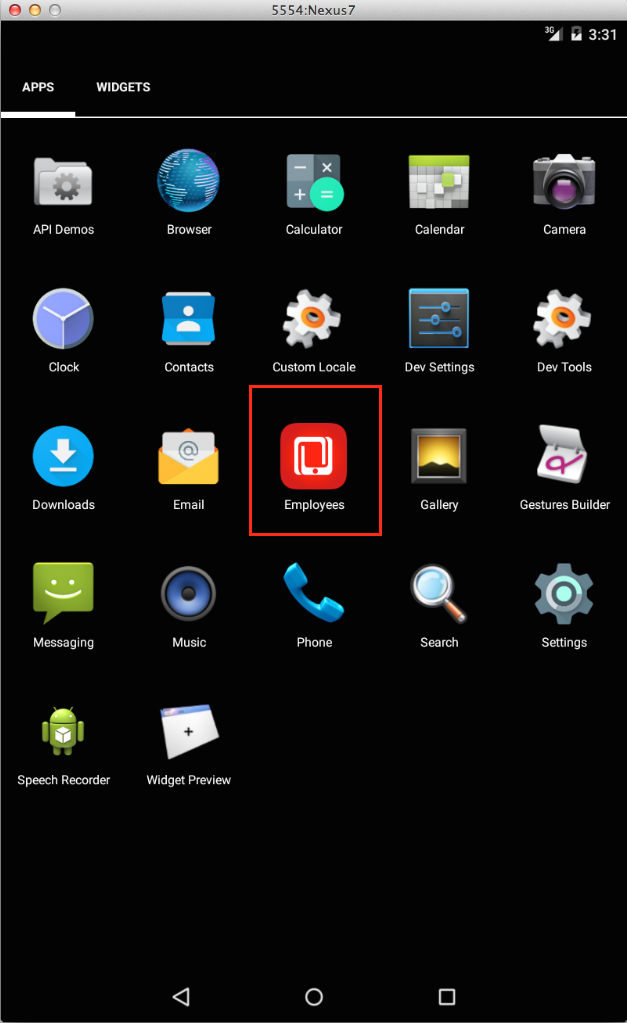
Click Employees to open you application.
-
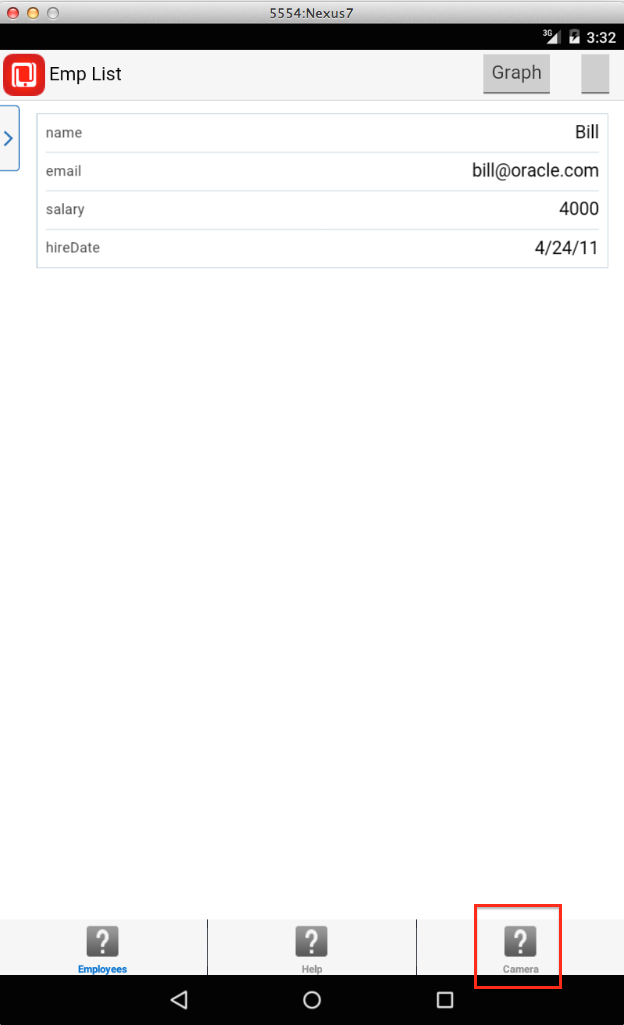
The application opens to the employees page. Click the Camera feature icon on the Navigator bar.
-
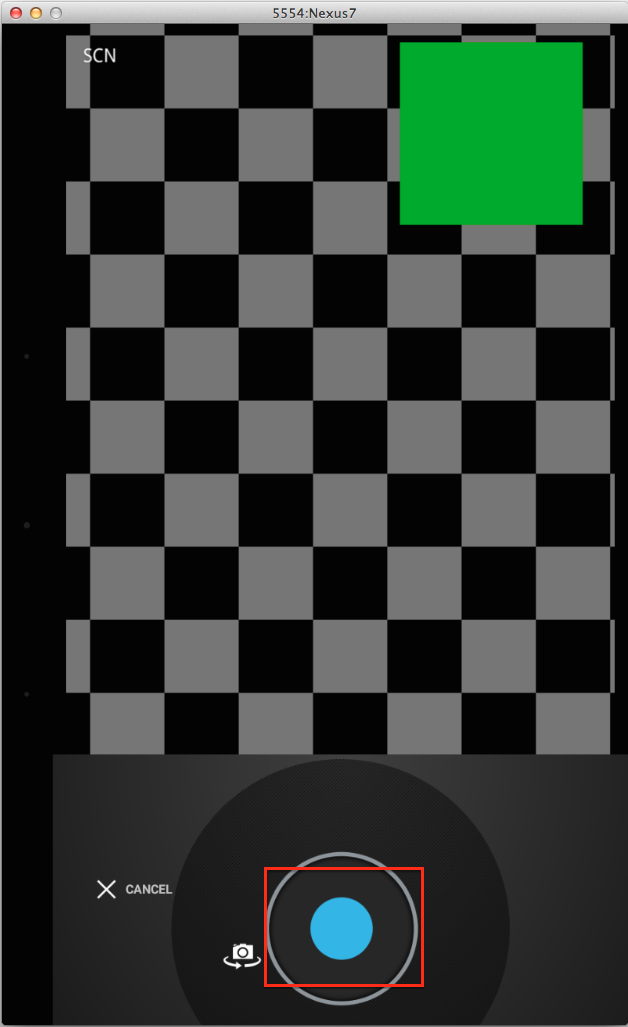
This opens the takePicture page which executes getPicture immediately. The camera emulator shows a box moving around the screen. Click the shutter (small circle at the bottom of the page) to take a picture.
-
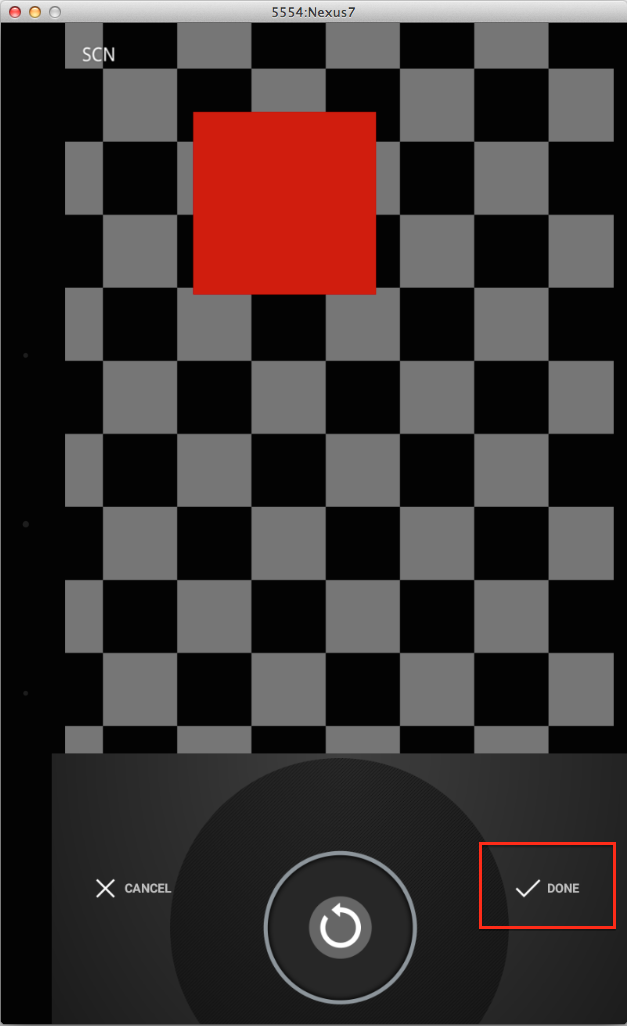
Click DONE to accept the picture.
-
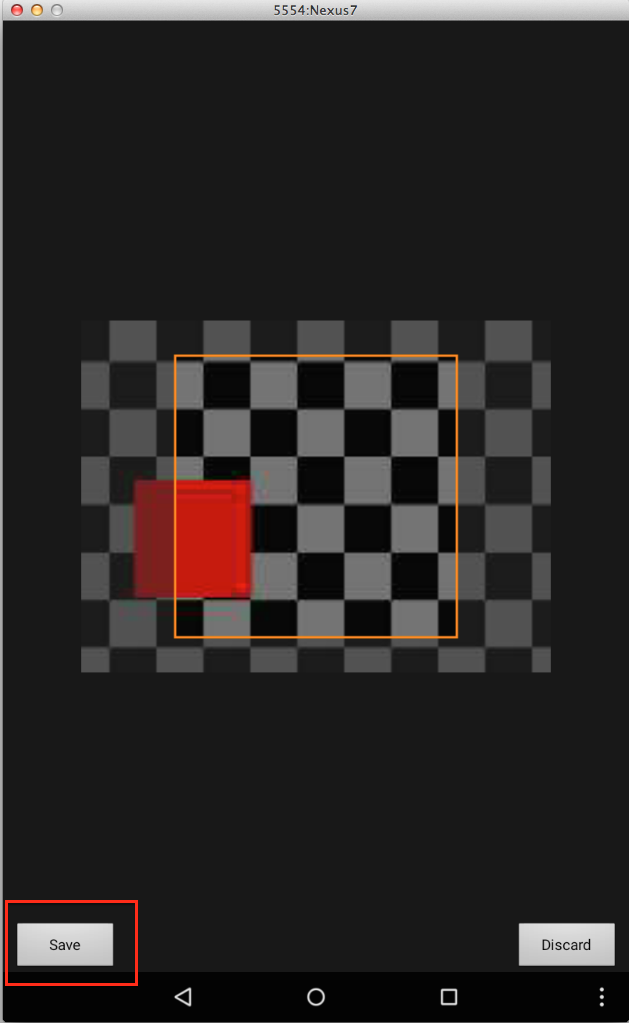
Click Save to save the picture.
-
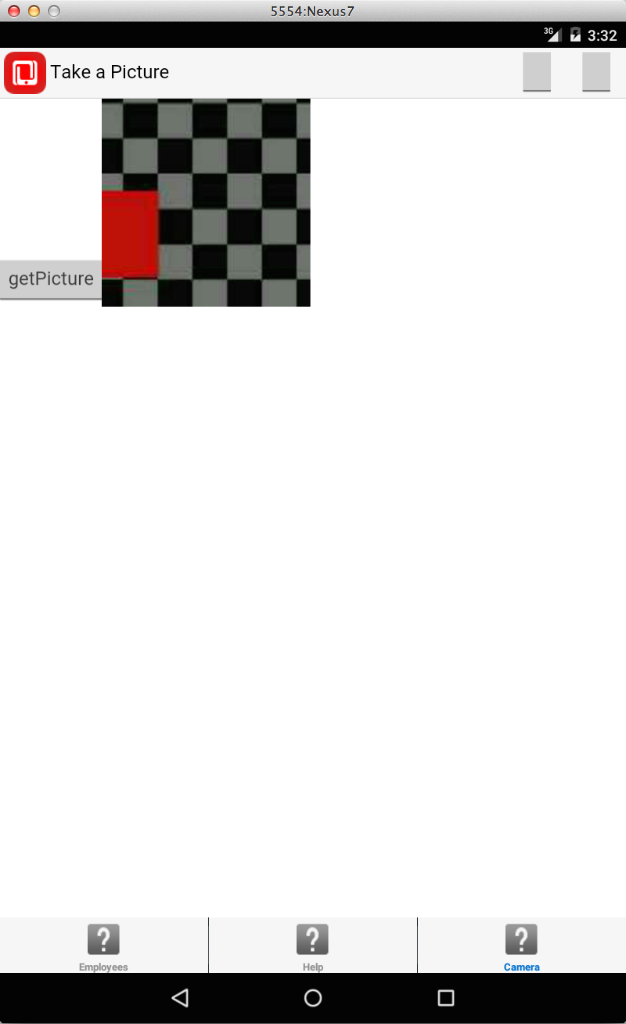
You now see the takePicture page with the picture displayed in the image component. You can click getPicture to take another picture or click any of the other features.
You have successfully used MAF to interact with a standard device feature. In the next section you add a Java program that interacts with the contacts feature of the device.
The page and code should look something like this:
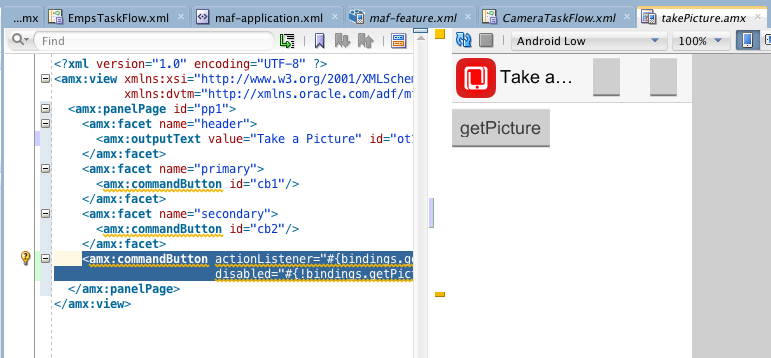
In the next few steps, you will add an output text component bound to the return of the getPicture method. As you would suspect, the return from the camera is a picture not text. We are adding the output text component for the purpose of creating the binding to the return of the method. After you add the output text component, you will add an image component and copy the binding to be the source of the image component. After you copy the binding, you will delete the text field.
In this section, you expand the application by adding Java code to interact with the device's contacts programmatically. The interaction will be a simple create operation just to show the technique. Rather than dragging a device data control to a page, you access the device feature from Java code.
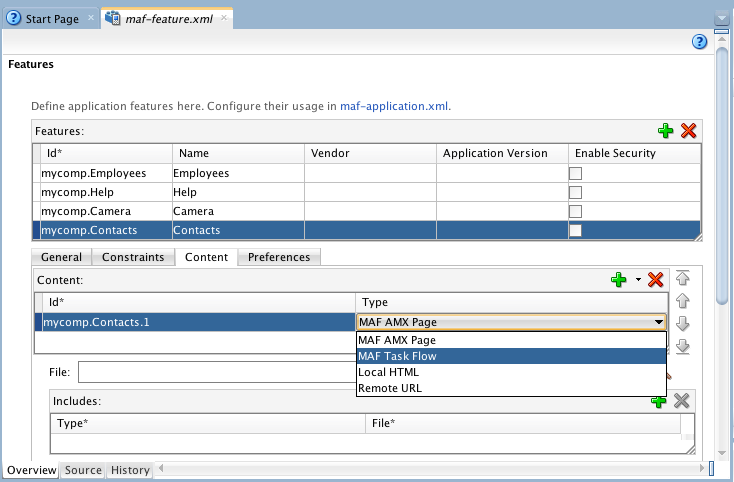
The Contacts interaction will be a feature just like Employees and Camera, so you start be creating the feature.
-
Open maf-feature.xml.
-
Click the Add icon to add a Feature.
-
Name the Feature Contacts and click OK.

-
Click the Content tab.
-
Set the Content Type to MAF Task Flow.
-
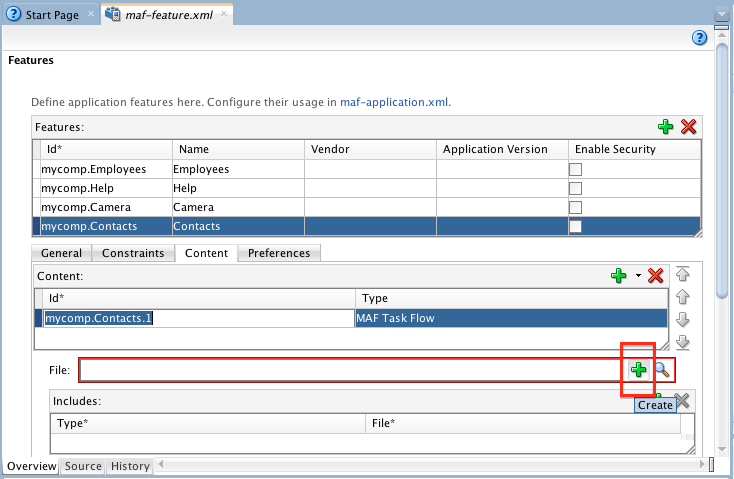
In the highlighted File field, click the Add icon to add a Task Flow.
-
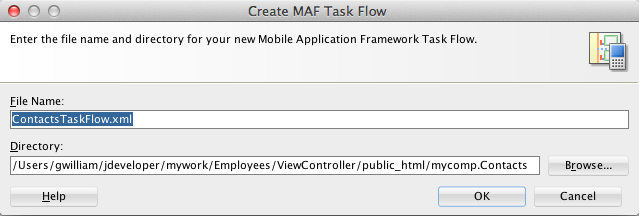
Name the Task Flow ContactsTaskFlow.xml and click OK.
-
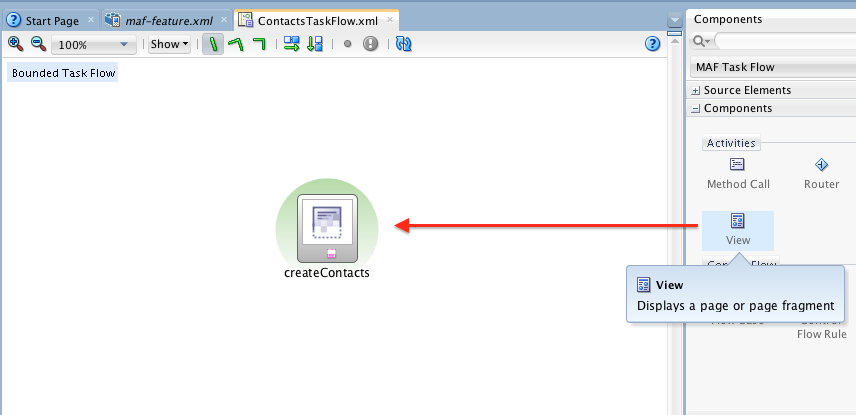
Drag a View activity to the Task Flow and name it createContacts.
-
Double-click createContacts to create a page. Click OK to accept the default values and create the page.
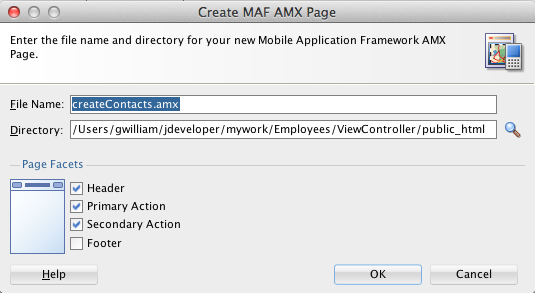
-
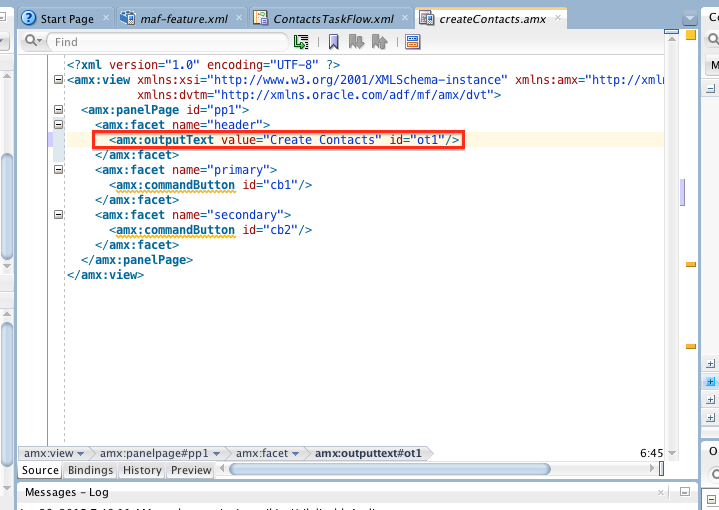
Change the Value property of the header outputText component to "Create Contacts".
-
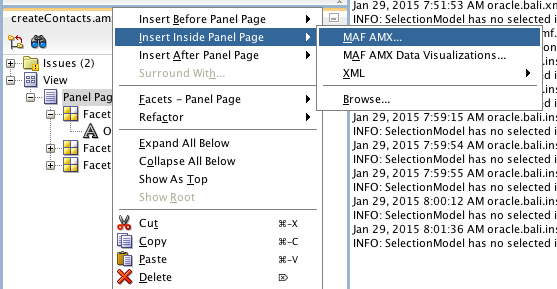
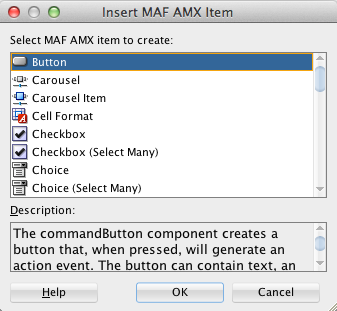
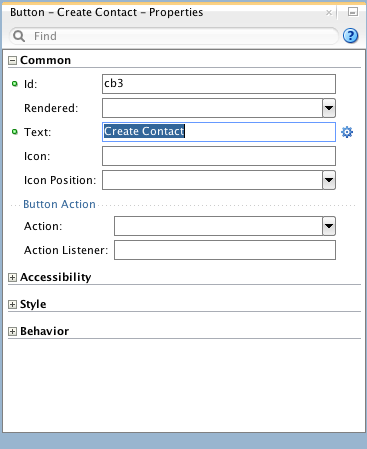
Insert an MAF AMX Button into the Panel Page (Structure window - right-click Panel Page > Insert MAF AMX > Button.)
-
Make sure the button is selected in the source editor and set the Text property to Create Contact.
-
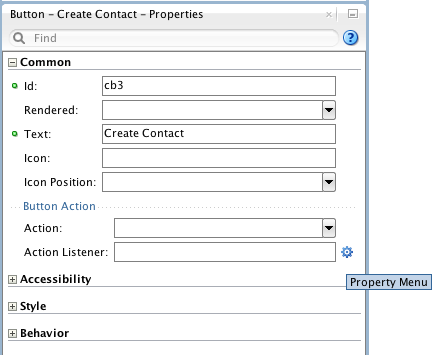
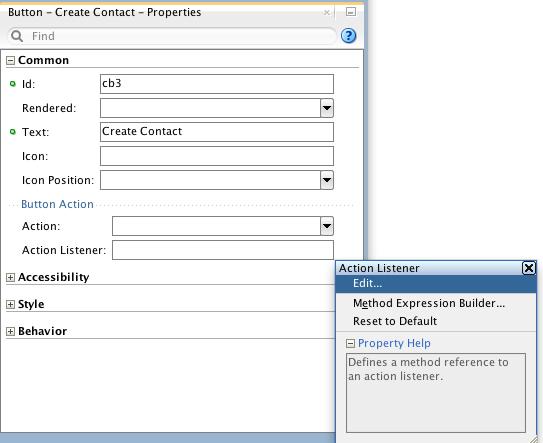
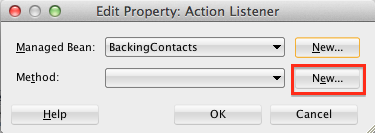
Rather than using the Device Features data control from the Data Controls palette, we will create a JavaBean to call the device feature. To create the JavaBean and method, click the settings icon to the right of the Action Listener property and select Edit.
-
In the Edit Property: Action Listener dialog box, click the New button next to the Managed Bean list.
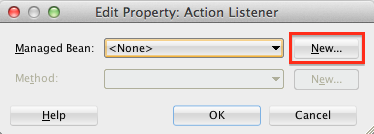
-
In the Create Managed Bean dialog box, set the following property values and then click OK.
Name Value Bean Name: BackingContacts Class Name BackingContacts Scope view 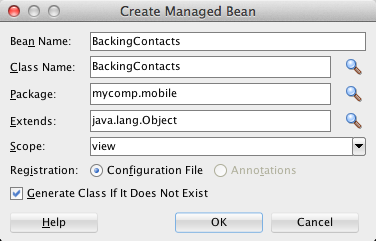
-
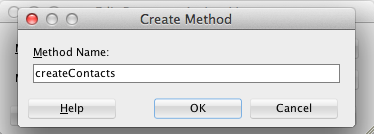
Click the New button next to the Method list to create a new method.
-
Set the Method Name to createContacts, and then click OK.
-
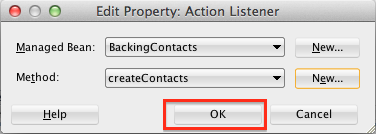
Click OK to create the Java class and the method.
-
Save your work.
-
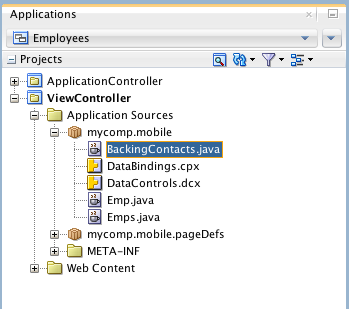
Double-click BackingPic.java in the Application Navigator to open it in the editor. (HINT: Expand Application Sources > mycomp.mobile)
-
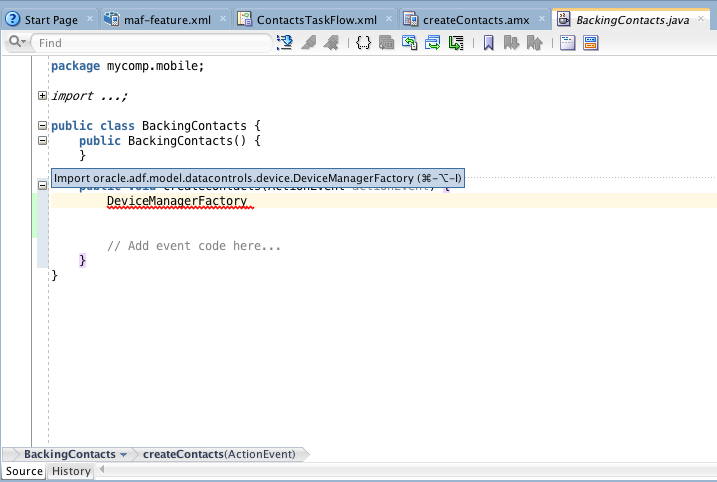
Find the createContacts(ActionEvent actionEvent) method and type the code DeviceManagerFactory inside the method. JDeveloper prompts you with a suggested import for the DeviceManagerFactory. Press either Command + Option + I or Alt+Enter on Windows, to add the import statement for oracle.adf.model.datacontrols.device.DeviceManagerFactory.
-
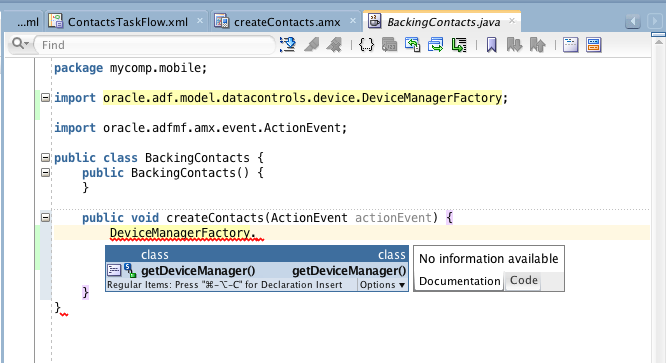
Type a period (.) at the end of DeviceManagerFactory and JDeveloper will propose a list of available methods from the class. Click getDeviceManager() and press return to add the method call to your code.
-
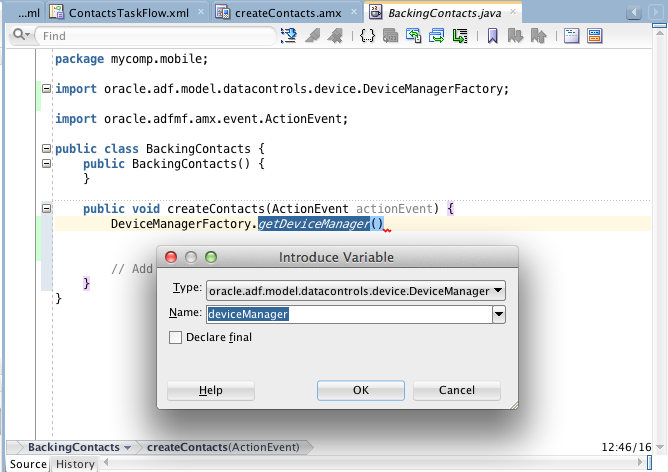
Click the getDeviceManager() method and press Shift + Command + V or Ctrl+Alt+V on Windows to open the Introduce Variable dialog box. This dialog box proposes a variable and a type to add to this method. Click OK to accept the defaults.
-
On a new line just below the deviceManager declaration, enter deviceManager.cr. JDeveloper will propose a list of available methods. Choose createContact(Contact, aContact) to add the method call to your code.
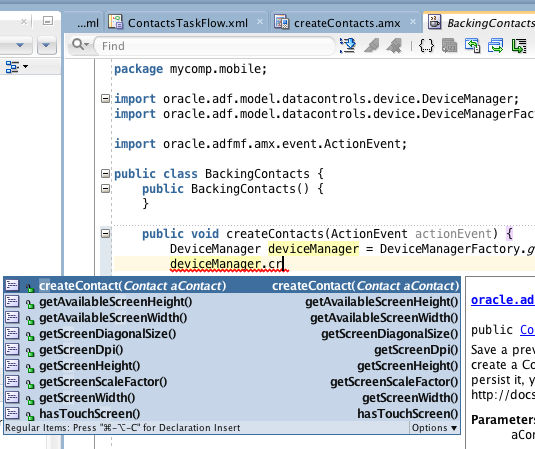
As you can see from the code editor, the createContact method expects a Contact object as the argument. Now that you know that, you can create the Contact object.
-
Just above the code you just created, type Contact and wait for JDeveloper to add the import oracle.adf.model.datacontrols.device.Contact.
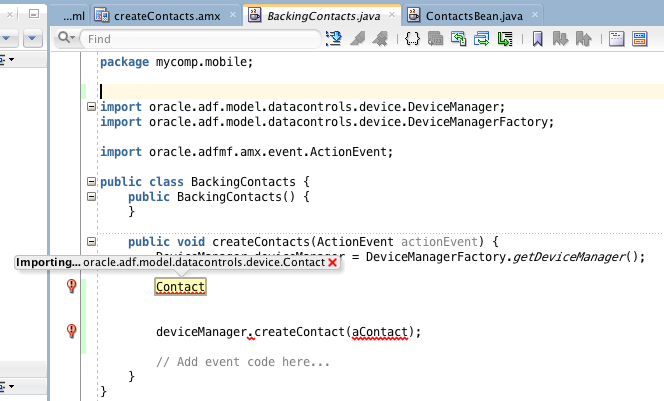
-
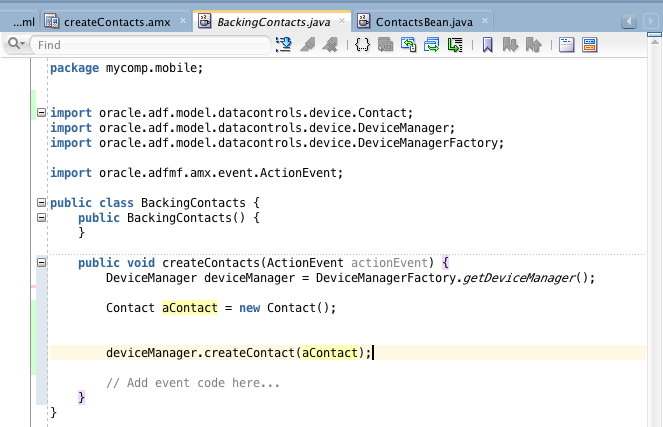
Add the following code to create the aContact variable and populate it with a new Contact object.
Contact aContact = new Contact();
-
The code should look something like:
-
The Contact object is made up of a number of objects, one of which is the ContactName object. So in order to store a name in the Contact object, you must first create a ContactName object.
Enter the following highlighted code to create and populate a ContactName object.
Contact aContact = new Contact();
ContactName contactName = new ContactName();
contactName.setGivenName("Gary");
contactName.setFamilyName("Williams");
contactName.setHonorificPrefix("Mr."); -
Now that you have the ContactName object, insert it into the Contact object with the following highlighted code:
Contact aContact = new Contact();
ContactName contactName = new ContactName();
contactName.setGivenName("Gary");
contactName.setFamilyName("Williams");
contactName.setHonorificPrefix("Mr.");
aContact.setName(contactName);
-
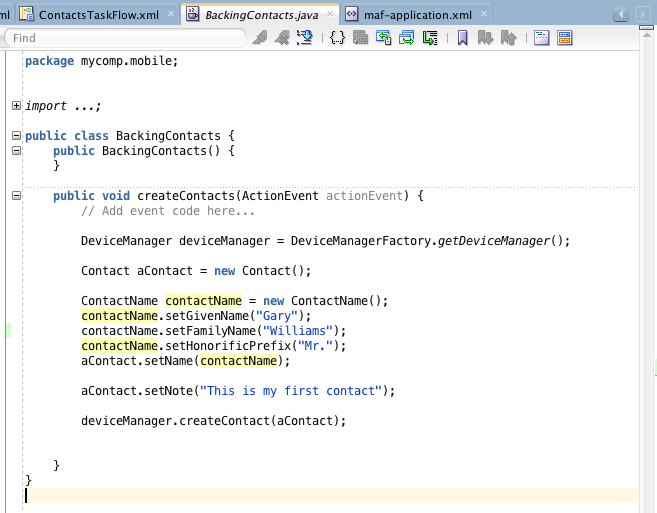
The last bit of Contact data we want to populate is a Note. The Note attribute is a String so you can add it directly to the Contact object with the following highlighted code:
Contact aContact = new Contact();
ContactName contactName = new ContactName();
contactName.setGivenName("Gary");
contactName.setFamilyName("Williams");
contactName.setHonorificPrefix("Mr.");
aContact.setName(contactName);
aContact.setNote("This is my first contact"); -
The createContacts method should be complete and should look something like the following:
-
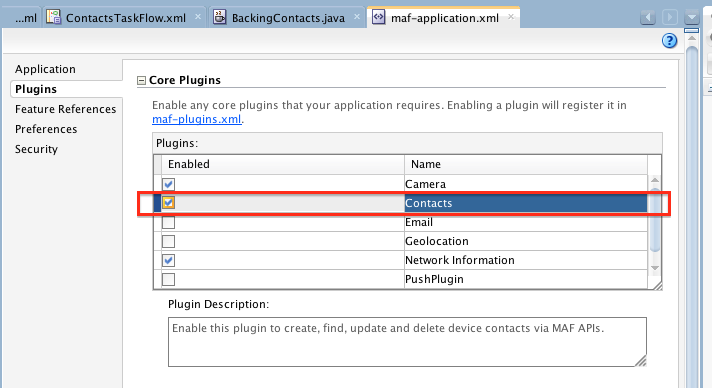
Since you are calling a native device service, you need to enable it in the Contacts Plugin. In the Application Resources panel, expand Descriptors > ADF META-INF and double-click maf-application.xml.
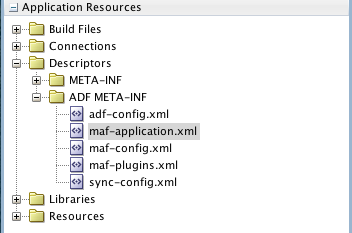
-
In the maf-application editor, click Plugins and then Enable Contacts.
-
Save your work.
Your application will now create a contact using a Java method that will use the native device Contacts to create a contact. In a more complete example, you would probably create a form that would accept variable and pass them as arguments to this method. In this example, you just hard coded the values.
In the next few steps, you test the application.
-
Just as you did before, deploy the application to either the iOS simulator or an Android emulator.
-
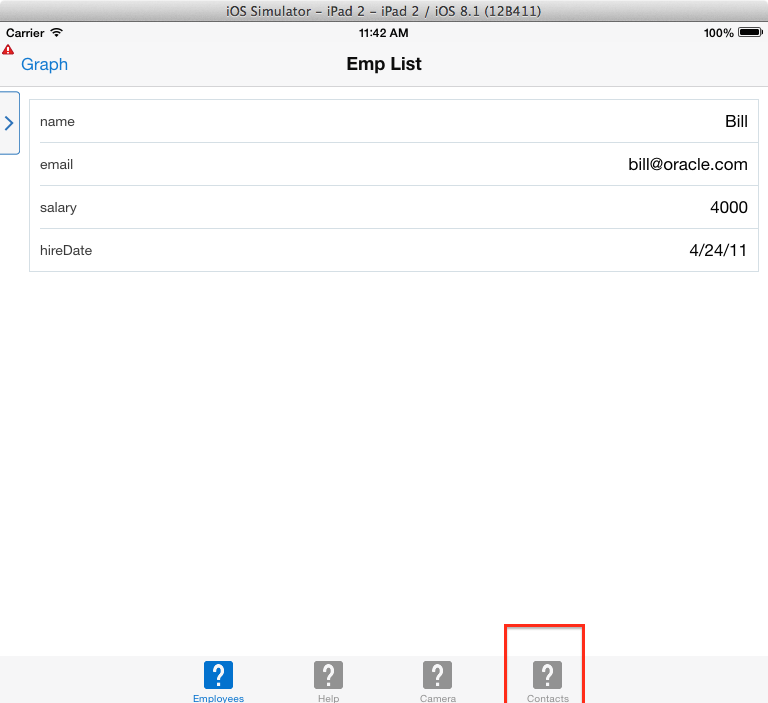
When the application runs, the simulator knows that the application In the Employees application, click the Contacts icon on the Navigation bar.
-
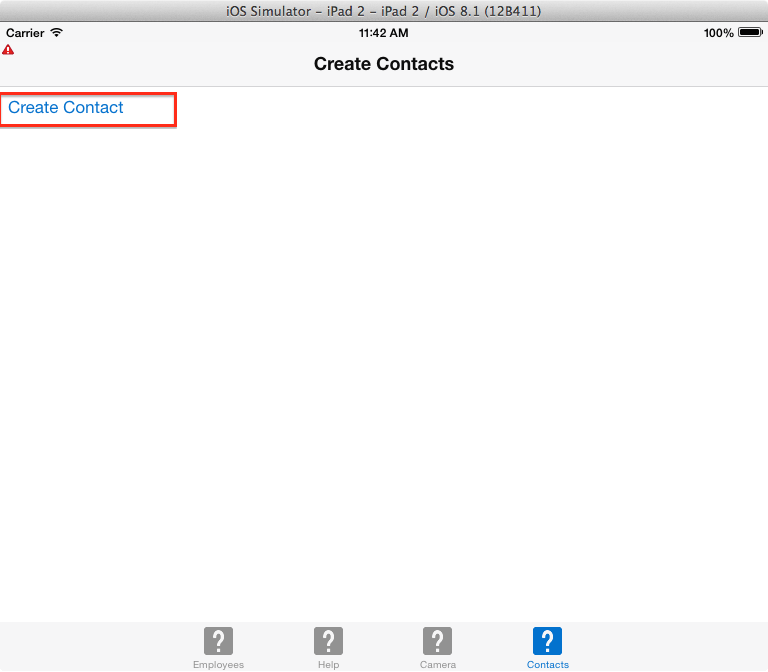
On the Create Contacts page, click Create Contact.
-
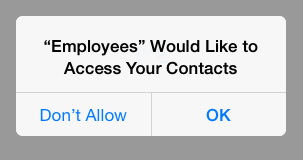
The simulator will ask you to verify that you want to allow the application to access you Contacts. Click OK.
-
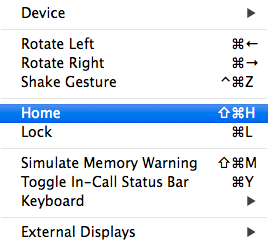
On an iOS simulator, navigate to the device Home page by using the Simulator menu. Select Hardware > Home.
-
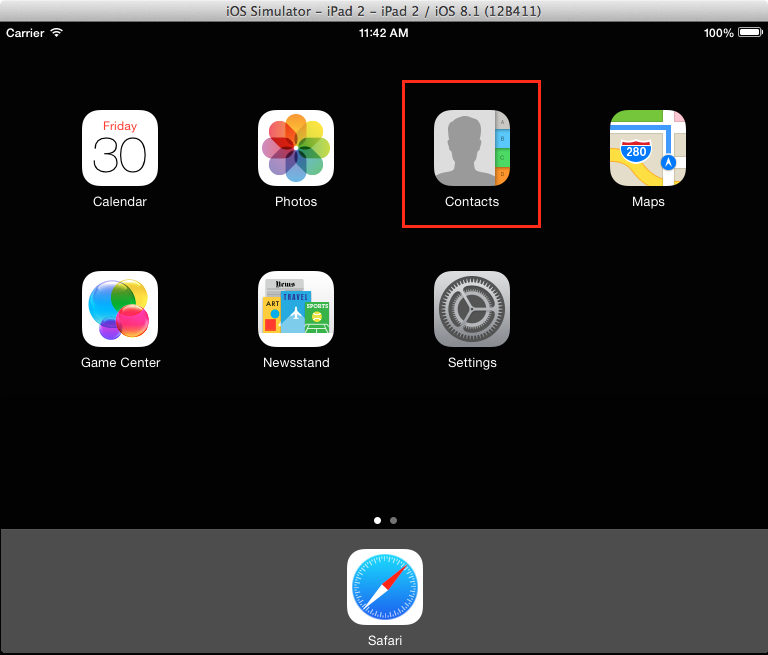
On the Home page, click Contacts.
-
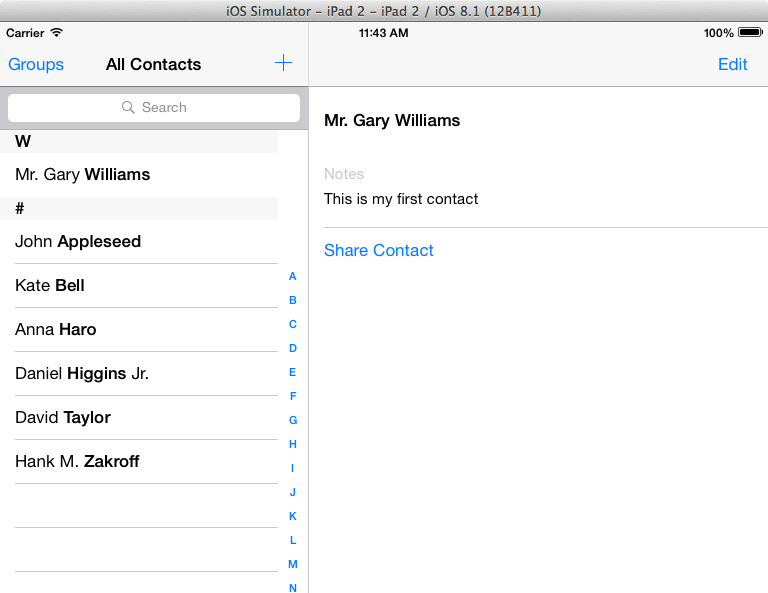
Notice your application added a contact to the device's Contacts.
In this section of this tutorial, you add a couple of pages that accessed native device features. For the camera device you consumed it using Developer's declarative technique. For Contacts you used the programmatic approach.
In the next part of this tutorial, you add a page that consumes a REST web service.

 Expand all |
Hide all
Expand all |
Hide all