 Part 1: Building the RESTful Services

In this section you will open and run the completed application. This application uses all the REST services you created and consumed as data controls.
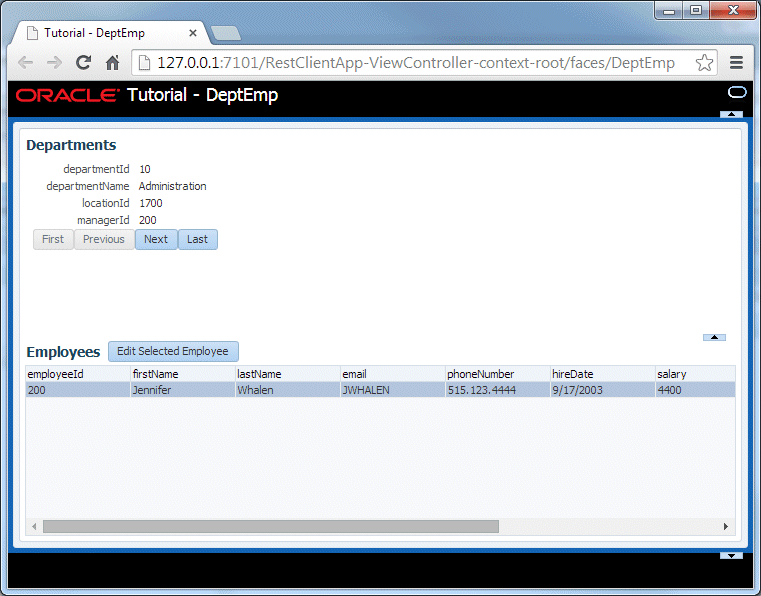
When t he DeptEmp page runs you'll see the same Department master with Employees as the detail. A button named Edit Selected Employee will navigate to an EditEmployees page where you can modify an employee and save your changes.
In the next few steps, you'll open the completed client application. The client application will run with your EjbRestService (Model/RestService) application. You MUST have the EjbRestServices (http://localhost:7101/hr-restservice-context-root/resources/tut/department) running for the completed client application to retrieve records.
If they are not started, start both the DepartmentsService and EmployeesService.
-
Download the completed application zip file and extract to a location that works best for you.
-
In JDeveloper, select File > Open and navigate to the directory containing the unpacked sample application zip file content. Open the completed\RestClientApp folder and select the RestClientApp.jws file.
-
In the Application window, expand the ViewController > Web Content > pages and select DeptEmp.jsf.
-
Right click the DeptEmp.jsf and from the context menu, select Run.
In the next few steps, you examine the completed application and test the REST service functionality.
-
Once the application opens in the browser it should look very similar to the one you saw upon completion of Part 2: Developing the Client Application, with one difference.
-
You still have the scrolling between department record, but you should also see a button next to the Employees table label.
With an employee highlighted in the table, click the Edit Selected Employee button.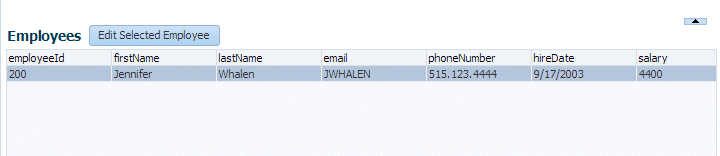
-
Click the the button and you navigate to a second page which displays the employee details.

-
Modify any of the field values, except the employeeId.
In the image below, the lastName has been modified.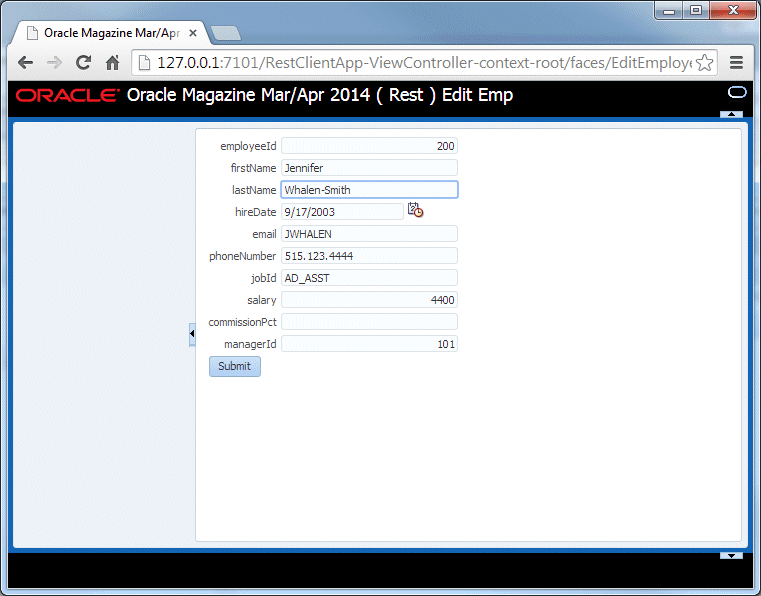
-
Then click the Submit button.
-
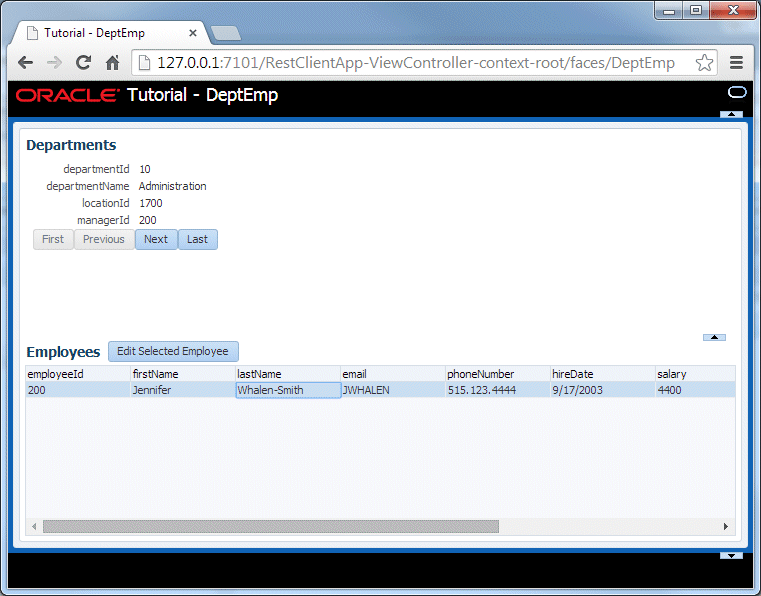
The application will return to the DeptEmp page and the lastName field reflects the change made on the previous page.
.
-
Close the browser. This part of the tutorial is complete.