Adding an Individual to Your Database
To create records in your PeopleSoft Campus Solutions database, you add a person record or an organization record. This section discusses how to add person records for students and other nonpaid individuals. Use PeopleSoft Human Resources Management (HRMS) to enter records for employees and contingent workers.
To add an individual to your system, you must create a personal information record for that individual. If you use automatic ID assignment, when you enter data and save the record, the system assigns the next available sequential ID to that individual and adds the record to your database. Before adding an individual, however, you should run the Search/Match process to determine if a record already exists for that individual.
Important! When you add an individual to your database and save the new value, the system performs an automatic search to determine if a duplicate record already exists. This automatic search uses the search/match criteria established by your institution. It notifies you that a duplicate is detected, but it does not give you the opportunity to identify the duplicates. Use the Search/Match feature to help detect and identify duplicates.
If you license PeopleSoft HRMS, you should read the HRMS Administer Workforce documentation for adding a person and become familiar with the difference and implications of adding records for employees, contingent workers, and persons of interest. Persons of interest are individuals who do not have or need a job record in your PeopleSoft database. Students are persons of interest.
If you are implementing separate instances of PeopleSoft Campus Solutions and PeopleSoft HCM, you should read the additional documentation describing those integrations. Certain items and business processes that are detailed in this documentation may vary depending on how you configure your separated systems. The CS-HCM Integration Information Knowledge Document details the additional documents that describe the setup, functional, and technical implementation considerations.
See:
PeopleSoft HRMS 9.0: Administer Workforce, "Adding a Person in PeopleSoft Human Resources"
Warning! Before adding organizations or entering and updating data about them, you must be familiar with PeopleSoft applications, including the Add, Update/Display, Include History, and Correct History modes and the PeopleSoft method of applying effective dates with active or inactive status.
See PeopleTools: Applications User's Guide, "Understanding Effective Dates."
You can update personal information for an individual on the same Biographical Details page, but in update/display mode after adding the individual.
To add an individual to your database using automatic ID assignment:
Select
Click the Add a New Value link at the bottom of the Add/Update a Person search page.
The Add a New Value search page appears with the word New in the ID field.
Warning! If you overwrite the word NEW in the ID field on the Add a New Value search page, and manually enter an ID for the new person, you will disrupt the autonumbering sequence included with your system. Your system administrator might need to correct the situation.
Click the Add button.
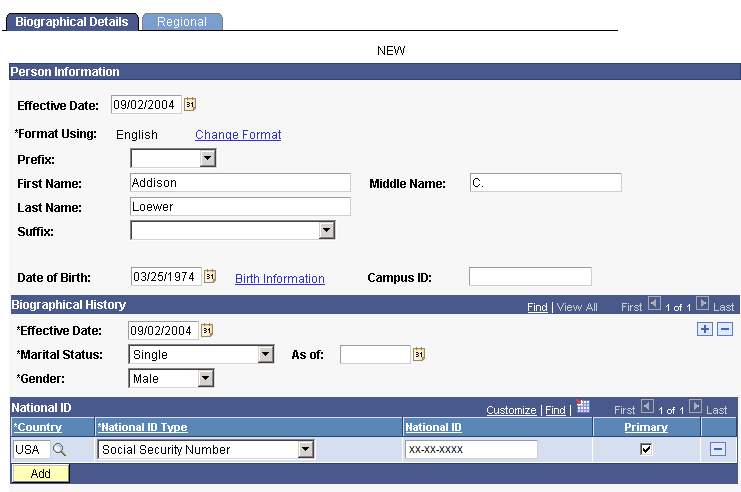
The Biographical Details page appears with an ID value of NEW.
Enter at least the required data, which includes the individual's first and last name and all of the data in the Biographical Historygroup box (effective date, marital status, and gender).
Click Save.
If you click Save before you enter the required data, an error message appears, reminding you that required data is missing.
If all required data is entered, the system runs an automatic search based on the entered data and the specified search/match criteria. The search determines if a record for this individual already exists. If a record with this data does not already exist, the system assigns the next available unique ID to the record and adds it to your database.
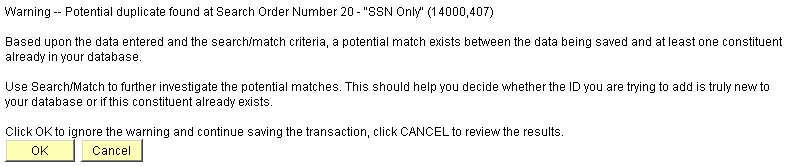
If the system finds an existing record with the data, it displays the Potential Duplicate Found warning message.
You can click OK to add the individual or click Cancel to investigate further.
Warning! If you click OK, the system adds the new person even though potential duplicates exist. If this is not what you want, click Cancel.
In most cases, you should identify the potential duplicate individuals first to determine if you should add the new one. Then click Cancel to exit the message and return to the Biographical Details page; from there, access the Search/Match page to run a search and identify the duplicate.
Image: Example of the Add/Update a Person, Add a New Value page where you enter "NEW" to add a person
This example illustrates the fields and controls on the Example of the Add/Update a Person, Add a New Value page where you enter "NEW" to add a person. You can find definitions for the fields and controls later on this page.
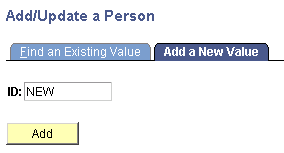
Image: Example of the top of the Biographical Details page where the system displays the ID of "NEW" when you add a person
This example illustrates the fields and controls on the Example of the top of the Biographical Details page where the system displays the ID of "NEW" when you add a person. You can find definitions for the fields and controls later on this page.
If the system detects a record with duplicate information, such as another record with the same National ID number, a Potential Duplicate Found warning message appears, providing you the opportunity to continue adding the person or to cancel and investigate the duplicate further.
Image: Example of a "Potential Duplicate Found" warning message that appears when the system detects duplicate data
This example illustrates the fields and controls on the Example of a "Potential Duplicate Found" warning message that appears when the system detects duplicate data. You can find definitions for the fields and controls later on this page.